

AussieB1rd
-
Posts
146 -
Joined
-
Last visited
Content Type
Profiles
Forums
Gallery
Downloads
Blogs
Events
Store
Aircraft
Resources
Tutorials
Articles
Classifieds
Movies
Books
Community Map
Quizzes
Posts posted by AussieB1rd
-
-
Cheers Onetrack, when I exhaust all other options I will contact James.
-
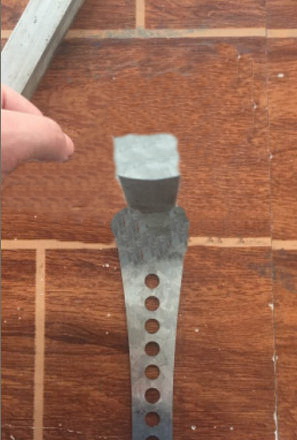
Thanks Onetrack, I have seen 3 prong offsets around well before Belite made those I posted, that's where I scored the pics, thought maybe something local was available or maybe off a quad or something, my mechanic races gocarts and said the pattern was the same off old carts from the 60's, Onetrack you wouldn't happen to know the centre to centre of the Belite offsets by any chance, my centres are 3 1/4You can only obtain those ally standoffs from Belite Aircraft, as Belite get them custom-made locally.http://jameswiebe.blogspot.com/2010/07/wichita-machinists-disc-brakes-and-part.html
cheers
-
At that point where while cleaning up old drum brakes one gets to pondering is it worthwhile changing to discs, seen a few rotor and disc set ups on pit bikes and mountain bikes but offsetting the rotor from the rim will require a set of these three prong ally offsets, but where can they be obtained.
Any ideas thanks

-
Love the way it balances on one wheel like that, be great for wheel rut landings in rough paddocks, just be sure if you move the muffler or the bracket that there isn't a doubler inside the boom, there is a bit of weight and vibration in the muffler and if you move it there may not be the thickness to repop
-
Yes I need a handful of bolts as well, heard there was a chap at Caboolture but have forgotten his name. think it was Rob or Rod or something like that. I found this chart I downloaded printed and laminated for dirty work, easy to keep clean but makes AN made easy. ( http://tinyurl.com/ANboltschart ) ( AN Bolts decoded )
(NOTE: DO NOT use "fit to page" in the printer options, when you print out this chart. The "three inch ruler" on the left side of the chart MUST measure an accurate three inches or 76,2mm.)
This .PDF file will give you AN bolt sizes, by Part Number. The first digit after the AN letters in the Part Number will be the bolt diameter, in 1/16ths of an inch. The AN-3 bolts are 3/16” (~5mm) in diameter. AN-4 bolts are 4/16” or 1/4” (~6,4mm) in diameter. AN-5 bolts are 5/16” (~8mm) in diameter. You can measure the length of AN bolts in a glider with calipers, without removing the bolt from the airframe.
-
Hmmmmmm I would be worried that the CO2 canisters could due to heat or cold improper storage or altitude become a mini V2 Flying bomb, easiest way to check is pack some in your carry on luggage and if it makes it thru Xray and onto the plane then smuggle you ciggy lighter on as well, just saying
-
I think your catching on fast, if you use the foot pump have rubber hose on it and a valve connector on it, with your cap you need two holes, one the same size as the hole in your tubeless wheel and pull a tube nipple thru from the inside so it poke out the top and you attach your valve connector from the pump on that, the other hole put a brass connector or just silicone some clear hose in it, enough in to reach the bottom of the jerry/bladder the other side enough to reach your tank, and happy pumping, most camping or BCF stores sell th pumps, I saw one yeaterday on FB market place had been used once and an air mattress real cheap
AND the pommy setup same as my idea said it pumps 12L a minute so whats that 4 minutes to load your 40L
Here is a slightly different foot pump (DRC Mini Foot Pump | Shop | Wheeling Cycle Supply)
-
Hi Skippydiesel, I was about to go into great detail on how to make a set up and while searching for some pics to explain it seems some clever people have beat me to it although it's a bit pricey, my idea was for an extra cap for bladder, a tubeless valve some clear plastic pipe and a foot valve, pressurize the bladder with foot pump and fuel flows into tank, lightweight but electric would be a lot easier and add an extra small battery if weight allows. but here is the link with basically my idea but could be built for cost of foot pump and valve and tube. The site says it will pump 12L a minute and is about 90 English pounds .
-
Put a photo up Dave, I might be interested as well if DP don't want it
-
Just a day to go Jacky Lad, I hope your have great weather and a great turn up, you put so much time, effort and commitment into everything you do and I'm sure your second Muster In The Mallee will be awesome and looking forward to some pics and videos, wish I could be there, cheers buddy
-
 2
2
-
-
PS: have also driven many old cars that had a high frequency whine, from memory an inline frequency suppressor on the high tension leads from the coil usually fixed that, just an idea. Hope you sort your problems they can wear you down trying to source them.
Engine noise
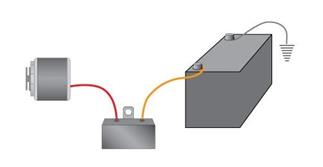
Noise introduced through the power and ground wires connected to your receiver is called engine noise (sometimes referred to as “backway noise”). If engine noise is your culprit, you may hear a whining or clicking sound. Its pitch will usually vary with engine speed.
If this is the case, you can install an alternator noise filter on the power line between the battery and the alternator to minimize the problem. You can also install a noise filter on the receiver's power lead to cut down on signal pollution (American International's S15A (15-amp, 250-watt) or S25A (25-amp, 350-watt) filters, for example). Most often, however, backway noise comes from a loose or intermittent ground connection. See the section below about noise in the electrical system.
An alternator noise suppressor connects inline between the alternator and battery, and can reduce high-pitched whining noise that modulates according to engine RPMs.
-
Callahan, I'm gunna go out on a limb here, 2 stroke rotax engines are similar to 2 stroke motorcycle engines, with you breaking down and rough running issues I just wonder, Had an old BSA Bantam years ago and had a heaps of issues over a period of time, myself and mechanics couldn't solve it, went for a long ride one day and got so bad I had to stop luckily it was near an old fashioned bike shop, the old guy had me up and running in quick time and just a few bucks, seemed the capacitor in the points was faulty and once fixed ran smooth as, as the Rotax 503 has two capacitors just wondering if that is part of your running smooth issues. Showing my age on this is irrelevant lol [/url]
I have a 503 in pieces here and checked the ignition system and has two capacitors
31 in diagram is the two capacitors
Bosch ignition, Rotax 503 Bosch points ignition, Rotax points, Rotax condensors.
-
 1
1
-
-
I have heard them a couple of times and had me jump, your not expecting a blast like that from an aircraft and I think it's most effective for clearing stock or wildlife off a strip or getting attention to those on the ground.I have a set of airhorns fitted under the cowling pointing downwards and a button mounted just under the LH throttle. I must admit that I have never heard them on the ground when flying, as I am always the one flying, but as Mark Kyle mentions (#27), he heard them ok when I flew over his house at 1200' -
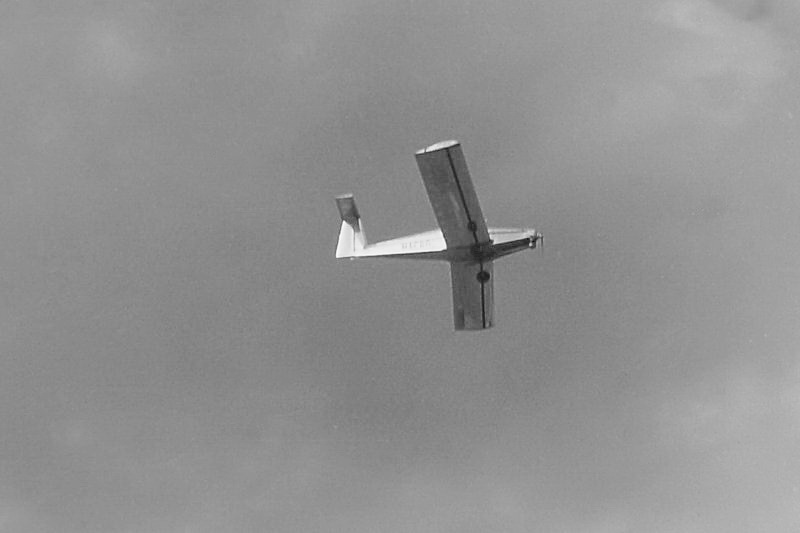
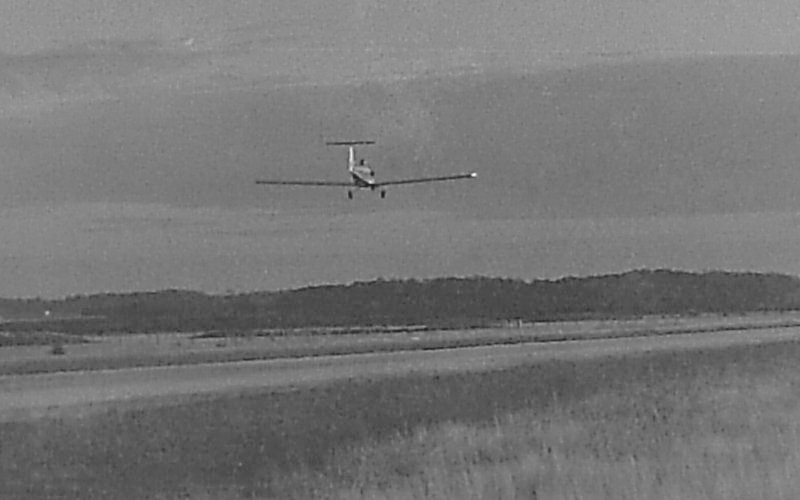
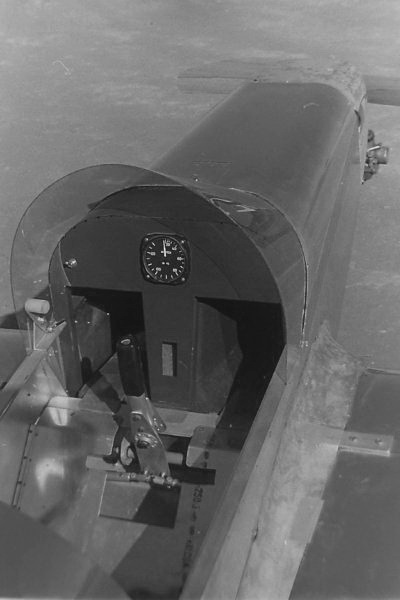
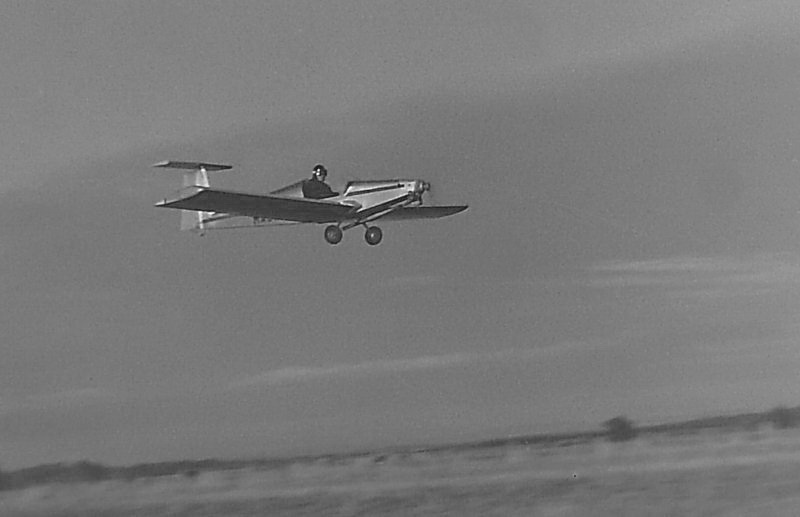
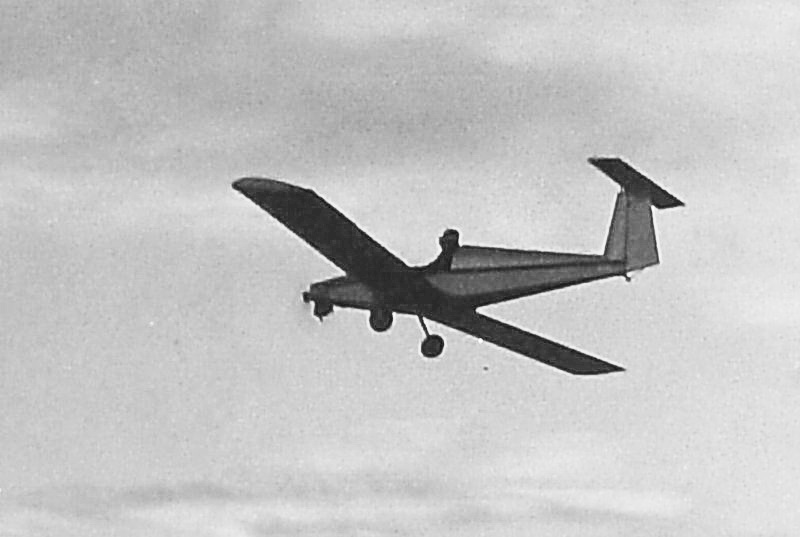
HITC just came across this, looks very much like an early Cri Cri without the canopy, Um I noticed your heat effected photos, I have taken the liberty of attempting to fix them but this is the best I can do on what you supplied, hope you don't mind.It was a bit of a cross between a Cri Cri, Hummelbird, Moni and an RC model,-
4
-
-
Want to start a thread or keep us up todate on the trim tab install ClintonB, sure be interested to see with some notes and pics, have been pondering this one myself.I am putting a trim tab in a plane that did not have one to start with -
Ok bit rough and ready, don't have fancy proggys, but still think a simple bracket using round tube or square tube mounted on the rib with short direct rod to aileron horn and have all you bell cranks and and other bits inboard, all those connections are just more things that can go wrong and I for one would not want something to drop off in a wing during flight, way too complex
-
Dunno Bex looks way complicated and not very cheap, think you penchant for drawing things in CAD have overtaken you, KISS, something like this is used in heaps of aircraft for simplicity and easy of use and maintenance, your making more work for your self and others. And yes it's a high wing still works on all wings,So figured a base line for a fast, easy, super cheap Aileron linkage, off to the laser shop in the morning, weld it up and see what I have to push and shove to get things working as desired.It's one of the very few welded parts in the beast. .. and yes, differential Ailerons.[ATTACH=full]50251[/ATTACH]
Inboard bellcrank, control, cables thru to wing, aileron flap control
-
1
-
-
What's wrong with right here, then we all gain the knowledge you have to pass onNot sure how to contact you privatly . I Don't do Facetubetwitterbook -
I didn't see any Gyro CopterYou didn't have to wait long-
 2
2
-
 2
2
-
-
Blackhawk it looks a little like a Wittman Buttercup, and plans for that can had by joining Yahoo! Groups cheers and who knows someone there maybe able to help you out.
-
Welcome from Oz RLDNC
-
Best start to a fleet your ever going to get, where is that, looks like just off the boat ramp at Crab Creek Tin Can Bay
-
I found a reasonable etch primer to get paint to stick and harden better on ally, it is from Bunnings but a bit more expensive than cheap stuff, cant move the primer once its dries, took to it with wet and dry, then stainless steel scourer, got all the wrong paint I put over it off and primer is there ready to be painted over again, was well worth the extra money but can't remember the product but will see it once I get back in the spray can section, grey in colour
-
1
-
-
Looking extra good Doug, is that new ally or have you brightened it up some on the old stuff either way looks good ??????


ultralight brakes
in Aircraft General Discussion
Posted