Guy s Posted May 4, 2015 Author Share Posted May 4, 2015 Thanks for the info Rich but was already onto it and have got the new type of fuel line but again thanks It seems that checking a youtube clip to check if I had things right is to follow other peoples mistakes.. Link to comment Share on other sites More sharing options...
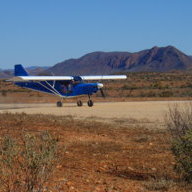
Guy s Posted May 20, 2015 Author Share Posted May 20, 2015 Some more pics on the progress. Link to comment Share on other sites More sharing options...
Guy s Posted May 20, 2015 Author Share Posted May 20, 2015 Tried to upload more photo's but came up that they were to big to load mmm Link to comment Share on other sites More sharing options...
Kyle Communications Posted May 20, 2015 Share Posted May 20, 2015 Have a look at Dennis's thread the S in sweden....look at the new bracket he has for the base of the noseleg support. it is heaps better than the original you have. I made mine from stainless steel but the same shape as you have Link to comment Share on other sites More sharing options...
rankamateur Posted May 20, 2015 Share Posted May 20, 2015 Mark, they have a new outer bracket that goes over the top of that original one, makes it much better looking, but doesn't transfer ridiculous loads further up the firewall frame like mine, and probably your modified ones do. The plane Reg finished building at Christmas time was the first kit I have seen with the new parts, but it could be retrofit unless the modification gets in the way. Link to comment Share on other sites More sharing options...
Guy s Posted May 21, 2015 Author Share Posted May 21, 2015 I'm going to get the injected 912 iS sport and was wondering if you can use the existing throttle set-up which is photo 69 which is for the ULS I think or do you need to change the set-up and how to go about it also the other parts that come for the motor like oil cooler etc again guessing useless for the injected.. I have been told that I will need to modified the cowling. Thanks in advance. Link to comment Share on other sites More sharing options...
rankamateur Posted May 21, 2015 Share Posted May 21, 2015 I was told that the 912iS motor needed glass instrument panel, but have since been told the senders should work with standard instruments, so that would bear more questions of Garry at Floods. Link to comment Share on other sites More sharing options...
Guy s Posted May 21, 2015 Author Share Posted May 21, 2015 Yea Steve, I am going glass instrument but with a few standard instruments for back-up. I was just wondering on the throttle set-up they have given me and whether it will work on the iS and what other changes need to be made. I'm a little blind with all this as lacking experience with building planes and never really had anything to do with Rotax's, so trying to work it out as I go. Link to comment Share on other sites More sharing options...
rick morawski Posted May 21, 2015 Share Posted May 21, 2015 Yea Steve, I am going glass instrument but with a few standard instruments for back-up. I was just wondering on the throttle set-up they have given me and whether it will work on the iS and what other changes need to be made. I'm a little blind with all this as lacking experience with building planes and never really had anything to do with Rotax's, so trying to work it out as I go. Hi Guy I think you will be able to use the throttle control supplied. I was looking at a 912is installed in a CH750 on you Tube. The engine a only has one throttle cable coming out so should be easy(ha ha!) I still reckon it's not worth the trouble and expense to put in a 912is, just my opinion. Cheers Rick Link to comment Share on other sites More sharing options...
Guy s Posted May 21, 2015 Author Share Posted May 21, 2015 Hi GuyI think you will be able to use the throttle control supplied. I was looking at a 912is installed in a CH750 on you Tube. The engine a only has one throttle cable coming out so should be easy(ha ha!) I still reckon it's not worth the trouble and expense to put in a 912is, just my opinion. Cheers Rick Yep your probably right Rick but at this stage my mind and heart is set on the iS Link to comment Share on other sites More sharing options...
rick morawski Posted May 21, 2015 Share Posted May 21, 2015 Yep your probably right Rick but at this stage my mind and heart is set on the iS Know that feeling, you go for it, just make sure you keep the photos coming. Cheers Rick 1 Link to comment Share on other sites More sharing options...
Guy s Posted June 12, 2015 Author Share Posted June 12, 2015 I seem to be having trouble lining the holes up. I was told to get a tapered Mandrel and get quite brutal. Have try but still can't see how the holes will line up without redrilling. Was wondering if other builders had the same problem and how they got around it. Maybe I just to get more brutal? 1 Link to comment Share on other sites More sharing options...
rick morawski Posted June 12, 2015 Share Posted June 12, 2015 Always a struggle getting those brackets to fit all the holes, the last one I did the rear three outside holes were so far out I got them welded over and drilled new holes. Did you try lining up the outside holes before the channel holes, the channel holes are more receptive to moving with the taper. Cheers Rick 1 Link to comment Share on other sites More sharing options...
Guy s Posted June 13, 2015 Author Share Posted June 13, 2015 Yes I did try lining the holes up before I bolted the channel holes but no go. I notice that the side sheeting isn't quite as straight because of the force i use to try and line the holes up as to the other side where I didn't use any force but both sides are the same when it comes to lining up the holes. Good idea Rick on the welding so going to pull them out and weld the front holes as they're are the big problem, the rear holes I think I can work the bolts in somehow. On saying all that I can understand now why the Savannah aircraft are so popular to build as they go together extremely well and quality of the parts and the whole kit is exceptional and of-cause being a well design and thought out plane . It's been a pleasure to build with the parts going together so well and the holes lining up so good that basically you really can't build them crooked, When I first open the box I thought crikey at all the bits but now 3 months later the box looking quite empty and being a mug beekeeper with no real skills or trade reckon if I can do it anyone can. Cheers Guy. Link to comment Share on other sites More sharing options...
Guy s Posted June 13, 2015 Author Share Posted June 13, 2015 Lining the holes up before I bolted the channel holes must have been a half hearted attempt Rick. Loosing the channel bolts and having a length of pipe on the multi-grips for leverage did the trick and all bolts are in. No need to weld. 1 Link to comment Share on other sites More sharing options...
Guest Maj Millard Posted June 13, 2015 Share Posted June 13, 2015 Second wing nearly finish and has since been riveted up. [ATTACH=full]34788[/ATTACH] Nice Aldine job....... Link to comment Share on other sites More sharing options...
eightyknots Posted June 15, 2015 Share Posted June 15, 2015 Lining the holes up before I bolted the channel holes must have been a half hearted attempt Rick. Loosing the channel bolts and having a length of pipe on the multi-grips for leverage did the trick and all bolts are in. No need to weld. Fantastic Guy! I am watching your progress with interest. One day, I hope to be in the same position as you, building my plane. Hopefully not to far away now. 1 Link to comment Share on other sites More sharing options...
Guy s Posted June 17, 2015 Author Share Posted June 17, 2015 Thanks Maj and Eightyknots. Today been a little wet so decided to get back into the swing of thing after very little activity the past few weeks. So got all the bits for the doors and started the jigsaw puzzle and here's the end results. Next on the cards will be the wheels and undercarriage I think. Link to comment Share on other sites More sharing options...
Guy s Posted June 17, 2015 Author Share Posted June 17, 2015 And here the end result Link to comment Share on other sites More sharing options...
Guy s Posted June 22, 2015 Author Share Posted June 22, 2015 The adjustable seats are a work of art and with a bag full of bits and me thinking there's too many parts for just 2 seats but hey all slot together nicely and feels and looks super strong finish. The seats can also be tilted forward to exposed the inspection panel underneath the seat when install, a neat set-up. The wheel rims were another story and the instructions telling you to drill a hole for the inner tube nibble which the ones supplied have the nibble offset and when there is already a hole in the center of the rim which they give you a plug to fill that hole. Upon drilling the hole I found I couldn't get the tire on enough to get the nibble in- 2 hours of trying and cursing and then when that fail I took the rims into my local tire mob they couldn't get the tire on either but said I should've just got new inner tubes with the nibble in the center and use the existing hole, be easy then. Have since welded up the hole I made. Just making mention for future Savannah builders. Link to comment Share on other sites More sharing options...
eightyknots Posted June 22, 2015 Share Posted June 22, 2015 The adjustable seats are a work of art and with a bag full of bits and me thinking there's too many parts for just 2 seats but hey all slot together nicely and feels and looks super strong finish. The seats can also be tilted forward to exposed the inspection panel underneath the seat when install, a neat set-up.The wheel rims were another story and the instructions telling you to drill a hole for the inner tube nibble which the ones supplied have the nibble offset and when there is already a hole in the center of the rim which they give you a plug to fill that hole. Upon drilling the hole I found I couldn't get the tire on enough to get the nibble in- 2 hours of trying and cursing and then when that fail I took the rims into my local tire mob they couldn't get the tire on either but said I should've just got new inner tubes with the nibble in the center and use the existing hole, be easy then. Have since welded up the hole I made. Just making mention for future Savannah builders. Colin Chapman, the man who set up Lotus cars, told his designers the following: "Simplify, then add lightness". In aviation, we should follow this principle even more. Is drilling holes in the rim a good weight saving measure? This brings up another question: I wonder how much heavier Savannah's adjustable seats are compared to the fixed seats that they replace? Link to comment Share on other sites More sharing options...
Guy s Posted June 23, 2015 Author Share Posted June 23, 2015 Not sure of the weight difference eightyknots between the fix and adjustable seats but being able to adjust rather than one size fits all and being able to easy take the seat out is worth the extra weight in my book. Seats ready for covering and me taking them for a quick test flight. 2 1 Link to comment Share on other sites More sharing options...
Marty_d Posted June 23, 2015 Share Posted June 23, 2015 Love the joystick. Hope you scrubbed the deck while you were down there! 1 1 Link to comment Share on other sites More sharing options...
rick morawski Posted June 23, 2015 Share Posted June 23, 2015 Oh no, there goes the pool table:gaah: Link to comment Share on other sites More sharing options...
Skee Posted June 23, 2015 Share Posted June 23, 2015 About the tires, I had the same issue and did the same. In the end I bought high quality Beringer wheels instead. Link to comment Share on other sites More sharing options...
Recommended Posts
Create an account or sign in to comment
You need to be a member in order to leave a comment
Create an account
Sign up for a new account in our community. It's easy!
Register a new accountSign in
Already have an account? Sign in here.
Sign In Now