
jabiruken
-
Posts
60 -
Joined
-
Last visited
Content Type
Profiles
Forums
Gallery
Downloads
Blogs
Events
Store
Aircraft
Resources
Tutorials
Articles
Classifieds
Movies
Books
Community Map
Quizzes
Posts posted by jabiruken
-
-
Removed tappet cover and checked valve clearances today and yep exhaust on suspect cylinders 2-3 thou above my set 10. Oil change and a hard run for .4 in the air ( Italian tune up ) and she has settled back down, I suspect nev was right about rust in valves which is something I never considered. My pull through now is even as it was before and I’m one very happy camper. If this reoccurs I will be removing heads and have them serviced at a machine shop such as camels.
Ken
-
 1
1
-
-
My engine still has the original starter motor and has always gave a clunk and strain upon starting, borrowed leak down tester and found exhaust valves on 1,2,3 are leaking.
-
Yes engine had warmed up and let cool after 1:2 hour flight. All temps good in flight, cold start with no choke as usual for this time of year, hot start good but tight as usual upon crank, ( gives a heavy clunk as starter engages) however pull through finds not the familiar even resistance.. not having access to leak down test gauge will slow my research, but I know something is wrong with my girl.3 cylinders are down on prop pull through.... You need to be a bit more specific and give us more details.If it was when stone cold and not used for a while, then un-even compressions is not uncommon for a lot of engines. If it was after a monthly run-up (preventative maintenance) then you would know that everything is close to operating temperatures, lubricated and valve and ring contact surfaces are not contaminated with surface corrosion.Give the engine a quick ground run first and check your compressions again. Do not over-do the ground run,as valve seats have been known to come adrift from overheating.
I'm confident that your compressions will feel normal enough for a flight and be completely normal after your flight.
Wby.
-
You haven't flown for a while. How long is a while? Check the bores for rust visually ( with a borescope) before running the motor unless it was inhibited in some way. A month is plenty long enough for rust to be quite evident and sufficient to make running the engine unsafe. The exhaust stems are another rust possibility as well as the valve seat(s).. Nev.You haven't flown for a while. How long is a while? Check the bores for rust visually ( with a borescope) before running the motor unless it was inhibited in some way. A month is plenty long enough for rust to be quite evident and sufficient to make running the engine unsafe. The exhaust stems are another rust possibility as well as the valve seat(s).. Nev.
4-6 weeks she sits in hangar waiting for air work, and it’s not for very long as I don’t have time for long stints these days. Grummo advised leak down test as nev has said suspecting valve stems. Mark at jabiru says through bolts are done in full overhaul and not top end for my engine being 730 + serial number. Perhaps a good flogging may sort my issues out, or at least bring them to head..You haven't flown for a while. How long is a while? Check the bores for rust visually ( with a borescope) before running the motor unless it was inhibited in some way. A month is plenty long enough for rust to be quite evident and sufficient to make running the engine unsafe. The exhaust stems are another rust possibility as well as the valve seat(s).. Nev. -
ive not flowin my sp for a while and have noticed 3 cylinders during prop pull through are not as high as the other, nearly half the resistance in fact. Guessing rings are issue as valves haven’t needed adjustment for a few years, (about 96 hours) tappets still around 10thou gap. I Have noticed a bit of oil in intake but oil consumption doesn’t appear un usually high at this stage. She is the original engine 2001 with 780 hours, jabiru informed me there is no heads available and that they would be able to do top end over haul late may. My thoughts were to strip the cylinders and heads off an send to jab for service but after talking to them got the impression they want the whole engine. Any thoughts or opinions?
-
Bruce,Thanks Seb,Yes I would like to know more. I can't see anything wrong with those legs on your plane in the photo, they just look like mine which is a bit of a worry.Do the new legs look just like the old ones or have they been improved a bit?
Did you cut up the old legs looking for a failure? Where would you look? I imagine at the top of the leg where the bending load is greatest.
If there were a delamination, maybe an epoxy injection would fix it.
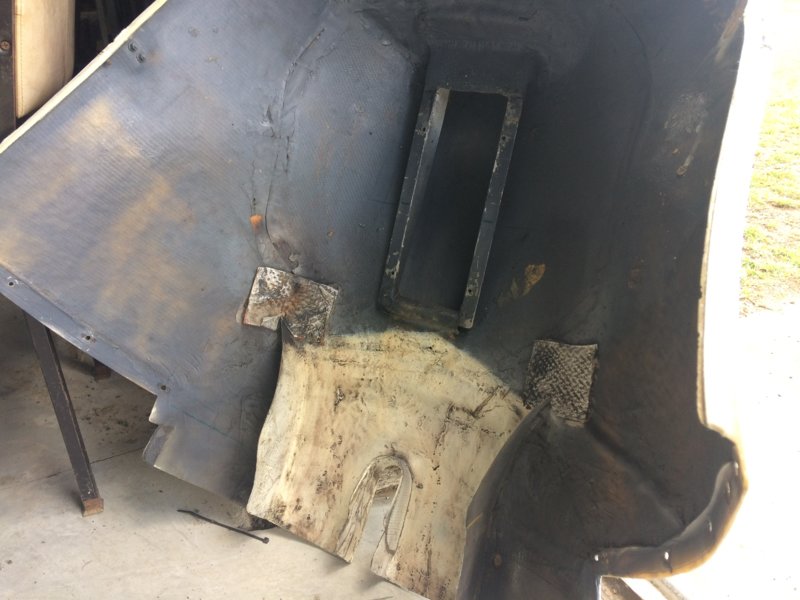
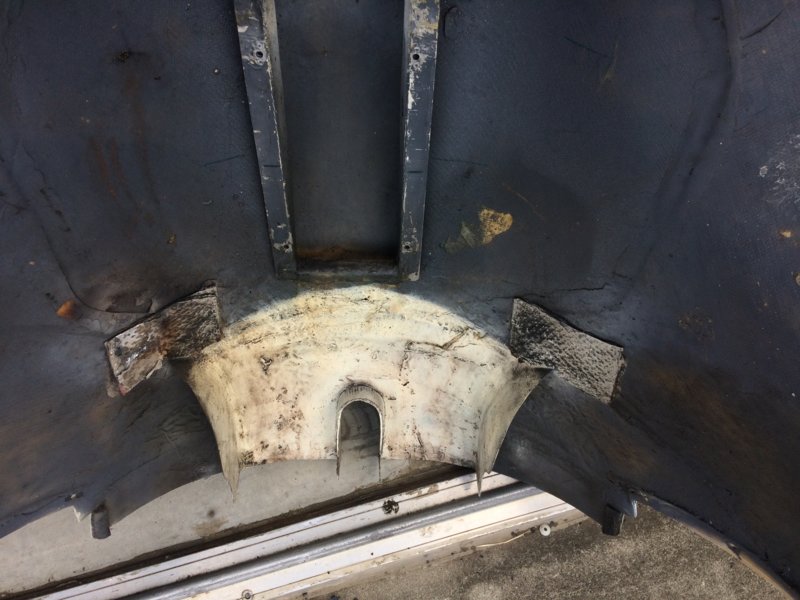
I found the legs had delaminated at the lower half. Once cut all you see is brownish discolouration in between the layer of glass here and their, they appeared to be totally sound other than for strange colouring in glass which I assumed was moisture related.
-
 1
1
-
-
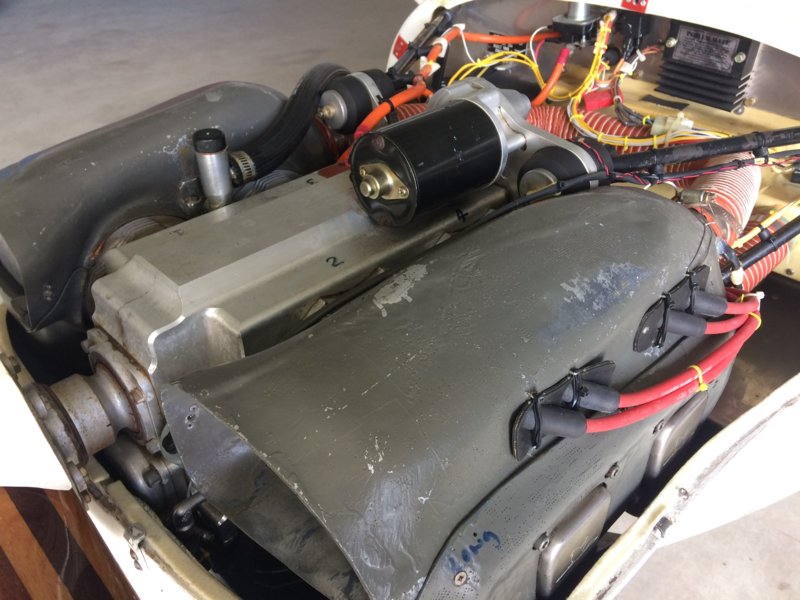
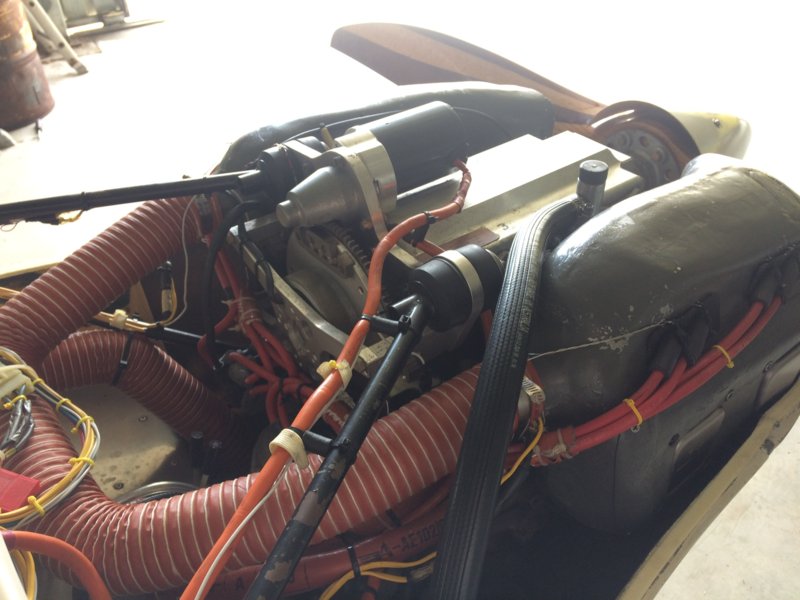
Seb can’t locate video after my move, it’ll show up in some stupid place I’m sure, took photos whilst doing oil change this morning the lower cowl has deflectors which hug around tail pipes, the video showed engine on stand with cowls fitted and blanked off at fire walll end, he used a smoke/fog machine and a large fan, u could clearly see the air flow through the cowl and swirling effects, personally I think it’s all a bit over the top as I found just little bits of tweaking on previous jabs had fair result with many hours flown on engine relatively trouble free.No dramas at all Ken, will just take what I can get as you really seem to have the best figures I have ever seen!!!
-
1
-
-
The drifter wing is not constructed strong enough to withstand the fabrics shrinking process,How would you go covering a Drifter with that? The Drifter wing is effectively a bag pulled tight. I am curious about its cost and would it effect my Certified aircraft registration? How long does it last?Wayne fisher said too much distortion would occur When I asked why only tails and ailerons were seconite and not wing.
-
1
-
 1
1
-
-
No,Oh heck yes Ken, if you do happen to dig up the vid...I have often wished I had a wind tunnel so I could actually see what is going on.Here's a stock intake, so not quite sure but looks a little smaller...Fascinating overall and someone has put in a LOT of work - great to know what can be achieved at least!
One last thing - do you have the standard deflector inside the duct coming down over the rear cylinder? What's inside??
Thanks again,
Seb
No deflector, there is actually eight components involved in his modifications.
I should have taken lower cowl off so you can get better view. The cylinders are nearly fully Encased with Kevlar like duct and air is forced out bottom of cylinders nearer to engine block. Have moved recently so may take a little time locating the stuff you require
-
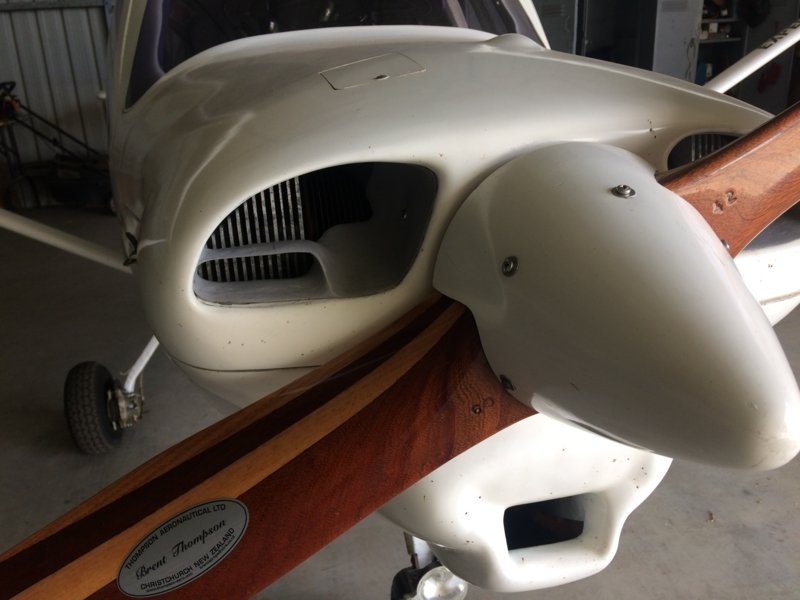
Hi, SebVERY interesting cowl work!Sorry, but there were always going to be some questions!!!1. Sorry to be painful, but any chance of some rough dimensions of your intakes at some stage (even just the yellow sections)? I took a chunk out of mine, as per the red section in the attached photo, but looking at them both, mine still has a LOT to open up!
Interestingly yours still seem to have more material on the bottom of the openings, so I guess the top of your cowls have flared upwards a fair bit?
2. Are there any thoughts on what the insert in the intake is doing (just focussing some flow through the head?) and is there anything similar on the left hand side at all, given the upwards prop blasting on the 'driver' side?
3. Which oil cooler and is it ducted exclusively out the bottom or is all exhaust air mixed in together?
The scat joining the two ducts, well that's got me beat, but fascinated...
Thanks again!
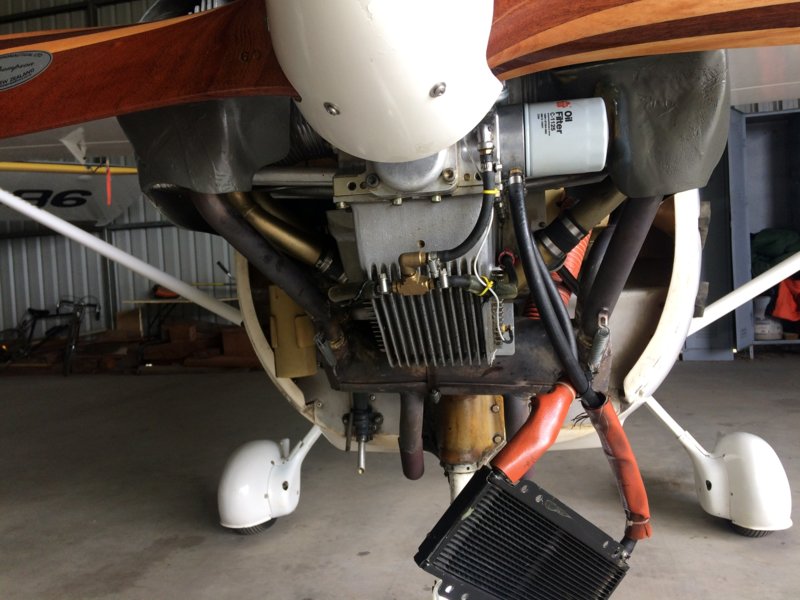
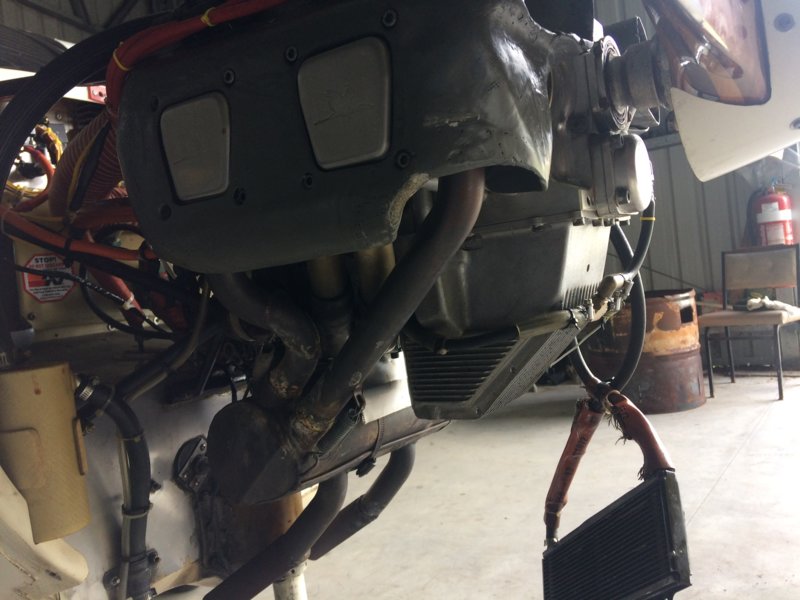
My intakes appear standard with an insert (grey coloured) in pics. You need to remove these inserts prior to removing cowl as they are screwed in. The hole intake moulds are not jabiru and are hand made of thick fibreglass and there is no deflector on drivers side, completely open unlike photo of passengers.
Yes oil cooler is from bottom inlet and cooler mounted on lower cowl then air forced into lower cowl that exits with exhaust.
I have a video somewhere that shows the engine on bench with smoke and fan showing air flow.
Will try to locate if you wish.. I think the scat hose is used as a balance for air pressure balance during different angles of attack, not sure but all seems to work ok.
-
Thanks Ken - although those temps are almost depressing!! Just goes to show what is possible. All I can say is next time you have the cowl off, I would very much appreciate a few snaps if you have the time, as you obviously have the golden goose of setups with temps like that!!! I would be particularly interested in the lower cowl opening and lips also. Those temps are just a marvel, particularly in terms of how even they are!
-
1
-
-
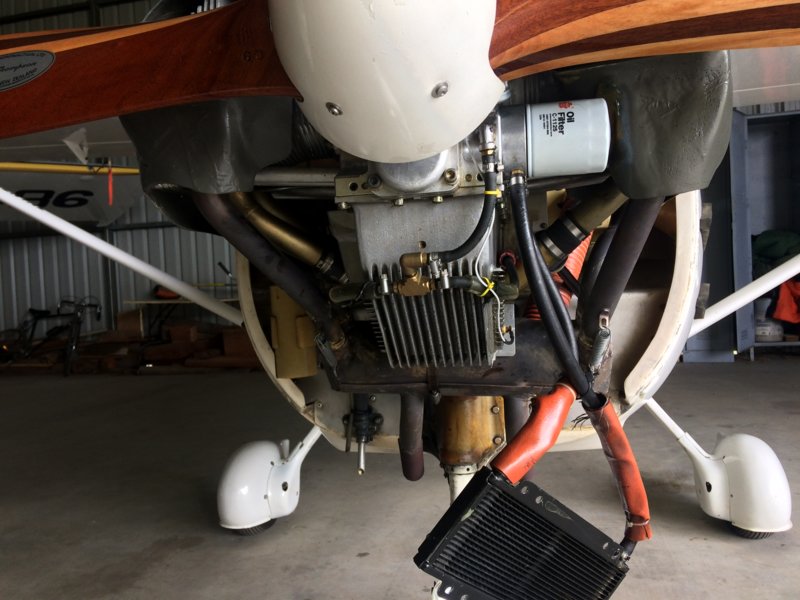
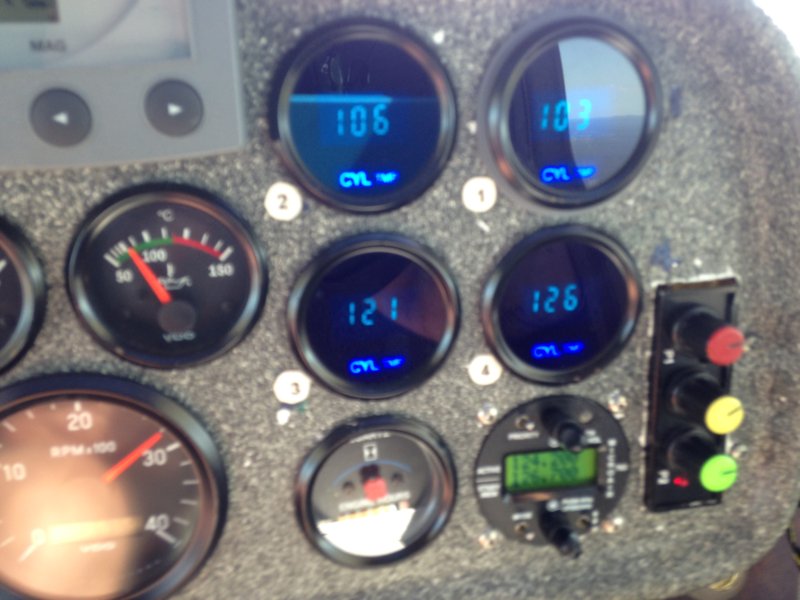
I bought this jab because of the builders detail to duct work etc. photo taken at 32 deg day @ 1000 feet last year.Oil cooler attached to lower cowl, large opening lower cowl and hand made air ducts that Inclose spark plugs and has scat hose at rear of ducts used to balance air between the 2.
On hard climb no 3 can reach 156 on a stinking hot day but lowering nose will quickly lower temps.
Oil is a bit cool, but I don’t want to play around with it and up set something else
-
Thanks to all of you guys - appreciated. Previously, a lot of the comparison temps were at much lower OAT's. I must say that the first flight today was at 25 and the last at 30deg, by which point the EGT's are now longer as even. I do wonder what effect air density has on the EGT's...My readings got more bizarre as the day went on after 4 test laps with same temps regardless of various mods. Annoyingly, no.4 is now within 2 degrees of no. 2. If it weren't a breach of forum rules, I'd be using profanities by now!!!!!n Just ridiculous when my pax side duct was whacked on stock standard and shows a temps of 116/140 wile the driver's side is was a pair of 160's by the end.
New duct in the mail and hopefully will regarding some normality...I am sooooo over this!!!!
-
1
-
-
We used to clean the spots where bugs hit wires with turps and 2 stroke oil mixed, worked a treat.Can anyone recommend something to clean flying wires on the drifter, they aren't all that old just need a good clean. Cheers -
It's a Nice feeling knowing that it's not just us getting old and unserviceable, How did you go with bolt length and camber etc?Well, first flight today since replacement of legs and, as per Ken's experience, it was like a new plane!!! Tracked straight and true on take-off and landing, but most noticeable was the ability to land and have the plane simply track straight down the strip like it was on rails, compared to the weaving and legs fighting each other. Brilliant!! -
What? The Next thing you would be recommending is aircraft should have twin ignition and perhaps carbs, guess you could call it having a redundancy system, It just might catch on Dan :)I have see a light wing out land in a paddock engine missing , it wouldn't,t miss on ground but off and on in the air . After a lot of time wasted it was found 912 pump failing replace problem fixed .I have a back up pump fitted always get used for my take off ,then out of circuit I turn it off but at same time watch fuel pressure gauge to check stay in green on manual pump mode .The idea is to have some common sense in a fuel system in your aircraft , it's not a car or bike or tractor etc , it is a flying machine and has a Big different called risk . I fuel system is most likely to show a problem under full power ( which is lack of full flow ) the first daily check of the pump max flow is taking off . Most aircraft taxi,s down and carry out a fast idle engine system check then apply full power to take off , big down side so not the best time to find out you haven,t got enough flow throw pumps and lines . So you have to reduce risk by having a back up pump in take of up to at least 1000 feet where you might have a better chance having to deal with a problem . If you have ever flown model planes it is a standard practice to hold mode at full power nose in the air for a few minute to check motor doesn't,t stop with a fuel flow problem . It,s a bit hard to hold full size aircraft on the ground with nose in the air or either many pilots tire it up preflight and ground run at full power unless you are on a aircraft carrier .
So those with only one pump fitted to there aircraft they are a test pilot every take off ,because you don,t know you have a lack of full flow problem until you are out of runway .
Weather listed in the 912 manual or not common sense goes along way .
-
1
-
 1
1
-
-
Not only manufacturing Bex,Nearly thirty years ago I had a workshop in Canberra. Among other things I was hand manufacturing some items for racing cars and someone said I should see if I could get some help to expand the product.So I contacted the relevant AusTrade office (might not have been called that then) and some days later the New Zealand Trade Officer turns up with an offer to make them in NZ, weird.I was at Austrade just recently here in China seeking help to distribute (wanted) Australian goods into China for a family member, they'll help alright, but you get to pay full price for their services as if they are a private concern.
That continues to kill people in taxi'ing and landing accidents.
It's 2016, reversing cameras are what, $50 .... it's a pretty simple solution.
The kiwi's are on the ball when it comes to strengthening there economic growth. I regularly get emails tempting us to cross the pond and set up business. The Last apprentice I put through here in Australia cost our business $22k to put through nsw tafe (as we are rural),
only to be poached at end of apprenticeship. A small business such as ours has given up training which peeves me somewhat knowing there will be a shortage in my field and that there are kids sitting around idle.
-
1
-
1
-
-
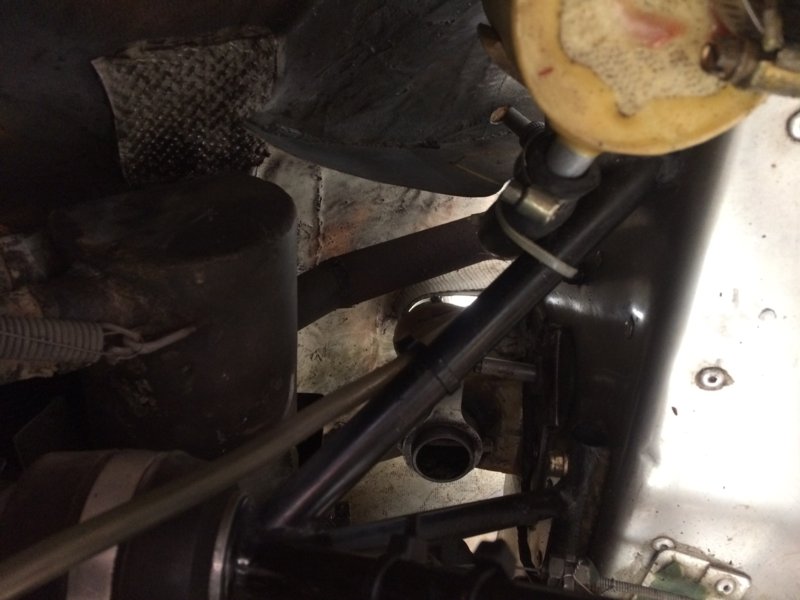
Yes I wondered about the crabbing issue, to align the nose wheel to the mains would be hard as the nose leg flex some what. Yes you should not shave legs, But. The legs are to wide to fit in saddle,they where flap discked on edges to fit. The leg is still somewhat rounded and do not seat well in saddle. Bolts loosened you can pull legs 2 or mm forward and aft. I believe 2 mm up there would equate to a large moment of toe at axle, flocking saddle in will square bottom of leg and set leg so for and aft movement doesn't occur in saddle.jk - I think you mean, the toe-in can be set by flocking at the axle (that is what Jabiru recommends, btw). You'd not want to reduce the strength of the leg by shaving anything off at the saddle clamp, it's a high-stress point on the leg, and it's (normally) a very tight fit anyway.I made up this device for setting toe-in: uses a laser level (which I have calibrated to be pretty damn accurate at 10 metres, within the laser-dot margin of error):[ATTACH=full]47064[/ATTACH]
It clamps onto the machined centre of the wheel (the bearing housing area) using the spat extension tube, and clears the tyre so it's reproducing accurately the machined surfaces of the actual wheel (the centre bolt floats on the spat extension so it pulls the thing down hard onto the wheel). I checked it in my lathe for accuracy and the laser-dot on the wall about 16 feet away, was again within the size of the dot circle for each end when rotated 180 degrees. I am quite sure I won't be able to get the aircraft lined up on a centre-line to anything like that accuracy, BUT, the mains will end up as a pair, with the combined toe-in equal either side and at the Jab. recommended toe-in - just the aircraft may taxi slightly crab-wise.. but that's going to be the same result for any other method, I believe
If you have access to a lathe and can weld, it's dead easy to make up..
-
I think the camber will be ok if axles where bolted straight up, the toe can be achieved at the saddle area. by flocking them in place to set toe - or +. Mine is set "toe in" a little too far for my likening, but will monitor tyre wear, when my spacers were fitted the builder placed 80 kg on each seat and used a skate board under axles to observe the flex in legs. Personally I don't think this area is that critical, as there are many variants in aviation ie: bounce and goes, solo flights. Everything is just a compromise and jab would have well covered this area in design.Thanks Ken -will take a look at the bolts sent and cross my fingers....The left leg is worse than the right. We did manage to tighten the left up a little a while back, thinking that may have been the issue, but no....My main concern will be the camber when I stick the wheels straight back on. Will be interesting to see whether simple shamming with washers can achieve the desired result.
-
1
-
-
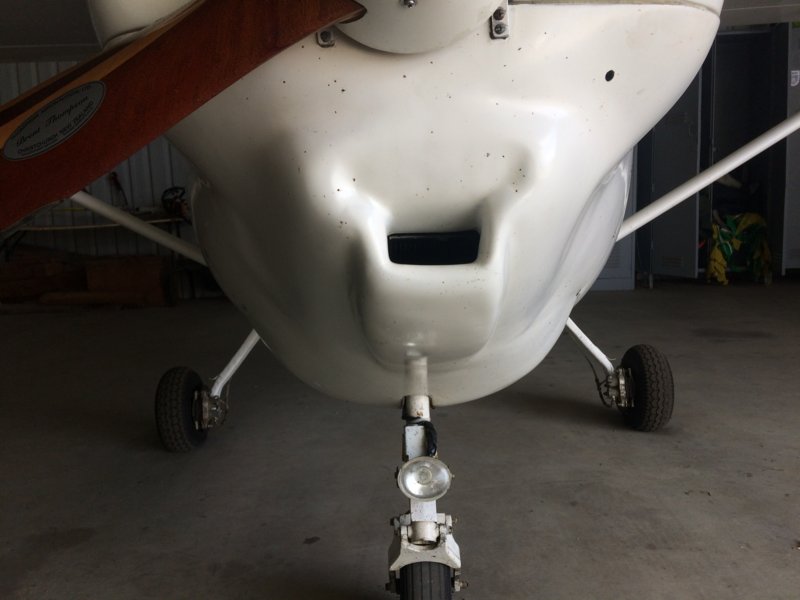
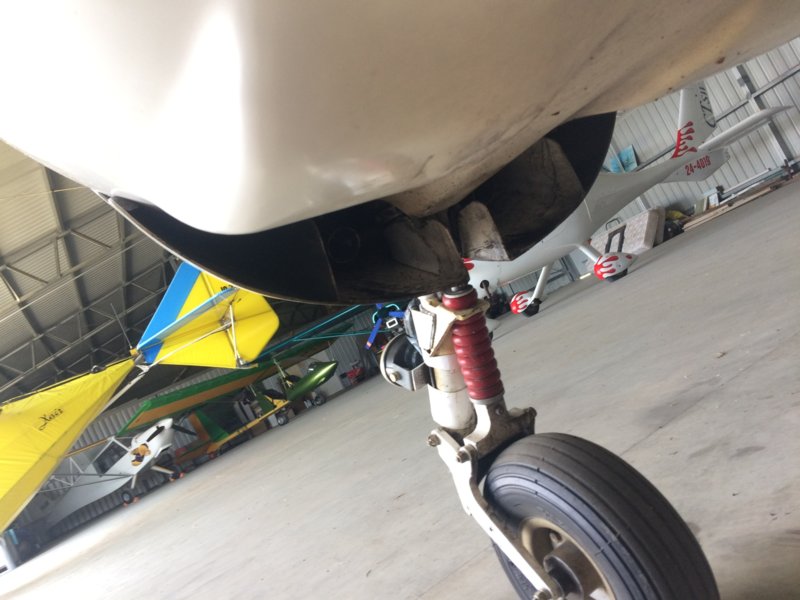
Looking at the photos I see your right leg bowed in the same place as mined, the left (pilots side) looks ok. In the end my brake rotors would touch ground on some arrivals, (they are slightly larger than the factory). I would check carefully the bolts and mounting points on aircraft upon removal as I suspect there is movement in your saddles. Also be aware factory bolts sent aren't always correct, there appears to be three different lengths. Unfortunately I had to pack some bolts with up to 4 washers, most of my original bolts where shorter than those supplied. I did mine on my own and yes it was a bit of a pain, especially when I stuffed up and had no one else to blame.Thanks Ken - couldn't see anything in the manual, but did wonder.As for tyre wear, well, my tyres went from photo 1 to photo 2 in 20hrs.... The shots are fuzzy, but you get the idea!!-
1
-
-
My legs looked worse than yours, They where scrubbing the inside of the tyres at an alarming rate. as for the washer? Nothing Found in my build manual stating there ever was one, it appears to be brake only fitted. My build log states that my shim style washers where fitted in the same place as your washers sometime after build in an attempt to slow tyre wear. Interesting to note that there is a huge math equation noted for saaa regarding the new geometry changes this had on aircraft as rims were also widened with 20 mm spacer at same time.Well, haven't had a chance to put my legs on yet, as I'll need a hand but did notices an interesting circular kinda deal between my old legs and the brakes. Does anyone know whether there is usually something between the bare gear leg and the brakes? In my case the spat bracket is the first item, but wasn't sure about how the circular spacer thingy got there?? I hadn't previously looked, but thought that there wasn't any washers etc required (unless for camber adjustment...)As per the first photo, the camber alone from my droopy legs explains a lot about what I felt were bad manners during the landing phase!!! -
Hanford's claim the champion c138 is no more, and there Hof-230 replaces it?I saw the Champion filter on Jabiru Owners web site as an alternative Jab spare.It feels very rigid and the test below convinced me: -
I have all ways lifted my wing after flight so to tuck the under carriage under as instructed by jab factory many years ago with my lsa 55, the idea was to prevent splayed leg syndrome after you push plane backwards.The Jab wing is untapered and of constant section. It is also supported by a lift strut. The Jab is certificated at around +4G. The mainspar tapers in thickness outboard - but not in depth.If you can't lift a Jab by the outer wing skin and have the wing not even noticeably deflect, then run away from it as soon as you have put it down - it's seriously damaged.-
1
-
1
-
-
The issue is fore and aft movement or the leg rolling inside saddle clamp on heavy arrival. Movement would also screw up camber and toe. Creaking and groaning from under cart whilst taxiing would be a good indercater that something is up.on any of these 300 kg planes (particularly high wing) its easy to get one person to lift the wingtip .................. thereby lifting the wheel off the ground and another person to check if the leg is secure ?-
1
-

503 rebuild
in Thruster
Posted
Just a thought,
u do have a hole in that vent hose to allow air in carb. It’s difficult to see in video, I used to make it a big v with side cutters to ensure it did not clog.