

Ross
-
Posts
729 -
Joined
-
Last visited
Content Type
Profiles
Forums
Gallery
Downloads
Blogs
Events
Store
Aircraft
Resources
Tutorials
Articles
Classifieds
Movies
Books
Community Map
Quizzes
Posts posted by Ross
-
-
Air filter
in Jabiru
Making many assumptions a 2200 cc, 4 cylinder, 4 stroke engine running at 2850 RPM consumes the following volume of air in one hour.
2.2 litres / 2 (for a 4 stroke engine) x 2850 RPM x 60 minutes) litres of air/ hour
188,100 litres/hour
188.1 cubic metres/hour every hour
If the same engine was running at 4,800 rpm it would consume 316.8 cu. metres per hour of air
-
Air filter
in Jabiru
Ryco filters were originally designed and manufactured by RYCO in Australia. They were taken over by GUD. They are now manufactured in China and imported back into Australia with the company, GUD Holdings, still Australian owned.
Supposedly the design and testing continues in Australia after the manufacturing was moved to China.
-
Magnetic variation changes as you fly North or South or East or West so your magnetic compass heading theoretically needs to gradually change if you flew a long enough track to cross a few compass variation lines-ignoring great circle tracking for our type of flying.
If you go flying near Iron Ore deposits you might have to ignore your compass completely. Lang Hancock is supposed to have found his Iron ore deposits due to aircraft compass anomalies when flying in a light plane over the area.
It is normal or close enough usually to take an average deviation into account from the start to the end of each straight line portion of the track on the map especially as we are all flying VFR in RAA aircraft so far.
Another factor is that the compass variation at a particular location changes over time. New issued WAC charts take this into account but my new current Canberra WAC chart is possibly at least four years out of date.
I have two Canberra WAC charts for Canberra.
Eighth edition dated 1981 . This one says isogonic information based on 1980 info (lines of equal magnetic declination).
Sixteenth edition dated Jan 2008. This one says the Magnetic variation info is 2005 info.
They respectively show magnetic variations for Griffith NSW of about 10.4 degrees East and 10.9 degrees East for 2005.
Eventually the Magnetic North and South poles will flip (swap over). I don't want to be still flying when that happens.
From what I remember flying from Griffith to Ballarat results in flying down a track with almost the same magnetic variation from start to finish.
My ERSA lists the deviations in whole degrees with both as 11 degrees East.
-
Air filter
in Jabiru
I am under the impression that it is a standard Holden Commodore filter.
Regards
-
The original Jabirus were originally supplied with 1600 cc motors and were eventually upgraded to heavier 2200 cc motors manufactured by Jabiru. The new factory built ones then had impressive climb performance with the 2200 motor.
Any old Jabirus with the 1600 cc motor that were converted to the 2200 motor would need at least a new weigh and balance besides a different cowl and probably propeller etc. It would have still needed to comply with its original MTOW and as I understand it and also be loaded to comply with a max stall take off speed of 45 knots in the landing configuration.
It seems to me that all advertisements for Jabiru aircraft should specify the actual model of the aeroplane with its serial number and the engine model number and its serial number.
A Jabiru advertised as Jabiru 2.2 could be an old LSA 55, UL-D,J120c, J160, J160c, J170, J170c and number of others. Each one of the above aircraft has a very different performance and a different load capacity and even different again depending on their options and the limitations caused by the pressure height of the aerodrome and the type and length of airstrip.
The Jabiru web site has a chart explaining the difference for some of the models and some more explanation in the text for others including the factory built J-120c.
There is also some explanation of the different rules of the various registration schemes.
-
20090603
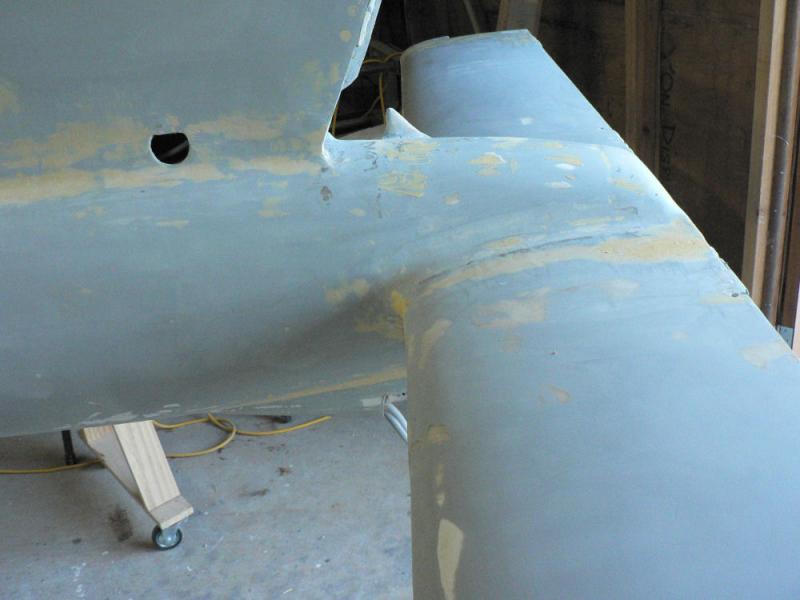
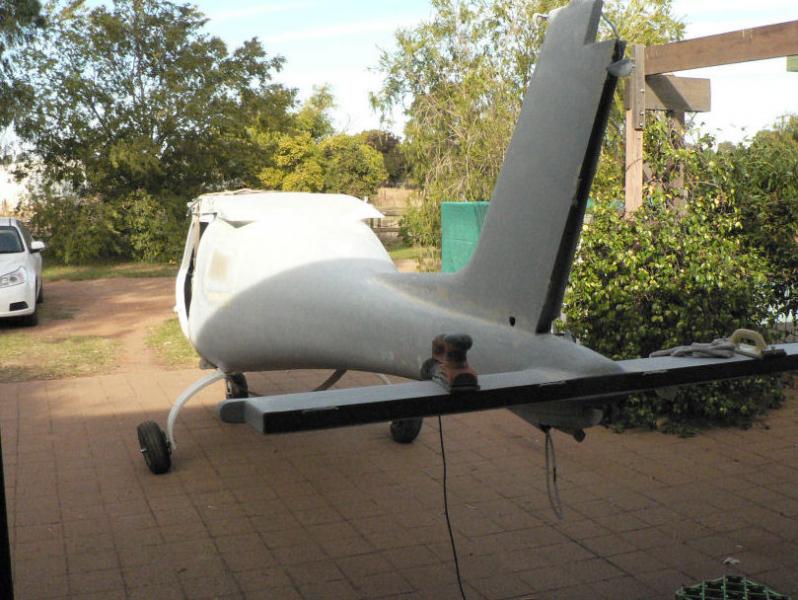
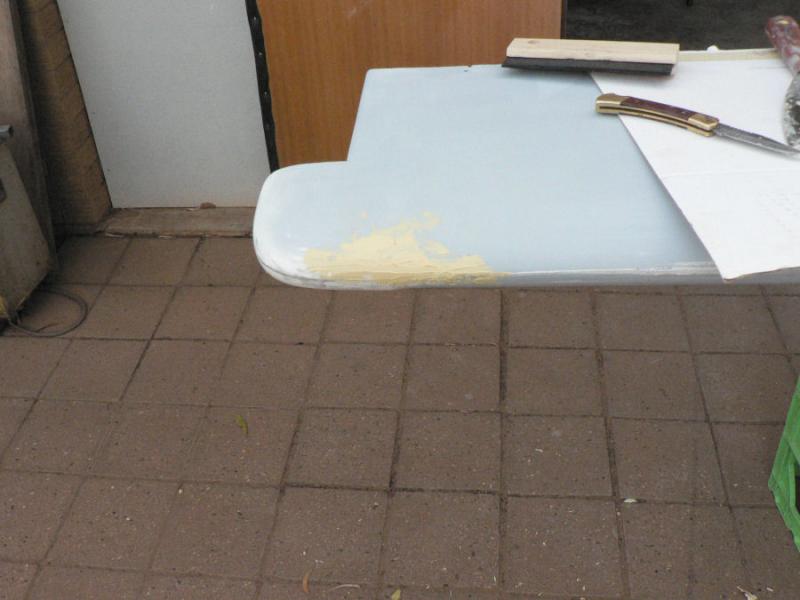
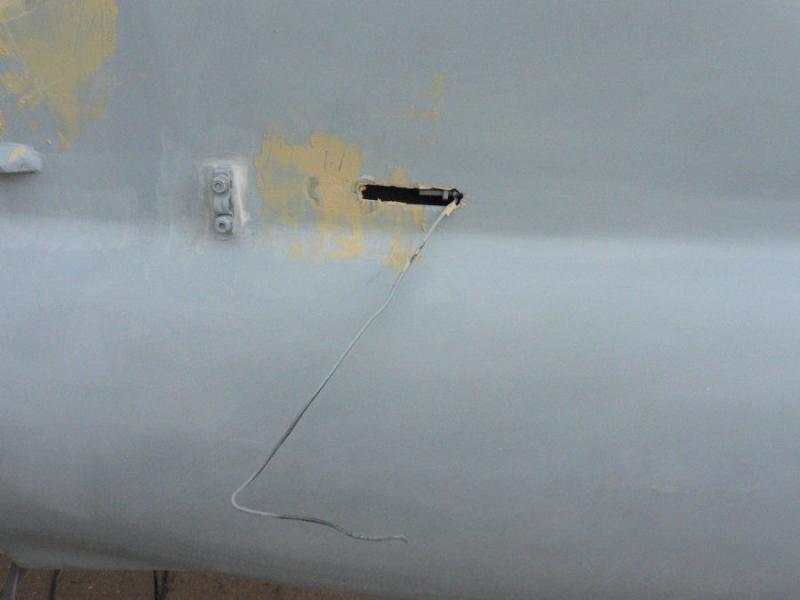
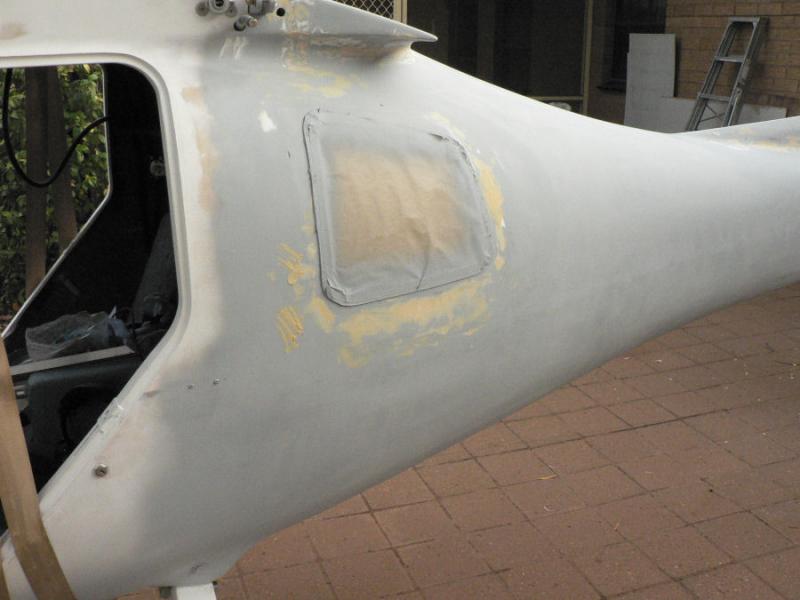
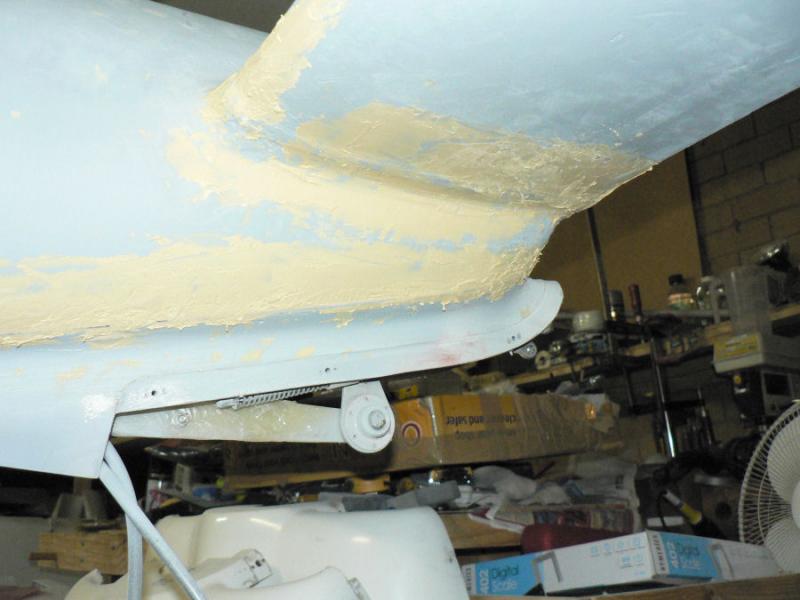
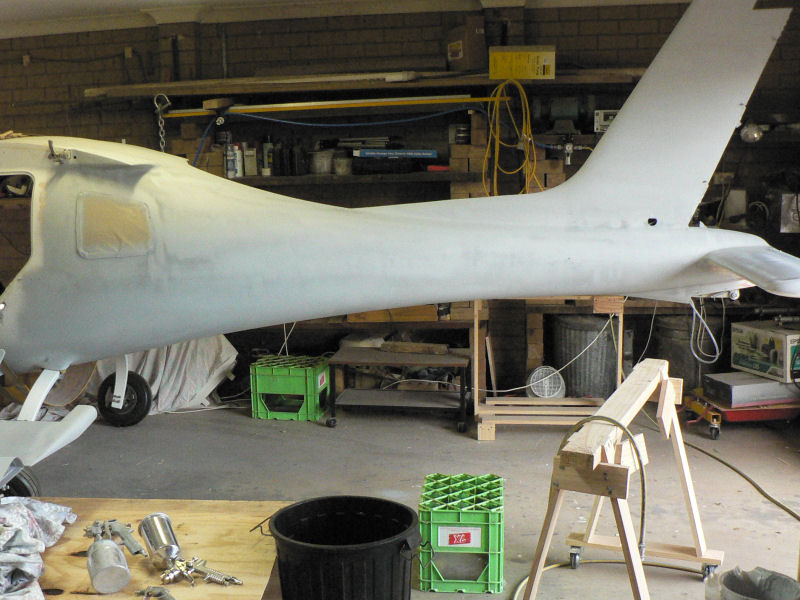
OK OK, I did actually do a little bit in the last couple of weeks. The dust storms then the cold damp weather did give me some excuse as I am trying to avoid as much dust then mud and fumes as possible so need to get the aircraft outside on dry, non dusty, not too windy days.
I emptied our rain gauge this morning showing a total of a miserable 19 mm total after almost a week of so called rain (heavy inland rain according to the city based TV weather reporters). It took about three days before the rain stopped covering our car with muddy water.
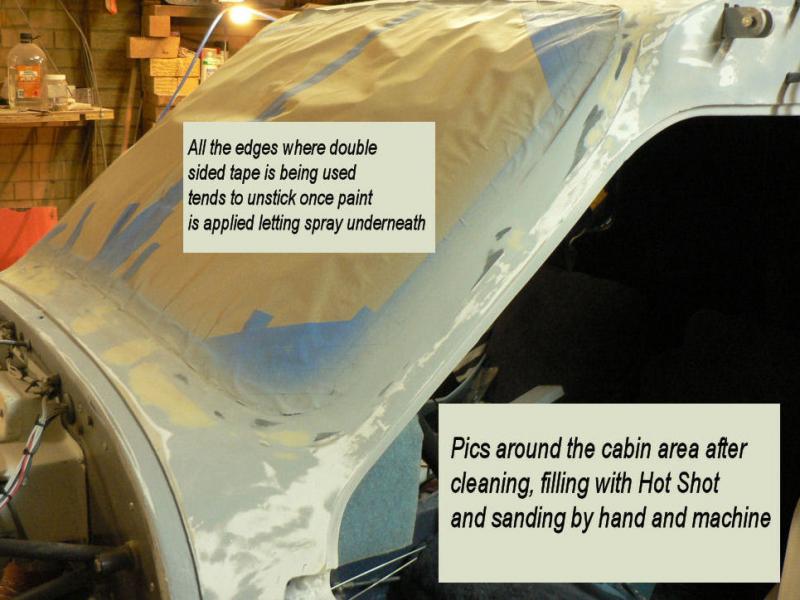
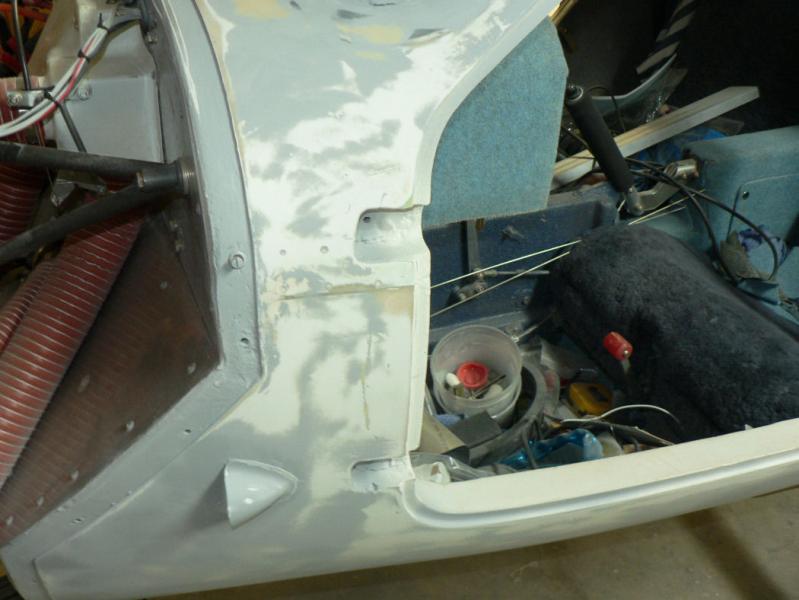
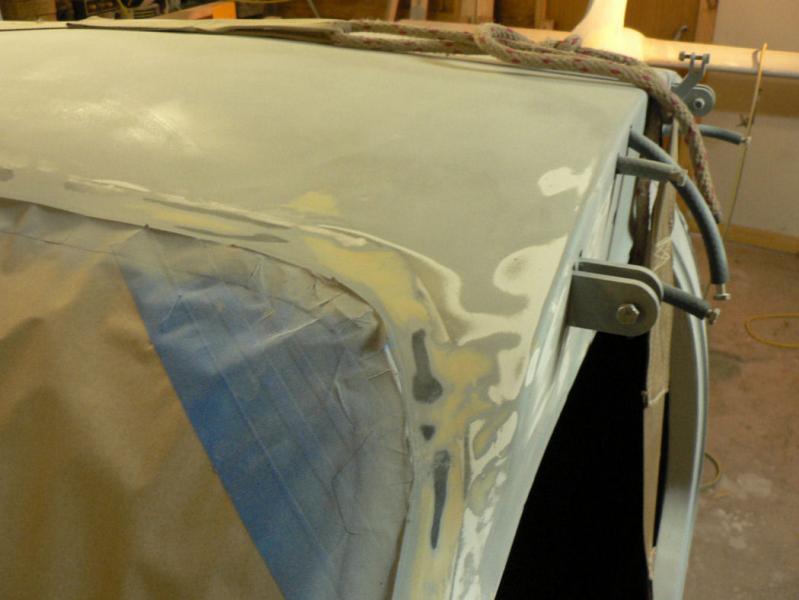
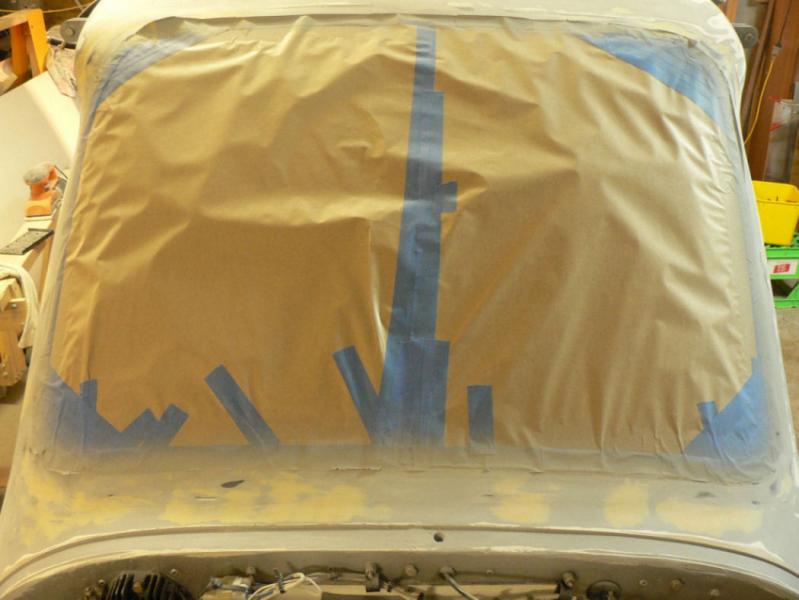
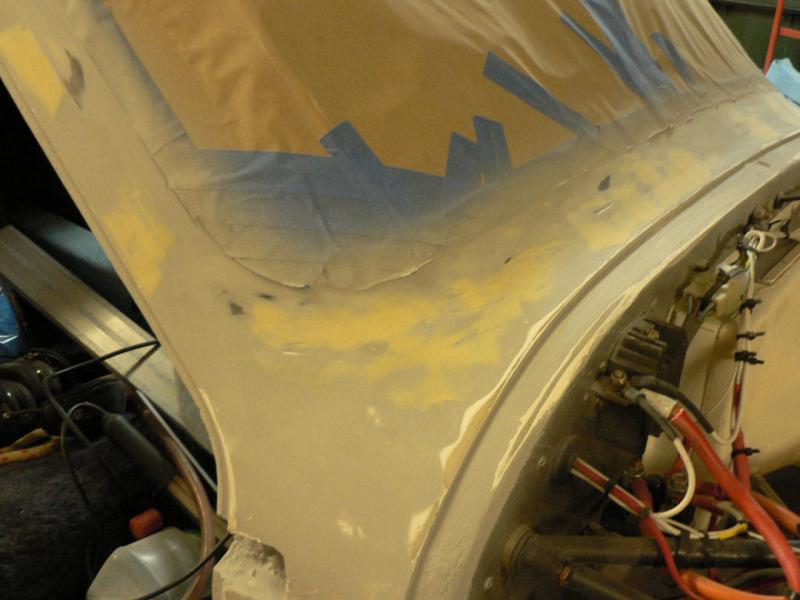
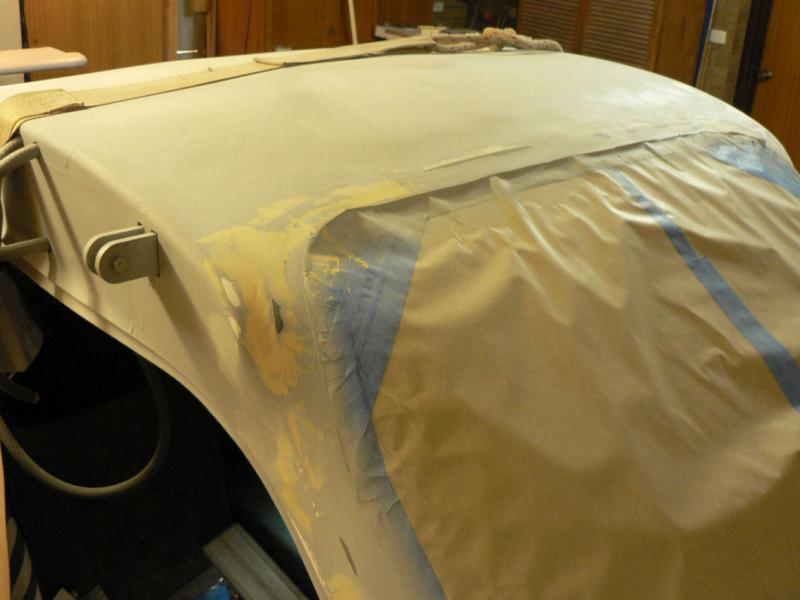
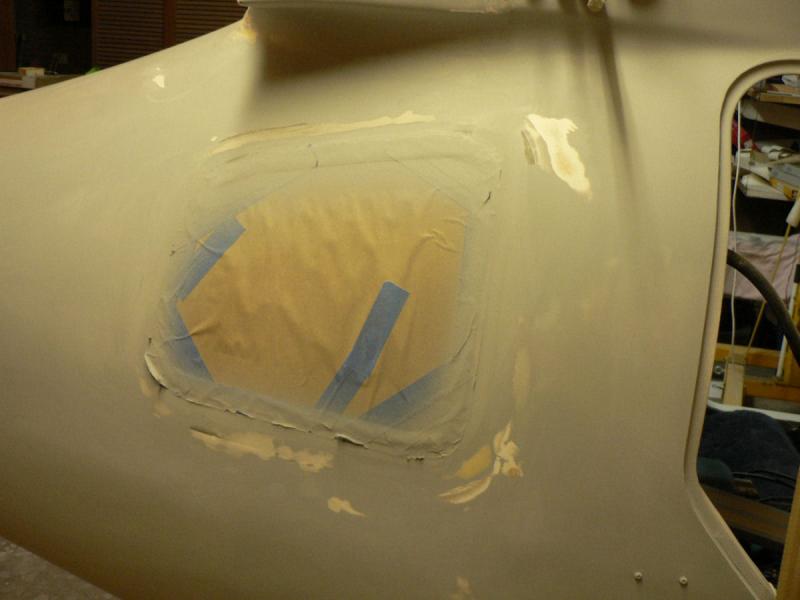
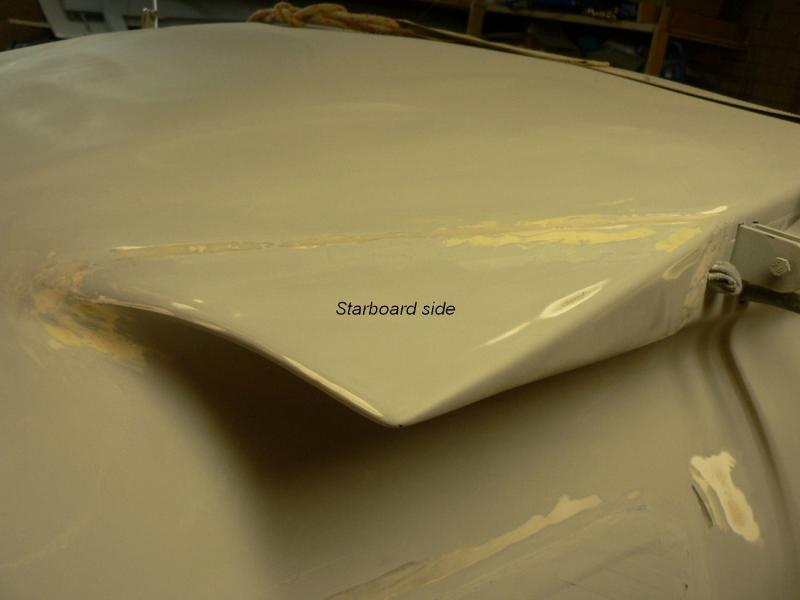
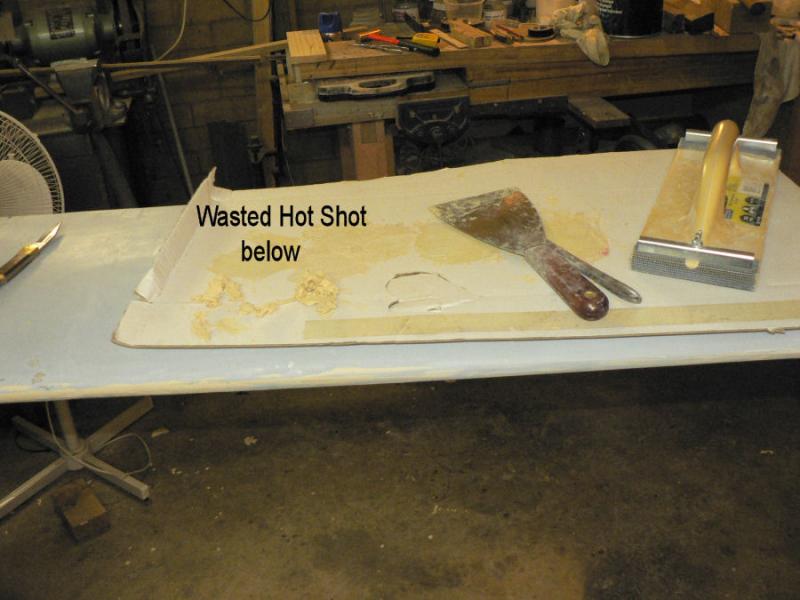
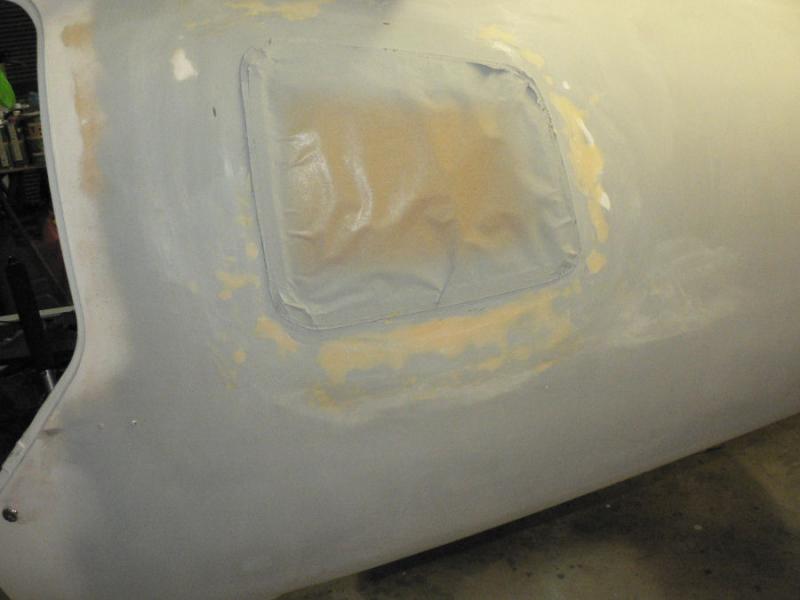
Did some more sanding of hot shot all around the tail feathers that was previously filled. Did some filling around the windscreen area and in the front of both door openings. These areas were then sanded. They will require some more touch up filling then sanding again.
[ATTACH]8218.vB[/ATTACH][ATTACH]8219.vB[/ATTACH][ATTACH]8220.vB[/ATTACH][ATTACH]8221.vB[/ATTACH][ATTACH]8222.vB[/ATTACH]
[ATTACH]8223.vB[/ATTACH][ATTACH]8224.vB[/ATTACH][ATTACH]8225.vB[/ATTACH][ATTACH]8226.vB[/ATTACH][ATTACH]8227.vB[/ATTACH][ATTACH]8228.vB[/ATTACH]
I was thinking some water based glue on the paper edge join might help the security of the windscreen protection!
Any suggestions are most welcome.

-
There is an explanation dated last year of changes made to TAFs on the BOM site below.
http://www.bom.gov.au/reguser/by_prod/aviation/TAF_changes_edu.pdf
-
When there is any kind of loose electrical connection that results in a spark of any size it produces an electromagnetic wave transmission - in other words a radio signal.
Examples you might be familiar with would be the click noise you might hear in a radio when an electrical switch is turned on or off or when there is a lightening strike.
The spark produced by the spark plug also produces a radio transmission but usually has a bit of trouble escaping from inside the engine where it could then be detected but a damaged plug lead might result in a spark inside a plug lead or where it connects to the distributor or the spark plug thus producing interference.
-
We have just returned from Irymple on 8th & 9th May, on the Melbourne road just out of Mildura and stayed at the Irymple Hotel Motel there for a couple of nights. Rooms were $50 for a double or $45 for a single including a cereal breakfast plus toast with tea or coffee. We paid $40 total for dinner including a carafe of white on our first night for the pair of us in the hotel lounge/dining room about 40 metres from our motel room. It is probably closer to the airport than Mildura. It must have the quietest motel rooms that I have ever stayed in to ensure a restful nights sleep.
The Grand Hotel on the Eastern side of the city of MIldura is a top spot with a large parking area close to it. A feature of our last stay there some years ago was the classic English cooked breakfast with all the trimmings around a large round table in the hotel dining room which was great for the event we were celebrating. The Grand occupies about half of a city block.
The other possibility is Wentworth Areodrome with its ultralight friendly environment including an Avgas bowser operated by credit card I think. It is fairly close to the town of Wentworth just off the highway going NW. Wentworth was once considered for the site of the capital as it was once the busiest port in Australia in the heydays of the riverboats being on the junction of the Darling and Murray rivers.
-
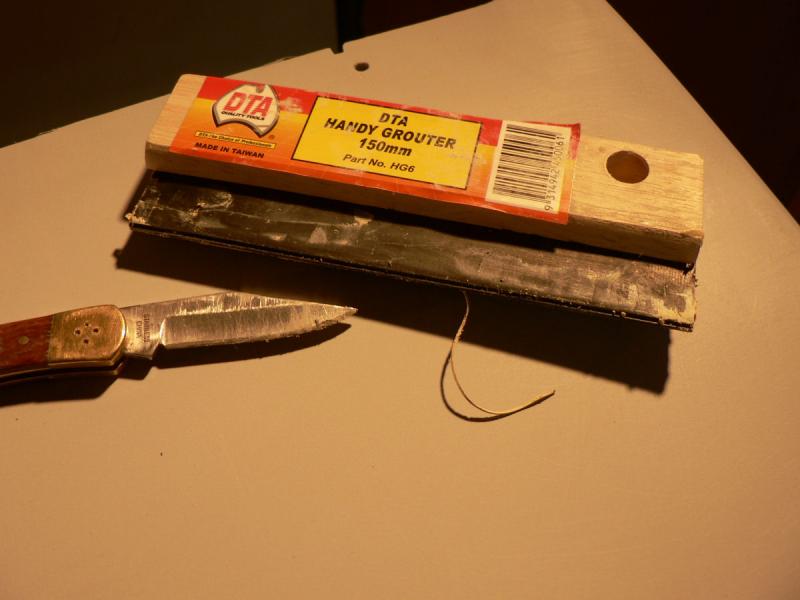
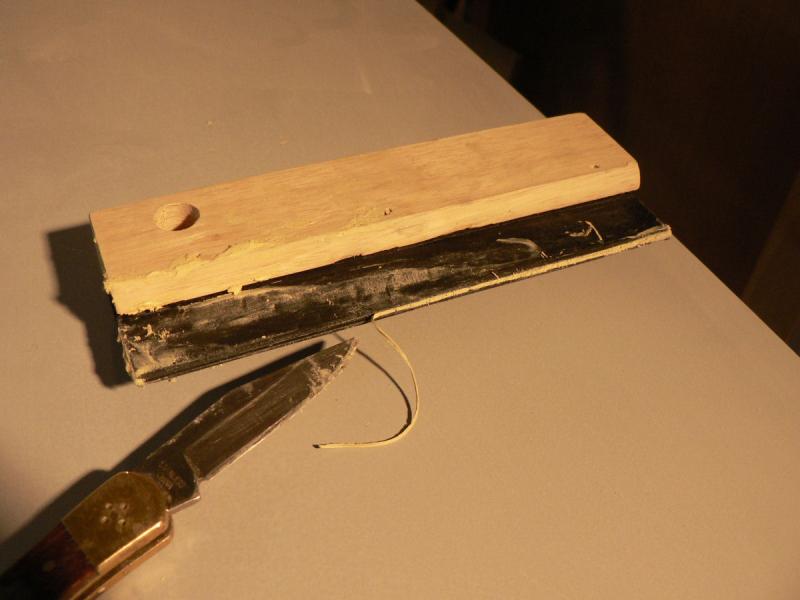
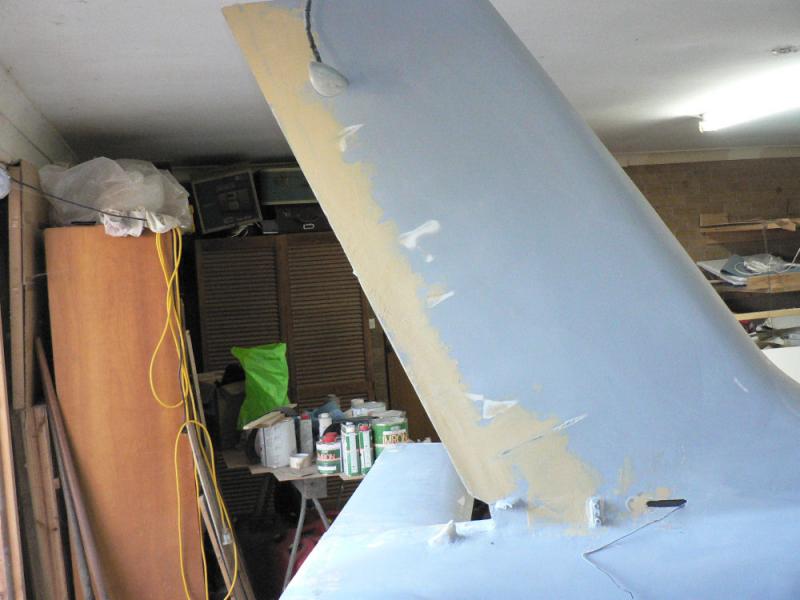
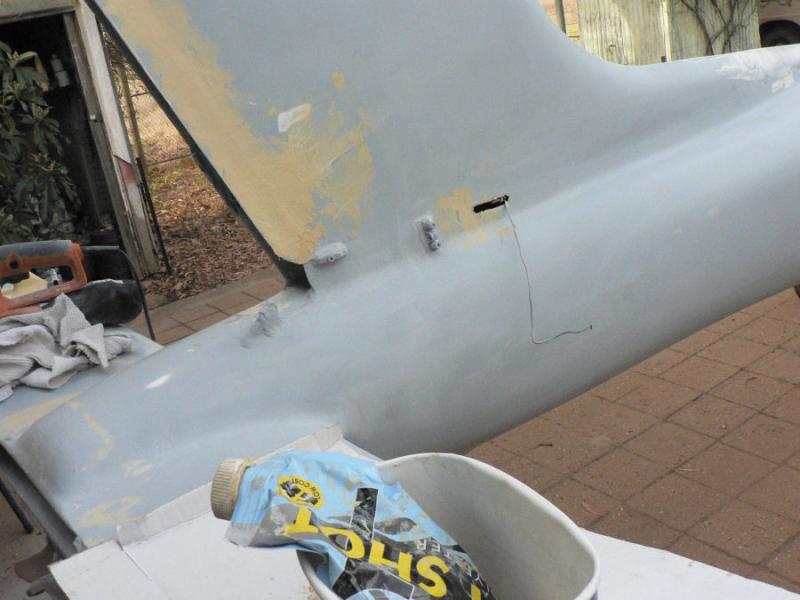
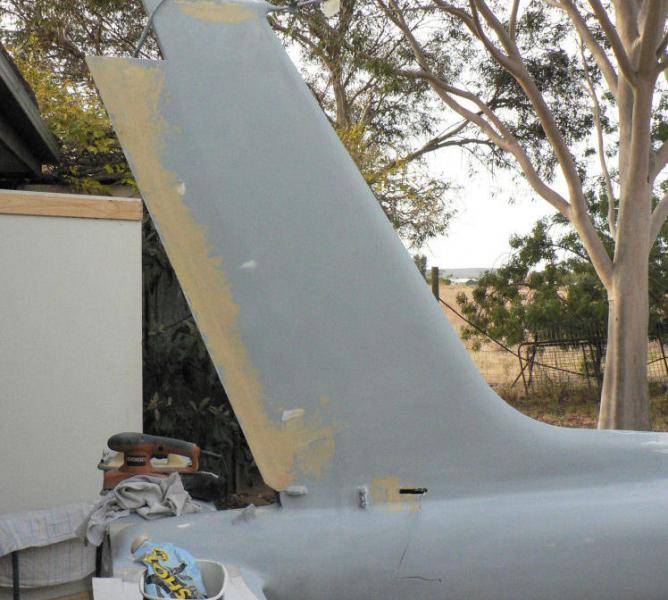
Filling & Sanding
20090521
Continued some sanding of the undercoat in the transition areas from fuselage to vertical stabilizer, fuselage to horizontal stabilizer, the eyelashes to back of cabin and the extension on the vertical stabilizer.
These areas were then filled with Hot Shot and sanded again by hand and using the electric sander.
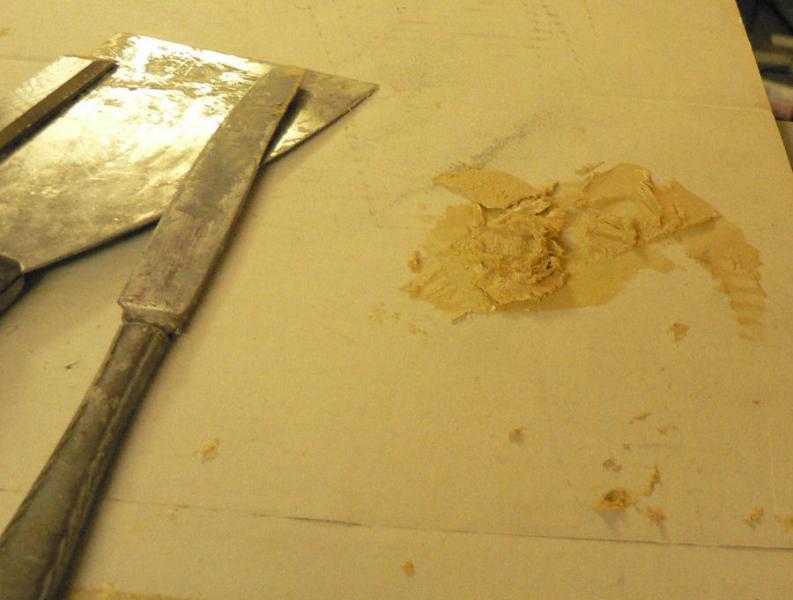
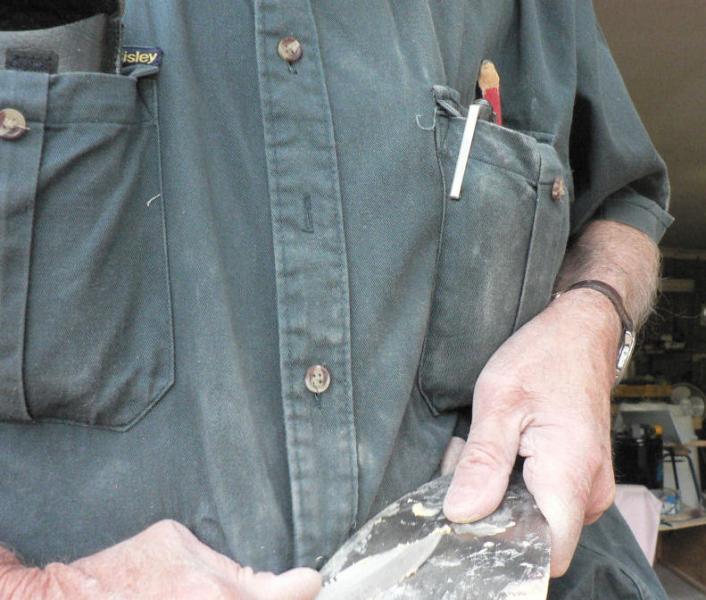
The Hot Shot was spread with a "Handy Grouter" which I find much better and easier to use than a metal trowel that I had been using previously. It has a T shaped working edge so the thin part contacts the work and the thicker part supports the thin working edge. So the edge needs cleaning at the end of each filling session so I used a pocket knife to get the Hot Shot out of the two L shaped sides of the Grouter.
I looked up the U-Pol website in regard to Hot Shot and saw that its setting time is about 4 minutes. So I have been attempting to do much bigger areas than is feasible with one mix. It has used up half its pot life while I was mixing it up and the result is a worse finish.
The fills in these photos were done with two lots of mixes. Four lots would probably have given a better result requiring less work to smooth it up after it sets.
It is ready for sanding in about twenty minutes.
According to the web site, the mixing ratio is 100 parts of Hot Shot to 2 parts of DIBENZOYLPEROXIDE hardener. That is two percent!
This is a bit hard to judge when one is squeezed out of a tube about five times the size of a tooth paste tube in about a 20 mm diameter stream and the hardener is squeezed out of a tube maybe a tenth the size of a tooth paste tube and emits a stream about as thick as a matchstick.
So make both streams about the same length and their diameters will look after the volume ratio.
The nearest supplier to Leeton according to the website is at Penrith. My original supplier was in Brisbane.
[ATTACH]8148.vB[/ATTACH][ATTACH]8149.vB[/ATTACH][ATTACH]8150.vB[/ATTACH][ATTACH]8151.vB[/ATTACH][ATTACH]8152.vB[/ATTACH]
[ATTACH]8153.vB[/ATTACH][ATTACH]8154.vB[/ATTACH][ATTACH]8155.vB[/ATTACH][ATTACH]8156.vB[/ATTACH][ATTACH]8157.vB[/ATTACH]
[ATTACH]8158.vB[/ATTACH][ATTACH]8159.vB[/ATTACH][ATTACH]8160.vB[/ATTACH][ATTACH]8161.vB[/ATTACH][ATTACH]8162.vB[/ATTACH]
[ATTACH]8163.vB[/ATTACH]
Another one or two undercoat filler coats from the spray gun and sanding will go close to finishing off the undercoat for these parts of the aircraft.
-
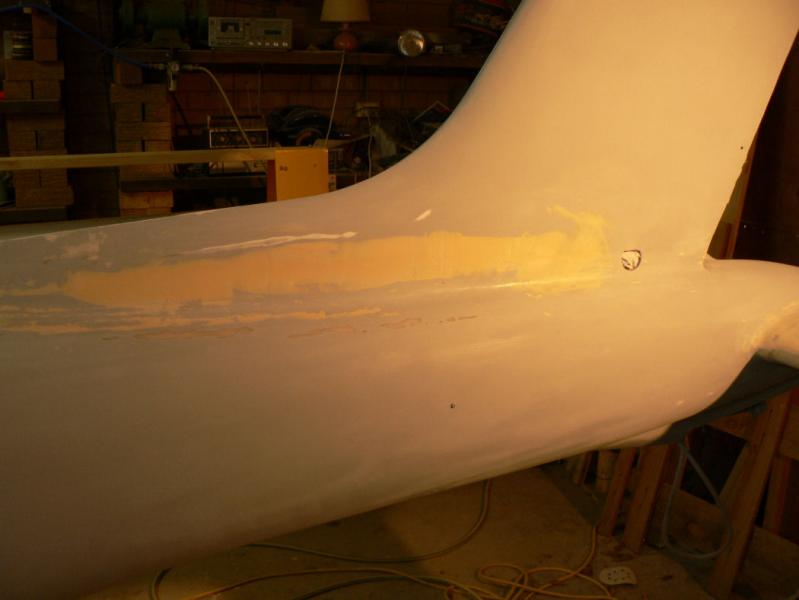
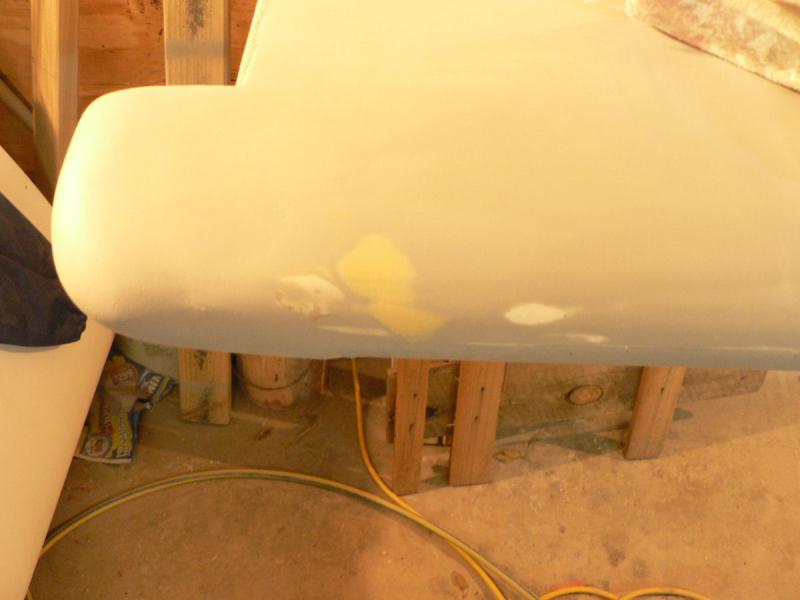
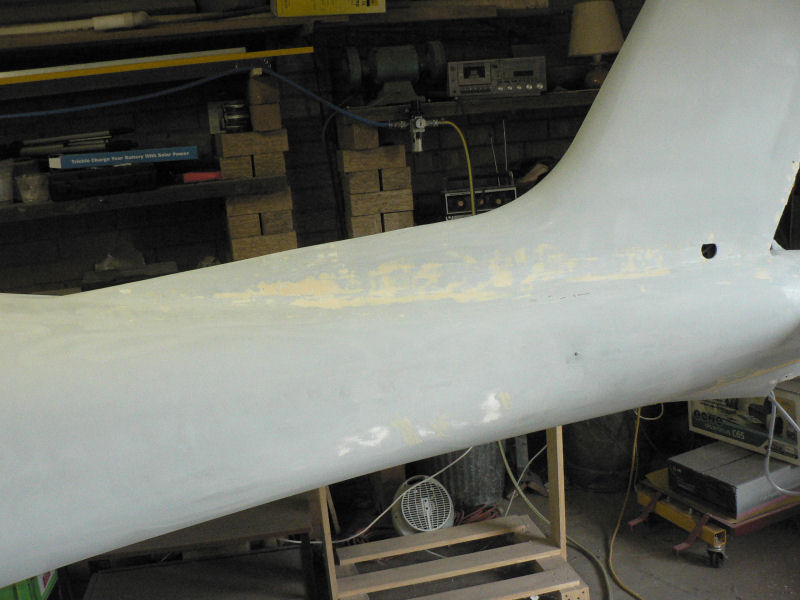
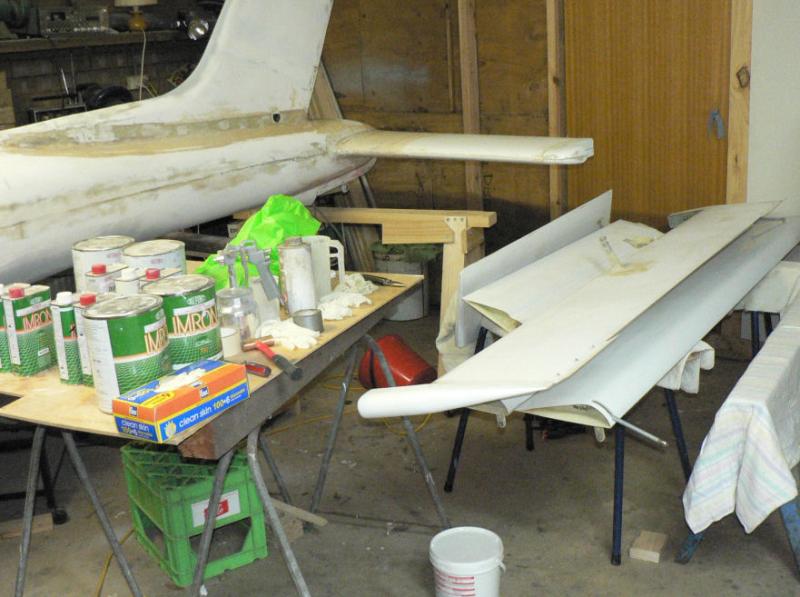
Sanding, Filling & Undercoating
20090506
More sanding filling and undercoating
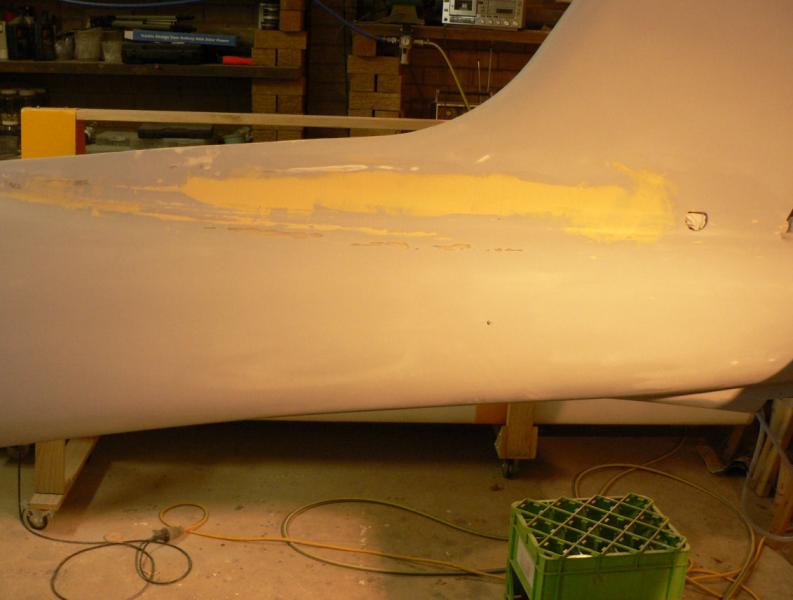
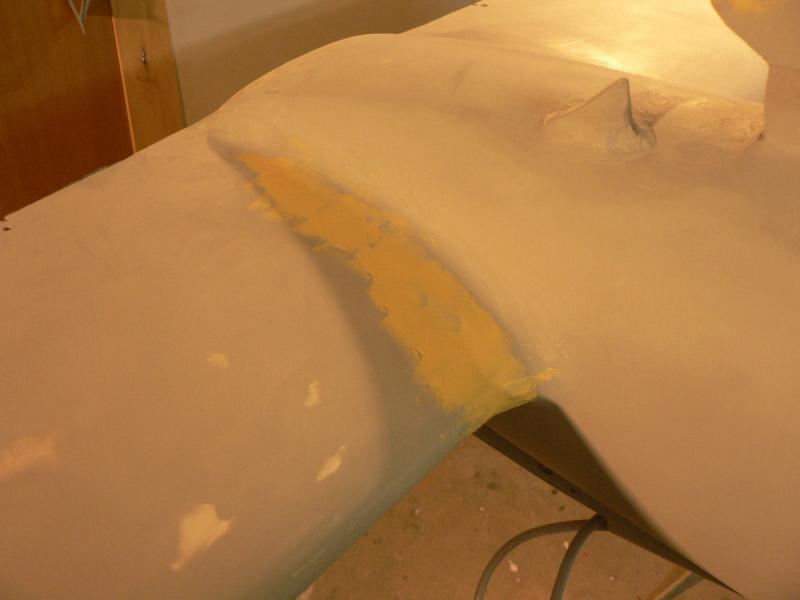
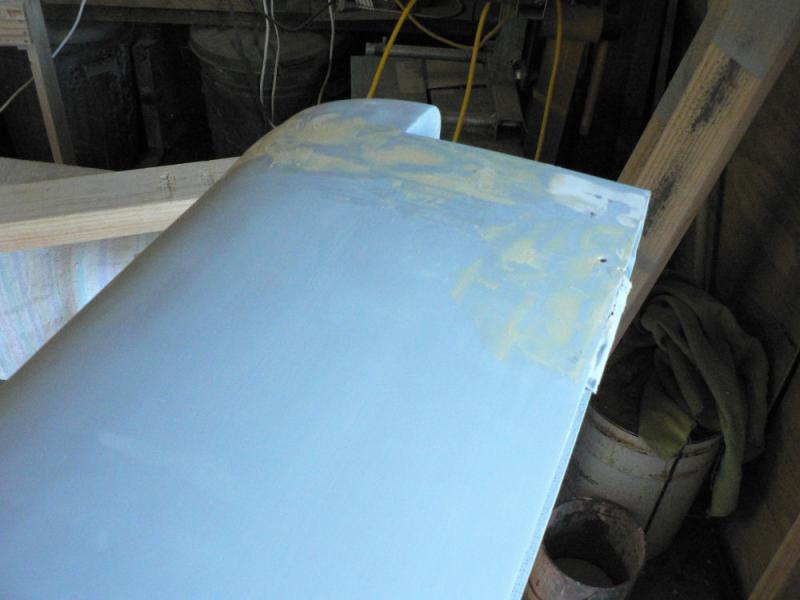
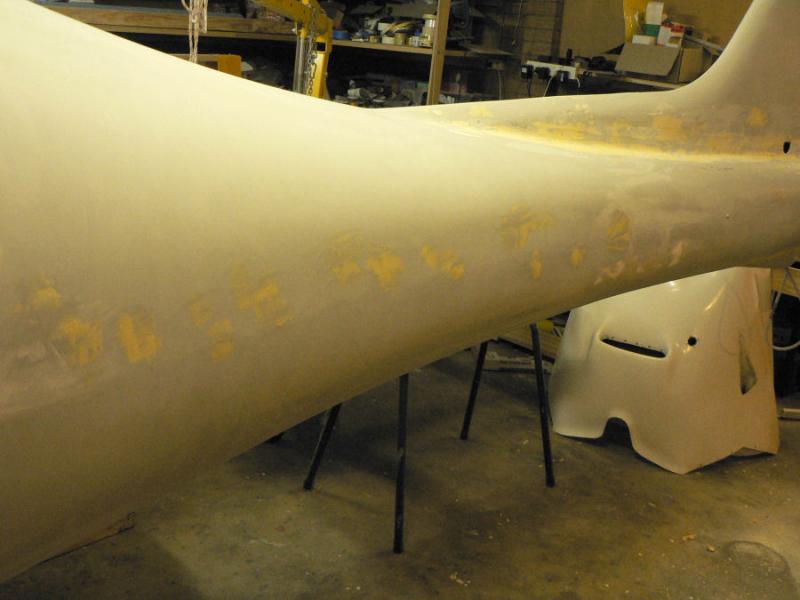
Sanded the Hot Shot fills and then cleaned them and filled them again including the vertical fin around the added strip as well as both teardrops at the back of the cabin.
Once these new fills were sanded again they were cleaned again then undercoat filler was applied. Virtually all the fuselage aft of the doors was done with extra coats on the rougher areas.
[ATTACH]7994.vB[/ATTACH][ATTACH]7995.vB[/ATTACH][ATTACH]7996.vB[/ATTACH][ATTACH]7997.vB[/ATTACH][ATTACH]7998.vB[/ATTACH]
[ATTACH]7999.vB[/ATTACH][ATTACH]8000.vB[/ATTACH][ATTACH]8001.vB[/ATTACH][ATTACH]8002.vB[/ATTACH]
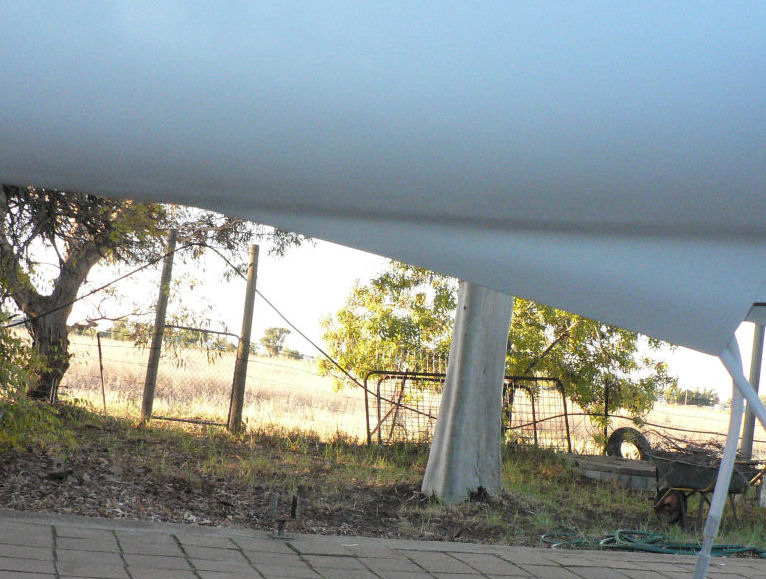
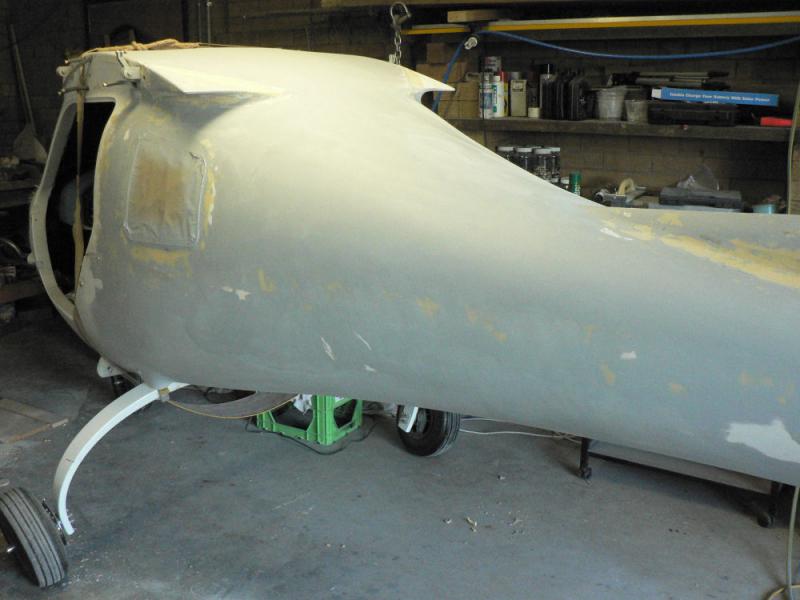
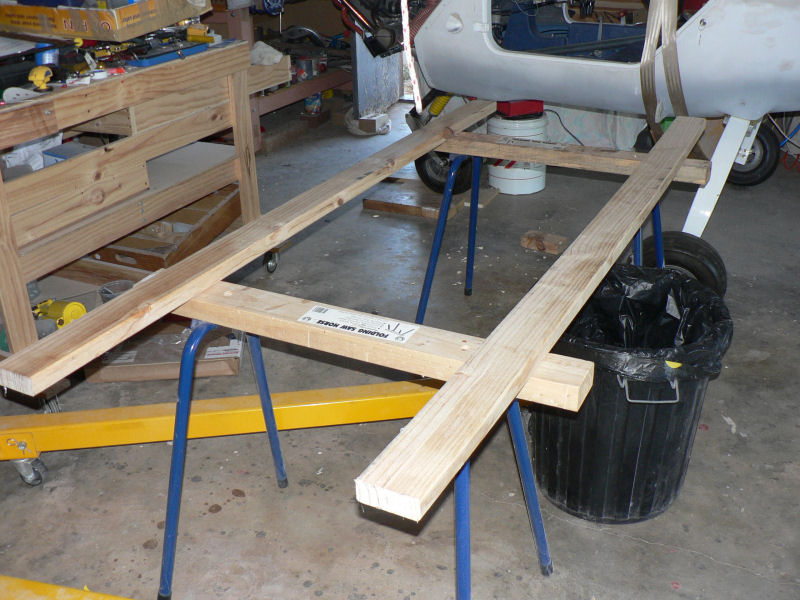
The buckets of sand are used to counterbalance the plane to make it easier to push back into the carport and at the same time to lower the tail plane to get it under the carport entrance 10" RSJ and the added timber framing the doors. Once inside the top of the tail plane only clears the ceiling by about 5 cm without the strobe mounted!
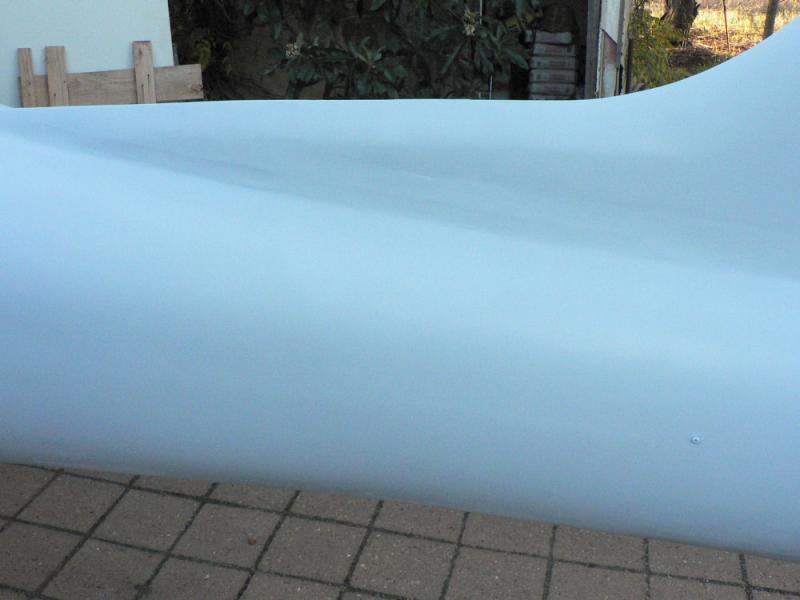
As you can see, my wife Joan took a photo of me as required in the log records occasionally. Because it was late afternoon and in the shade when these photos were taken the flash was switched on, a mistake apparently. All photos are flaring from the aircraft paint colour and therefor not showing any detail on the surfaces.
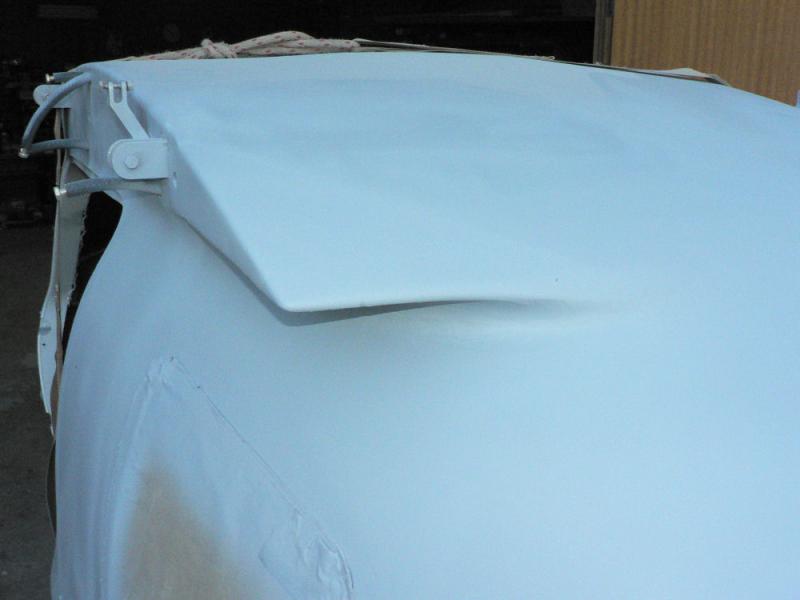
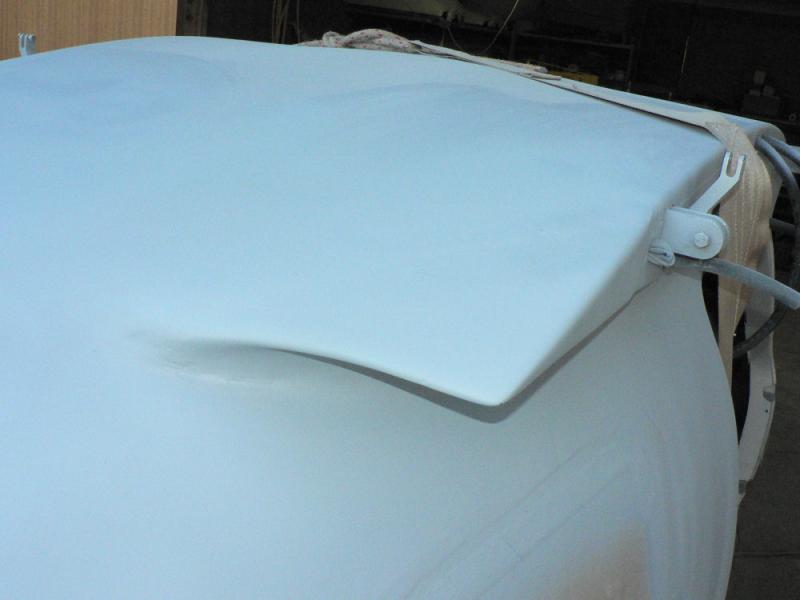
A number of areas will need more sanding and filling probably with undercoat filler before it is ready to top coat.
-
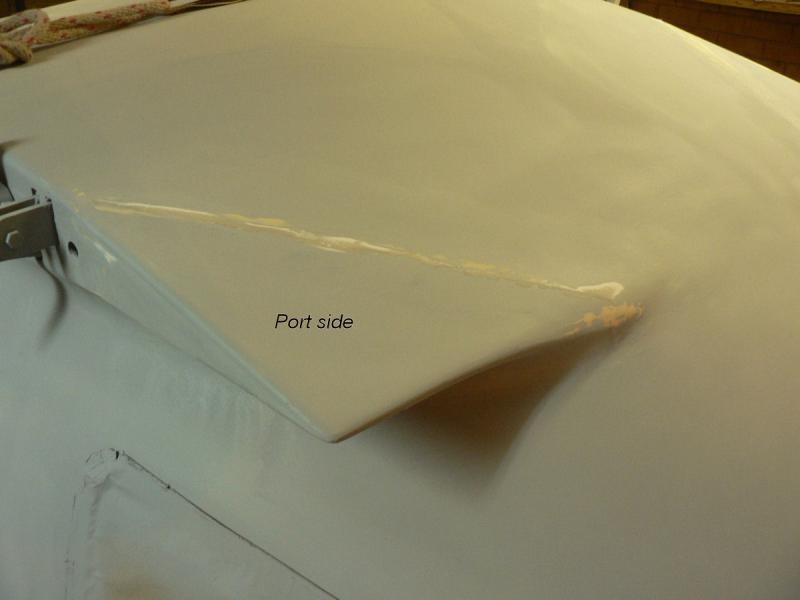
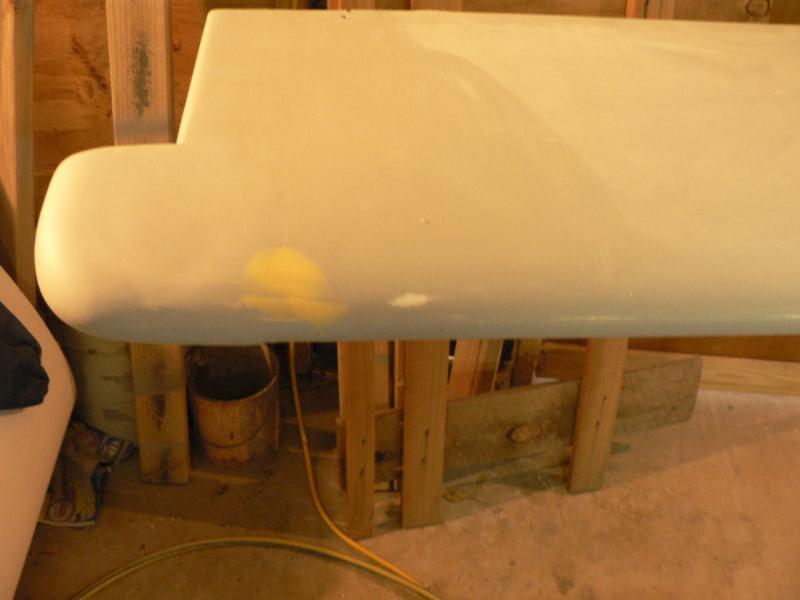
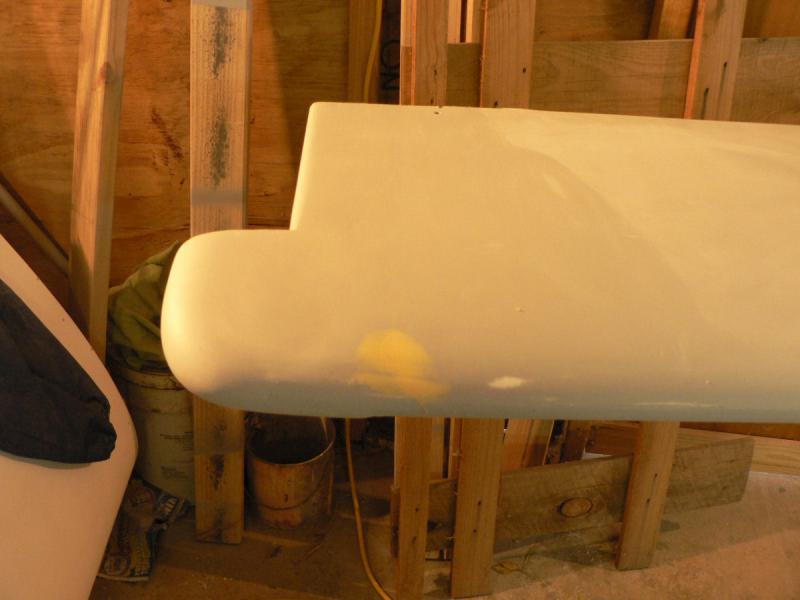
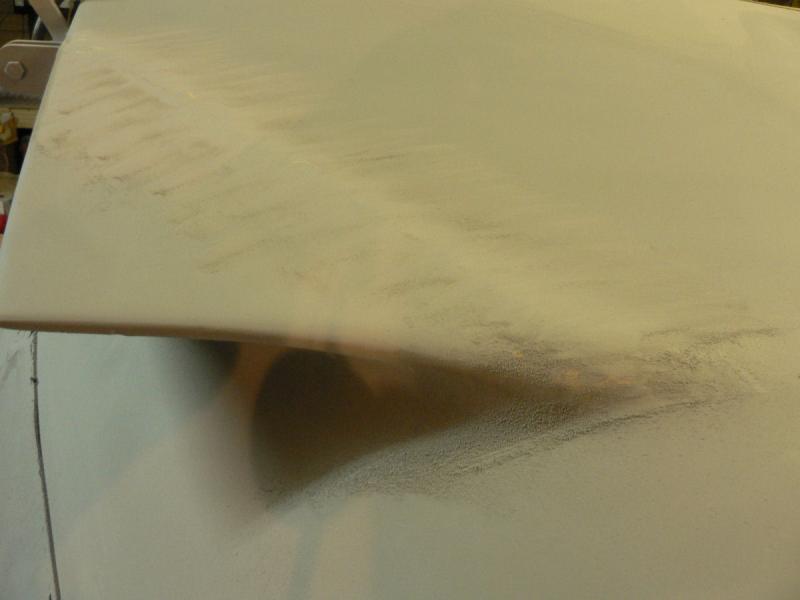
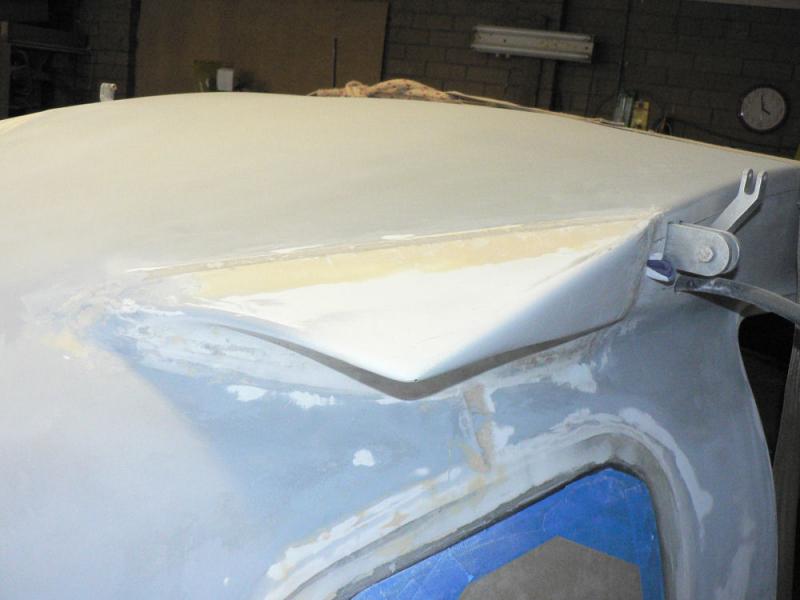
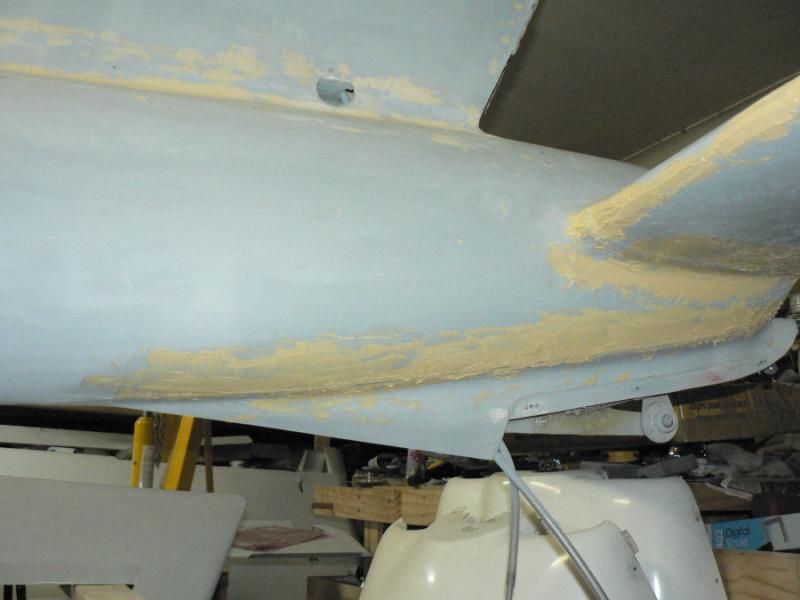
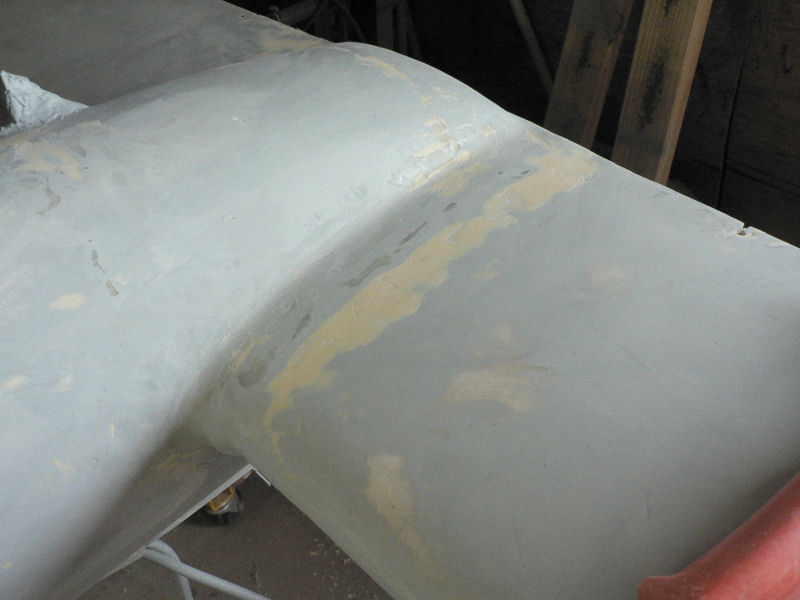
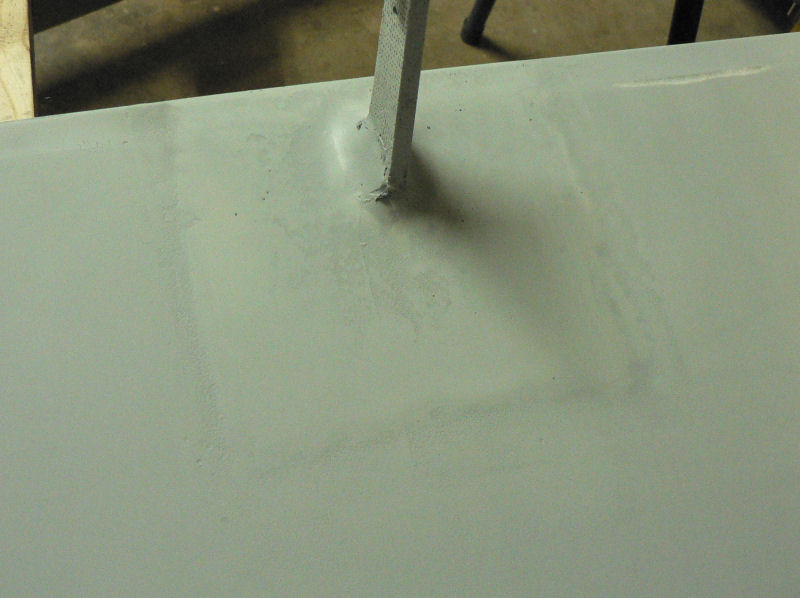
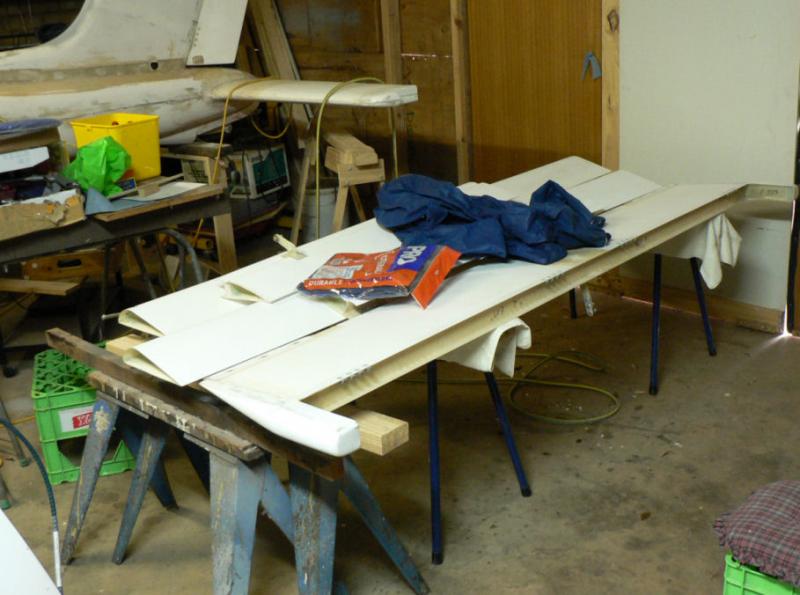
Scraping, Sanding and filling
20090501
Scraped the areas that were filled in the last couple of sessions then sanded them and filled some of them again from the windows back to the tail group.
Used the drill with small flap wheel 120 grit on the curved concave surfaces between horizontal stabiliser & fuselage and between the ventral fin & stabiliser & fuselage.
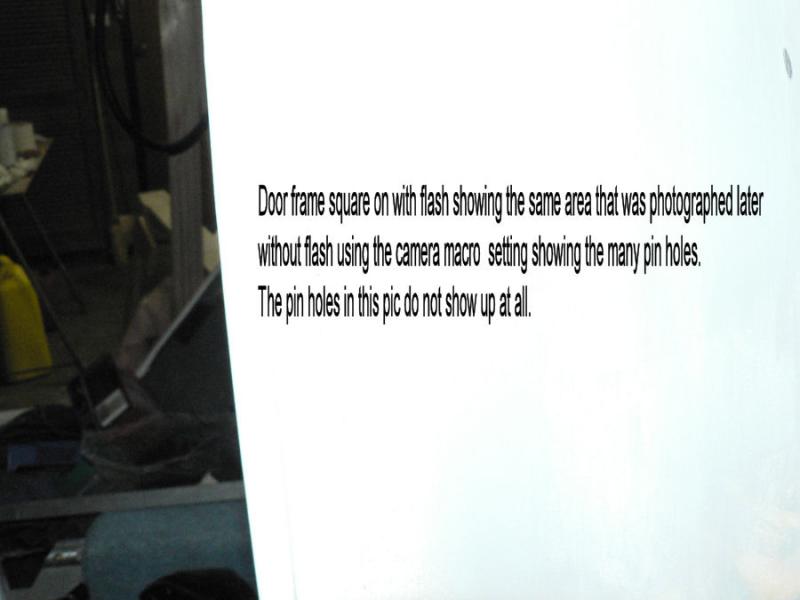
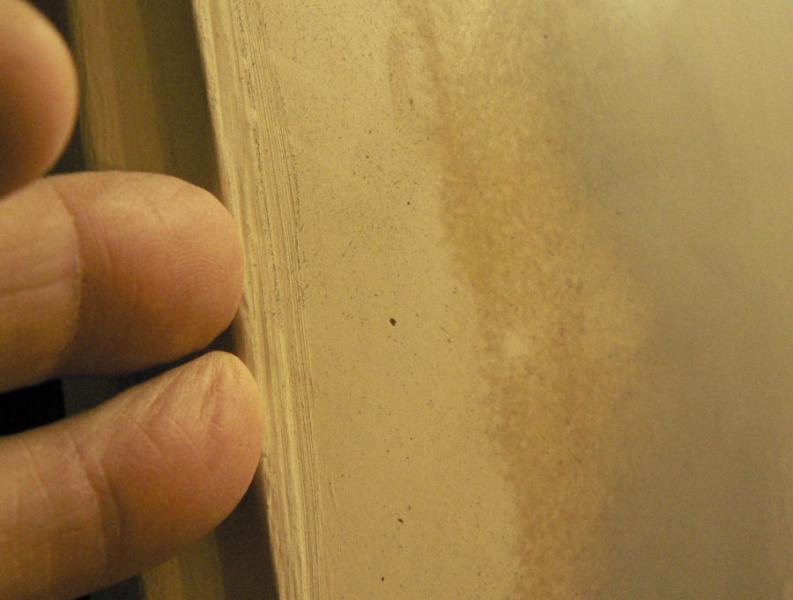
The photo of the area near the port door in the last pic appears to show the pin holes from the previous session have been filled with "Hot Shot" - if they are not filled they will show up immediately once the next coat of paint is applied over them.
[ATTACH]7911.vB[/ATTACH][ATTACH]7912.vB[/ATTACH][ATTACH]7913.vB[/ATTACH][ATTACH]7914.vB[/ATTACH]
[ATTACH]7915.vB[/ATTACH][ATTACH]7916.vB[/ATTACH][ATTACH]7917.vB[/ATTACH]
I missed taking a photo of the underside of the port side horizontal stabiliser and ventral fin area which was scraped, sanded and filled again in this session.
Once the fills from this session are all smoothed up then more undercoat will be applied and sanded until ready for final coat.
-
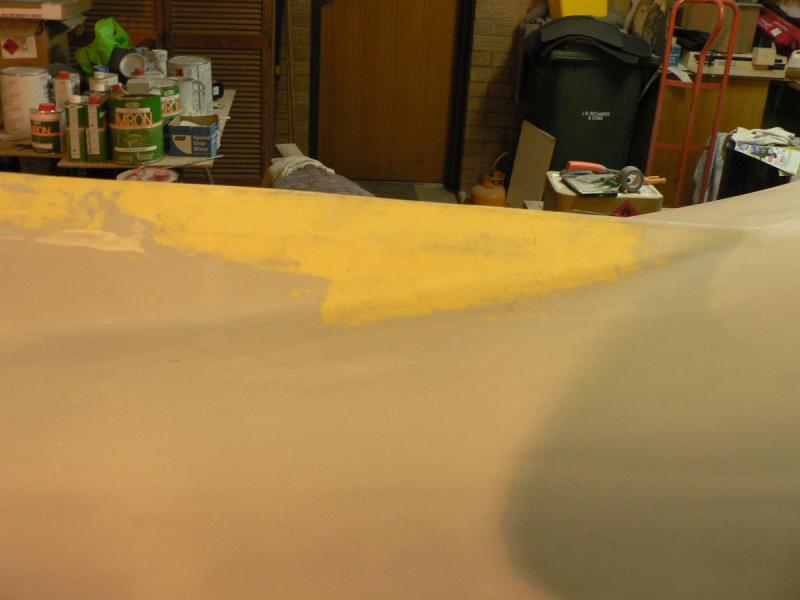
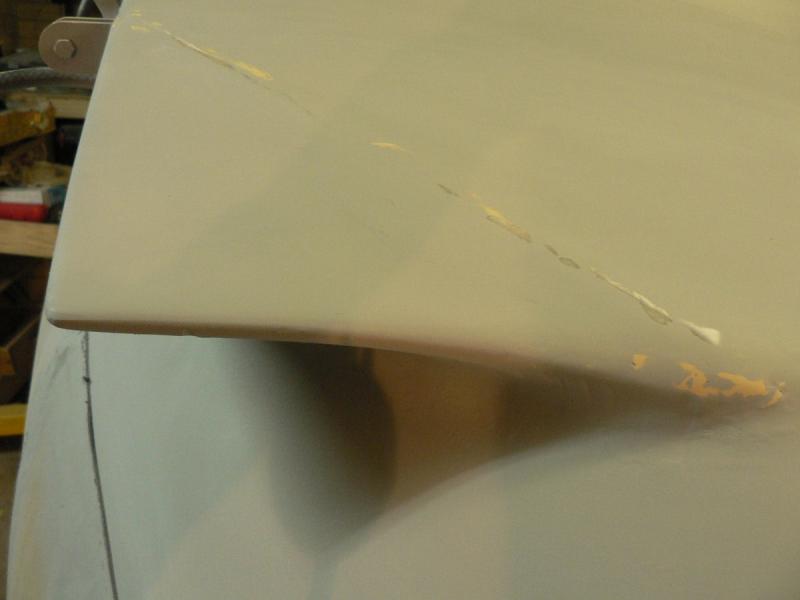
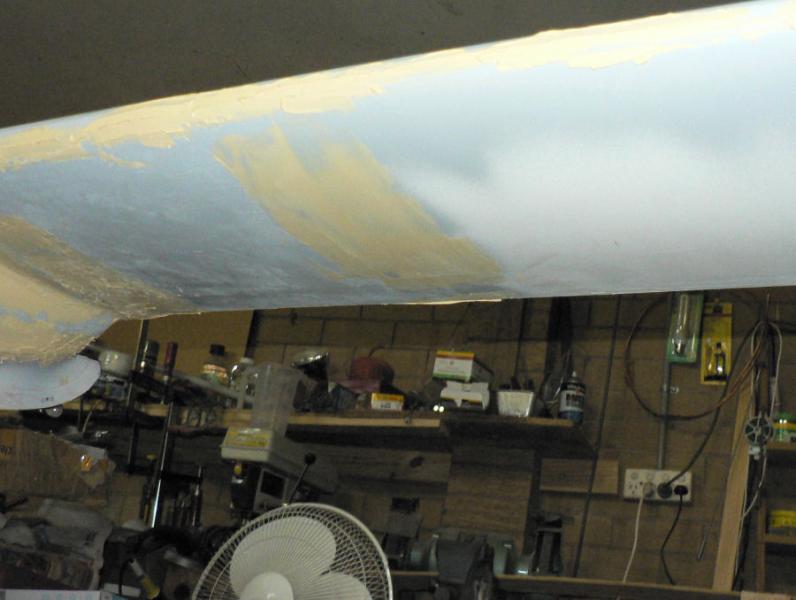
Filling & Sanding
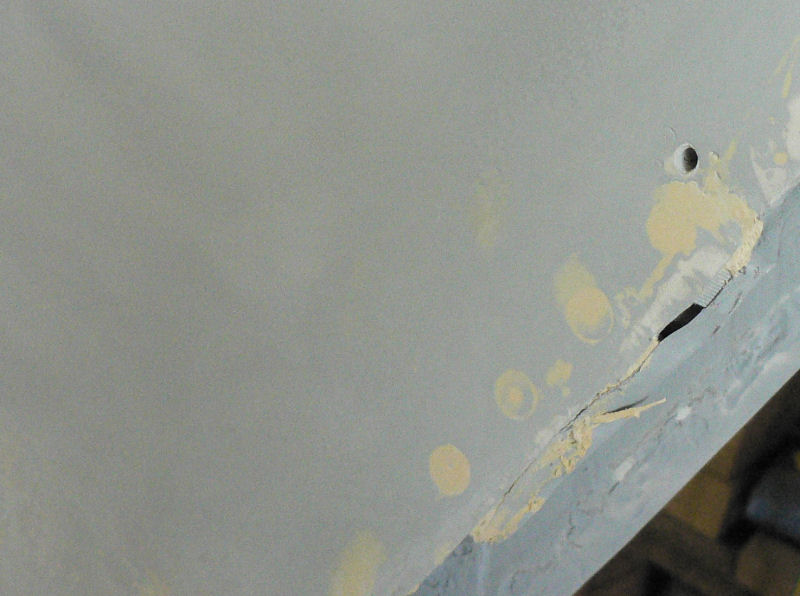
20090424
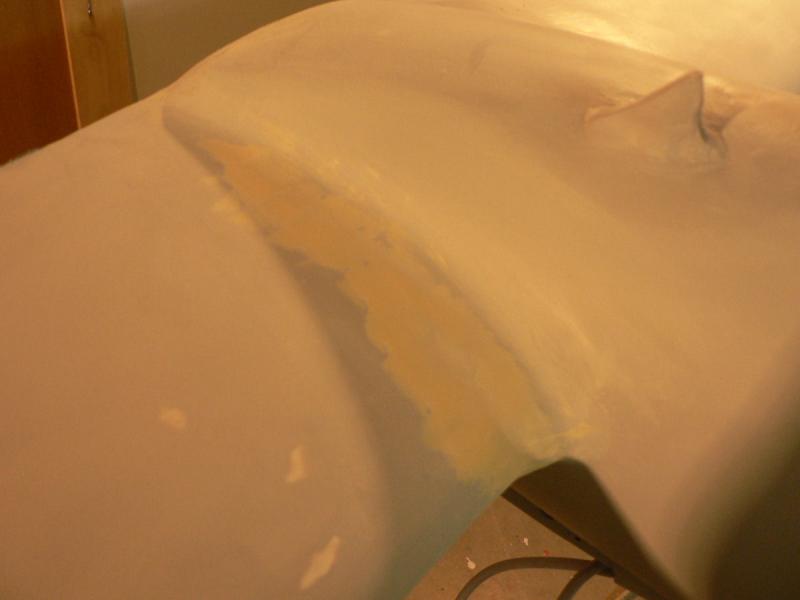
Continued sanding & filling. Two separate short sessions today with two lots of visitors and the usual Friday distractions. The second small session was this evening when taking photos quite a few rough spots showed up which were filled while I could see them.
See from the pics the result of mixing up too much Hot Shot for the first session today and later on to a lesser extent this evening as the hot shot was setting faster than it was applied. I think it lasted a bit longer in the cool of the evening but it was still pretty quick probably lasting less than five minutes before being unuseable. Taking a photograph of it did not help.
This evening while taking the pics noticed a batch of rough spots along the fuselage and a big patch of "pin holes" in the gel coat that I had not filled previously near the port door frame. The "pin holes" would not fill if sprayed with undercoat and so would still show up in the final top coat. So they had to be filled with epoxy microballs or hot shot before undercoating. So a second small batch of hot shot was mixed and applied to these areas. It still went off before it was all applied and more wasted than was expected.
[ATTACH]7848.vB[/ATTACH][ATTACH]7849.vB[/ATTACH][ATTACH]7850.vB[/ATTACH][ATTACH]7851.vB[/ATTACH][ATTACH]7852.vB[/ATTACH]
You can see the change in the smoothness of the applied hot shot as it goes off in at least one of the pics.
The evening fills can be seen in pics #8 and #9 and neither was sanded but probably could have been as it sets very quickly.
[ATTACH]7853.vB[/ATTACH][ATTACH]7854.vB[/ATTACH][ATTACH]7855.vB[/ATTACH][ATTACH]7856.vB[/ATTACH][ATTACH]7857.vB[/ATTACH]
There is still some awkward sanding to do of the filling done this morning under the horizontal stabiliser and along one edge of the ventral fin and probably some more filling and sanding on both before a final undercoat.
The plane was a bit difficult to access as it was still in the carport the wrong way round. This morning, when I had the doors open ready to get it out and turn it around, it started to rain so plan B came into action - do it in the carport.
By 8 pm this evening we had 9 mm of rain and now at 9:30 pm Yanco has recored 13.6 mm - not great but a usefull start for pastures in the area that got it. It looks like the Murrumbidgee catchment has missed out again receiving even smaller falls.
-
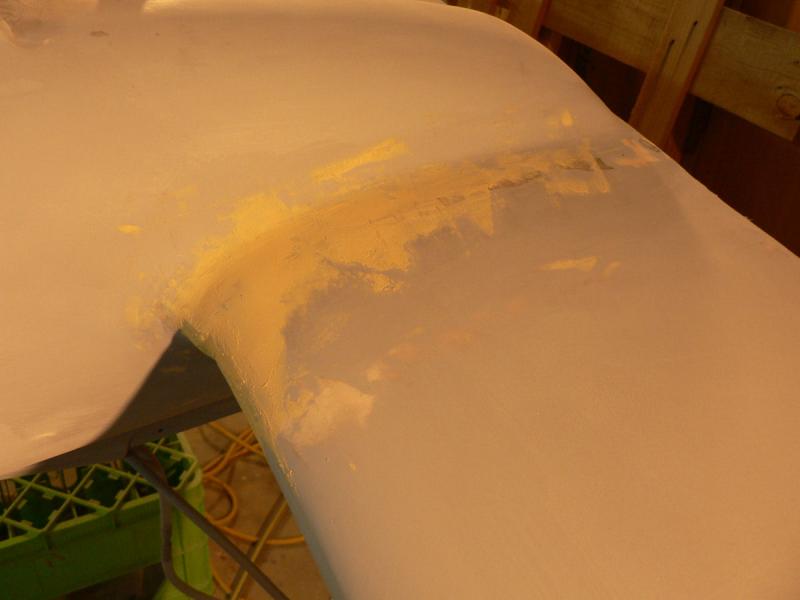
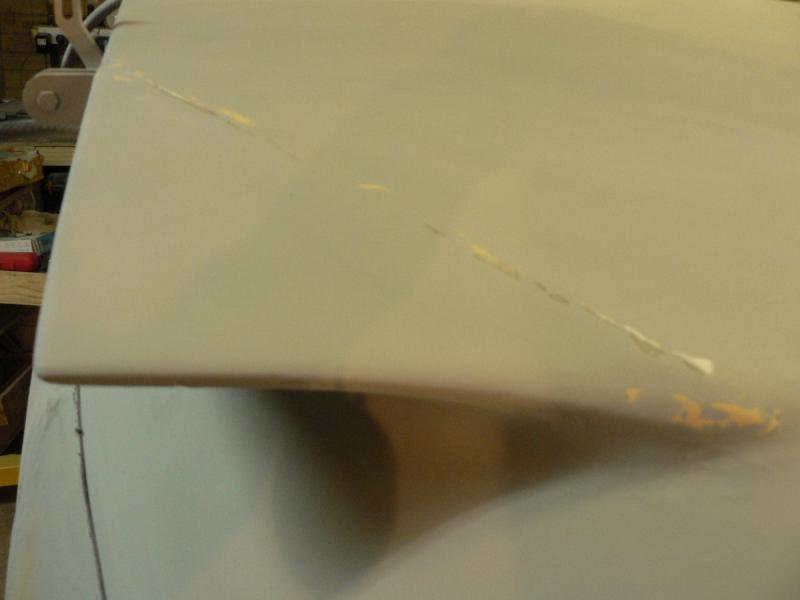
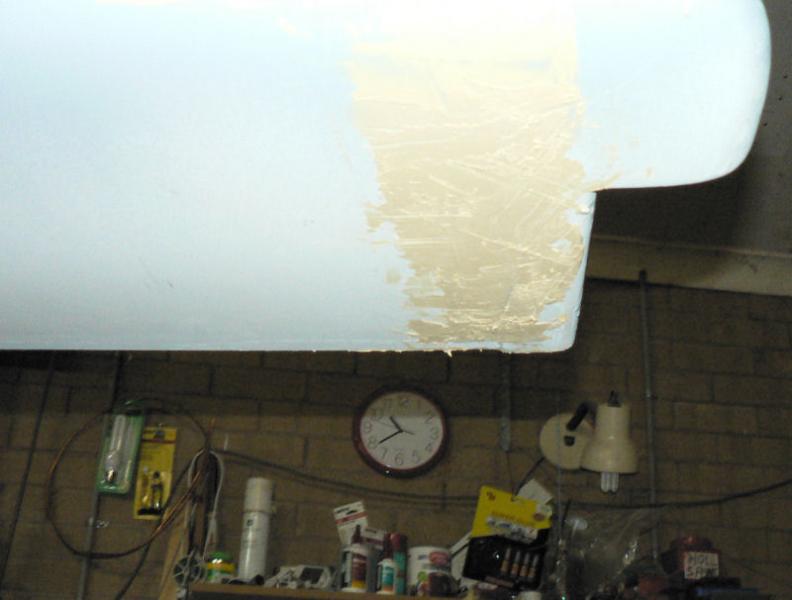
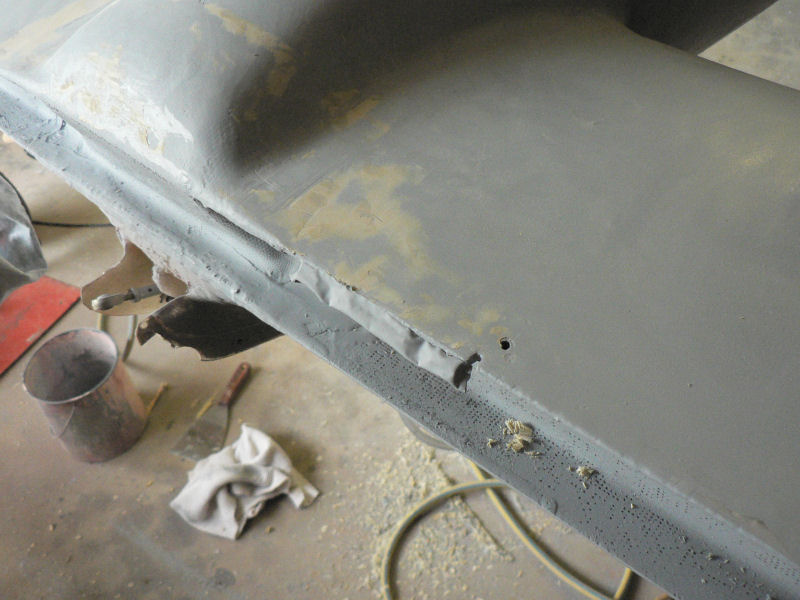
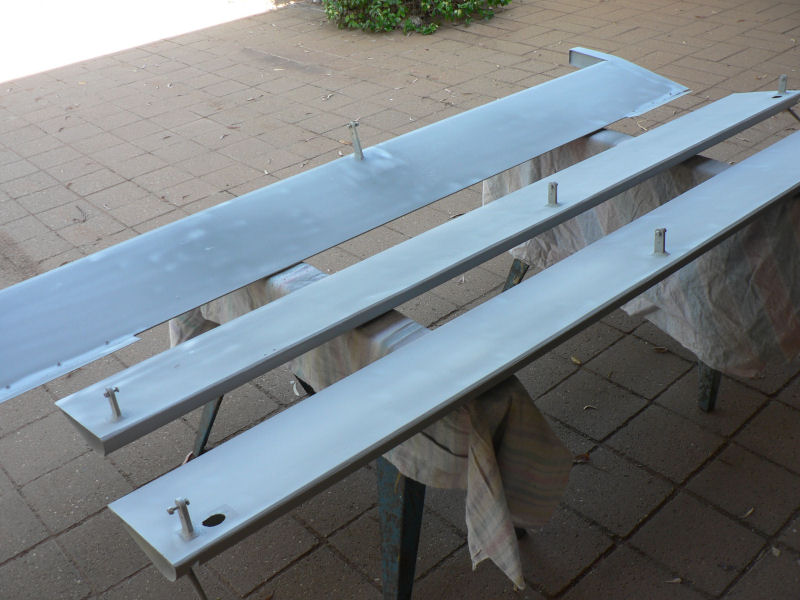
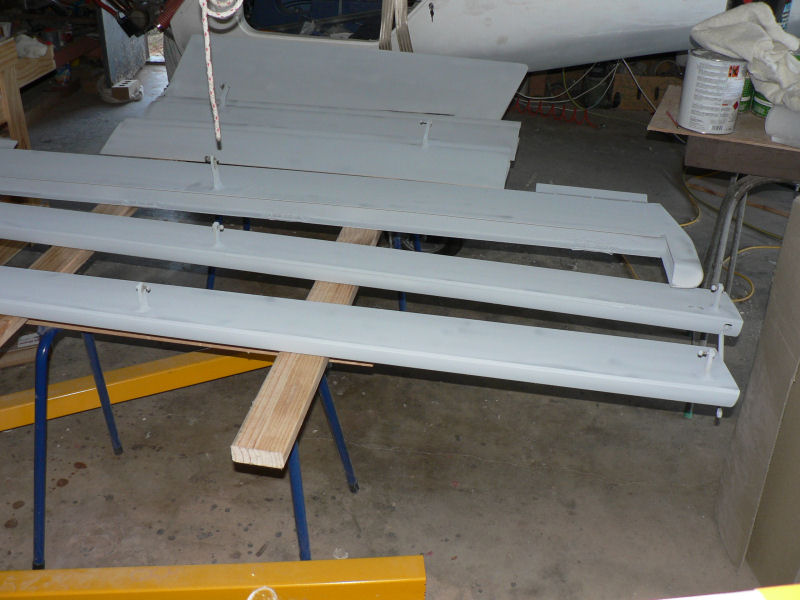
J160 Painting & Filling
20090423
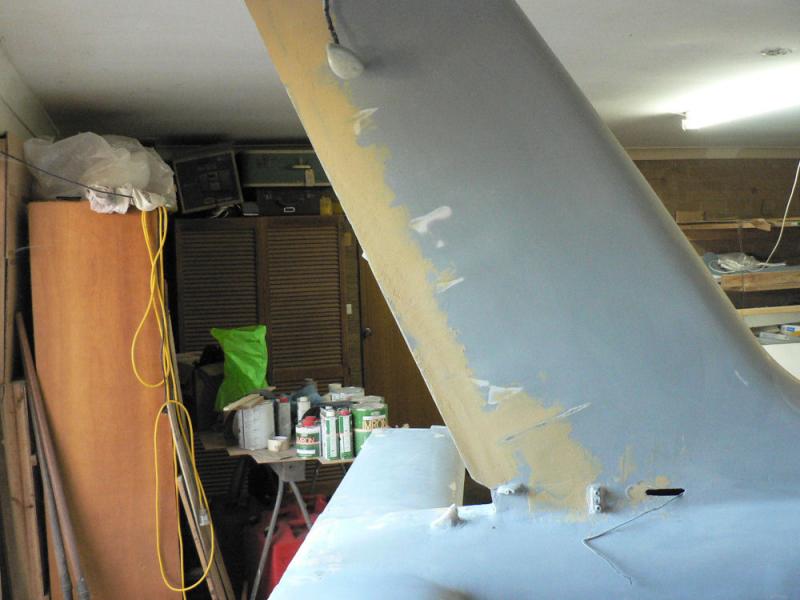
Continued sanding & filling around horizontal stabiliser & vertical stabiliser joins to fuselage.
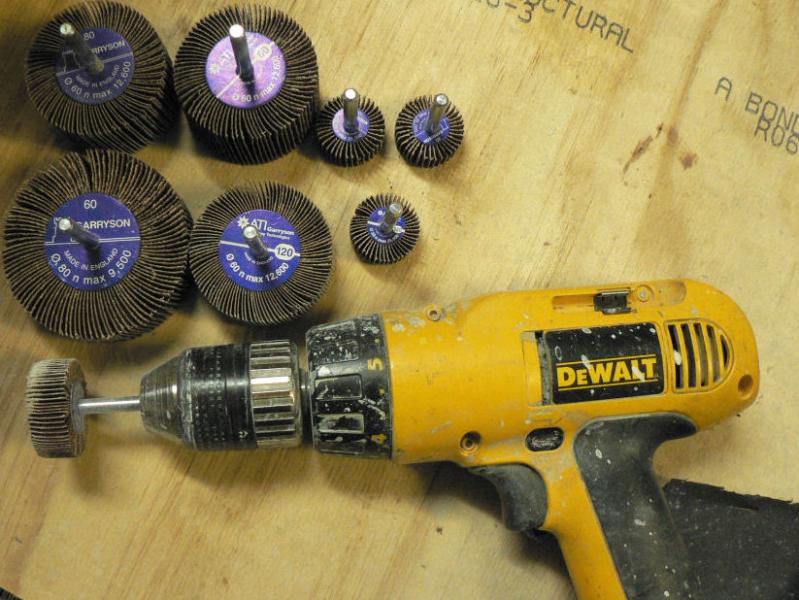
Was able to get some 120 grit flap sanding discs for use in a battery powered drill to sand awkward inside radii like around the tear-drops and the fuse to vertical stabiliser join after starting off with 60 grit which was far too coarse leaving noticeable slits in the fill.
Took the aeroplane out of carport into brighter light - a mistake, it showed up more blemishes & rough spots on the fuselage etc.
Used "Hot Shot" to fill the horizontal stabiliser to fuselage join and also the ventral fin to fuselage join - the fin is the early type that is epoxied underneath the aft end of the fuselage whereas the later ones are attached with retained nuts and screws.
[ATTACH]7834.vB[/ATTACH][ATTACH]7835.vB[/ATTACH][ATTACH]7836.vB[/ATTACH][ATTACH]7837.vB[/ATTACH]
[ATTACH]7838.vB[/ATTACH][ATTACH]7839.vB[/ATTACH][ATTACH]7840.vB[/ATTACH][ATTACH]7841.vB[/ATTACH]
The bad shirt front pic is supposed to show how hard it was to scrape the rapidly setting "Hot Shot" filler off a wide putty trowel. I gave up using the pocket knife and used a very sharp wood chisel instead.
[ATTACH]7842.vB[/ATTACH][ATTACH]7843.vB[/ATTACH][ATTACH]7844.vB[/ATTACH][ATTACH]7845.vB[/ATTACH]
The fibreglass strip added to close the gap between the rudder and vertical stabiliser needed fill to smooth it up & it will probably need some more after initial sanding.
Note in pic1 the new car which was my wife's price for getting a J160 kit. I could not stall it any longer. The old car was only 13 years old with about 165,000 km on the clock! My luck being what it is the day after we got the new car the washing machine died. It was probably about the same age as the car. So we ended up buying a new washing machine as well. My wife says she will go without a mothers day present from me this year! - I have to keep reminding her that she is not my mother!
The car is a turbo diesel and according to the dealer is supposed to do 6.6 L/100 km. On the first tank of fuel it did 704.6 km according to the odometer and took 65.79 litres of diesel to fill the tank despite the tank supposedly only holding sixty five (65) litres. This works out as 9.33 L/100 km and is higher than the fuel consumption on our traded in Magna which ran at around 8.5 L/100 km on a trip!! The second tank looks more promising so far with 350 km on the clock with the fuel gauge now showing about a touch under 3/4 full.
We should have spent the money on getting a factory J160 or a J230 and then that 705 km would have taken less than 30 litres of avgas at 100 Knots or better.
Continuing the good luck got a ride to Natfly with the Leeton Sonex builder. We arrived on Friday afternoon in the rain and started to erect our two man tent in the light rain and then saw some of the most hair raising conditions for the arriving aircraft that I have seen for a while. We spent most of the afternoon in the club house out of the wind and near gale conditions. The rain stopped for the night so we had a good sleep but Saturday brought real rain during which we walked the aircraft lines and the company tent displays. We paid for the dinner Saturday night but were so cold and damp by that time that we decided to pack up and drive home to Leeton leaving the site in the mud and rain at about 7 pm. We arrived home about 11:30 pm. We had dried out and warmed up by the time we reached Wyalong.
I heard there was abut 38 mm of rain at Dubbo over the Easter weekend and my gauge in Leeton recorded 1.5 mm.
-
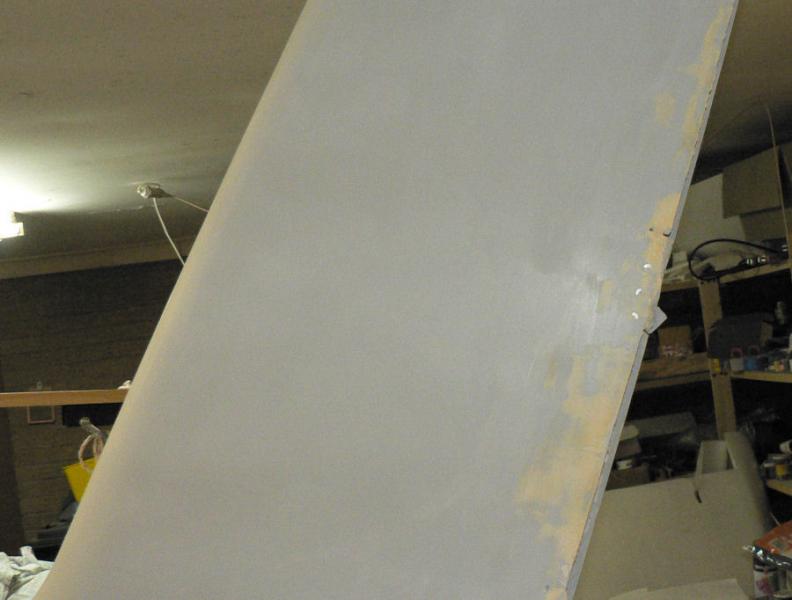
20090328
Attended the workshop funded by CASA at Temora airfield "Line Maintenance Forum for Recreational Aircraft Owners, Pilots & Students". This one day forum from 10:00 AM until about 3:00 PM was run by volunteers from RAA members.
20090329
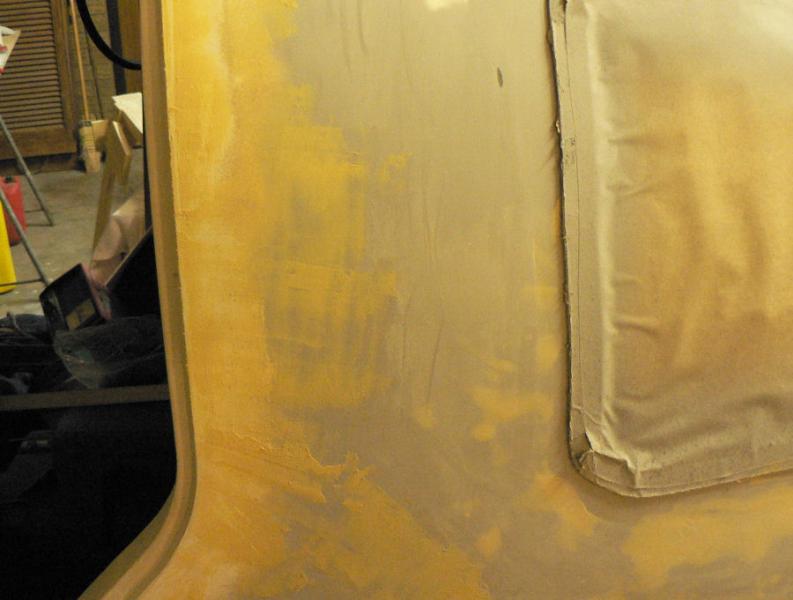
Allowed the very thick filler coat to cure for a couple of days before scraping and sanding it with the orbital sander. Not sufficient fill yet between the fuselage and the vertical stabiliser. So scraped and sanded the previous fill which still needed fill.
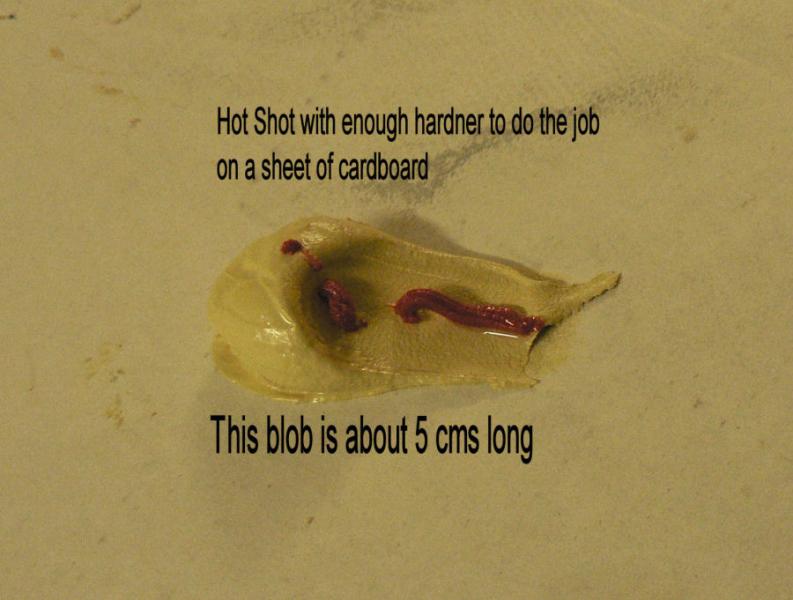
So have used "Hot Shot" filler which is used by squirting some filler from a plastic bag with a screw top onto the area to be treated then applying a squirt of the supplied hardener also in a small plastic sachet with a screw top lid and mixing it.
I used a SS table knife and a wide putty knife to mix and spread it. It has to be applied and spread within minutes before it cures enough to be useless. The package has no guidelines for use or the mix ratios required.
My estimate of the relative sizes of the two sachets was my guide as to the ratio required. So it was experimental. I ended up scraping out one application completely as there was not have enough hardener mixed with it.
[ATTACH]7476.vB[/ATTACH][ATTACH]7477.vB[/ATTACH][ATTACH]7478.vB[/ATTACH][ATTACH]7479.vB[/ATTACH]
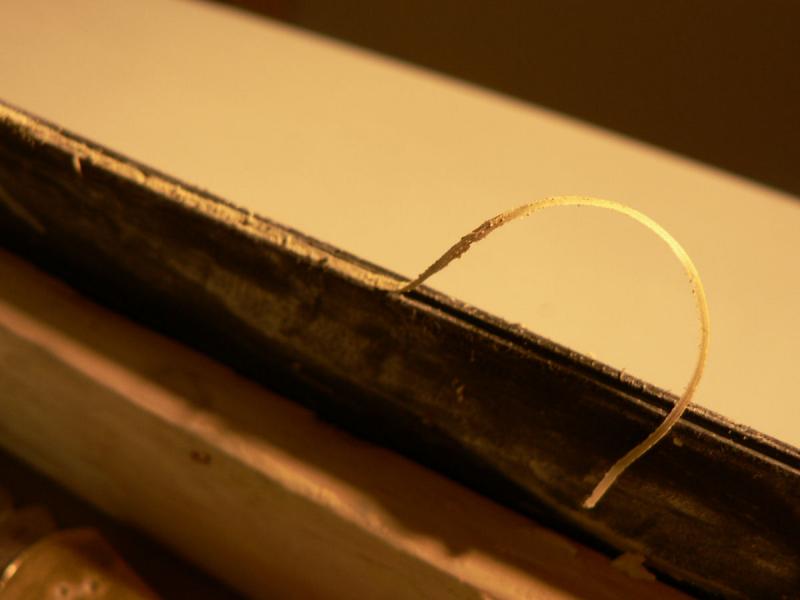
The last pic is a bit misleading as it shows one of the stabiliser hinge areas with a piece of tape covering a hinge. The tape has a sliver of Hot Shot sitting on it which is not part of the stabiliser. Immediately behind that is the inside of the channel which has been extended to close the gap between rudder(not fitted in this pic) & the vertical stabiliser.
I forgot to take a photo of the mess of Hot Shot that was there on the fuselage join before I started to scrape and sand it. Despite my comments it is fairly good to use where there is a rough fibreglass fill area to smooth up. The filling is not enough yet but is getting closer. As you can see from the pics around some of the hinge areas it can be very economical to use where there are are small deep holes or long faint ones to fill. In the last two pics I ran out of mixed fill and I had had enough for the day.
Note that the application of Hot Shot filler, scraping and sanding it was all done on the same afternoon. It sets very quickly ready to work on.
-
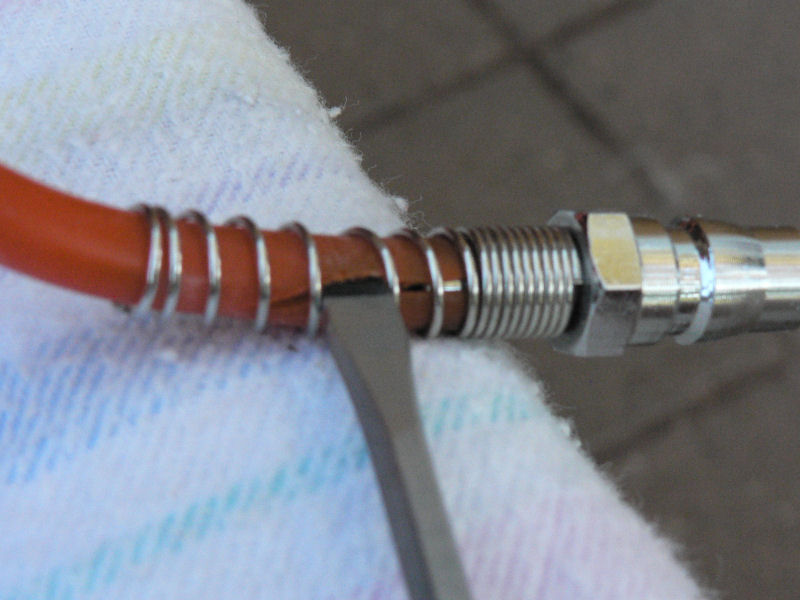
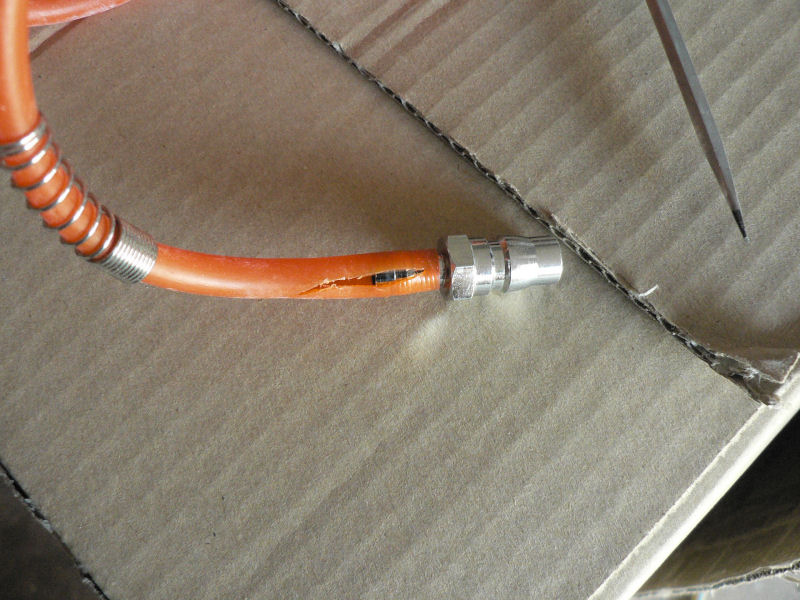
On the Jabiru engine that I have, the small bore clear plastic tube from the Bing carburettor to the air cleaner is very soft and pliable.
If it is tied to one of the engine mount tubes with cable ties it may not provide any functional air pressure connection between the carburettor and the air cleaner.
The tube obviously needs to be tested for a clear passage of air.
Regards
-
20090324
This is my second attempt to do this as the site crashed on me just as I had finished and was about to post. So I am posting this in stages to prevent doing it all again.
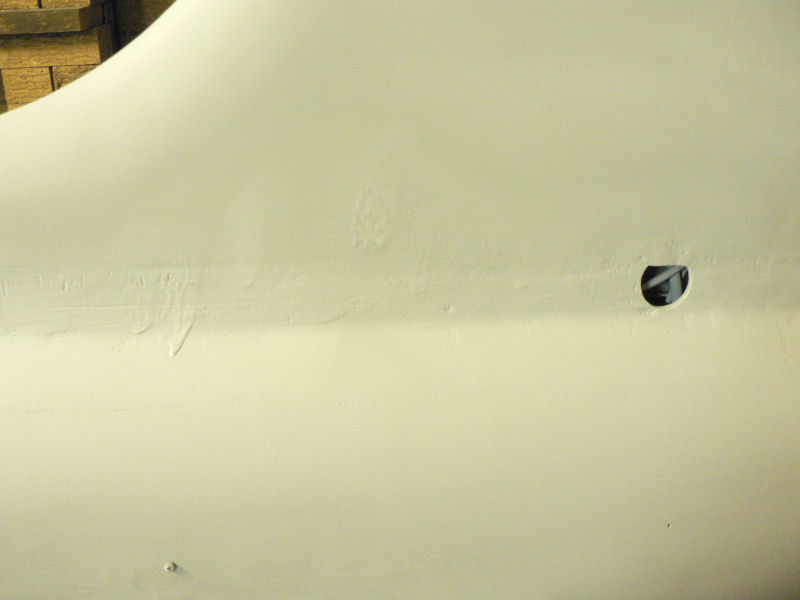
Continued today with a bit of very heavy thick spraying with a minimum use of thinner to the point of run-off on some of the rough areas like the hull to vertical stabiliser join, some of the hinge surrounds and the back side of the horn area on the elevator.
The paint was used with a minimum of thinner to maximise its filler action. We will see how effective it was after sanding this coat. It might need more than a day to cure because it was applied pretty heavily but there are plenty of other bits to do.
[ATTACH]7437.vB[/ATTACH][ATTACH]7438.vB[/ATTACH][ATTACH]7439.vB[/ATTACH][ATTACH]7440.vB[/ATTACH][ATTACH]7441.vB[/ATTACH]
Note the pin holes in some of the pics that will have to be filled.
The two sides of the elevator around the horn area shown in the pics are at two different stages of coatings and sanding.
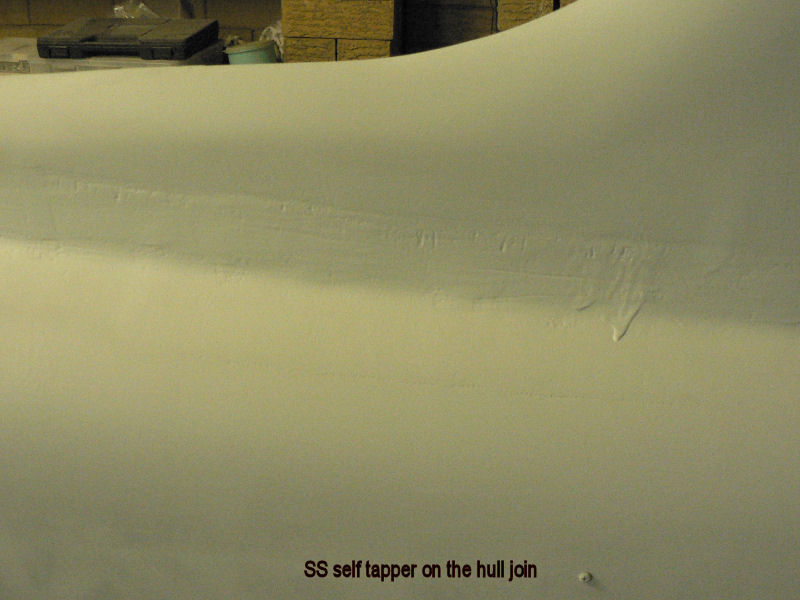
The SS self tapper seen in the first pic and one not shown up near the rear of the port doorway is on the join line of the two halves of the fuselage. A line joining these two screws indicates the reference line that the top of the engine crankcase should be parallel with to get the correct thrust line. The motor can be tilted up or down by inserting washers between the engine mount and the firewall.
I used a small laser level on the two screws to get them level by raising or lowering the tail to get them level. Once the hull line was level the engine can be levelled with a short spirit level on the top of the crankcase.
This painting today only used about half a pot of filler mix but it was enough air being used to get the water trap close to full and the need to empty it. So I could need a larger water trap to prevent a problem during a top coat.
-
I was answering "No" to the question "do you receive the safety digest"
I was not voting against the safety digest - quite the contrary if I was asked that question.
Having only received it automatically from CASA when I was doing my GA flying many years ago, I assumed that it was only available to GA pilots.
The few copies that I have read in my early days had some very interesting articles in them which I still recall. One was the recent story in the Pacific Flyer with a New Guinea setting which had a different slant on it in the original departmental version.
Another one was a light plane having an engine failure some distance from a good paddock near Camden I think. The pilot immediately pulled flaps and as a result the plane landed short into timber with fatalities.
I have an aviation reference number ARN which is used as my identifier that is needed to have an account with the Publications Unit of Airservices Australia.
I gave them my RAAus pilot certificate number to serve as my ARN.
The CASA website below has a large selection of publications concerned with safety which can be had for the price of the postage.
http://casa.cart.net.au/cat/2030076.html
Regards
-
20090323
Took delivery of more solvent from Wagga today 120 km by road, $10 freight.
The undercoat/filler thinner was $23.21/litre. The topcoat thinner was $22.91/litre
Rubbed down the control surfaces.
Used the hand scraper for any abnormal thick or local high bits or occasional runs.
Used the hand board sander with an open mesh type sanding medium for more delicate bits.
Used the orbital sander as the main tool - very productive compared to the others and no accidental scratches.
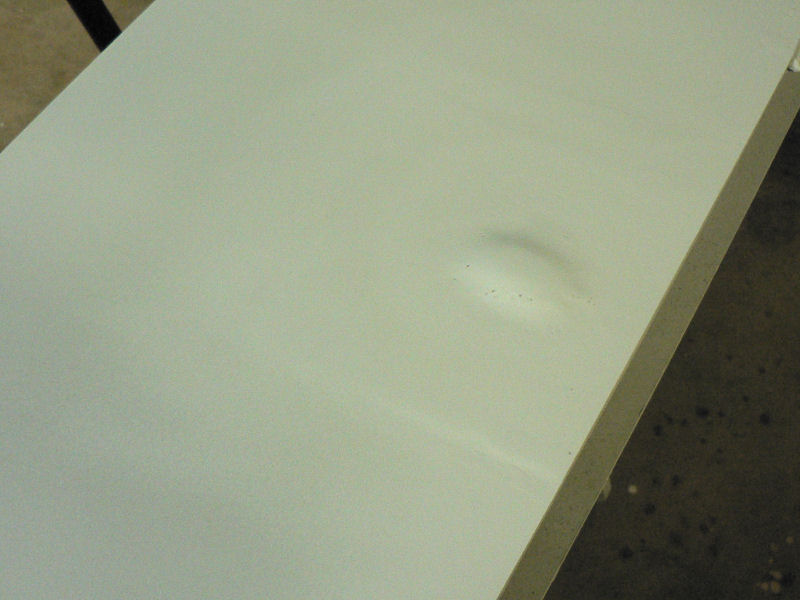
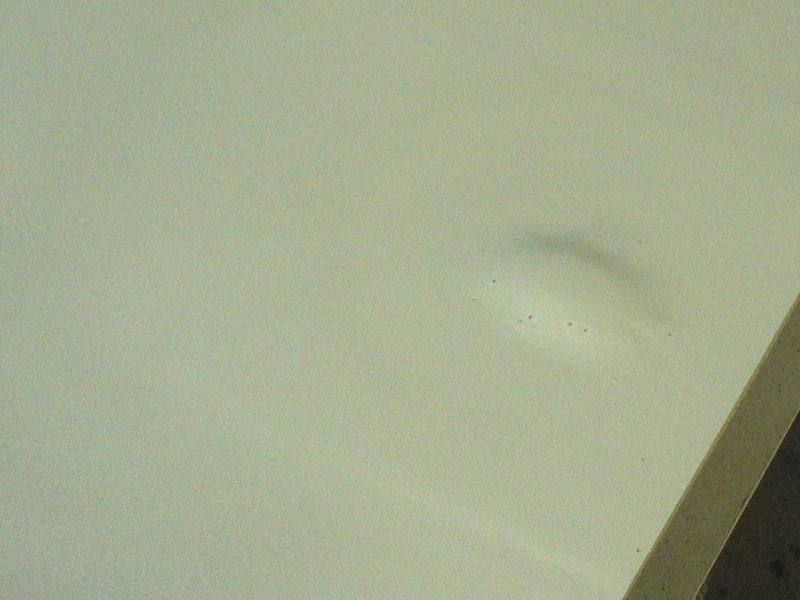
Pic two was taken before the orbital sander was used - so now I use it first.
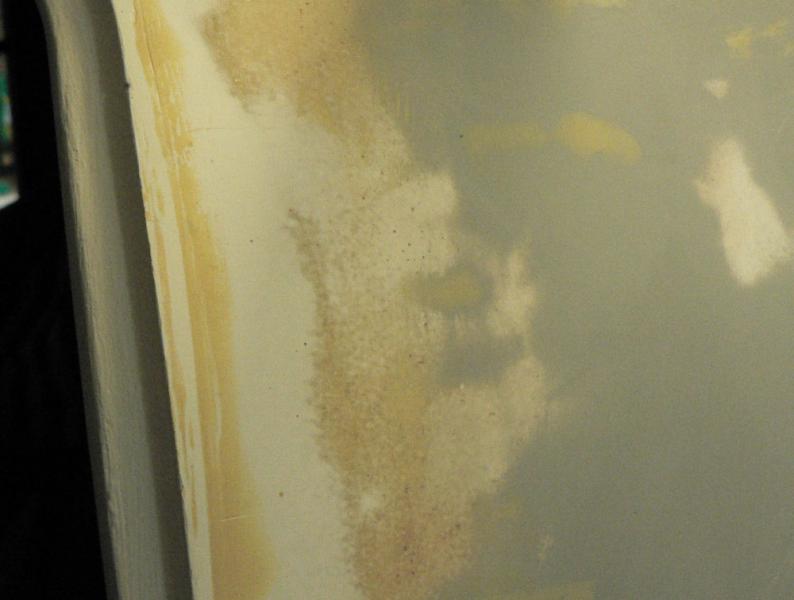
I now know what an "Orange peel" type paint coat looks like. See the fourth pic well below the horn of the elevator near the bottom of the pic. The photo was taken part way through sanding it out to make it more visible to the camera.
That pic also shows up some holes & pits that need filling before the next coat of paint.
The undercoat that is being used is supposed to be a pretty good filler or bogging paint if used with no thinner and I will use it in the gravity pot paint spray gun. So one could go around and spot spray the pits and hollows and sand them before the next general coat.
I will need to try that out along the join between the vertical stabiliser and the aft end of the fuselage as there is some filling required there to tidy up the join.
[ATTACH]7423.vB[/ATTACH][ATTACH]7424.vB[/ATTACH][ATTACH]7425.vB[/ATTACH][ATTACH]7426.vB[/ATTACH][ATTACH]7427.vB[/ATTACH]
Takes a lot of sanding to get the top irregularities of the "orange peel" down until the paint surface is smooth. So it was sanded until it disappeared.
That was the only example on about one third of one side of the elevator. With a bit of luck it will be the only example.
-
20090322
Yesterday, shifted some gear around in the carport to make it a bit easier to work on the painting.
As well the wing holder had a couple of fixed wheels replaced by pivoting ones to ease manoeuvring the wings around and in and out of the carport. There was a shortage of pivoting wheels when it was originally built.
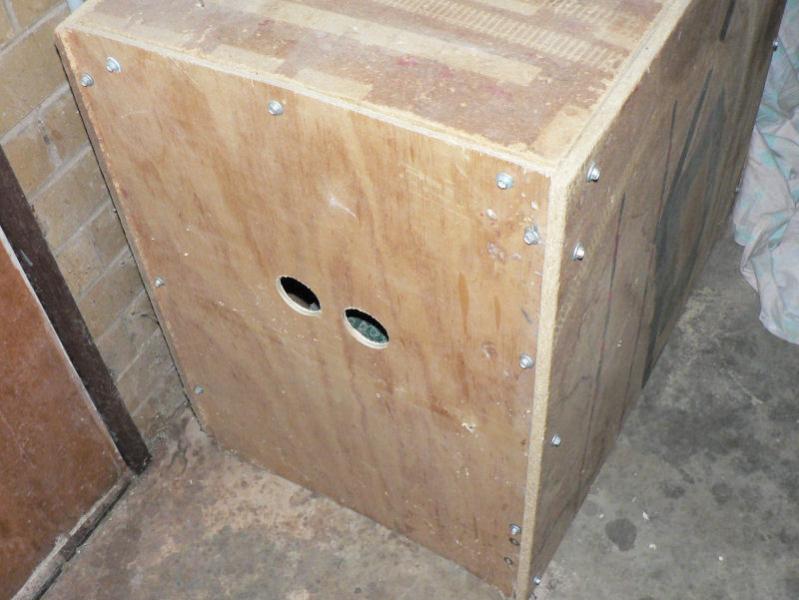
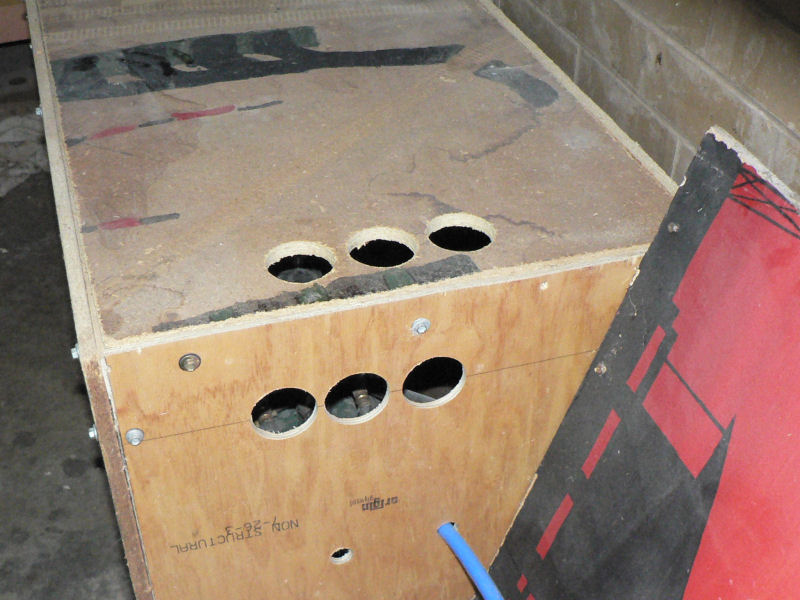
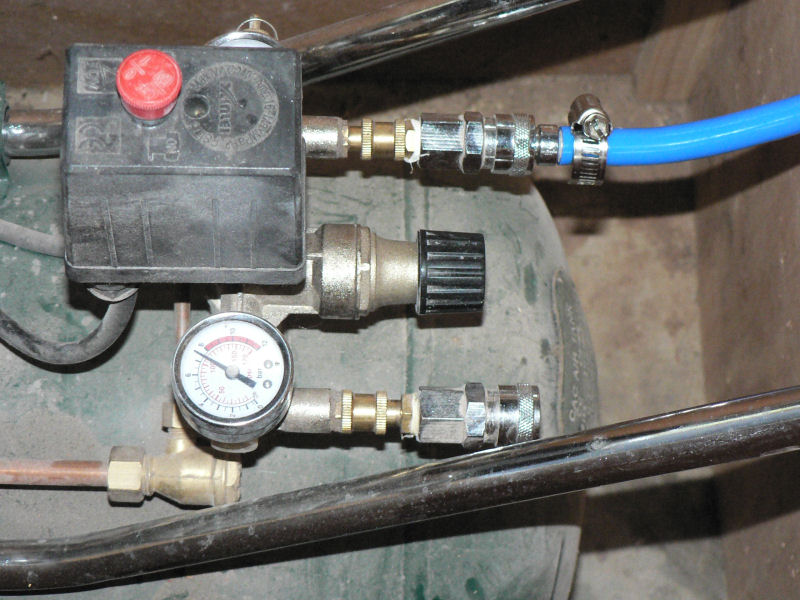
Then some extra air holes were cut into the compressor box which improved the cooling of the compressor. Despite the box not being lined it still cuts the noise significantly.
The rearrangement made it easy to wheel the a/c outside the carport which I had not done since the beginning of the build. It did tell me though that I have not got the wheel alignment right yet as the a/c was not very light to pull and the tyres squealed as it was moved on the smooth concrete. Another job to add to the list.
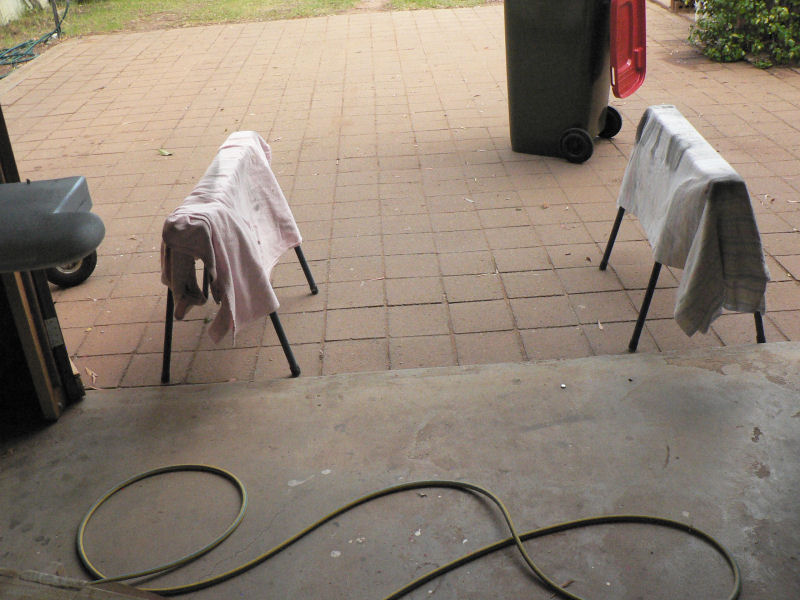
On Sunday afternoon the control surfaces were moved outside and sat on planks & trestles before mixing up a batch of paint. After painting they were returned to another set of planks and trestles inside the carport.
Painting was difficult on the control surfaces not giving a good finish. Later, after getting better results on the aft end of the fuselage which was inside the carport with a good breeze to take the excess away I realised the problem was caused by the ambient temperature being too hot which was obvious with hindsight and more experience. Most of the problem showed up as a reduction of the flow of paint from the gun probably caused by the thinner in the paint partially boiling as it was sucked up into the gun.
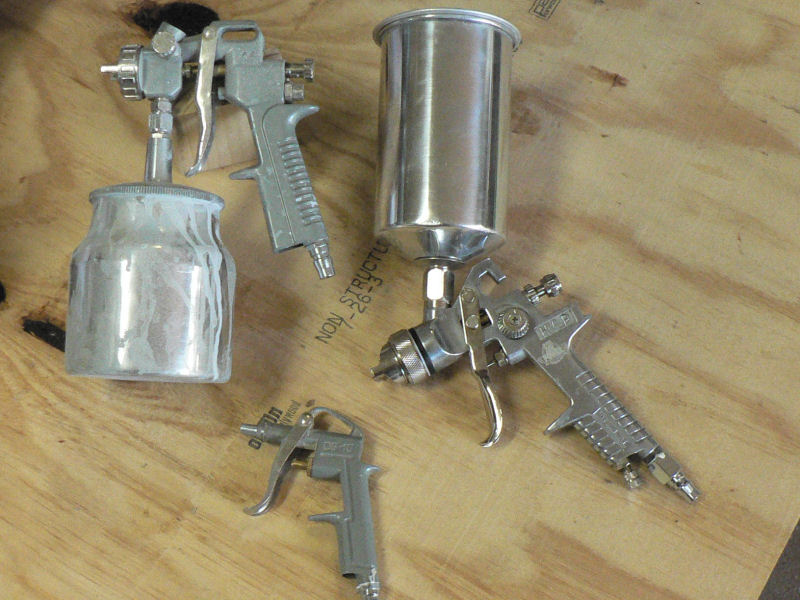
As I had a gravity gun which had not been used before, it was tried out with a large improvement in the quality compared to the other two guns in the pic.
[ATTACH]7416.vB[/ATTACH][ATTACH]7417.vB[/ATTACH][ATTACH]7418.vB[/ATTACH][ATTACH]7419.vB[/ATTACH]
[ATTACH]7420.vB[/ATTACH][ATTACH]7421.vB[/ATTACH][ATTACH]7422.vB[/ATTACH]
The main difficulty with the gravity feed gun with the pot on top is that a stand is needed to put it on or hang it from when it is put down to refill it or to do another job otherwise the paint will probably leak out. The aluminium interference press on lid has a small breather hole in the middle.
That particular gravity feed gun also has a small nylon like strainer that fits inside the top of the pipe that the top pot is attached too. There was some foreign material in this screen after just one pot of paint was put through the gun but it is easy to clean after each pot of paint.
The pot is fairly easy to clean as it can be emptied almost to the last drop of paint unlike a conventional spray gun which leaves a significant amount of paint in the pot. After the paint was used up the pot was washed out with a solvent.
-
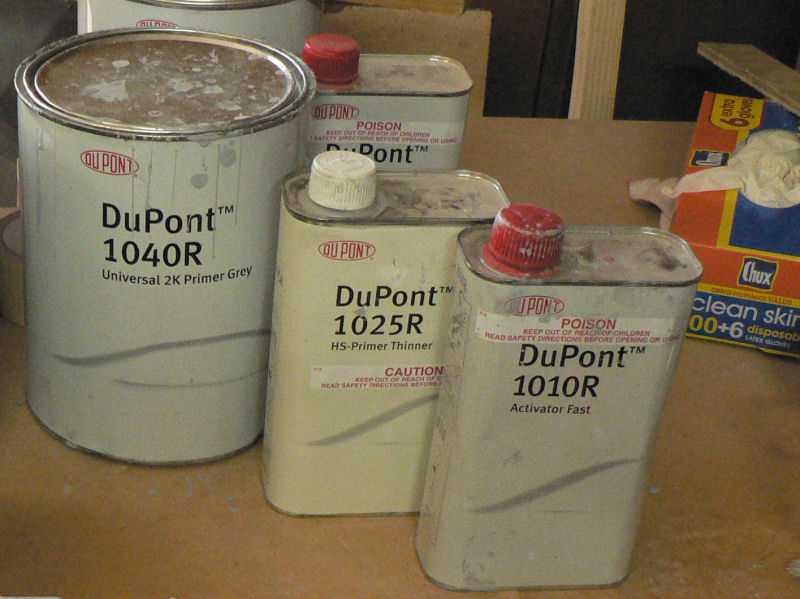
20090320
Undercoating control surfaces which all have a white gel coat except around the control horns like the lever on the rudder and the elevator and other unexpected tasks.
Mixed up a pot of Dupont paint as surfacer on the control surfaces.
Ratio 4:1:1
500 ml of 1040R Primer/Filler
125 ml of 1040R Activator
125 ml of 1025R Thinner
Used paint stirrer on drill to mix it.
Tipped it into the spray gun pot and cleaned out the measuring container.
This gave about 75% of the capacity of the spray gun pot.
From previous experience this gun has trouble sucking it up if thinner is not used with this paint.
All the pieces were sat on soft material across two trestles outside the garage.
As a surfacer, did one light coat on one side of each item then came back to do the other side by which time the original side was dry to the touch.
I had just started applying surfacer to the aft port hull join area of the fuselage which was interrupted by an extra air noise followed by nothing happening at the spray gun.
At this point water had also started coming out of the spray gun occasionally & dripping onto the job.
It turned out that the compressor in its sound box was getting pretty hot. This had contributed to the short piece of curly plastic air hose connecting the compressor to the water trap & external pressure regulator failing where it connected to the compressor.
So the remaining small amount of mixed undercoat paint in the spray gun was emptied out, disassembled and the gun cleaned with a rag & acetone without the assistance of compressed air.
Next step was to get 4 m of air hose and m & f couplings with hose clamps and fit it to the compressor.
It also turned out that the water trap was full of water - I will have to empty it more often. Just press the button at the bottom of the trap occasionally!
I will also organise more air flow though the compressor box to help keep the compressor cooler.
It turns out that the original paint order supplied was short by one litre of thinner for the undercoat/primer based on 4:1:1. As my gun seems to need the paint being thinned down to suck it up I would probably need more thinner for the undercoat and the top coat.
The original supplier in a capital city would now only supply the Undercoat/primer thinner in 5 or was it 20 litre containers at around $170 plus freight (and I had to organise the carrier for this hazardous material) and there was still the thinner for the top coat to consider although it was still available in one litre containers.
I finally thought I should be able to find a supplier using the internet but was frustrated for an hour or so until I located a wholesaler in Wagga. They were only too pleased to supply both of the thinners in any quantity as they "were used to supplying people at the airport in small quantities for spaying aircraft and had been doing so for the last fifteen years". I suppose a source there was obvious once you knew about it.
See the water marks in the first pic.
[ATTACH]7402.vB[/ATTACH][ATTACH]7403.vB[/ATTACH][ATTACH]7404.vB[/ATTACH][ATTACH]7405.vB[/ATTACH]
[ATTACH]7406.vB[/ATTACH][ATTACH]7407.vB[/ATTACH][ATTACH]7408.vB[/ATTACH][ATTACH]7409.vB[/ATTACH]
My hardware shop was out of stock of the right sized air hose clamps!
Tomorrow I should improve the air compressor cooling, continue the surfacer painting on the fuselage (take it outside), then apply two coats of filler to the control surfaces and the fuselage. Complete the fuselage priming, it will need extra complicated masking which I doubt I will have time to do.
Somehow I do not think that it will all be completed to that stage tomorrow.
-
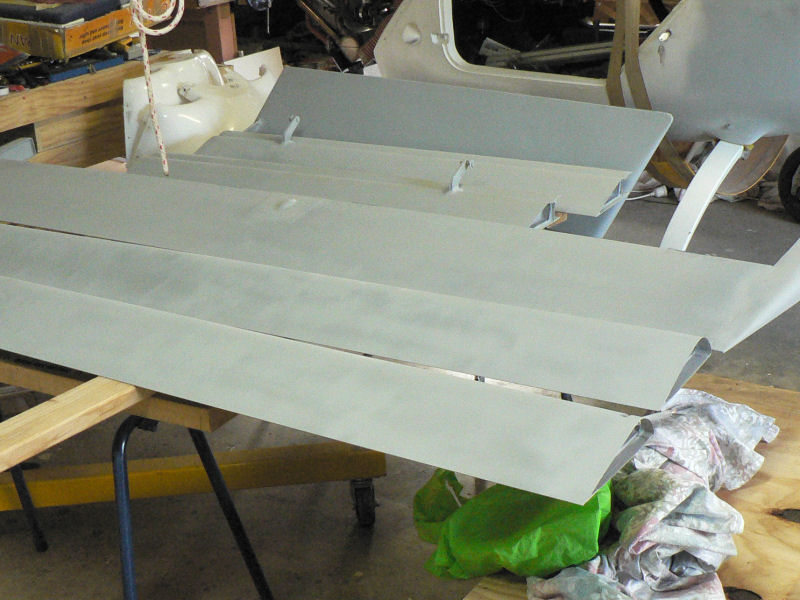
20090319
Prepare ailerons, flaps, rudder, horizontal stabiliser, vertical stabiliser for priming & undercoat.
This may be extended to starting the port side of the a/c undercoat back to the firewall from the tail group. The starboard side is well down the track of undercoating and filling rough areas but needs more work around the horizontal stabiliser and around the cabin area up to the firewall.
Undercoat/filler paint, top coat paint, their respective activators and thinners, spray gun, air gun, trestles, measuring jug (need to make up a dip stick) and electric drill to power paint stirrer, rags, spare acetone for cleaning, air gun, screwdriver, small hammer, protective clothing, latex gloves, mask, filters and air compressor were assembled.
The gel coats of the control surfaces have all been rubbed down ready for priming and undercoat and cleaned with acetone and with compressed air.
There is no sign of pin holes in the gel coat on these surfaces but the underlying fibreglass is exposed around the lever position on the elevator which will require extra attention (coats of filler & rubbing down).
The hinges were all covered with tape to keep paint out of the hinge holes.
[ATTACH]7398.vB[/ATTACH][ATTACH]7399.vB[/ATTACH][ATTACH]7396.vB[/ATTACH][ATTACH]7397.vB[/ATTACH]
All the captive nuts for the hinge pin safety lugs were filled with tape to prevent entry of paint.
Possibly prime and undercoat the control surfaces tomorrow outside the car port providing it does not get too hot or windy.
-
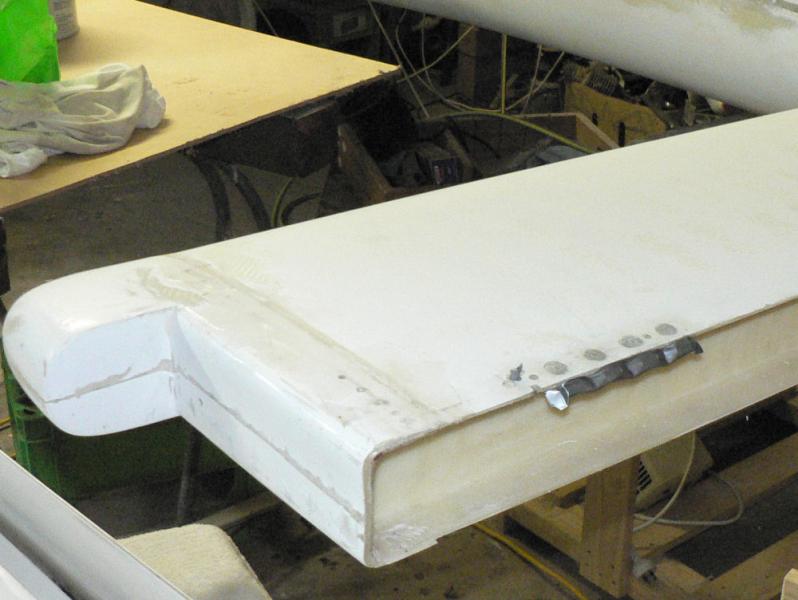
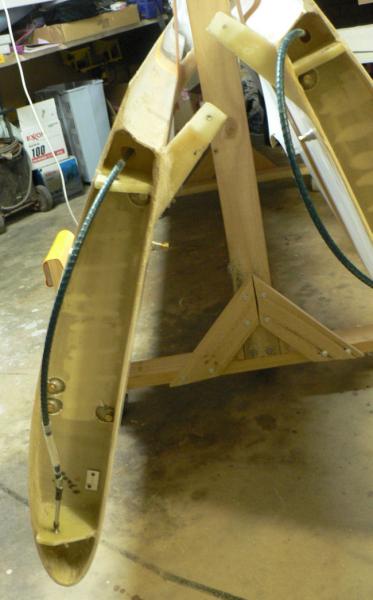
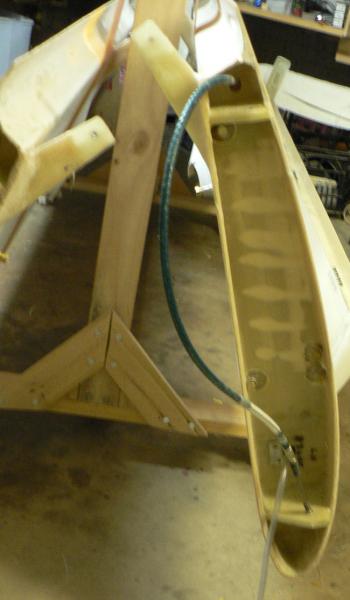
20090212
Get wings ready for sloshing.
Removed breather pipes & earth wires from both wings.
Removed finger strainers from both wings.
Removed quick drains from both wings.
Fitted all tapped holes with brass plugs ready for sloshing tanks over the top of the original sealer. Need five plugs per wing.
[ATTACH]7394.vB[/ATTACH][ATTACH]7395.vB[/ATTACH]
The completion of this was delayed by family commitments and availability of help.
-
If you are on cable, the cable usually might serve a whole street with its limited capacity.
So normally the more users that are active the less capacity each one has access to thus causing delays in cable traffic.
Trying the connection at times when there is less likely to be heavy traffic might give better service indicating the capacity of the cable is unsatisfactory at normal times.


Height loss in turning back
in AUS/NZ General Discussion
Posted
Some years ago, I had some intermittent engine trouble early in the take off once in the small Jab and was stupidly late deciding to abort so was at +500 ft when I finally decided to abort.
Since I then had full engine power however unreliable, I decided better late than never to do a 180 into a very slight cross wind and land back down the same strip but this time with a weak tail wind..
There was a short cross strip underneath the a/C most which was down wind of the position of the aircraft. I had immediately decided it was not an option as I would be lucky to be on the ground before the far end of that strip and would have to turn 270 degrees to land back from the far end.
During the 180 reverse of course, I probably did about a 45 degree climbing banked turn to slow it down and convert the excess speed into height. Ex Glider pilot.
I then went into into full flap landing to slow it down and to get a high sink rate. I really had to watch the air speed as you get a false idea of it from looking at the runway ground speed. You are much tempted to slow down by increasing the angle of attack as you see the runway rapidly being flown over.
It took full flaps all the way and full brakes when on the ground to try to stop it before the end of the runway as I had already flown over half of it before the wheels were on the ground.
I think it was still travelling well above my normal taxi speed when I exited the runway close to the end of the strip. There was still a couple of hundred yards of clear ground beyond the end of the designated runway.
I was so surprised at the long ground run that I took particular note of the now tail wind strength according to the windsock and I estimated it was probably well less than 5 knots with an equally weak cross wind component in the wrong direction for the situation.
I had stupidly passed up a lengthy opportunity in time to abort before it became critical once I was airborne at low altitude.
I survived a number of lessons that day that will stick in my memory for a long time.