
ianrat
-
Posts
138 -
Joined
-
Last visited
Content Type
Profiles
Forums
Gallery
Downloads
Blogs
Events
Store
Aircraft
Resources
Tutorials
Articles
Classifieds
Movies
Books
Community Map
Quizzes
Posts posted by ianrat
-
-
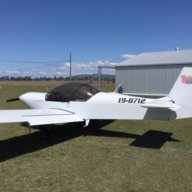
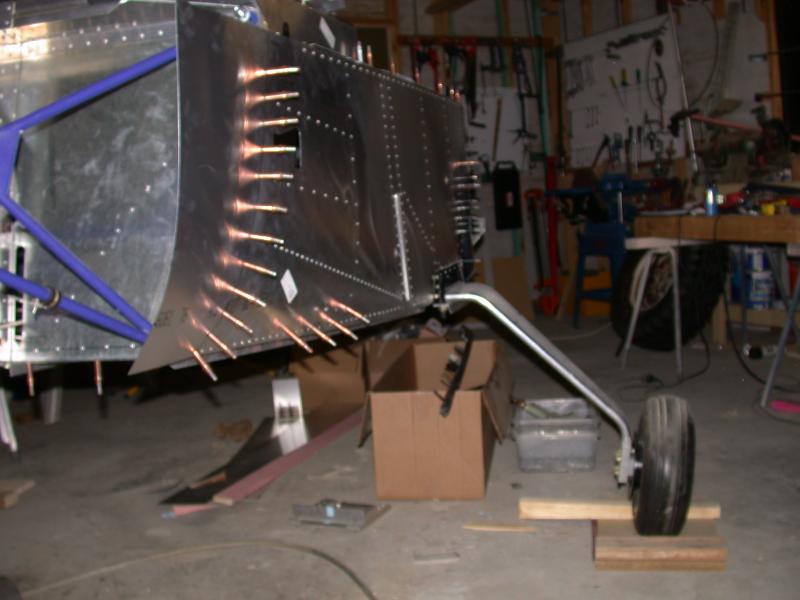
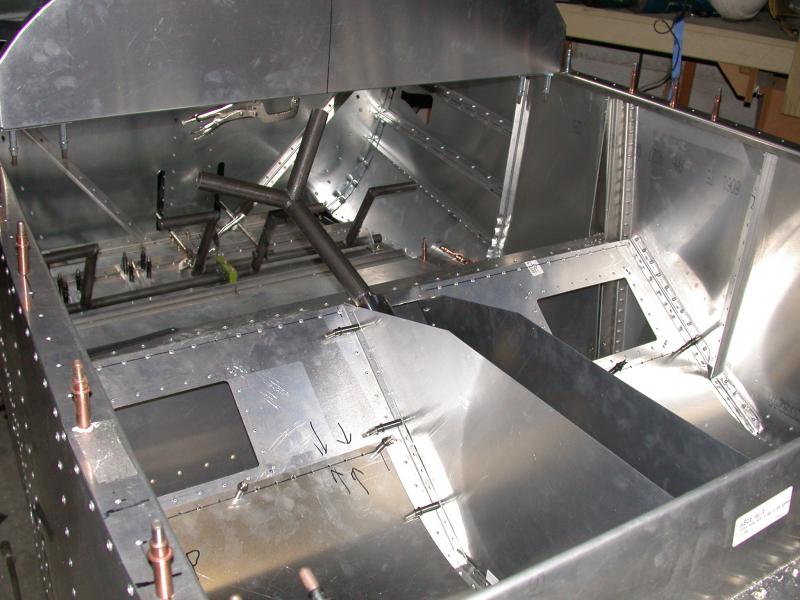
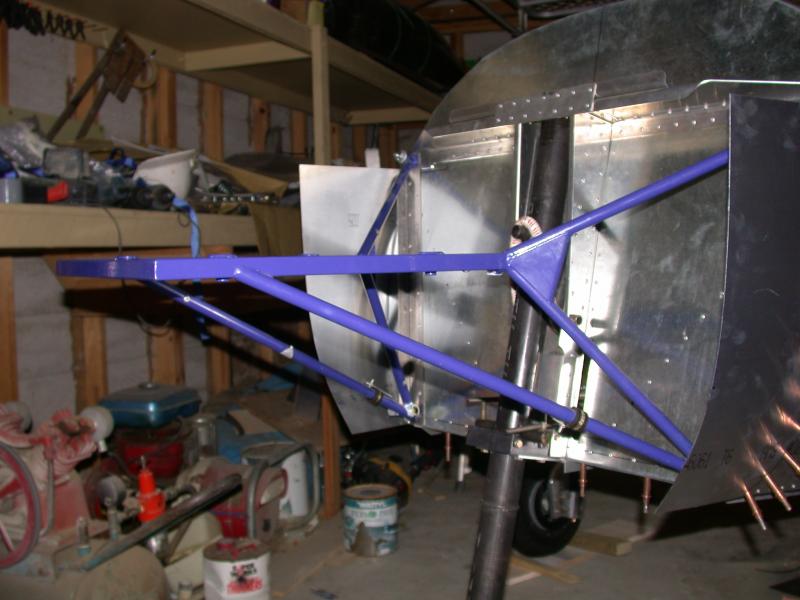
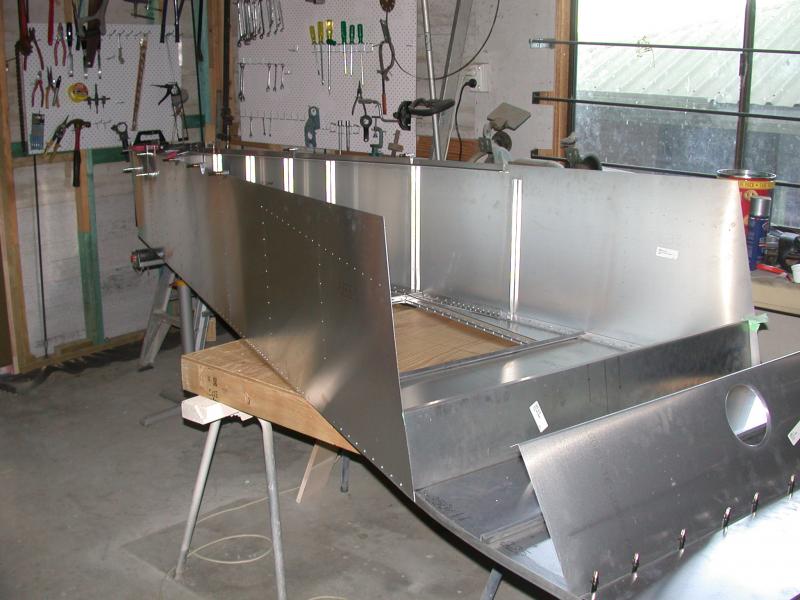
The fuselage is coming along very well. It is now sitting on the wheels and we have the engine mount for the Corvair Engine in place.
[ATTACH]5791.vB[/ATTACH] [ATTACH]5792.vB[/ATTACH] [ATTACH]5797.vB[/ATTACH] [ATTACH]5794.vB[/ATTACH]
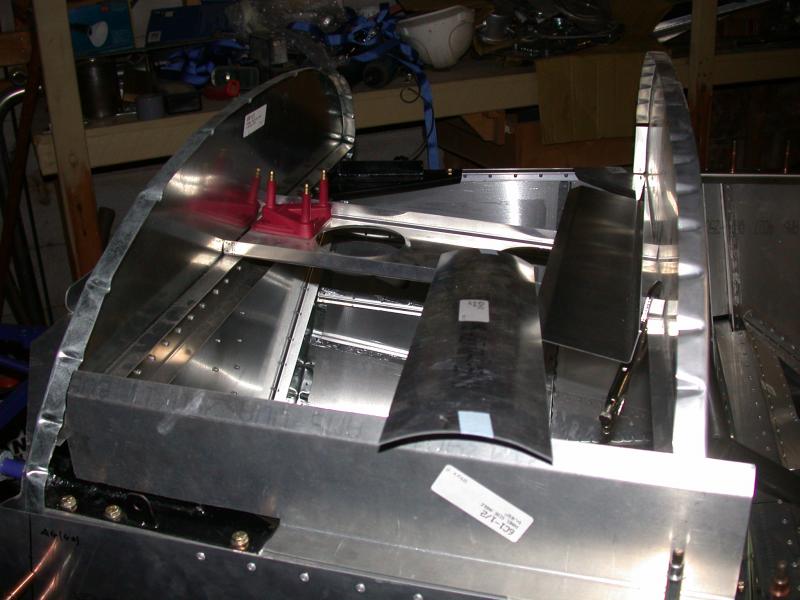
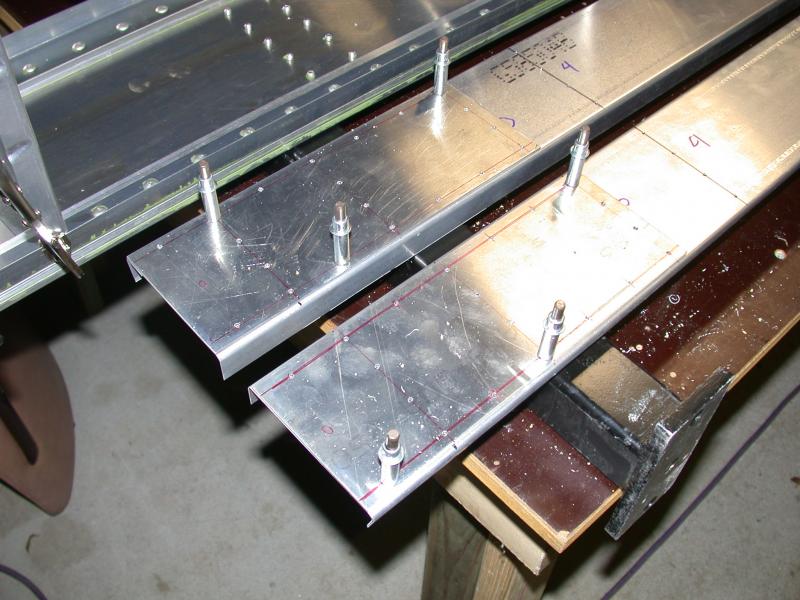
The seats section is complete, we have to get the stick painted or powder coated.
[ATTACH]5795.vB[/ATTACH] [ATTACH]5796.vB[/ATTACH]
The dual coil switch is in place behind the dash.
[ATTACH]5793.vB[/ATTACH]
Since these photo were taken we have completed the rear section of the turtle back and have installed the canopy arms and the sheeting over the instrument panel.
Not bad going considering that we only received the kit on the 7th March this year.
We are also helping one of the other builders to complete his kit at the same time. He has the fuselage up to the stage of putting on the cabin side and has completed the flaps, Rudder and ailerons.
The only problem that i have is that we have to share the Clecos. I have not got enough to work on the wing while the brothers are working on the fuselage. I have tried to get some more.
I will just keep building, hoping to be flying by Xmas.
Ianrat

-
I have been a bit slack lately. I spend about 2-3 hours per week on the wings and tail. The brothers who are building the fuselage spend about an hour every day after work. I will post the rest of the fuselage photos tonight. The kit is very easy to build and i believe that the new kits have even more pre drilled and formed parts than yours that arrived in march.:thumb_up:
Ianrat
-
Rocko
We imported 3 CH601XL kits early this year. We purchaced them through the Australian dealer on the gold coast (Sport Air). The price that we payed was the exact price quoted on the Zenith web site. The day you pay any money to sport air it is credited to your account and adjusted to the US Dollar as per the exchange rate for that day. They do not charge any other fees. We payed sport air in Australian dollars and they did the conversion for us.
To get all three kits from the US to Brisbane was $4711.02 Inc Gst. (this was for two crates). We then insured the whole thing for $63000.00 at cost of $303.00.
The GST on the kits were payed for by Sport Air as this was collected at the time of final payment.
We used C&H freight in Melbourne.
By sharing the cost we each only payed $1671.31 Inc Gst.
From the first contact with the dealer to the final delivery of the kits was very smooth and would certainly do it again using the local dealers.
Ianrat
-
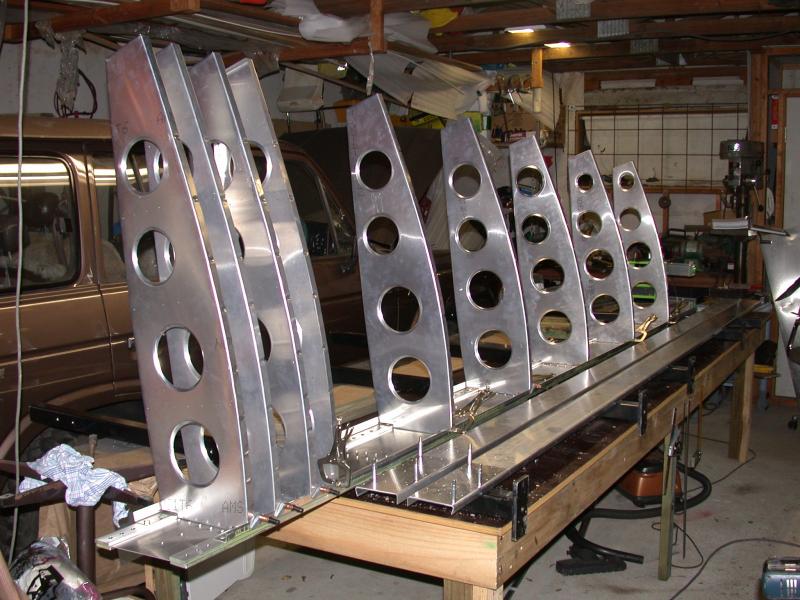
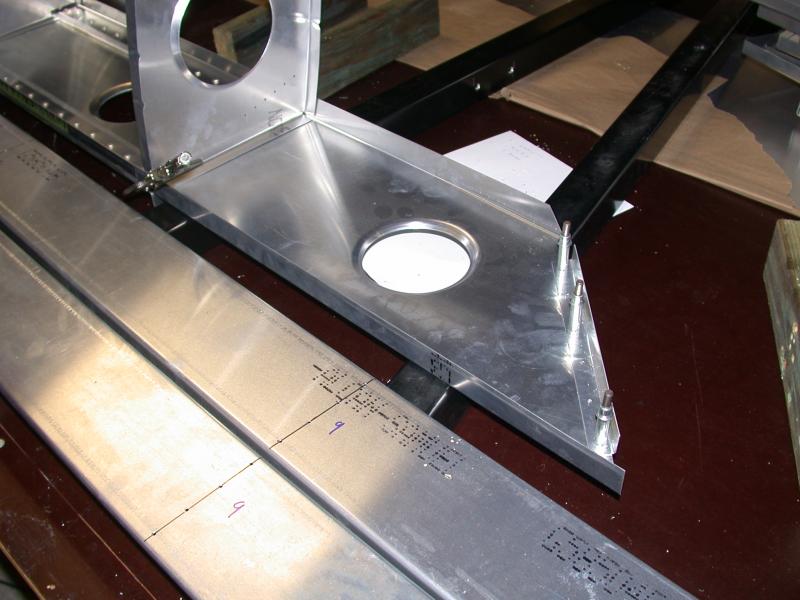
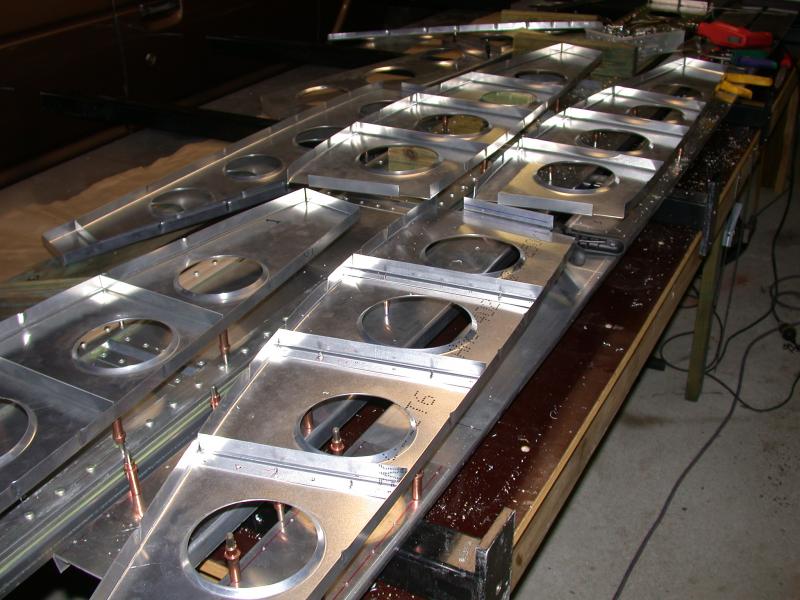
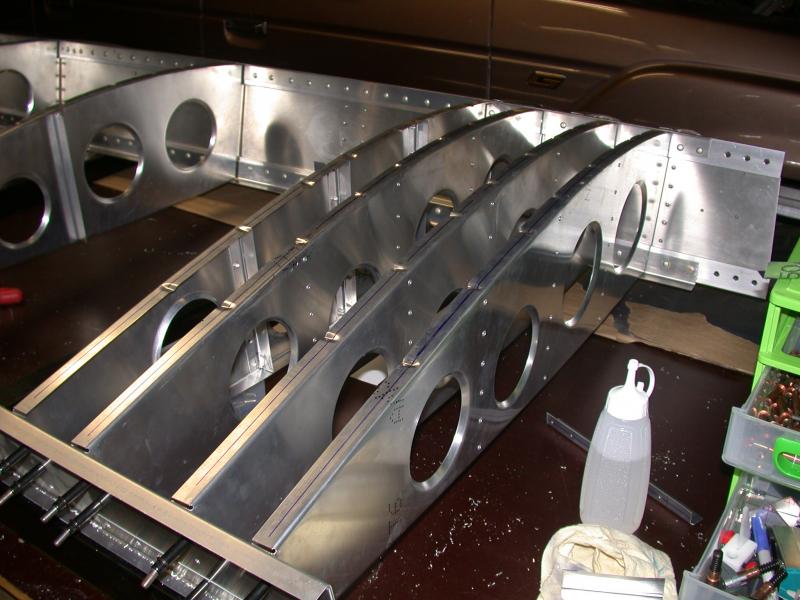
I have been busy with a lot of things and have not kept you updated. Sorry!
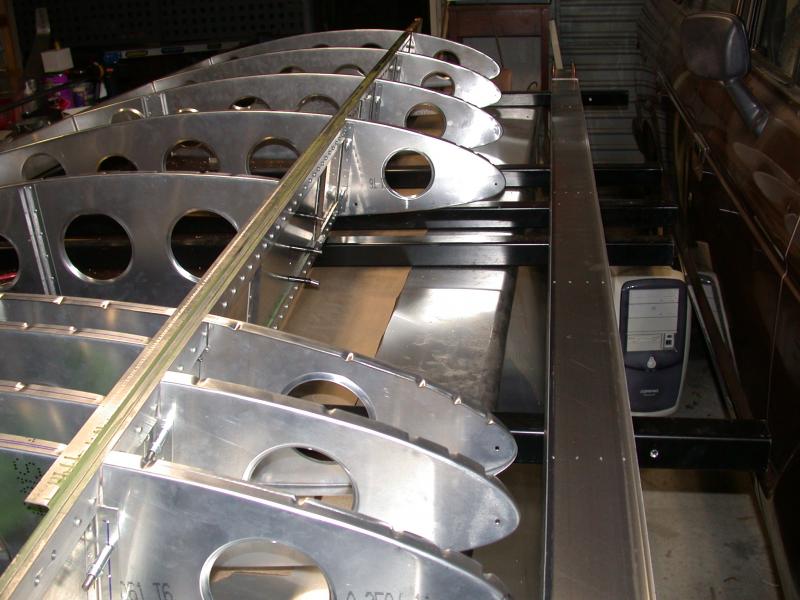
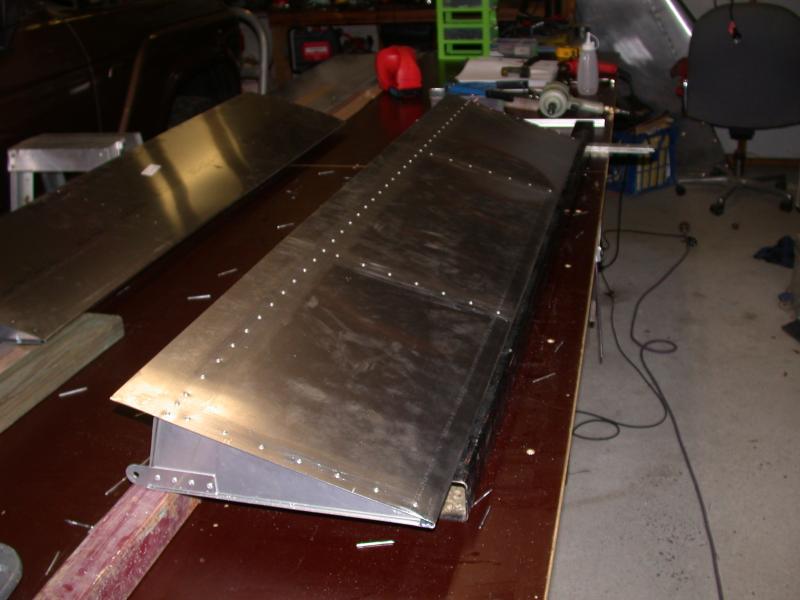
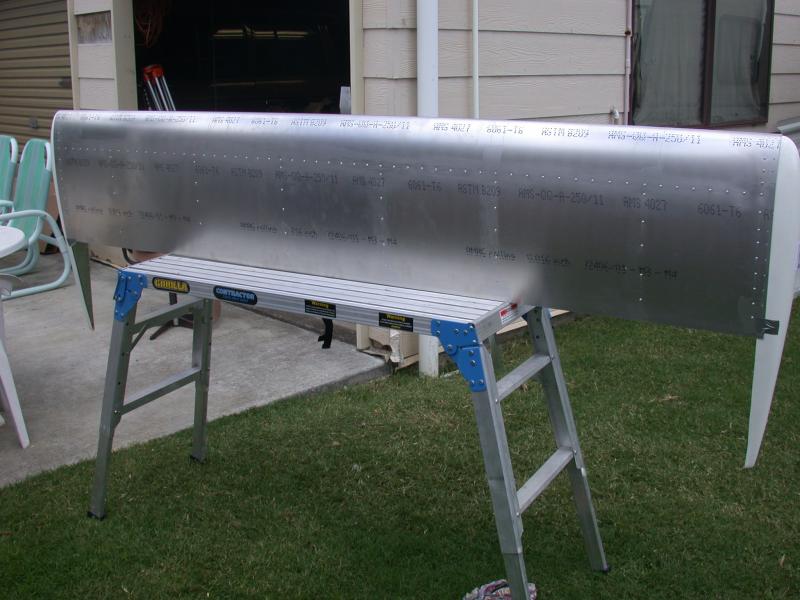
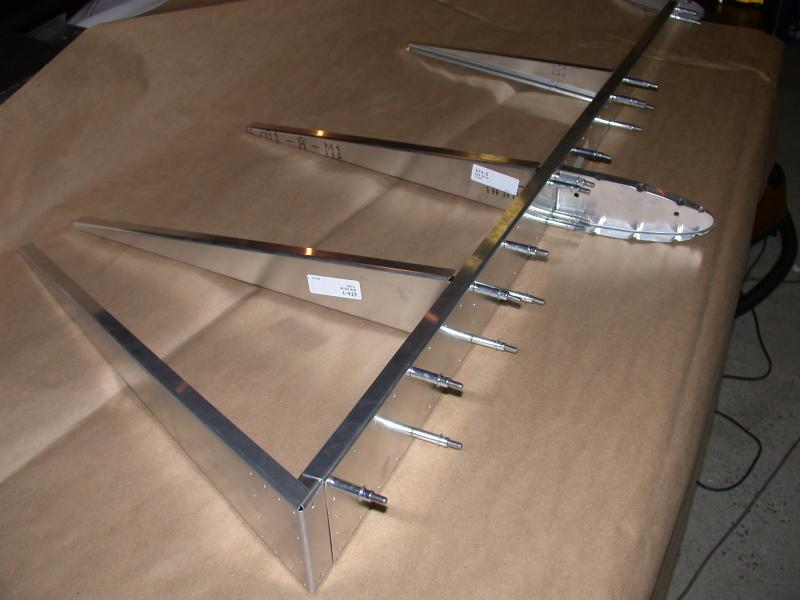
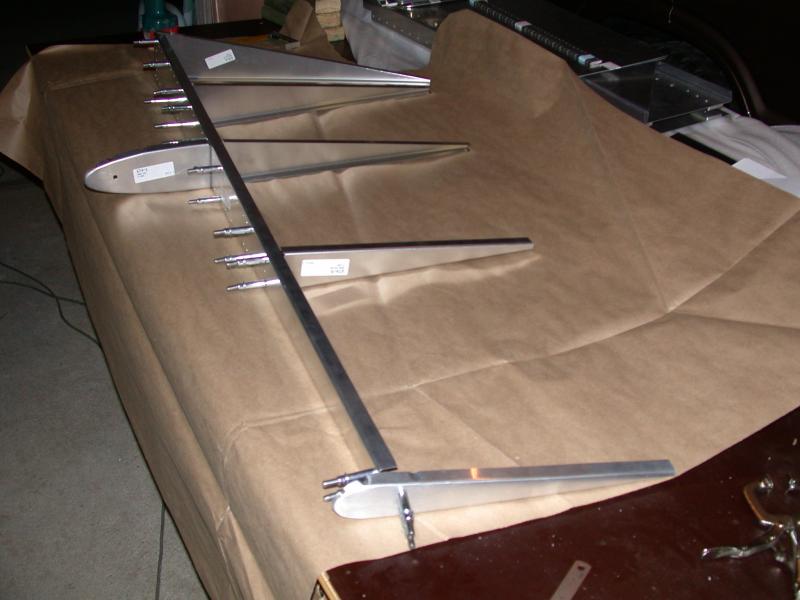
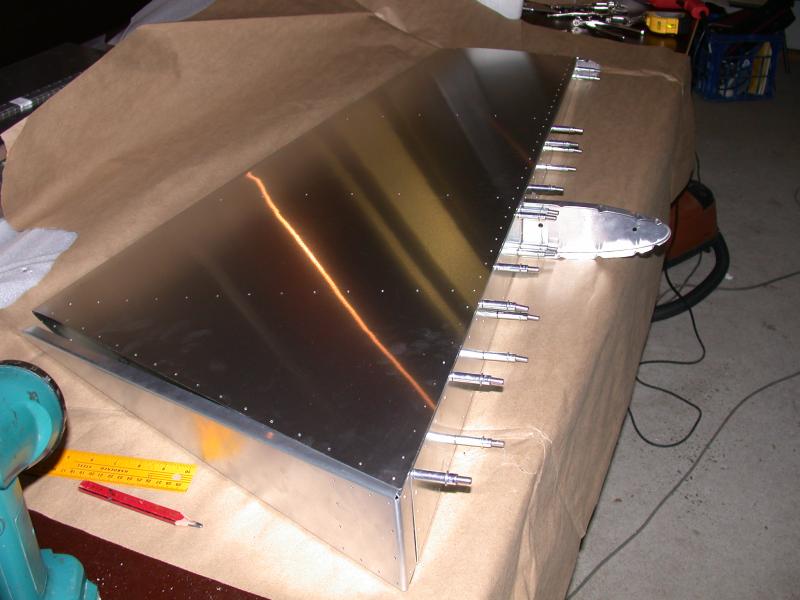
I have been working hard on the wings and the brothers have been very hard at work on the fuselage.
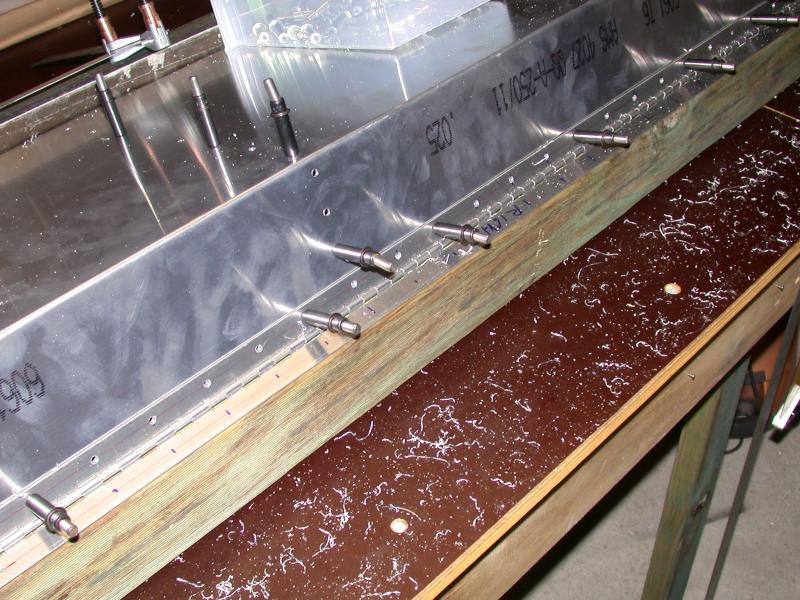
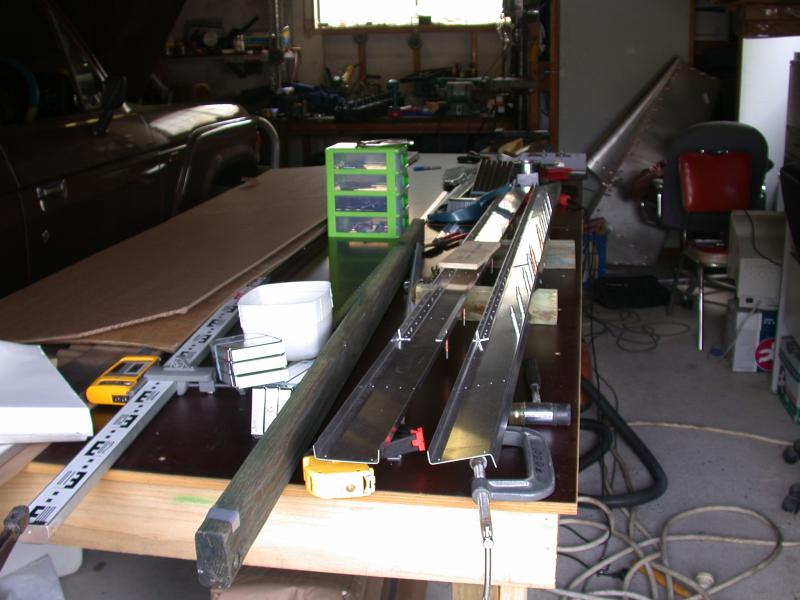
The rear wing spar was marked out and drilled.
[ATTACH]5702.vB[/ATTACH]
Wing tip
[ATTACH]5704.vB[/ATTACH]
Stiffeners to the ribs
[ATTACH]5705.vB[/ATTACH]
The wing taking shape.
[ATTACH]5703.vB[/ATTACH] [ATTACH]5706.vB[/ATTACH] [ATTACH]5707.vB[/ATTACH]
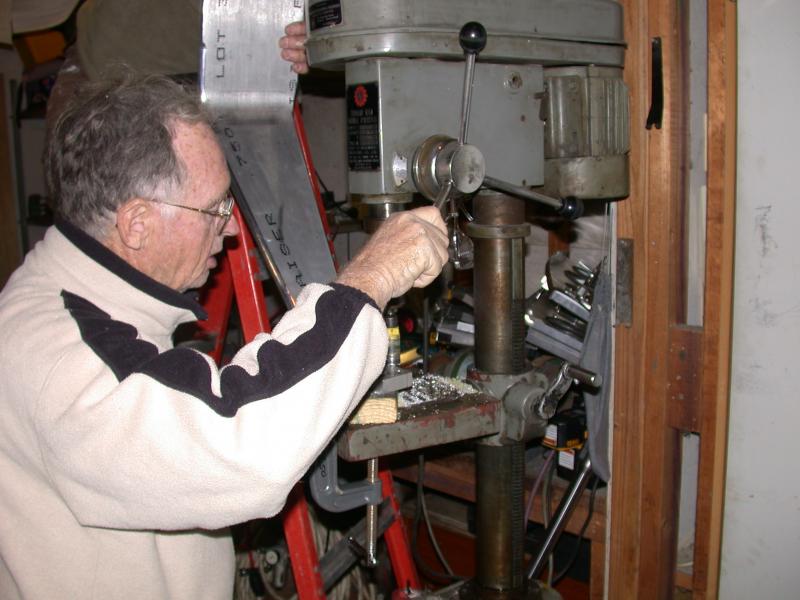
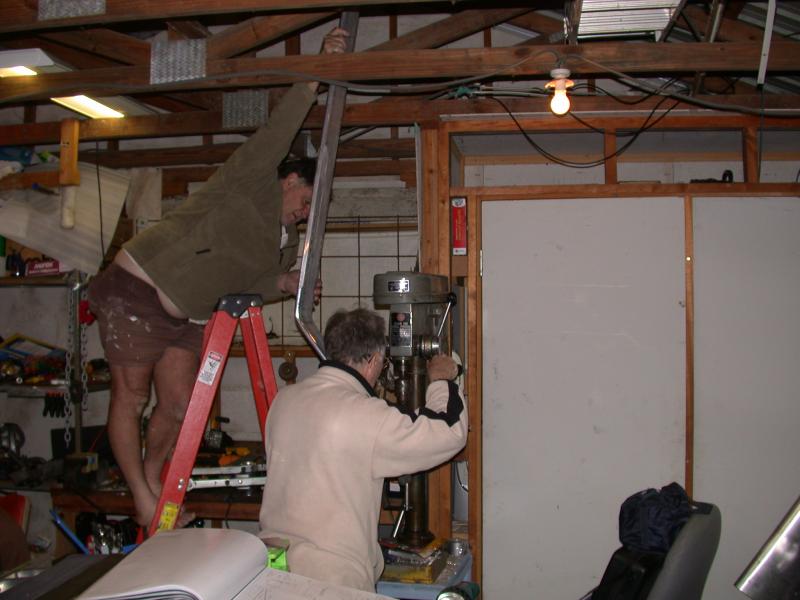
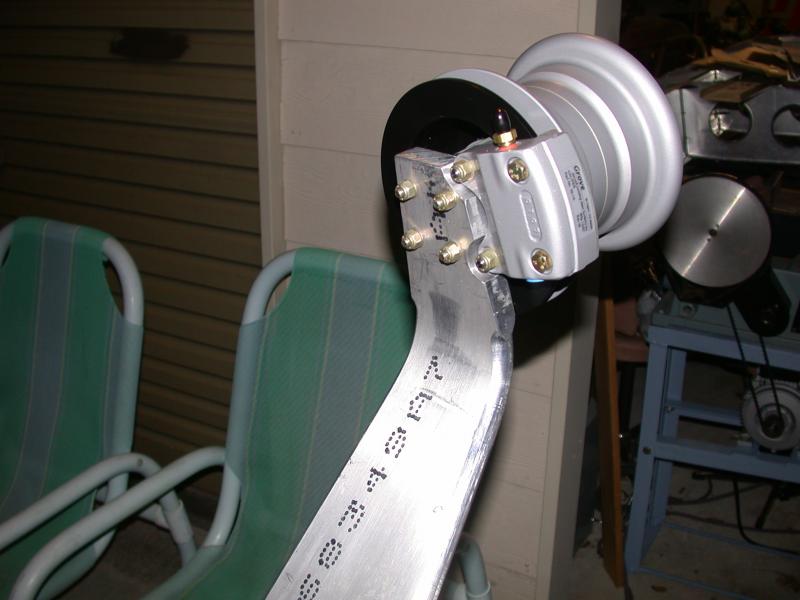
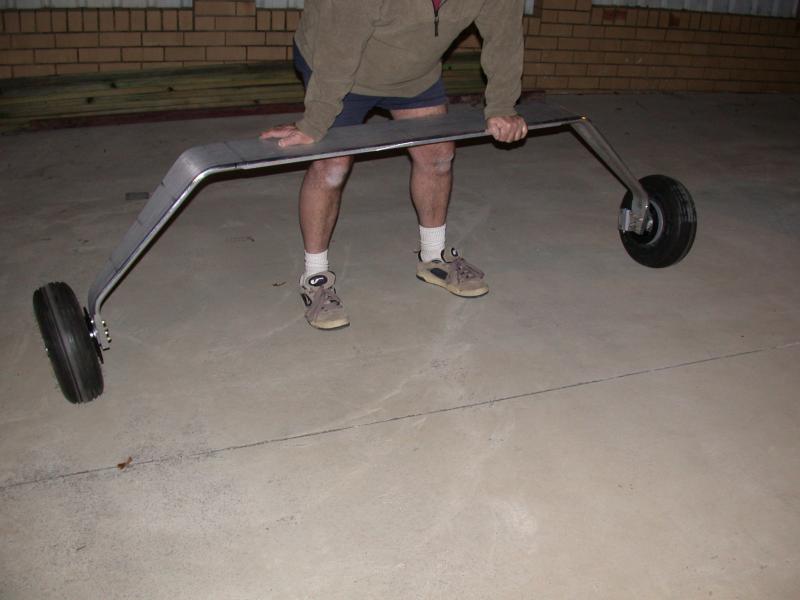
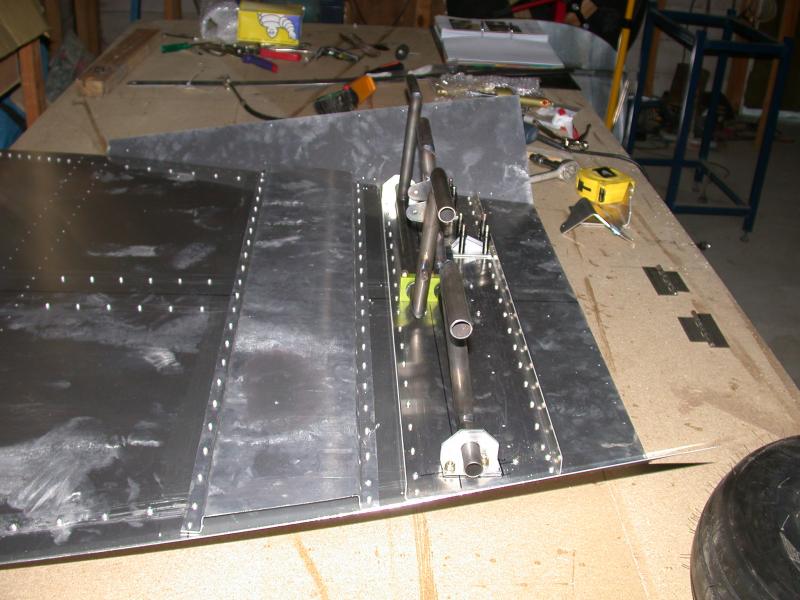
The landing gear has also been completed. Getting it on to the drill press so as to drill the holes perfectly straight took a bit of doing. We also uses a hole saw in the drill press to cut the clearance shapes for the brake callipers.
[ATTACH]5708.vB[/ATTACH] [ATTACH]5709.vB[/ATTACH] [ATTACH]5710.vB[/ATTACH] [ATTACH]5711.vB[/ATTACH] [ATTACH]5712.vB[/ATTACH]
I will post the pictures of the fuselage as soon as i reduce there size (The brother uses a 10 meg camera)
By for now.
Ianrat
-
Good to hear. I hope you have as much fun as we are having. Keep us informed of your progress.
Ianrat
-
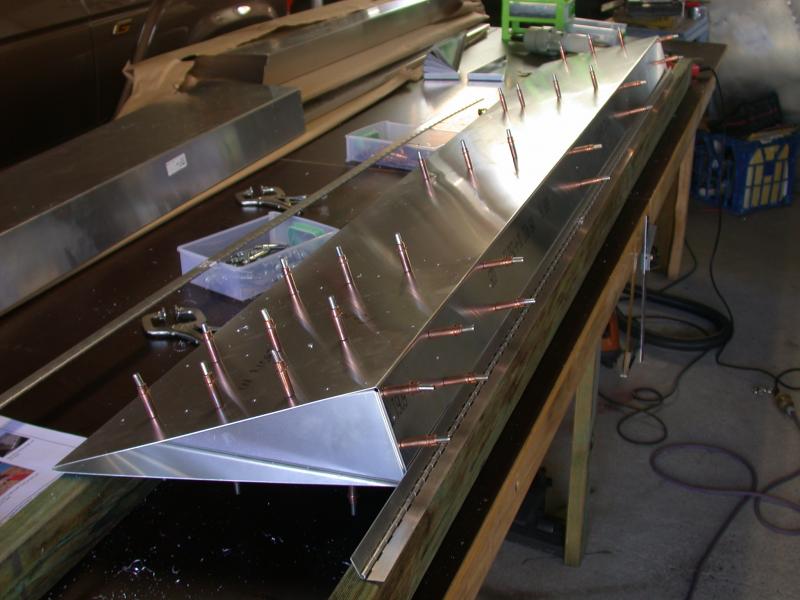
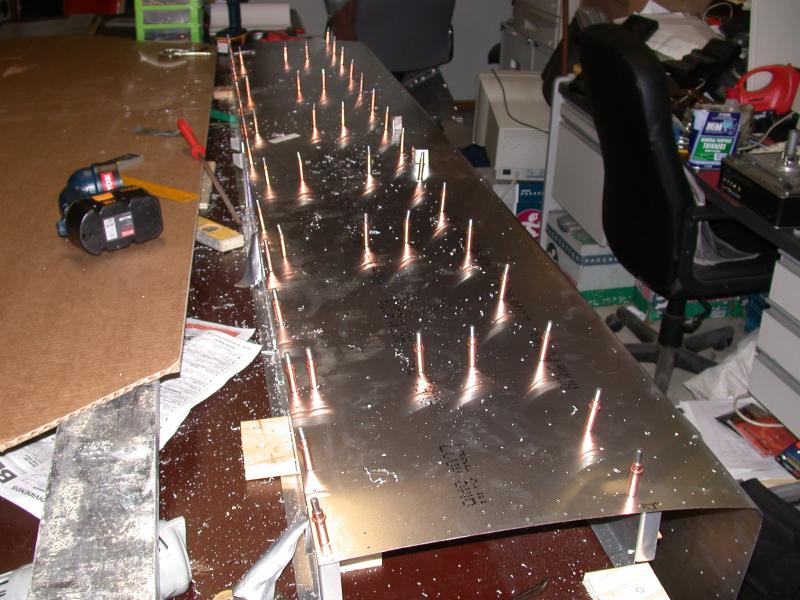
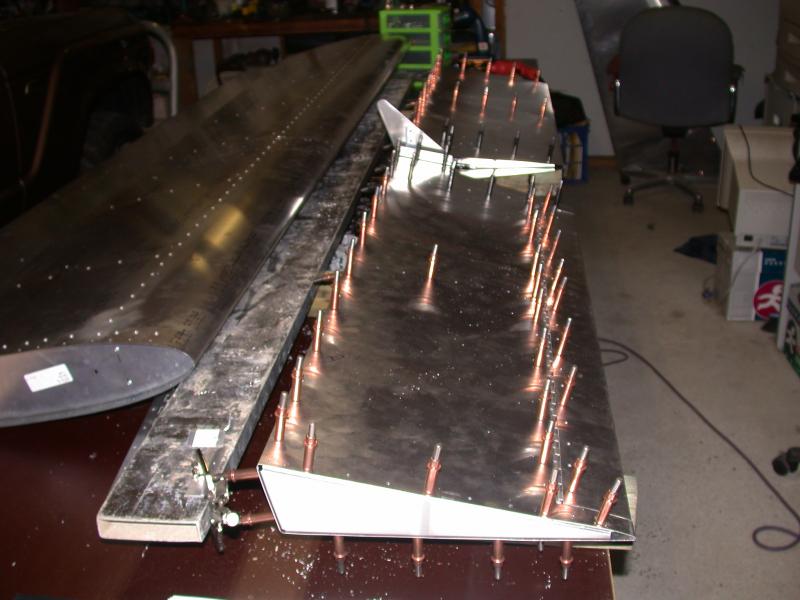
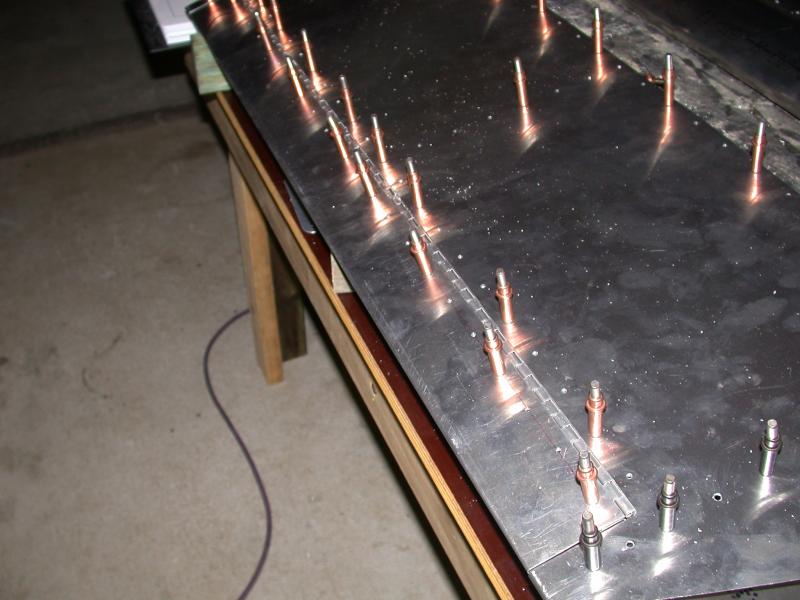
Managed to finish both flaps.
Continued on with the Ailerons. setting them up with the 13mm wist in the outward end.
[ATTACH]5509.vB[/ATTACH] [ATTACH]5507.vB[/ATTACH] [ATTACH]5508.vB[/ATTACH]
Having to keep moving the spacer every time you have to turn the aileron over to cleco some thing. I have only riveted one up because i will be installing trim in the pilots side. I have oped to scratch build the trim because we had already purchased a ray Allan trim motor when we were going to build a 701.
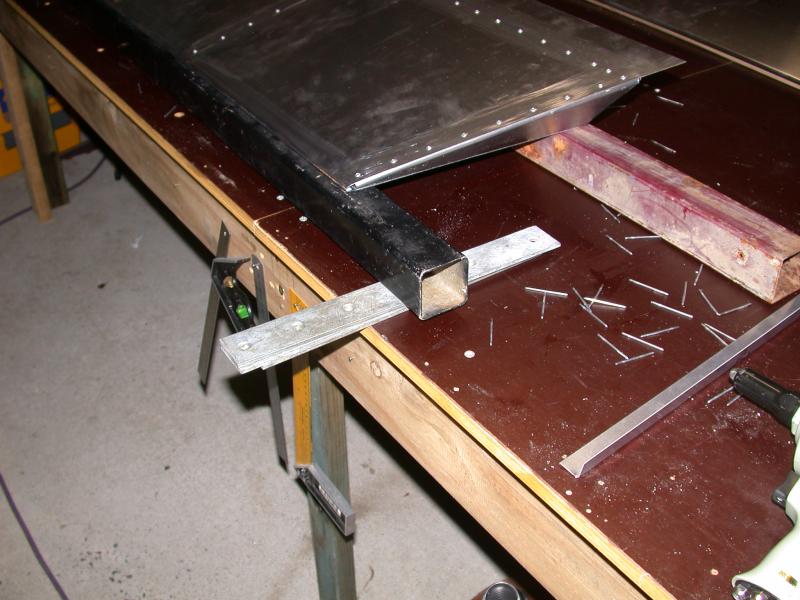
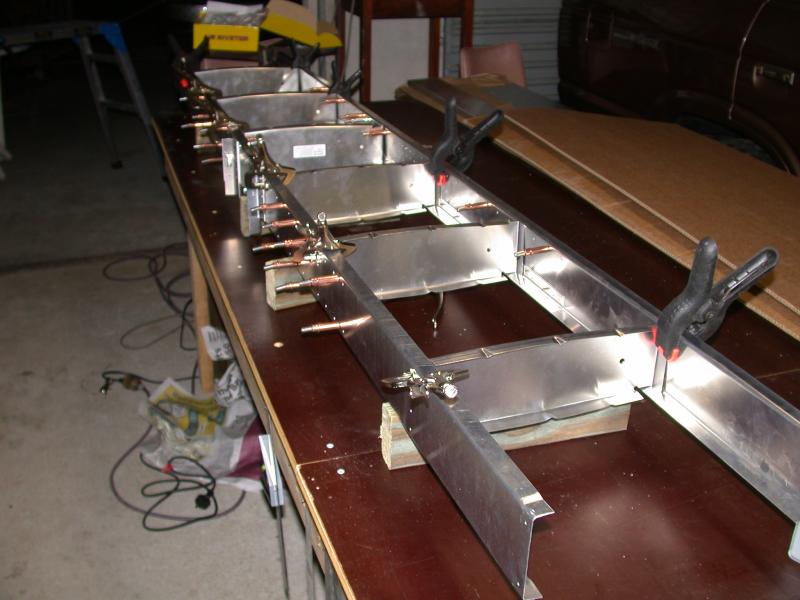
Over at the other work shop we have now connected the floor pan to the rear section of the fuselage. installed the fire wall and set it up to the 77deg using the templates that we made up. used the laser level again to get the whole thing setup to be perfectly level.
[ATTACH]5505.vB[/ATTACH] [ATTACH]5506.vB[/ATTACH]
We where having difficulty with the front and rear wing spar jig that was supplied with the kit. The section that matched the front wing spar was set out and drilled as per the plans but the holes did not line up the the centre section. a quick call to Zenith and i was told that we had the pre drilled kit and to throw the jig away. it can only go in one place because the skins are pre drilled, he said that the jigs caused more trouble than what is is worth. you just have to use the templates that you will make. (I will post some pictures of there use shortly).
So far the kit has just fallen together with out any stress. a pleasure to build.
Ianrat
-
There are lot of KR2 on this site.
http://mylist.net/archives/corvaircraft/2008/date.html
Most are in the US but they may be of some assistance.
Goto the "More info on this list..." and register and then just leave a post.
Ianrat
-
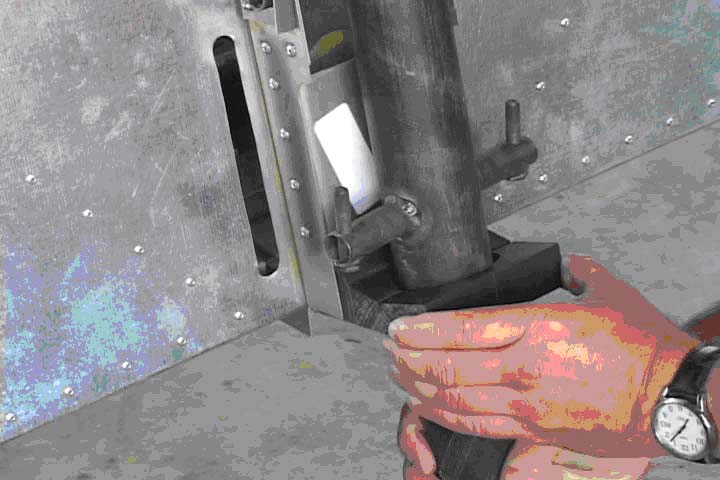
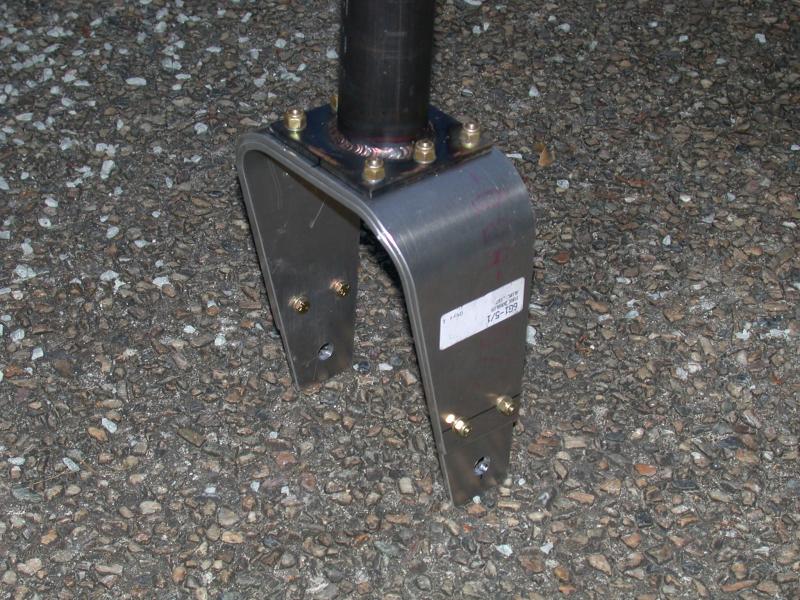
The bottom fork bearing has now been changed. The old one was just two pieces of angle for the fork to rest on, the new one is made out of a solid piece of Teflon. The new one is a far better idea.
[ATTACH]5447.vB[/ATTACH]
Thruster 87 when is your kit scheduled to arrive.
Ianrat
-
Not a lot happened last week. Had to install the new kitchen for my wife. (So I can go to Oshkosh in July. Bribery goes a long way.)
Also we had to help the third member of our group unpack his kit (He was away in England when it arrived).
Did manage to get the flaps completed ready to debur and prime. With the pre drilled skins this was only took six hours for the both flaps. The longest time was taken up in the setting up and drilling the hinge. All I have to do tonight is pull them all apart and debur them and then rivet them together. (Another section finished) hope to have the ailerons completed by the week end.
[ATTACH]5415.vB[/ATTACH] [ATTACH]5416.vB[/ATTACH] [ATTACH]5417.vB[/ATTACH]
Over at the other work shop we have been working on the cabin floor. They have mounted the pedals. Also have completed more on the fuselage.
[ATTACH]5418.vB[/ATTACH] [ATTACH]5419.vB[/ATTACH] [ATTACH]5420.vB[/ATTACH]
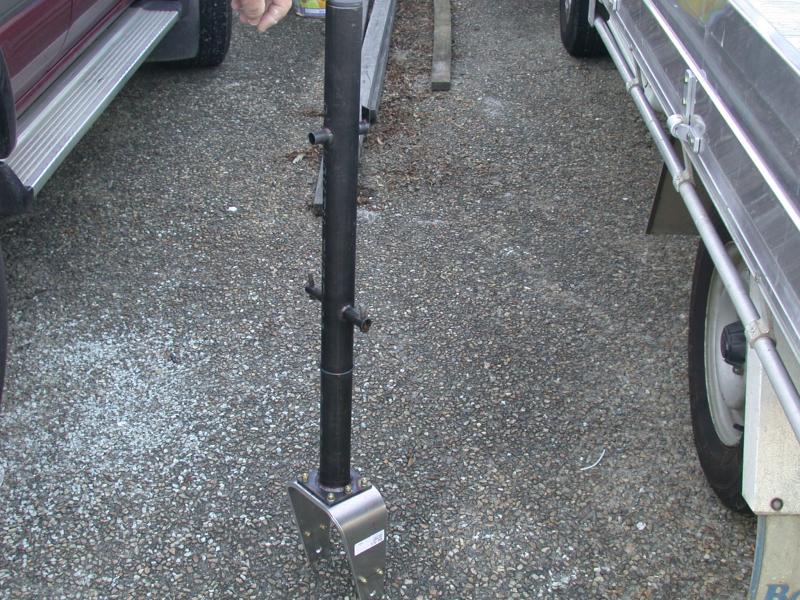
Also have mounted the front nose folks to the nose gear.
[ATTACH]5421.vB[/ATTACH] [ATTACH]5422.vB[/ATTACH]
Ianrat
-
This thread has now been moved to the new "Zenith Users Group"
Ianrat :thumb_up:
-
NO NATFLY
Did not get to go to Natfly 2008, so i used the time to keep building.
[ATTACH]5323.vB[/ATTACH]
Picture of the finished rudder
Managed to complete the rear Stabilizer and got the Rear Elevator ready to be debured and then riveted (Along with the wife stuff EG: mow the lawn do the gardening take her shopping.) will never get the plane finished!
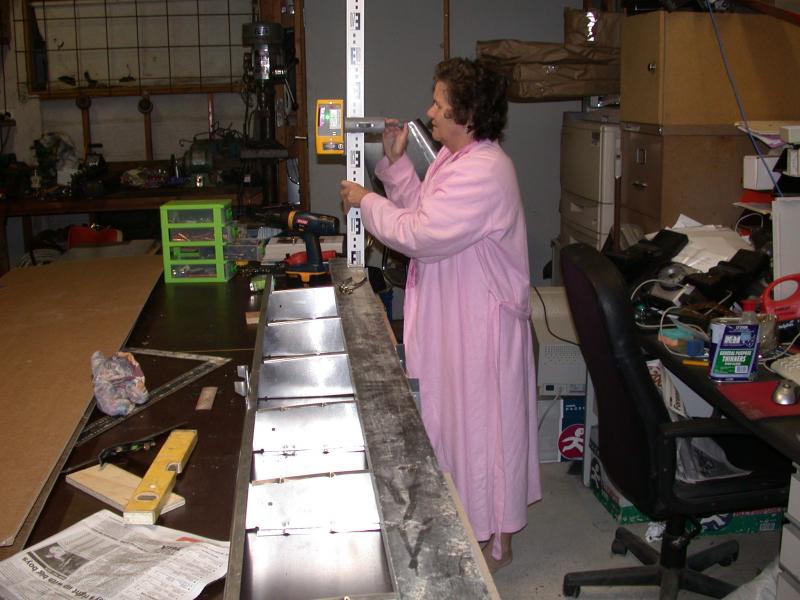
She did help me with the leveling of the rear stabilizer. (So she deserves some consideration i guess).
I used a laser level to get the frame perfectly level. (An over kill i guess but i want a perfect job when finished).[ATTACH]5325.vB[/ATTACH] [ATTACH]5324.vB[/ATTACH] [ATTACH]5326.vB[/ATTACH] [ATTACH]5333.vB[/ATTACH] [ATTACH]5334.vB[/ATTACH]
The rear elevator only took me about 6 hours to complete due to the kit being pre drilled. Saves a lot of time.
[ATTACH]5327.vB[/ATTACH] [ATTACH]5328.vB[/ATTACH] [ATTACH]5329.vB[/ATTACH]
While over at the other work shop the brothers have been hard at it working on the Fuselage. they have managed to complete the firewall and the base and side of the rear fuselage.
All in all a very successful Easter break.
Ianrat
-
I have just down loaded the following page from the Cortec web site.
The natural properties of 6061-T6 aluminum is very corrosion resistant. Combined with Cortec the risk of corrosion is very remote.
http://www.cortecvci.com/Products/Productcharts/Graph02.html
Ianrat
-
Corrosion Protection
We are using the Cortec VCI 373 as recommended and sold by Zenith. It is water based and very easy to use and clean up after. It dries to a clear finish. All that is required is to give the parts a clean down (I use a special souring pad that was recommended to me by CANZAC) and thinners and then just clean with thinners wait to dry and then on with the Cortec.
We are using it for the interior mating surfaces at this stage not sure what to use on the outside.
Ianrat
-
Shipping Cost
To get all three kits from the US to Brisbane was $4711.02 Inc Gst. (this was for two crates). We then insured the whole thing for $63000.00 at cost of $303.00.
The GST on the kits were payed for by Sport Air. We used C&H freight in Melbourne.
By sharing the cost we each only payed $1671.31 Inc Gst.
Ianrat
-
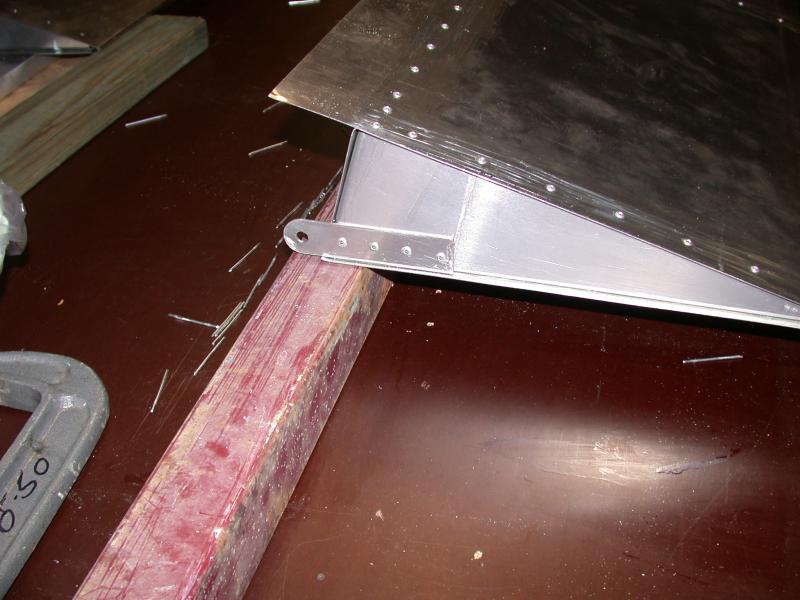
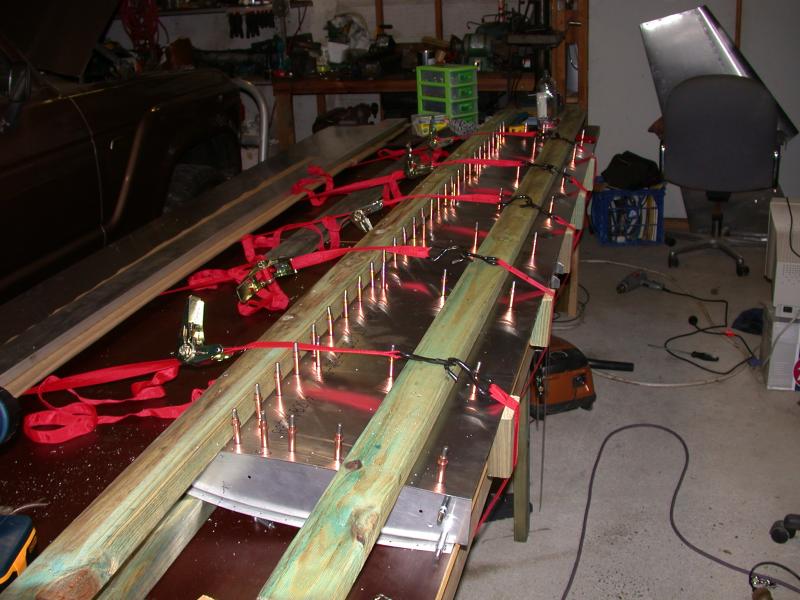
No i have got some nice lengths of 50x50 aluimium post (the ones you use for pool fencing) they are nice and light and do not mark the sheeting. Liifted rear bottom the 20mm.
The pictures above just had the frame sitting on some of the papers before drilling the skin. :thumb_up:
Ianrat
-
The plane is being built by myself and my two brothers. I will be making the tail, rear elevator and wings while the brothers work on the fuselage. This way we can both work on the plane every spare minute that we get. (not waiting for the others to come over to help) We then get together a couple of times a week to check each other and help.
The kit being pre drilled has made the rudder very easy to complete. it has only taken me about four hours of work to have it ready to rivet.
The brothers have been working on the fire wall.
The bench is from my place.
Ianrat
-
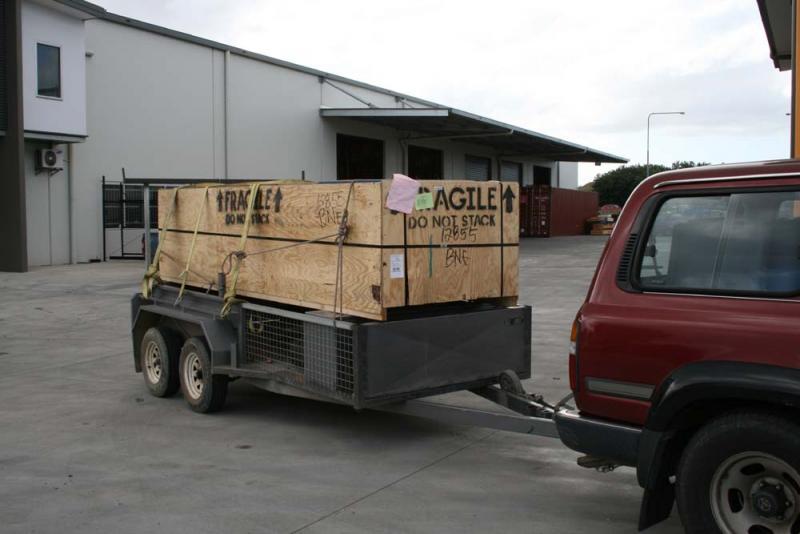
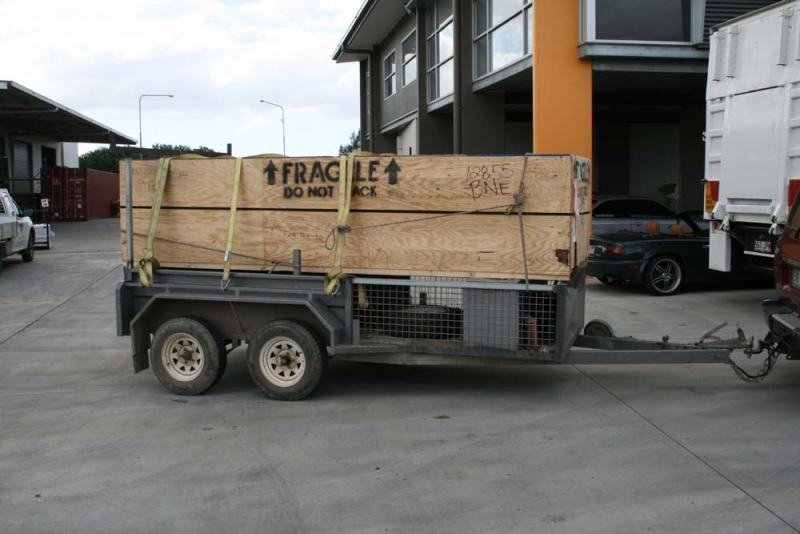
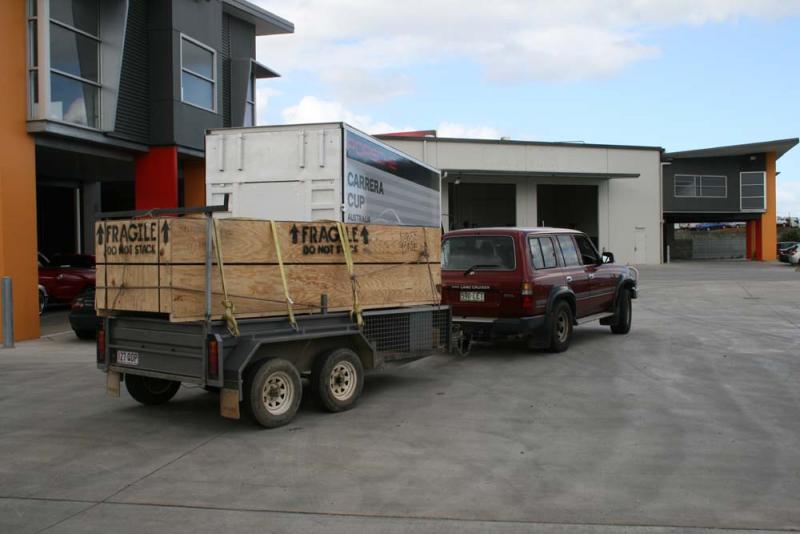
601XL
Finally got them.
Here are the photos of the first crate that contains the two 601XL kits. We picked them up from the Brisbane depot. the box survived the trip fairly well. :thumb_up: The third kit was picked up the next day. The crate looked exactly the same as the one in the photos.
I did not get any photos when we opened the crate, but inside looked just like Wanabigaplane's crate except there was two planes in it. Most of the parts were wrapped up together. Both of the canopies did not take up any more space that in Wanabigaplane's crate. The four fuel tanks and two under carriages took up some room.
I will put more photos up as they come.
Ianrat
-
When we went to pick up one of our kits it had been sitting in the yard uncovered for at least two days. The inside of the box was lined with black plastic. It would stop a fair bit of water. The second kit was picked up on the day that it arrived from Sydney by truck. The box was still in fair shape, no real damage only a couple of chips out of the ply.
Hope your kit arrives safely.
Ianrat
-
No! just canot get out of the brothers camera.
Will post asap
Ianrat
-
They have arrived!
My 601XL kit and the other two kits that are going to Brisbane have finally arrived.
After a little bit of confusion in the USA all of the kits have now arrived. My kit and one of the other kits arrived here in Brisbane but the other kit found its way to Sydney some how. The shipping company then trucked it back up here.
Spent the day unpacking the kits and i was impressed in how Zenith rapped all of the parts in paper before packing them into the crate. There were no missing parts. After helping scratch build a 701 the new kit comes with most parts completely formed and pre drilled and things like the inspection holes are already cut into the wing skins.
Now the fun begins with the putting it all together.
On a sadder note i was upset to here of loss of Garry Sweetnam. The plane that was lost is the one that i went for the test flight in. Garry will sadly missed.
Ianrat
-
Tell them Ian Ratcliffe gave you the details and they might do some thing better for you. (I work with one of the managers daughters)
Ianrat
-
-
Myself and my two brothers are going to Oshkosh and we are spending 7 days in LA. (Disneyland, Mexico, Sea-world, Huntington Beach (Boob Watch)
We should all get together to spread the word about the forum while we are there.
See you there
Ianrat
-
I have been given the notice that the three 601XL kit that are coming to Brisbane have now left LA for the final leg of there journey. There to land here on the 2nd March. A few days in customs and then the building starts.
Was hoping for some pictures from Zenith of the crates being packed up but alas did not get any.
Will keep you all posted on the progress
Ianrat


 I used a laser level to get the frame perfectly level. (An over kill i guess but i want a perfect job when finished).
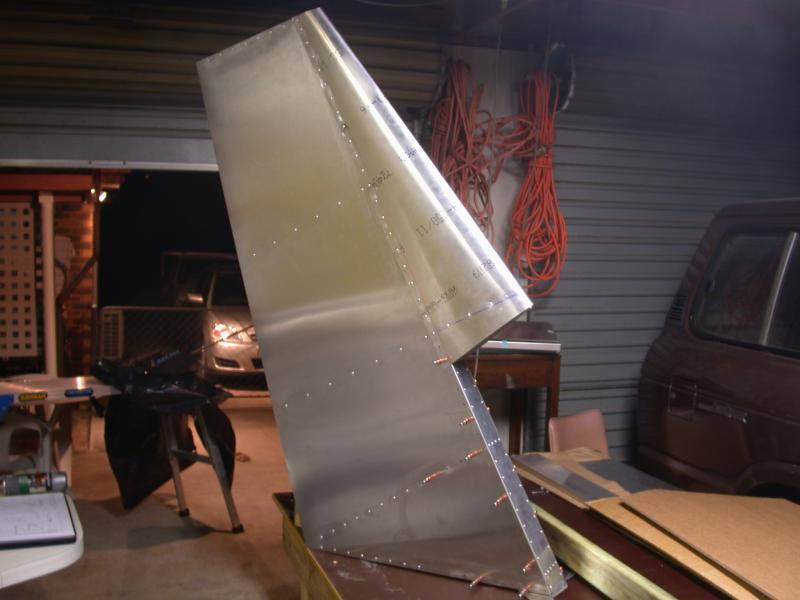


CH601XL Kits
in Zenith
Posted
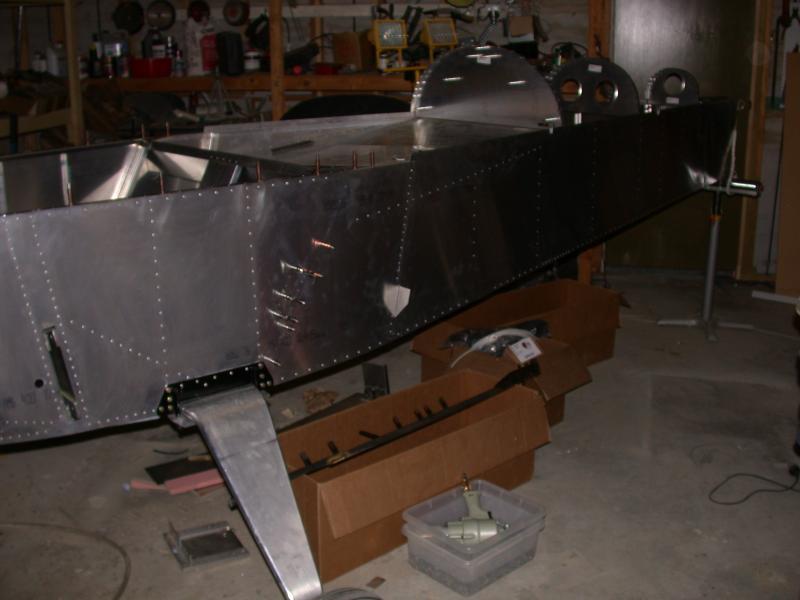
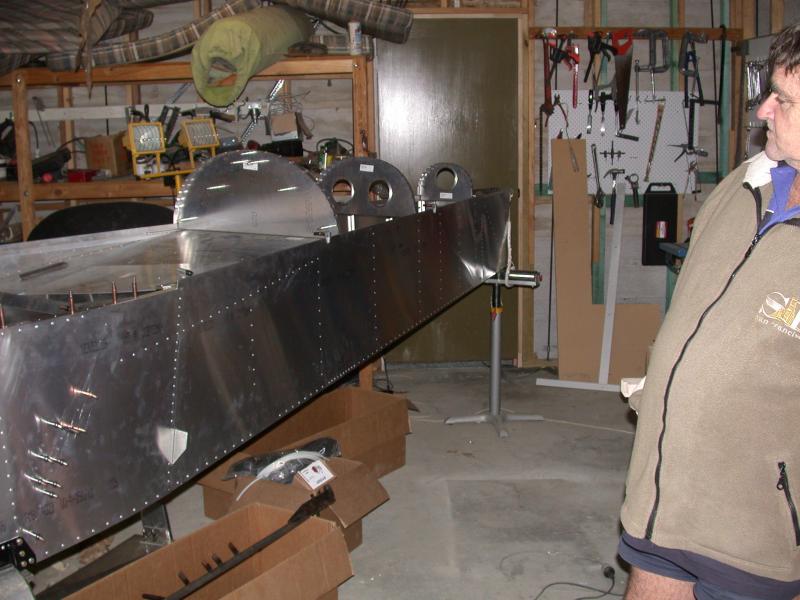
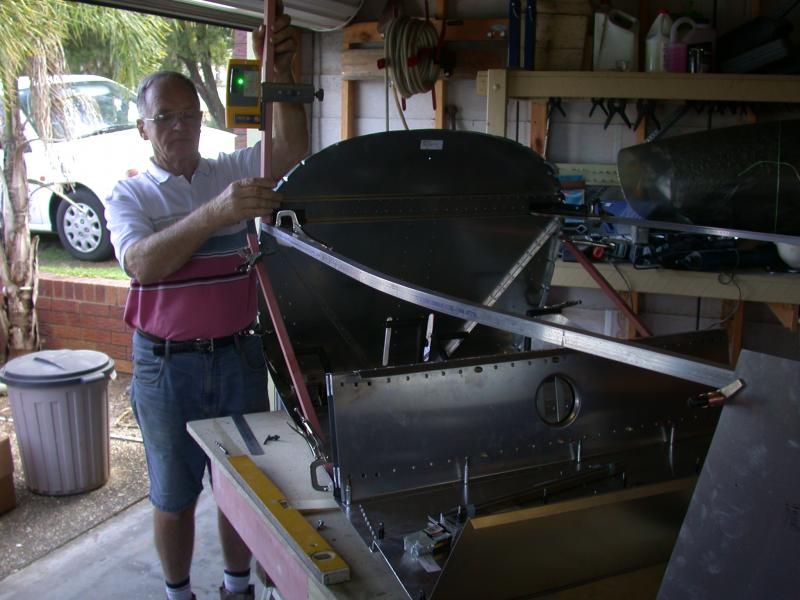
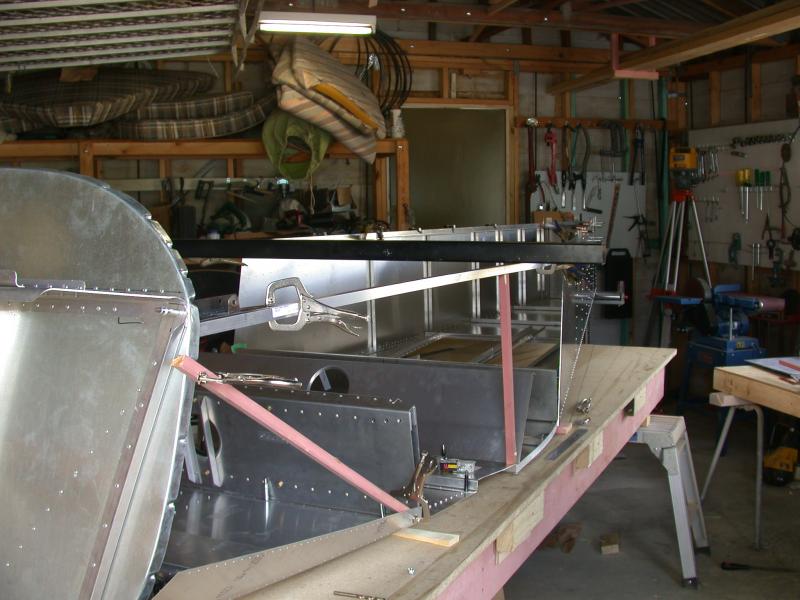
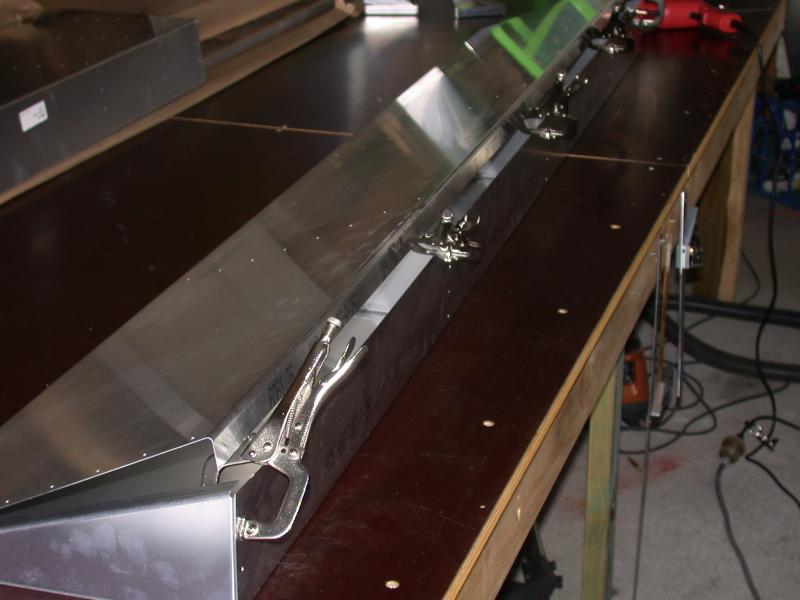
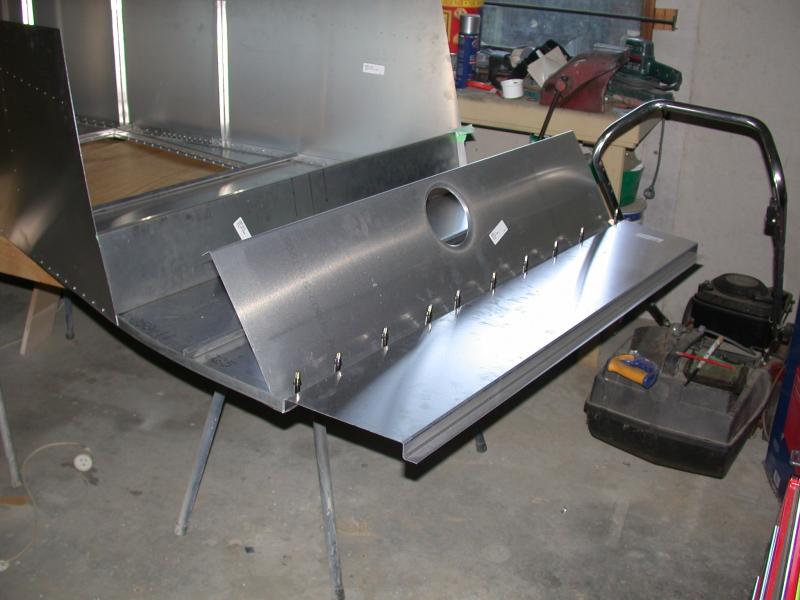
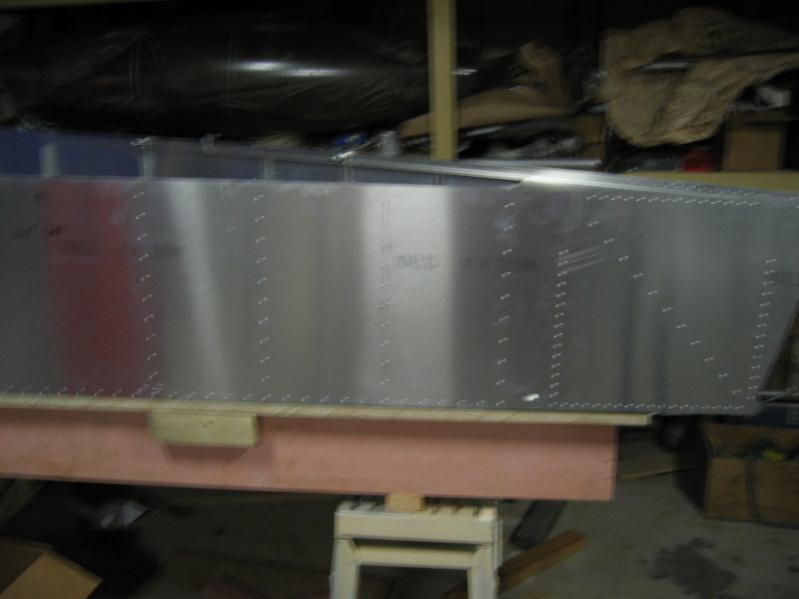
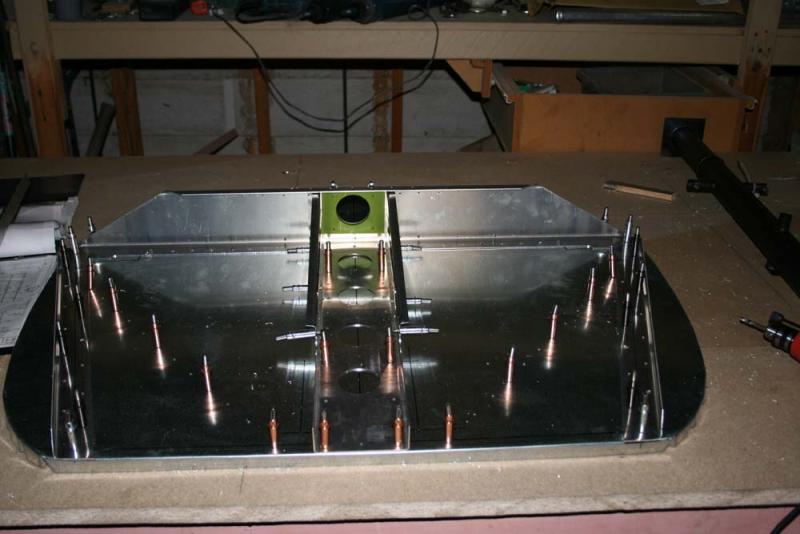
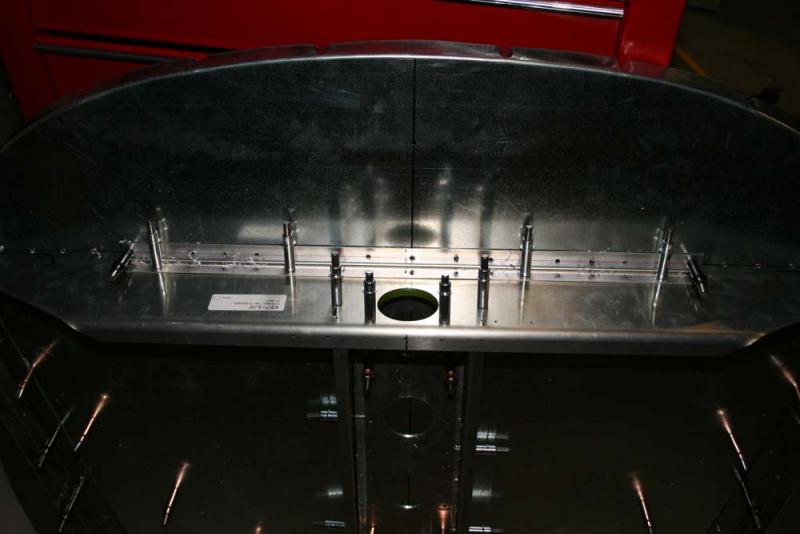
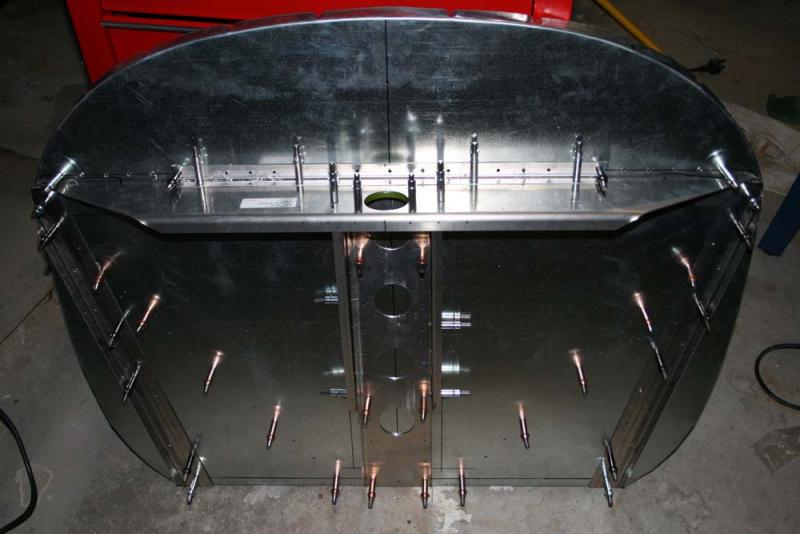
Have been working hard on the turtle back.
[ATTACH]5798.vB[/ATTACH] [ATTACH]5799.vB[/ATTACH]
We have only cut the front of the baggage area roughly to shape to allow the fitting of the front bow.
[ATTACH]5801.vB[/ATTACH] [ATTACH]5802.vB[/ATTACH]
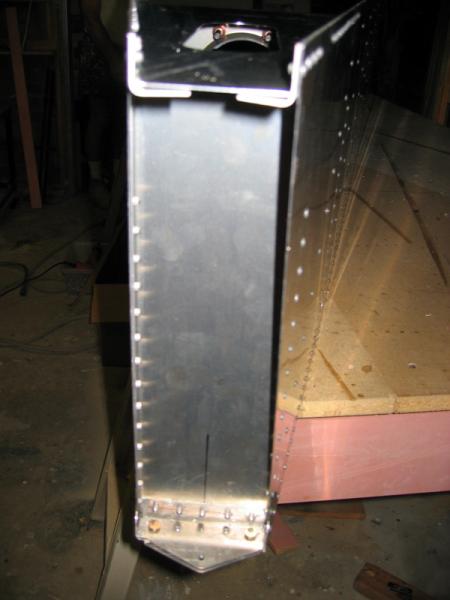
The sheeting over the instrument panel is now in place. We will be fixing down with bolts instead of rivets. this will allow us to remove it to do any work behind the panel.
[ATTACH]5800.vB[/ATTACH]
Ianrat