batesey
-
Posts
37 -
Joined
-
Last visited
Content Type
Profiles
Forums
Gallery
Downloads
Blogs
Events
Store
Aircraft
Resources
Tutorials
Articles
Classifieds
Movies
Books
Community Map
Quizzes
Videos Directory
Everything posted by batesey
-
Nice one Gomer, gald you're enjoying it. There will be heaps more posted over the next couple of day so stay tuned.
-
LOL...thanks Chris, it's the linishing and filing that makes it all pretty. That and the fact that my old man teaches me little tricks here and there to make life a bit easier...It's hard to believe but I took the art of HACKsawing a little to literally; that was until Dad showed me a better way of doing it. But like I said, the finished product is all thanks to sanding and filing. A little time consuming, but like you said, the results are worth it. Hey Louie, The bench...well ours is 5 meters long by 1.1 meters wide and .8meters off the gound. We also made shelves underneath and there was ample room to store the bits we were not using yet. I think that I mentioned on the blog that the bench is JUST wide enough. Remember, if you get Gary to mod your kit and make your plane wider, you'll need a wider bench. I'll be putting info on the blog about the workshop and tooling soon. As a matter of interest, the length of my workshop is just long enough to house the plane once the cowl is on...but I cant have the Prop or spinner attached...LOL. As for the 'Finisher', well I guess you could call it that, but it is actually a Linisher...a Vertical Belt Sander. The one I have is a Triton 2-in-1 Disc and Belt Sander. The belt part is pretty cool, it can stand up as seen on the blog, or lay flat. I wouldn't say that any tool is really essential, but saying that, having the right tool does certainly help and this belt sander is something that I knew I wanted. Before the kit arrived I thought of every tool I thought I would need and went on a mad tool buying bender...Come to think of it, I bought more tools than I really ever needed or thought I would use; but I have been surprised by how much I have used EVERYTHING I purchased. Cheers guys and thanks for watching the blog. Toby
-
Nope.
-
Hey Chris, Just using a hack saw mostly...there have been times when we have used a JigSaw with Alu blades. There really hasn't been that much that's needed to be cut on the tubes. Everyting is however finished up on the linisher; then a fine file is used on the ends to ensure that no marks that could generate cracks are left. Cheers, Toby
-
Hey Yenn, No, your not wrong, I know what you are saying too. I actually addressed the same question with Garry when I had all of those months to study the plans before the kit arrived. The diagonal tubes do fit snuggly up against the verticals and the logerons, they just haven't got that wedge shape cut in the end of them to match up in the corners. From what I was told it just adds a little unnecessary weight where it is not needed. At most those triangular gaps are only about 1/2". It really would make no sense to put that extra metal in there and it does nothing to improve the strength, the gussets and rivets are what take the loads and with the spacing of the rivets, you wouldn't put one that close to the corner of a join anyway. I think the main thing that Garry pointed out to me concerning this is it simply doubles the time of constructing this part of the aircraft, for no valuable returns. Remember also, the Sierra has a full Metal skin on the outside which acts as one GIGANTIC gusset. I just put a post on my blog and one of the lines is as follows: "It’s amazing, with every cross member, rivet and bolt that you put in, you can just feel this airframe getting stronger and stronger and stronger." The drawings that are supplied with the kit are satisfactory, there are improvements that could be made, but let’s just say, I have made it pretty far into the construction without having to make too many calls to Garry. Garry also knows the weaknesses of his manual/plans and listens to his builders. Hope this answers your question and thanks for looking at the blog...it's good to know a couple of people out there are enjoying it. Cheers, Toby
-
Hi Wanabigaplane, It's an interesting comment. I was actually at Mangalore that year, I think I was 17/18 years old at the time and had had my pilots license for a couple of years. I was in the Australian Air League at the time and you would see us guys in the blue uniforms guarding planes along the tarmac. I had finished my duties for the morning and got back into my casual clothes, met up with a mate of mine Chris and went for a walk along the flight line to look at all the planes. The ultrabat took both of our attention right away. The pilot was getting the Ultrabat ready for the demonstration. Both Chris and I were standing right behind the plane when the pilot stated throwing the prop to start it alone. I called from across the fence to see if he wanted my assistance. I explained that I was a pilot and could in fact help and it was dangerous to start it by himself. I must have looked to young, he refused my help. He could not get it going, so I offered 2 more times, on the third time he actually told me in no uncertain terms to "p%$# off". I looked at Chris and said, "this is gonna end bad." The pilot looked to really open the throttle (after many failed attempts to start it) and then threw the prop. That was it; she fired up at full power, blew the guy on his XXXX, charged off down the tarmac. It hit a stone, made a 180 degree turn and headed right for Chris and me . All I remember doing was turning to Chris and yelling RUN! There were people all over the place on the tarmac trying to pounce on the tail to stop it. Chris, I and a crowd of others scattered looking for shelter. We hid behind a hanger and when I looked back, the plane had changed course. It was now heading towards 36 on the taxiway narrowly missing Martin Hones Karatoo, before it made it to the runway, it hit another stone and that's what made it career into the crowd...the rest is history.
-
Hey Vision, Slarti has hit the nail right on the head. The Sierra has a 3mm Box section tube instead of the round because the Sierra is all metal covered. The main reason I believe was to make for a nicer look to the fabric as it wrapped around the curves in the tube. Also, due to vibration over time it was thought that square tube would eventually cut through the fabric. As Slarti pointed out, the Cheetah can only accommodate the 4 cyl Jab whereas the Cheetah Sierra can have a variety of power plants up to 125hp. You can of course fit the 4 cyl to the Sierra if you don't wish to burn as much fuel, and there are a couple of Sierras out there that have gone with this option. The whole airframe is Aluminium apart from a very few select parts that are steel and fibreglass. I'm glad you are enjoying the blog, one of the reasons I started it was because apart from being a bit of a geek, I knew when I was looking for info on that one aircraft, there was NEVER enough...I just wanted more and more. Cheers, Toby
-
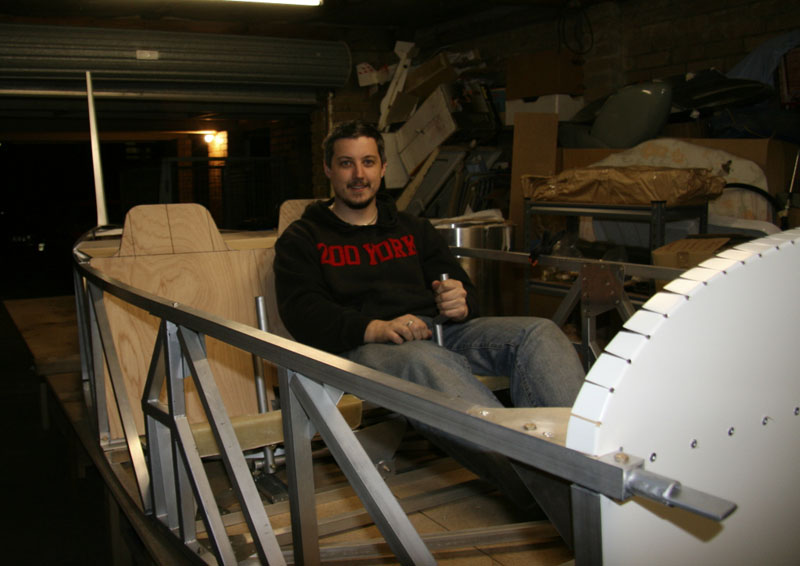
Hey Ross, Thanks for the compliments. As for the fin post, it actually has to be trimmed 1" in the top as marked by Garry. I think what you are seeing is our fin sits at a 12 degree raked back angle. The original (I think yours as well) only has a 7 degree angle making the fin look more vertical. It was a consideration form the start that we wanted the sleeker looking Fin/Rudder combo and Garry made our kit with the greater swept back fin in mind. We are adding a nice fiberglass tip to the top; adding another 3 inches. Also, we'll probably make our rudder slightly narrower at the top and add the area to the bottom thus giving it a different look. The real illusion that will make our Fin/Rudder look HUGE (just the way I like it) is our rear deck can come down really close to the top longerons and really tighten up the tail end. Because we have the dual controls installed, our elevator control horn hangs upside down so we don't need the room up top. Speaking of a lot of aeroplane, before taking the photo above of me sitting in it, we mocked up the cowel on the firewall just to see how she would look. Let me tell ya, this thing is MASSIVE in the front end...there is definately a WHOLE LOT of plane in front of you. I can't wait to put her shoes on and see how she looks all three point like...I think this plane is going to have one mean stance, kind of like the way my Doberman looks when he's alert. Cheers Toby
-
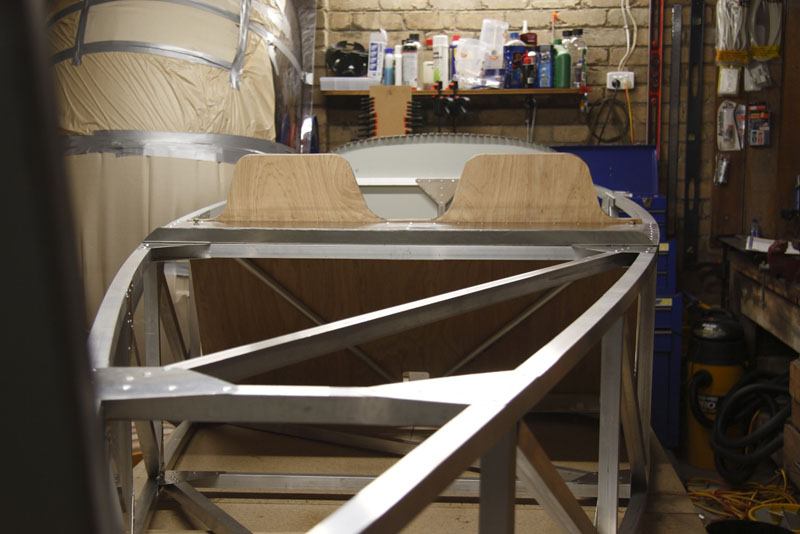
LOL, no not speedy, it's just a testament to Garry's kit. It's as quick to building as it will be to fly. You got to remember though, 9 times out of 10 there are 2 of us working on the plane, cuts the walking around the bench time in half. We usually work about 3 nights a week for a few hours and all day Saturday. The nights that we aren’t working on it we are studying the plans, watching the video & reading the manual. When we get together we generally have pretty good idea of what we want to get done for the following night. To be honest, we have probably spent WAY too much time thinking about how to attack certain things in the construction and laboured far too much on little things that will never be seen, but we are pretty proud of how she's looking so far...we aren't rushing it and although I am biased, the workmanship really shows. Here are a couple of sneak peeks: [ATTACH]8606.vB[/ATTACH] [ATTACH]8607.vB[/ATTACH] Cheers, Toby P.S. The floor and Rudder pedals went in tonight...LOL

-
Thanks Chris, I have many, many more posts to put on the blog. It takes a bit of time to write about the building. We have just installed the dual controls and the floor is next...apart from the outer skins, the base fuse it pretty much complete. We'll be starting the tailplane on the weekend. Stay tuned, more will be up shortly. Cheers Toby
-
Hi Yenn, Yes, my site will be updated tonight, I have some time to myself and like I said, have a months worth or builders logs to put up there. The pics you see at the moment were only from Garry's site and used as place holders while I designed the Blog. This will change...count on it! I see the finish as a little way down the track and thus have not invested in any equipment that I don't immediately require. That being said I will have an image of my aircraft and it's final color scheme up shortly...It's going to blow away the conventional graphics you see on most aircraft...my background affords me the ability to make this plane of mine a little different than the norm. I was telling another forum member that it took my dad and I exactly 3 minutes after the test flight to make a decision and order the kit...Why three minutes you ask. We were both giggling like little school girls and it took us a while to compose ourselves. Cheers, Toby
-
Hey Chris, I'm currently building one of Gary Morgans Cheetah Sierra 100's (taildragger) with my Dad. As Slarti says, a Rivet gun and compressor are the first things you'll need. I had my rivet gun breakdown after the first day of laying up one side of the fuse, had to do half the other side by hand. LUCKY my dad was able to pull the bugger apart and have it up and running to complete the fuse...my hand was killing after doing the gussets on one side. I can give you a bit of a break down as to what I have acquired in order to make building a bit easier. Compressor Rivet Gun Hand Rivet Gun Imperial Socket and Spanner set Drill Press (used for more than just drilling) 2 in 1 Sander and Linisher Grinder Set of Files, Small round to Large Flat...Fine Right Angle Ruler Long Metal Ruler Protractor Spirit Level Plumb Bob Power Drill Cordress Drill 1/4" HSS Drill Bits 5/32" HSS Drill Bits 3/16" HSS Drill Bits 1/8" HSS Drill Bits Range of Pliers Clamps, Clamps and MORE Clamps Clecos 100 of each 1/8, 5/32, 3/32 ? - (i'll have to check that) Cleco Pliers 12" Gilbow Straight Tin Snips (Dont get the Bunnings "Aviation" maked Snips.) Olfa Knife (From USA) Centre Punch and the list goes on... I know that there is more that I just cant remeber at the moment, but I currently have a Blog running on my progress...you can check it out @ www.bx2.com.au Among the pages will be one on how I setup my workshop/tooling. I am in the process of adding the last month worth of building. Every time I have a spare minute I seem to be working on a plane...LOL. I have hundreds of images that will accompany the posts as well. I will make a more formal announcement in this forum once I am certain that the blog is working to my liking. Hope this sorta helps and if you get a kit, happy building.:thumb_up: Cheers, Toby
-

Anybody know of a spare Aeronca 7AC Champ?
batesey replied to Riley's topic in AUS/NZ General Discussion
Hi, I don't know of any for sale in Aus, but I just did a quick google search using the phrase "Aeronca Champ 7AC for sale" and as usual it came up with a pretty good list of pages with aircraft for sale. There was one site called barnstormers that had quite a few listed. If you can't get a hold of any information about Aeronc's for sale in Aus, you might have better luck and a bigger variety of aircraft to choose from by looking at that site (seems like there is quite a few). If you are going to the States it might be worth going through the site and getting an idea of what's over there before you set off on your trip. Some prettty nice looking ones there too.