duncan_rtfm
-
Posts
78 -
Joined
-
Last visited
Content Type
Profiles
Forums
Gallery
Downloads
Blogs
Events
Store
Aircraft
Resources
Tutorials
Articles
Classifieds
Movies
Books
Community Map
Quizzes
Videos Directory
Everything posted by duncan_rtfm
-
A quick question: Yes, I know this has been asked and answered many times, but I'm still confused. I joined SAAA half-way through their financial year because I wasn't aware that RAAus had people to help and mentor builders (their main thrust is in pilot training). Since then I have learned that they do in fact have a building support program (although this is hard to find on their website). SAAA have just billed me for the 2021/2022 financial year, and I'm not sure this is the way I want to go. I'm building a Flea, and a watchful eye on my construction, as well as a guide to the necessary paperwork to get the plane into the air is what I'm after. I have heard some less than complimentary stories about RAAus being inflexible and expensive. Is this true? And if I join RAAus, will I be able to call on the assistance of qualified people to get me into the air? Sorry to be asking this again, but I need some help with all the political crap which seems to be the norm in and SAAA vs RAAus discussion. Regards, Duncan
-
Hi, Nice to know my idea isn't way out there. Just seems sensible. But please keep a watchful eye on my build and save me from further SNAFUs No building today - router bits didn't arrive. Bugger. Regards, Duncan
-
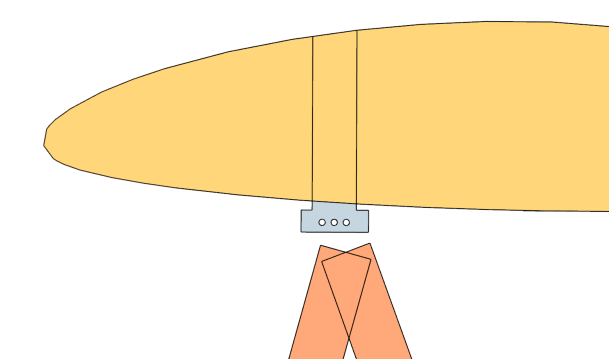
Great point, and it's great to learn from your experience. However, this is something I have already considered. The pivot will not be fixed, but will have an extension bolted to the main spar, something like this, allowing for ground-adjustable pivot point of 22%, 23% and 24% chord. This will allow me to sort out the optimal pivot position during testing, and permit pilots to choose a setting to their own preference.

-
Hi, I'm afraid you're right. I spent most of last night and then again at sparrows this morning working on the wing. Two spars. Main spar now at 22% chord, rear spar remains where it was. Checked out the HM360 and HM293 plans I have to verify pivot placement. I am very please you picked this up. I am now waiting for new router bits to arrive by express courier so that I don't lose too much time, and then I'll cut new ribs (fortunately, I had only cut the ribs for the inside panel, and I have extra ply in the shop, so no big deal as far as that's concerned. And speaking of time - while I'm waiting for the bits to arrive, I'll go and re-check the wing. Again. Duncan
-
Mmmm You have a point... You said: "Design concern - your pivot spar is not your lift spar therefore you are expecting the full lift forces to be passed from the lift spar to the pivot spar through the ply ribs - I would reconsider that and use the same full span spar as both your lift and pivot as you are then not passing significant loads through the ribs" I can't use the main spar as the pivot spar - the main spar is at 40% chord, while the pivot spar is at 22.5% (i.e. ahead of the CP). I'll have to think about this. Good catch. Duncan
-
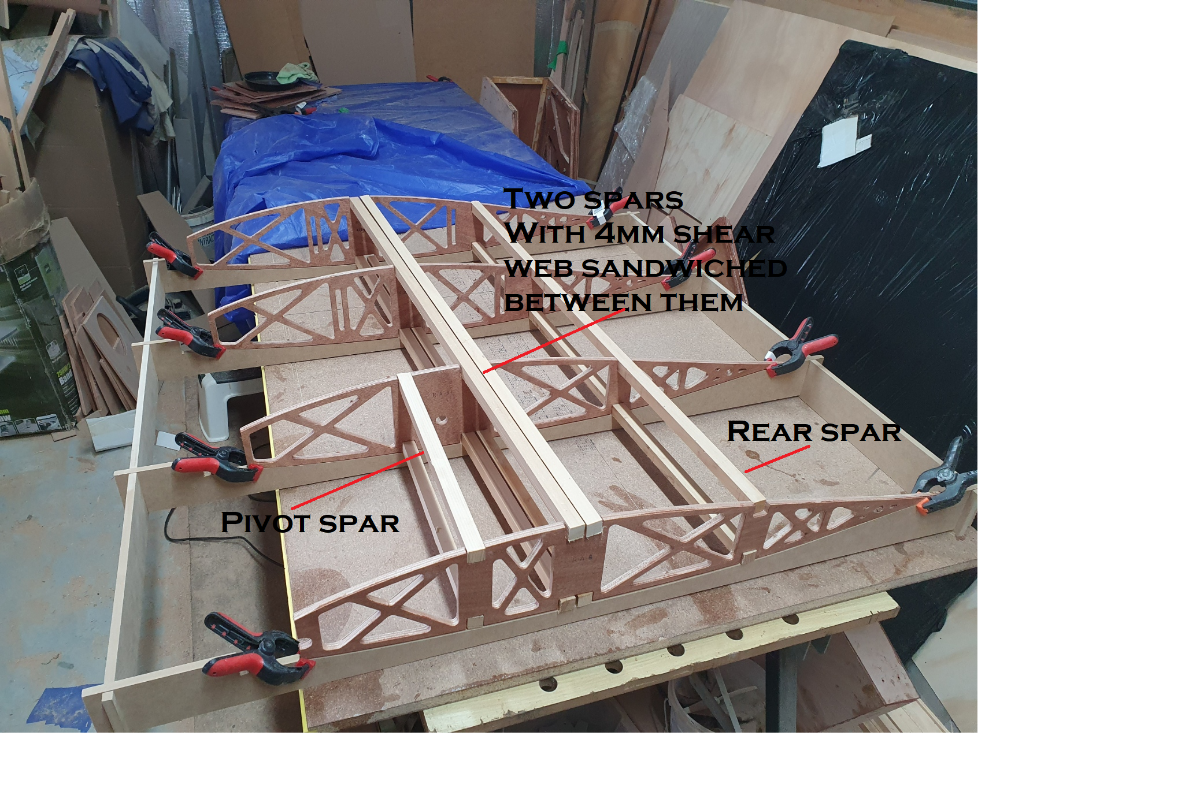
Today I cut the rib "cradle" jig. The ribs rest in this cradle perfectly spaced and aligned. The spar caps (19mm x 19mm Hoop Pine) are then slid into the recesses in the ribs. There is a second cradle jig, so that I can turn the ribs upside-down and bond in the top spar caps. In the photo below, you can see: The "Pivot" mini-spar. This is set at 22.5% of the chord and has a 9mm shear web. This is where the wing actually attaches to the masts, and pivots on it. There are two spar caps at 40% chord (thickest part of the wing). You will notice a gap between them - this is to accommodate the 4mm shear web. I was going to use 3mm, but since I had a sheet of 4mm Gaboon ply, I again erred on the side of caution, and used this instead. I was going to use a single spar, but decided to use two, as you can see. I think this wing is going to be as strong as a brick SH** house. I'm aiming for 6G (though in a Flea, this is never going to happen). One of the nice things about a Flea wing is that is can be built in sections. My wing has three sections: the inner section (what you can see here), a middle section (which will fold upwards as per standard Flea doctrine, and a third outer panel, which will fold downwards. This gives me 5.75m span (on the rear wing) with an aspect ratio of almost 7 which is more than almost all Fleas.
-
Hi, I haven't opened my Bote Cote yet - so I'm actually going to ask if I can return it (only arrived a few weeks ago). Thank you very much for the info. Regards, Duncan
-
That's interesting about the thermal softening point of Bote Cote. I wonder if I can return mine? 😀
-
Beautiful plane, and STUNNING colours! The glue is T88. It's great stuff, but is very thick. Mixed, it is like cold condensed milk. So it is great for bonding smaller pieces - you can't paint the stuff on or use a roller. Strictly tongue-depressor use only. I have quite a lot of it, and started using it - only to find that the parts I bonded almost fell apart. It has a shelf life of about 6 months. Mine was at least four years old. And it is bloody expensive, to boot. So I am sticking to West System, which paints on very easy, and a roller is perfect for larger surfaces. My West System stuff is brand new. Another epoxy I like, because it is half-way between T88 and West System in viscosity is Bote Cote from Boatcraft Pacific. But no good epoxy is cheap. Even crap epoxy is expensive. Ha ha. Regards, Duncan
-
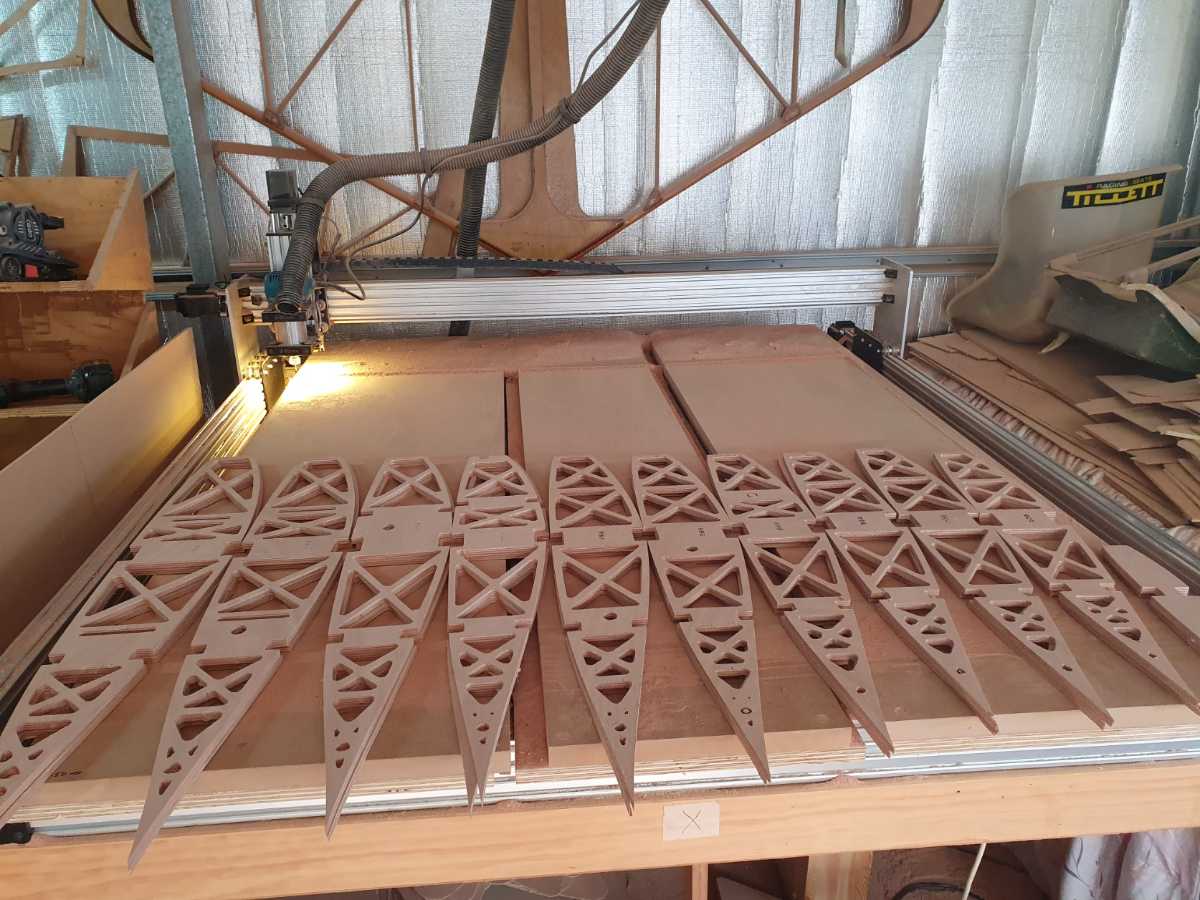
I cut all the ribs for the rear wing today. Every rib is a different size, because the wing is tapered. Next job: cut the jigs for the wing panels (tomorrow's job).
-
Mmmm OK, I'll give it a go. Not sure how I got the first photo in portrait...
-
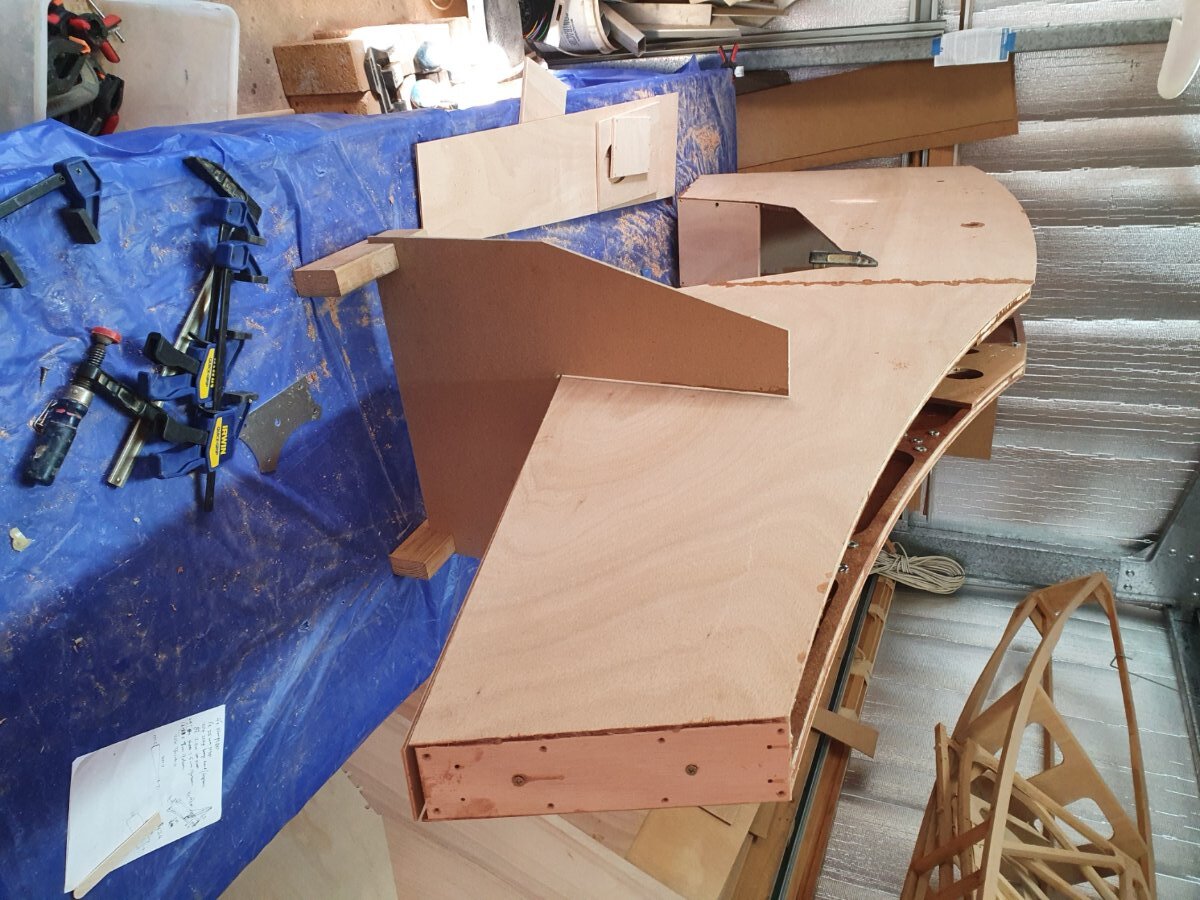
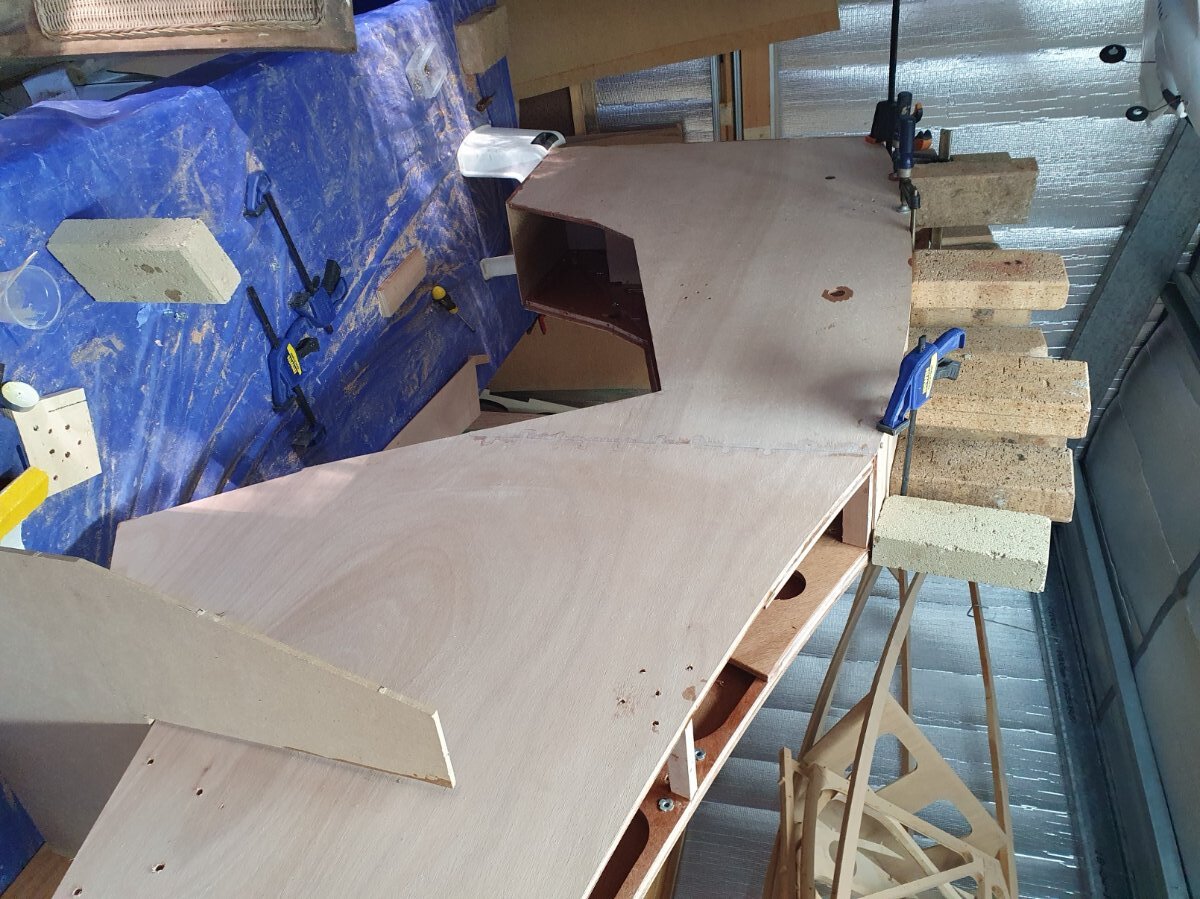
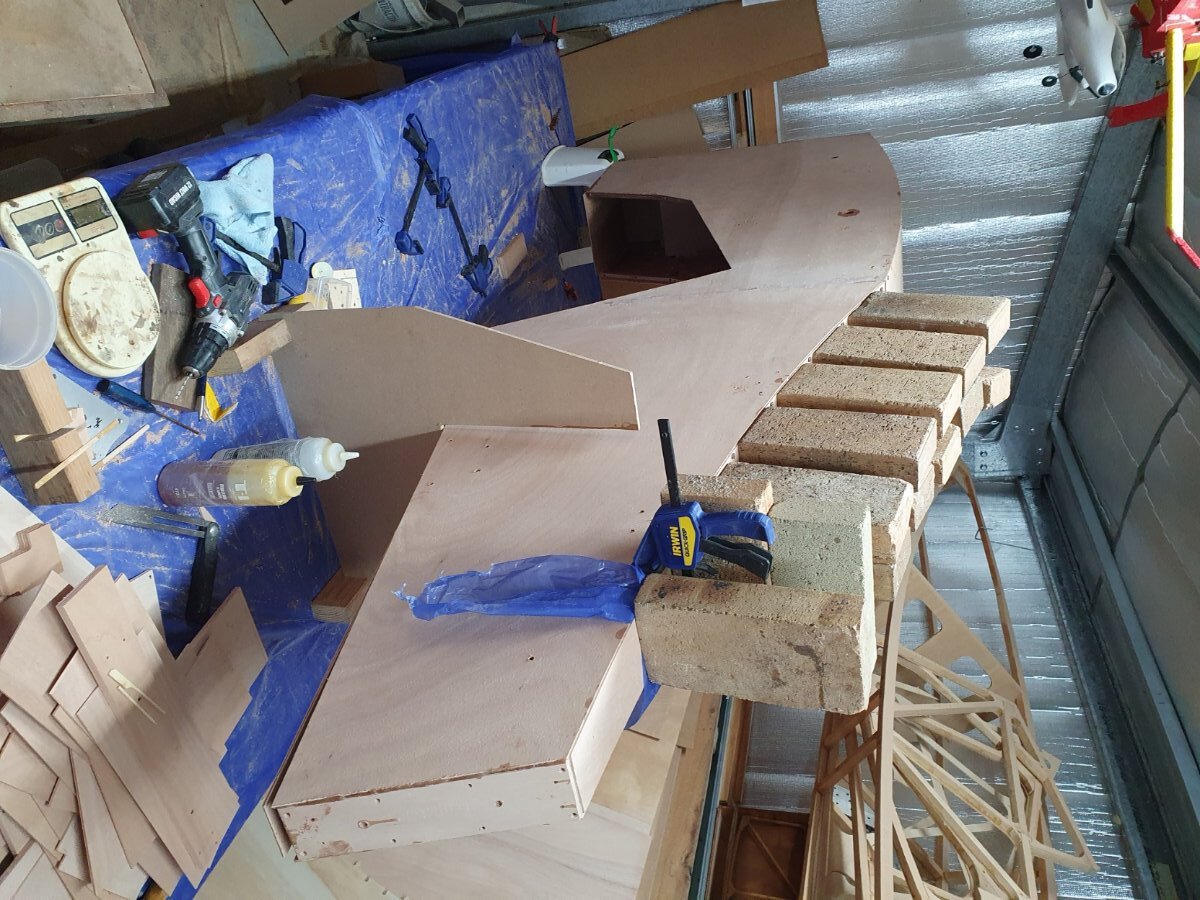
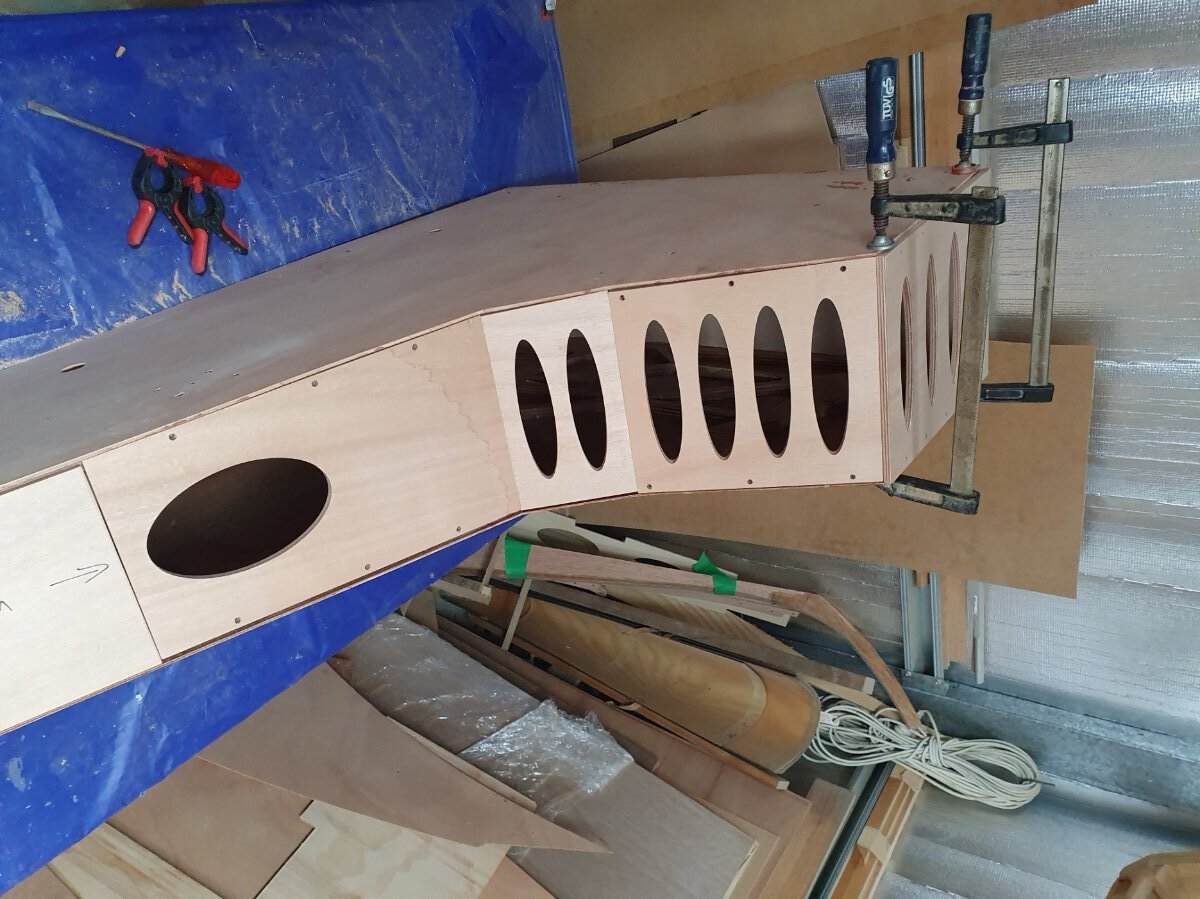
Hi, Please excuse the side-ways pictures, but until I figure out how to rotate pictures, you will have to stand on your head to see them properly. Here is the airframe bonded to the skin. I mounted both sides upside-down in their cradles, so that I could fit the belly. As you can see, I favour a concave aft section. With the assistance of my trusty collection of bricks, I fitted the front half of the belly, applied lots of West System epoxy and waited for it to cure. Followed by the aft section Back on it's feet as it were, I trial fitted the outer bulkheads (Cowl base, both control panels, seat seat back and turtledeck. Total construction time so far: 16 hours This does not include all the time sitting round waiting for epoxy to cure, or sitting at the laptop re-drawing pieces or actually cutting the pieces.
-
Hi Scott, This is something I didn't think of doing. Excellent idea. Fortunately, I have plenty of pieces from two "failed" attempts at building the fuselage, forcing me to return to the CAD package, redesign pieces and start again. I'm using West System BTW.
-
Hi, Using a Generac 990cc prepared by Valley Engineering. 50hp, 53kg Duncan
-
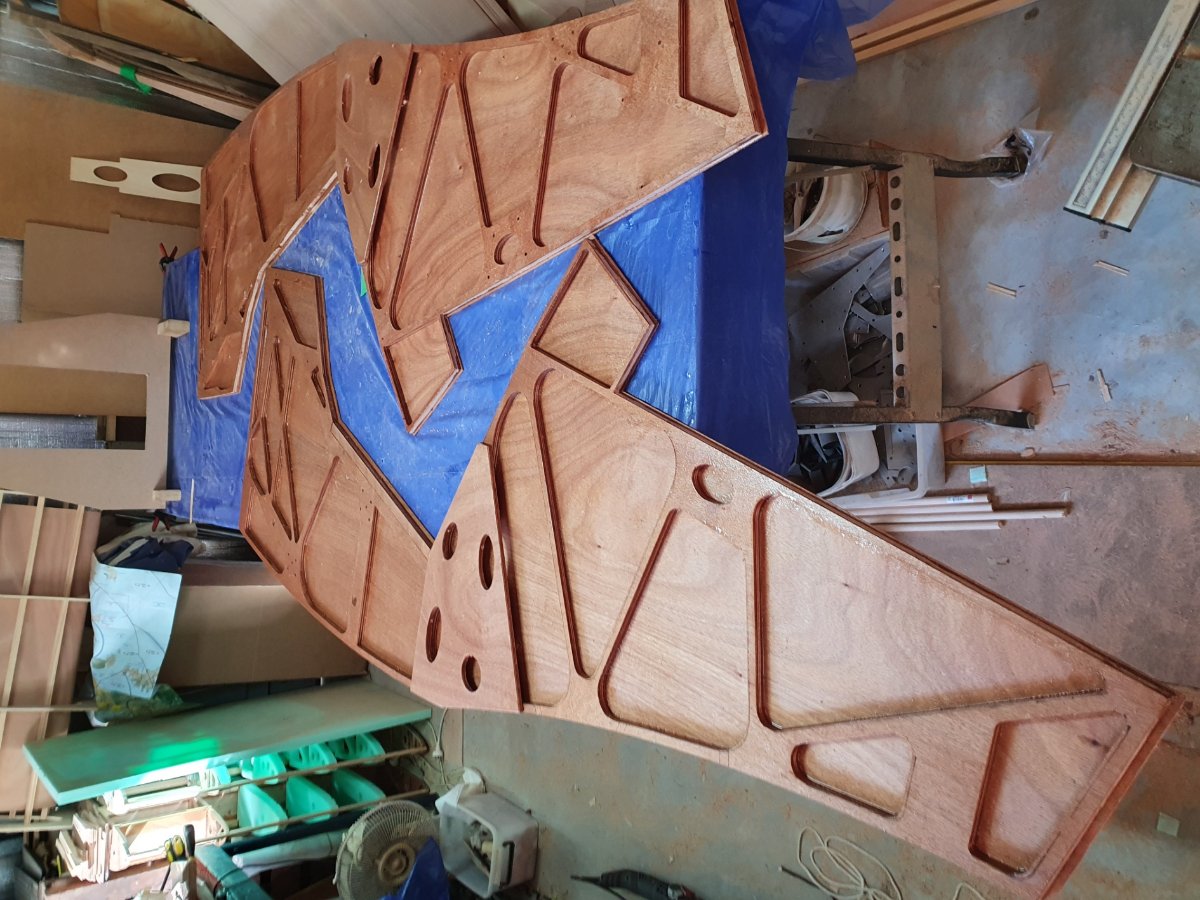
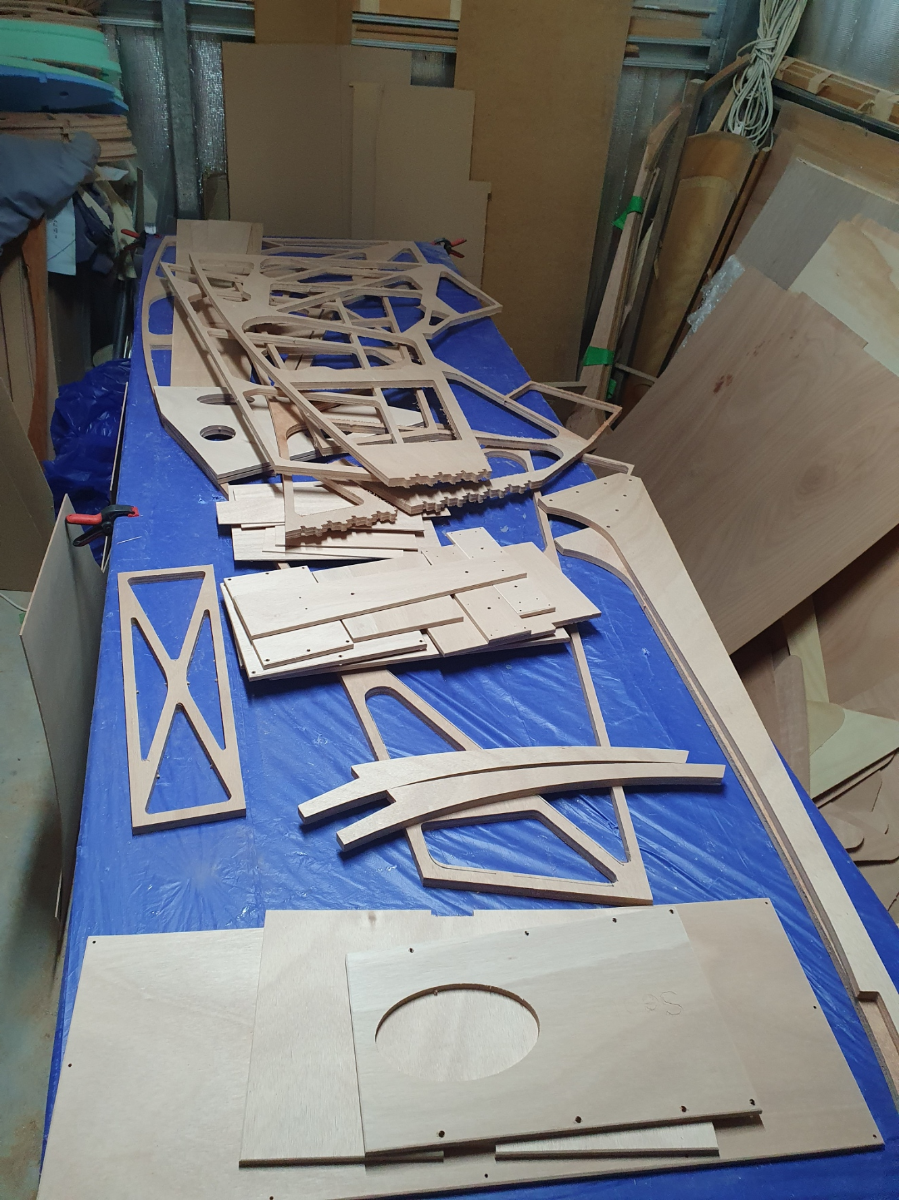
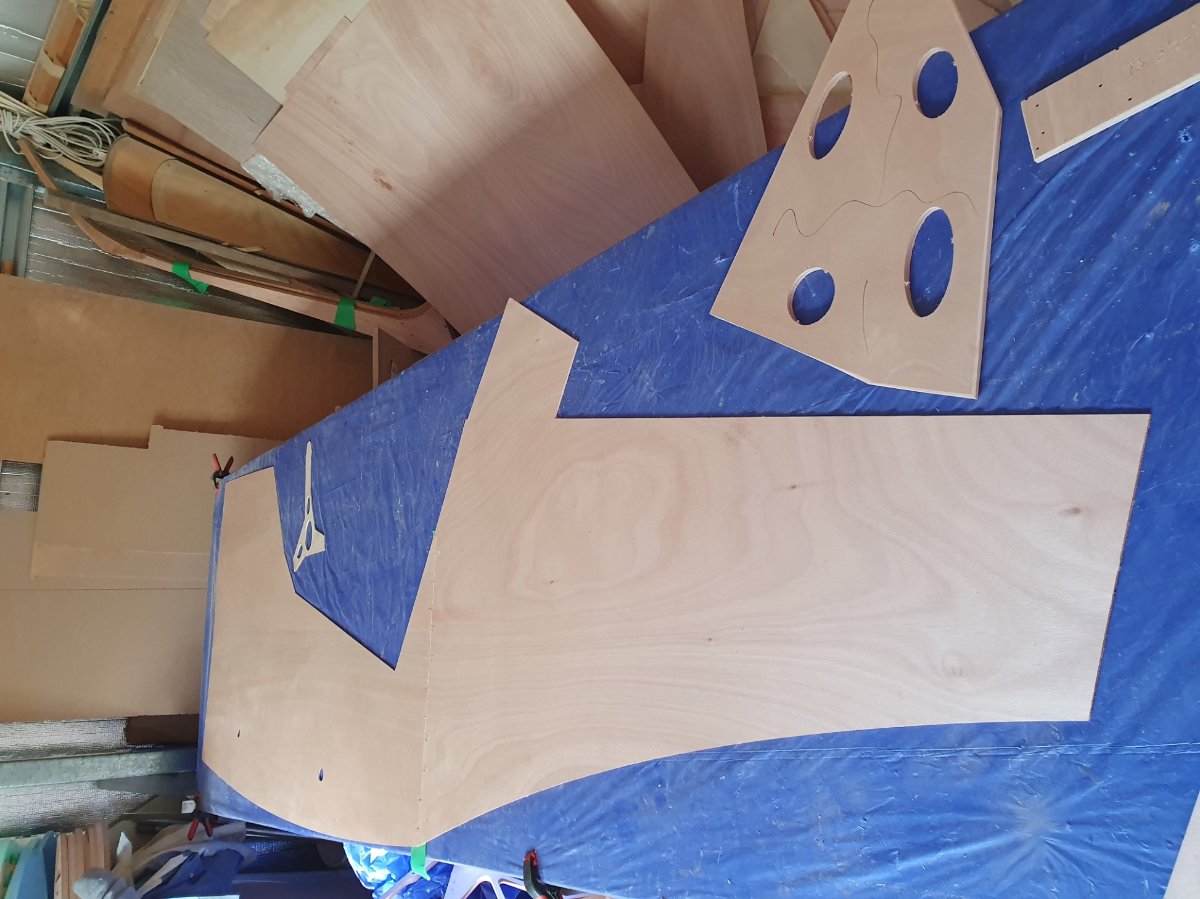
Hi, After much deliberation, and not a few false starts, I decided to build a Flying Flea. Not one of the usual HM-varieties, but a brand new design, which I'm calling the "Fleabike" because the pilot sits a-straddle the airframe, just like he would in a bike. Of course, there are other designs using this concept, like the Aeromax, the Airbike and so on. But this one is a Flea. The airframe consists of CNC-cut Gaboon ply with a 3mm Gaboon skin. Having a cnc-router helps, of course. These are all the airframe pieces. When all put together, I'm hoping it will look quite attractive. The plane is very small, but no smaller than the HM293. Construction is very simple. Just line up the correct parts, add epoxy and set aside. The skins are jigsawed together (my router can only handle half a sheet) and clamped to the airframe. And before someone asks, the odd-shaped pieces in the photo below is the seat doubler, to address the potential weakness at the point under the pilot's bum. Next job is to bond the firewall and the tailstock, so that the two sides can stand upright. Then invert so that the two bellies can be bonded. The bellies are crucial to getting the fuselage square. Once back upright, the addition of the final bulkheads completes the construction of the fuselage. There are 12 bulkheads in all (Firewall and tailstock of course, the two bellies, six "external" bulkheads (cowl base, two control panels, seat, seat back and turtledeck), and then four internal bulkheads. But they all fit together quite easily, and with each successive bulkhead, the squareness of the fuselage is enhanced, as is the stiffness of the fuselage, which is essentially a pretty-shaped box. I've actually completed the fuselage already (five days of building, and about 20 hrs of actual construction) the rest of the time was spent waiting for epoxy to cure, and on the computer finalising the wing design. However, I can't find a way to rotate the images on this forum. If someone can help me out with this, I'll post the remaining pictures. The forum seems only to like landscape oriented photos, and most of mine are in portrait. That's a pity. I start on the wings tomorrow. Duncan