
Marty_d
-
Posts
4,931 -
Joined
-
Last visited
-
Days Won
71
Content Type
Profiles
Forums
Gallery
Downloads
Blogs
Events
Store
Aircraft
Resources
Tutorials
Articles
Classifieds
Movies
Books
Community Map
Quizzes
Videos Directory
Posts posted by Marty_d
-
-
What's Lockheed doing assembling Airbuses?
(I know, it's just a joke, but you have to have internal consistency)
-
 1
1
-
 1
1
-
-
4 hours ago, red750 said:
Is this within specs?

Why not? Home made blind.
-
1
-
-
Thanks RF - Clear Prop were basically the same price, so went with Ian.
-
2
-
1
-
-
Clear Prop sell them. I can certainly fabricate a box/panel to mount them in. I assume I need 2 each of the headset jack and microphone jack?
-
1
-
-
Thanks Bob.
Microair M760, which I don't think has a built in intercom (happy to be corrected!)
I'd like to put the jacks on the centre front of the baggage area, but having just installed the seat cushions there's no room between them there. So will have to be on the baggage area "floor" just aft of the seats. I definitely want them in the middle as opposed to the outside, as you said for ingress/egress you're not getting tangled in leads.
-
Hey folks,
I need some advice on what I need for intercom & jacks etc.
I have a panel mounted radio, and have run 4x good quality audio cable from panel to behind the headrests.
My wife asked what I wanted for Xmas, and I said "an intercom" as I believe that's needed too.
So... guessing that I need to get a double jack set for each seat mounted behind the seats for the headsets? And they go via the cables to the intercom which is connected to the radio?
Any advice appreciated.
Thanks!
Marty
-
I'm not aware that there's any difference in firewall angle in the 701.
Plans just require the thrust line to be 3 degrees right of centerline, which I did by designing the engine mount to incorporate it.
I believe the bed mount plans also incorporate the 3 degree offset, come to think of it. So the firewall would be the same.
-
1
-
-
Playing devil's advocate here, I can imagine a future with pilotless RPT.
As Nev said it's been possible for years, and the US has been flying drones over the middle East from Nevada for years too.
It's a whole lot easier than trying to make driverless road vehicles as there's not many situations in the air where you have to decide whether to hit a streetlamp or that kid chasing his ball.
The emergency situations where you need a pilot are the real issue (thinking QF2, Hudson river landing) and of course if you lost all electrical power you're stuffed. And the possibility of being hacked of course.
But on the positive side you avoid suicide by pilot (GermanWings, MH370) and some pilot error situations.
You would have to have a type qualified pilot in or near a fully connected simulator but they could possibly be backup for several flights simultaneously.
Not saying I'd be keen to board a flight without a trained human at the pointy end, but just saying it may well happen.
-
1
-
-
Hi Kyle!
While I have no particular opinion on your two questions, I wanted to wish you luck with your build.
We love seeing progress photos!
I'm scratch building a CH701, I picked up a round mount second hand - but probably would have built the bed mount if that hadn't been advertised.
All the best!
https://www.recreationalflying.com/forums/topic/28196-marty-ds-ch-701-build-log/page/31/#comments
-
1
-
-
But the reason the engine quit was lack of fuel. With a 20min reserve that both tanks feed into you get a flashing light on the panel if there's air at the top.
So you've got 20 minutes to find somewhere to land with the engine going.
-
1
-
1
-
-
The point of the reserve is so you don't go down.
-
3
-
-
Yep I can imagine the fan stopping and the wheels spinning just after takeoff...
-
2
-
-
12 minutes ago, facthunter said:
Does the Fan propel it on the road? . Nev
You have to hunt for it, but from their FAQs - In Drive Mode, the gas engine is connected to a generator that directs power to an electric motor that powers the wheels.
When you transition to Flight Mode, our proprietary Skybrid™ system automatically changes from wheel power to prop power, and the wheels are automatically disconnected after takeoff.-
 2
2
-
-
Can I just ask, if people want to know the rules, why not ask CASA or Home Affairs directly and ask for the answer by email so you have it from the horses mouth?
Forums are great for general information but if you want to know a specific legal situation then it makes sense to ask the department overseeing enforcement of that rule.
-
1
-
 1
1
-
-
She's got lots of Sav bits in her but I hesitate to call her MaZenSav.
-
2
-
-
3 hours ago, skippydiesel said:
Polycarbonate: WARNING - Will react badly to almost all hydrocarbons. Be very careful that you don't spill/splash petrol on your windscreen or use any substance containing hydrocarbons. If in doubt don't use it.
Yeah fuel spills are a big worry especially as there's a top window as well and the wing root skins fair down onto it. So any fuel spilled will go there.
I've been thinking that perhaps I should put a gate on the first full rib to stop any leaks from getting past it, they can just run to the leading or trailing edge and drip to the ground.
Thoughts?
-
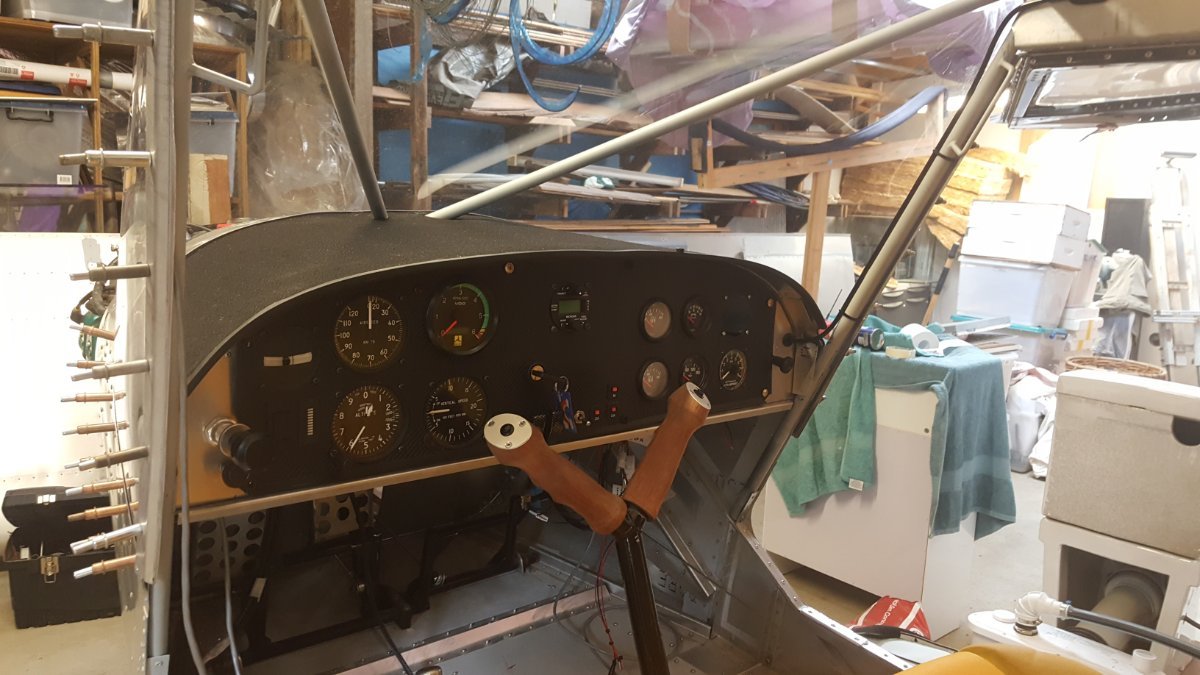
I've done a few things in the last couple of weeks. Bought some hose clamps (thanks @skippydiesel for the Icon 35 advice, they fit perfectly) so the cooling system is now all hooked up.
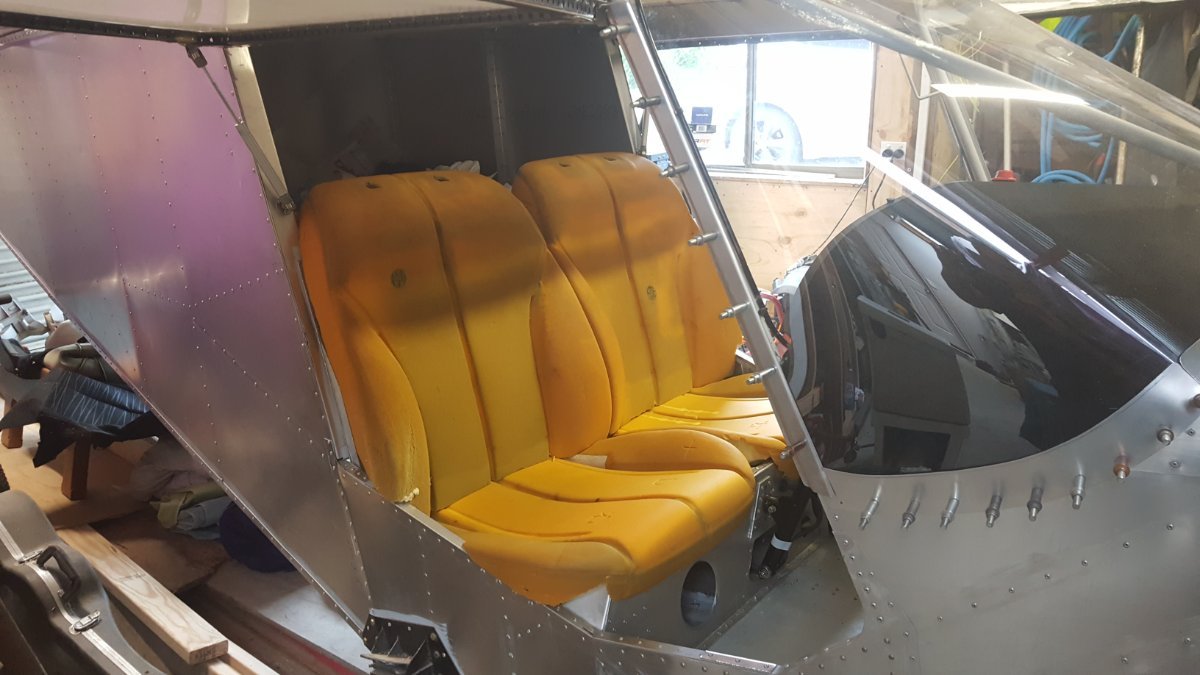
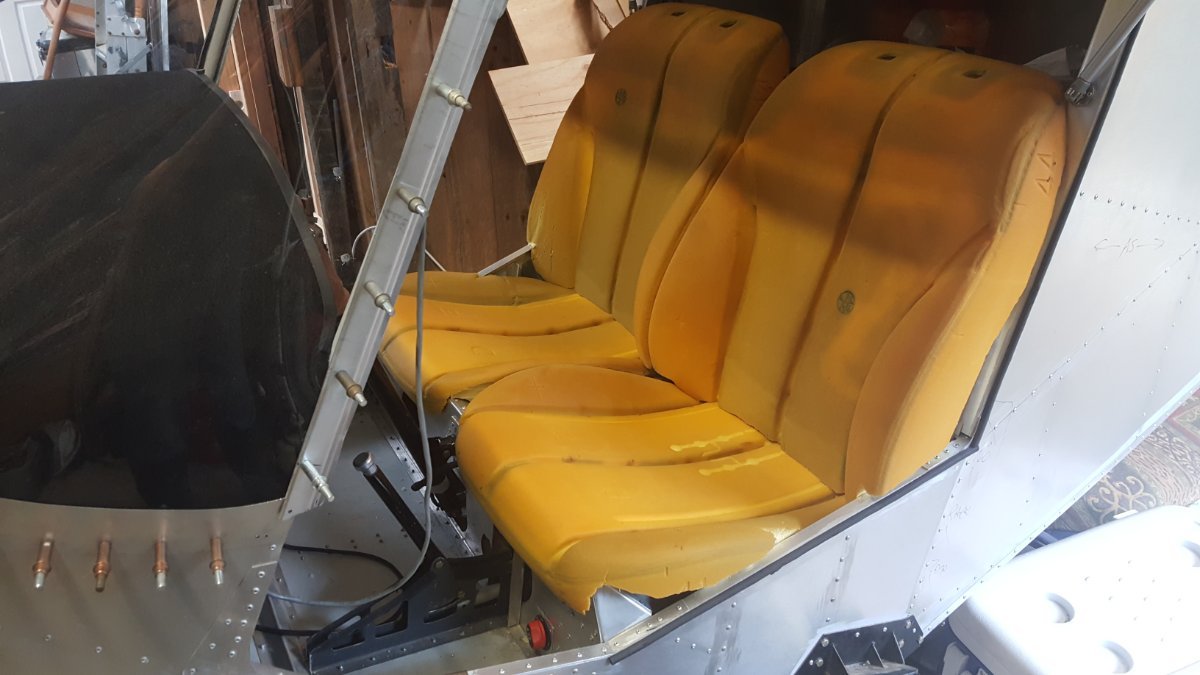
Started thinking about seat cushions and seatbelts. I picked up a couple of front seats from a written off Mazda 2, removed the frames and covers and went to work with a breadknife. Quite happy with the result both look and feel, so now "just" a matter of re-covering. Shouldn't be impossible as I have the original covers as a pattern. There's a couple of rips in those and they're a bit boring in colour so I can't really reuse them.
Also glued on the felt cover over the top of the dash, looks nice and neat now.

-
4
-
-
17 hours ago, facthunter said:
The Parliament in Australia INCLUDES the Honourable members in His Majesties LOYAL opposition. Nev
I think you meant "Horrible"
-
 1
1
-
-
-
Well, we can all bitch and moan about various government services not sharing your ID with each other, but the simple fact is that we had a chance to get a national identity card in 1985 - but due to some legislative flaws and an opposition playing politics, it never happened.
-
1
-
1
-
-
They may equate your fabric covered aircraft with a scratching post...
-
1
-
-
Beautiful job - looks like it just came out of the factory. In a few years will it get some micro-meteorite hits and maybe some Cylon burns?
-
1
-
-
duplicate
-
2 hours ago, skippydiesel said:
Just had a random thought:
Does not our law require that payment for a service/good can not be demanded (illegal) where no such service/good exists (eg QANTAS is facing court over selling tickets for non existent/cancelled services).
I would suggest that ASIC is a non service (in that it provides no demonstrable benefit to the customer - we the proletariat ) and therefore illegal under our system of law.
But the government lawyers would point out that the ASIC card has prevented 5000 serious security threats, none of which you can know about because of national security.
-
1
-
 1
1
-
Marty d's CH-701 build log
in Zenith
Posted
Over the xmas break I finished the last bit of concreting - a ramp in front of the shed - so now the plane can finally leave the womb!
I went to pull her out the other day - racking my brains to think of a flat spot on the property where I can set up to put the wings on. When I got the main wheels on the flat bit outside the shed I realised the wings would fit there, so she didn't have to go any further.
I struggled a bit with the left wing, the skin near the root still needs a bit of trimming and the cabin frame bracket is a REALLY tight fit. Will have to get her out again next weekend if it's sunny and try again.
Also need to make another wing support for the other side, which will be taller as there's a drop off after the concrete.