
rmorton
-
Posts
290 -
Joined
-
Last visited
Content Type
Profiles
Forums
Gallery
Downloads
Blogs
Events
Store
Aircraft
Resources
Tutorials
Articles
Classifieds
Movies
Books
Community Map
Quizzes
Posts posted by rmorton
-
-
Indeed they are but I found this one rebuilt by one of the few people I would trust to fly behind.The UK?Aren't Rotax engines available from Austria any more?
-
Hi Thomas greta to see the progress. I am finally getting back to the important things in life and hope to tart the wings. Your bubbles look a bit worrying as oil is clearly getting past the seal. Have you tried lightning the Allen bolt you can see behind the piston? I read you must use a mineral oil bathe are very thin and maybe a more viscous oil may help? Otherwise its a visit to the bank manager and go the derringer route ;)
-
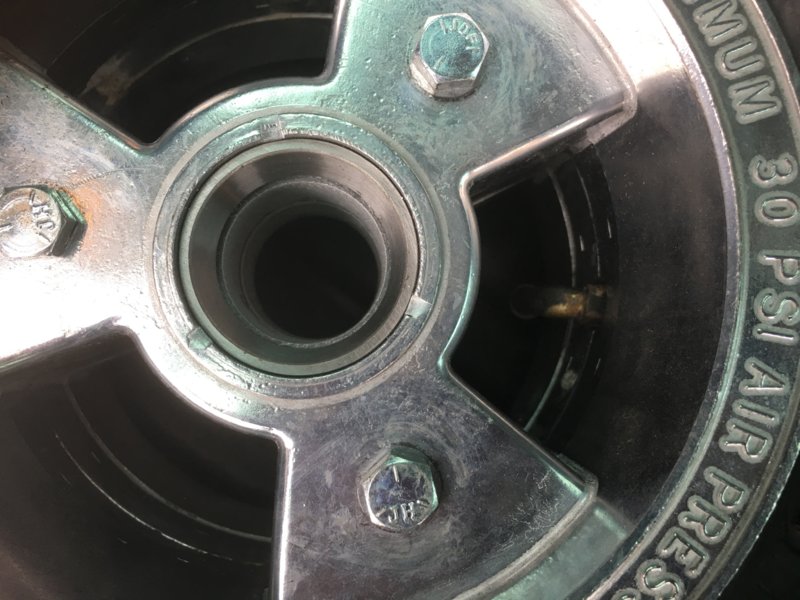
Just to confirm that the advice in the video and given by Thomas is correct. I let the air out of the two tires, repositioned the valve stems to come out at 90 degrees and re-inflated. Bingo both are now easy to access and look the part! I just can't see why the supplied inner tubes were straight valves, hopefully I won't find out once it is all put together.....
-
 Yorkshire air museum. Halifax
-
Hello Rose and welcome, do you have any photos of the Skyfox?
-
Hi Thomas You are absolutely right in two of the pictures you can see that the valve hasn't fully seated so I will try to let the air out and re-inflate. I dont know why but this simple(because someone else did the hard part ) achievement was very satisfying and gives the impression that you have made progress! Also now getting on with the first wing
-
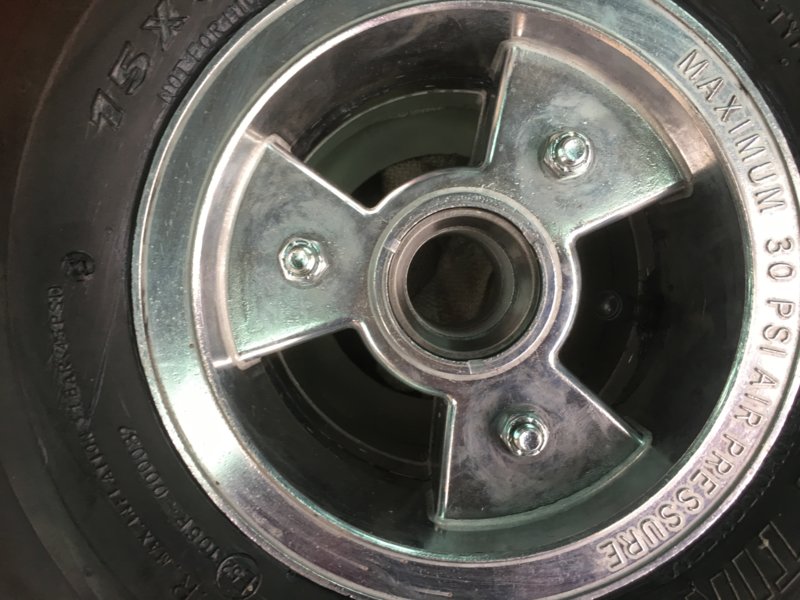
So finally I resumed production! Having made the mistake of drilling the rim and then having to get the hole welded (thank you Paul G for a brilliant job) I finally went to the tire specialist and had new inner tubes with 90 degree valves and the supplied tires assembled. Total cost for three tubes and assembly 75 Chfs, which for the work they did was well worth the money. The trick as stated here seems to be to cover the whole of the wheel with lube (a sort of black soap in this case) Press one half of the wheel into the tire and then set the valve in position with the inner tube stuffed into the tire. Add a small amount of air so the tire takes shape but only just. Then wiggle the second half of the wheel into place and insert the bolts and finger tighten the nuts. If needed add more air so that the inner tube doesn't get caught between the two wheel halves. tighten progressively the three nuts and check for pinching. If needed add more air so the inner tube moves clear of the gap. Repeat until the two halves are tight, then jack up the air to full pressure. Step back and feel good that at last it looks like a real aeroplane!!! :) and enjoy.
-
Hi Mark,
thanks for that! It is interesting that I can get Aluprep, which is similar to the Ali bride for 15£ a quart in the UK but here it costs50£ Same story with Aldine :( I did find a powder version and use that to top up the solution when it weakens but in view of the toxic nature I am reluctant to do much more of it.
-
Wow well done you :) I hope you don't mind but the more I look at that the more I want the same colour scheme
-
 1
1
-
-
Your alodineing looks perfect! What acid mix do you use and which alodine?
-
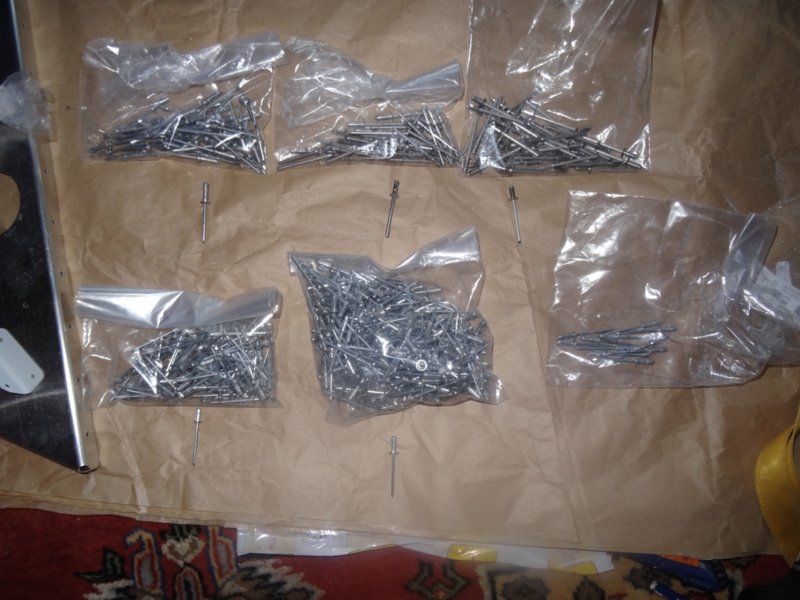
Do the instructions tell you which rivets go where? I am struggling to work it out and can only assume that the stainless goes where you have more than one type of metal.... but I am not so sureRight, excellent dealer email support, confirms rivets I described as steel are in fact stainless steel, and belong in the adjustable seats. Has also supplied a current copy of the seat assembly instructions. End of puzzle.Thanks all for the help...on with the game! -
still very slow progress here though. we are buying a house for retirement and with work etc I have had little time or enthusiasm. thankfully your new photos and words have spurred me on so ten more rivets in place and one step closer :)Good to see you back on track! Now keep going, so we can have our little fly in next spring! -
Such amazing progress and best part is you have chosen the same colours and I want (unless I change my mind) Can you let me in on how to put the tires on the wheels mine won't go on even with unreasonable force. Would also like to know the procedure your man used to prepare and paint the fuselage? Great progress you will be airborne before the winter at this rate, well doneNot to much progress over the last weeks. "90% finished - 90% to go"But my the fuselage was in a paint shop. I was lucky to find a retiered professional who was amazed to paint an airplane.The empty space on the work bench was used to finish the wing tanks.
And did the first wheels in my live. I had to replace one tube, that I ruined during intallation.
Also recieved the rest of the kit including the rotax.
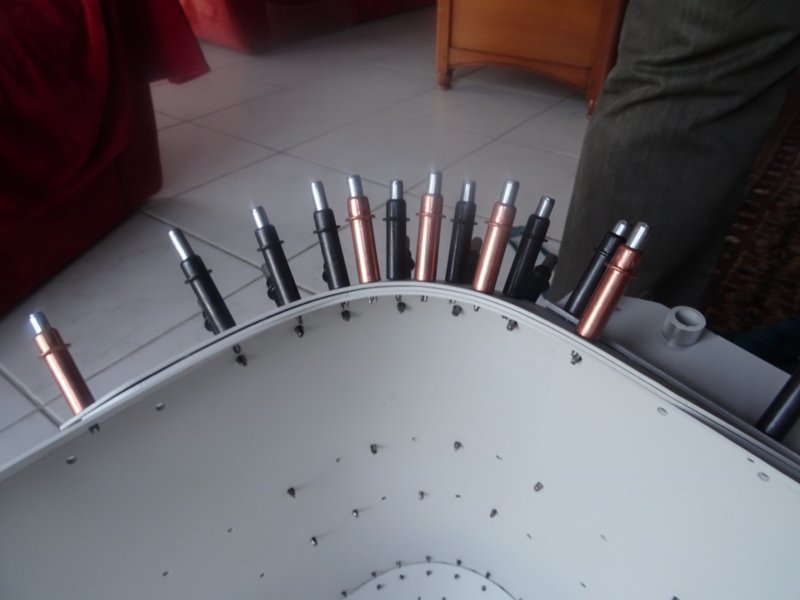
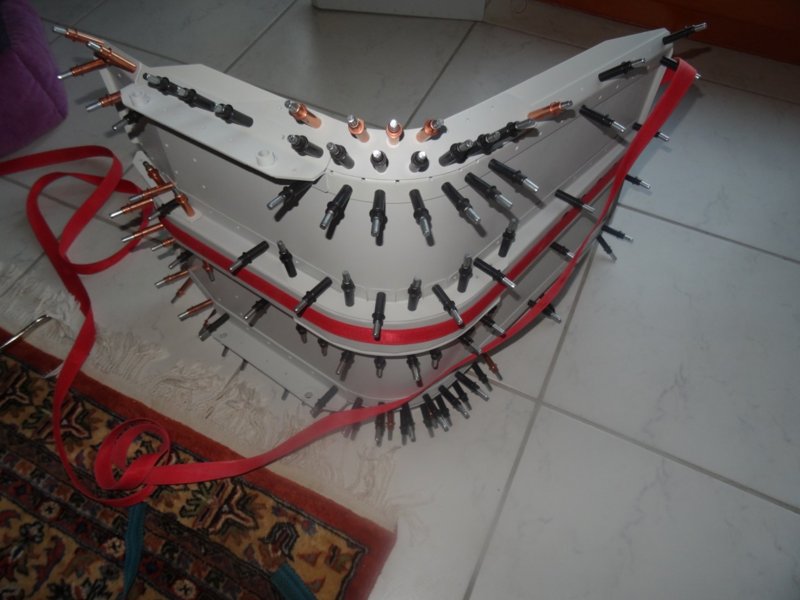
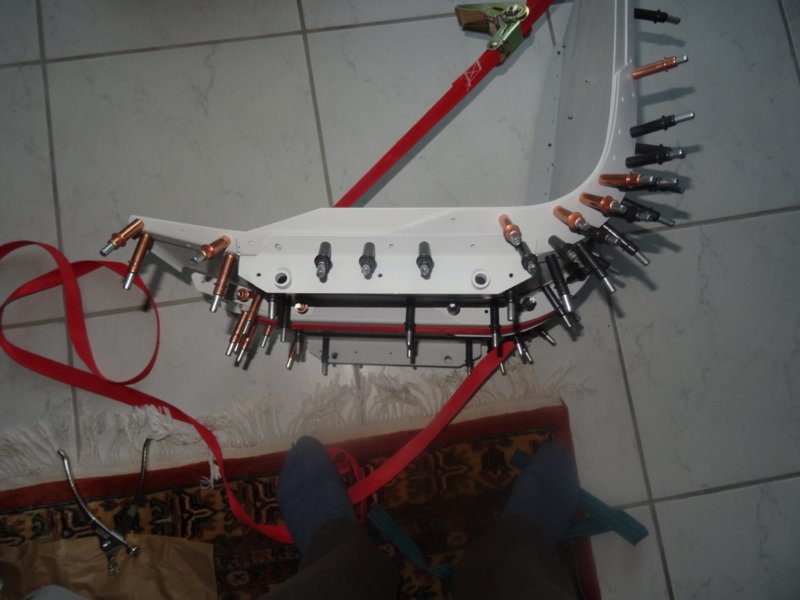
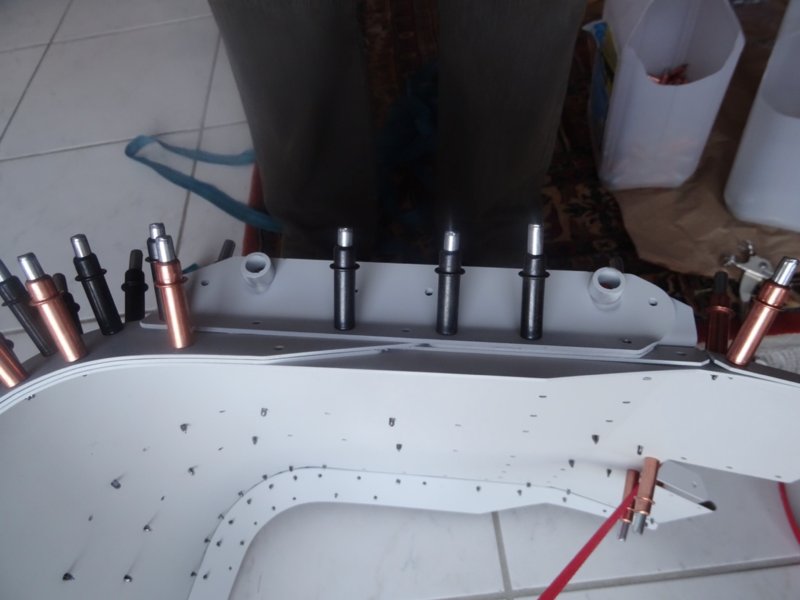
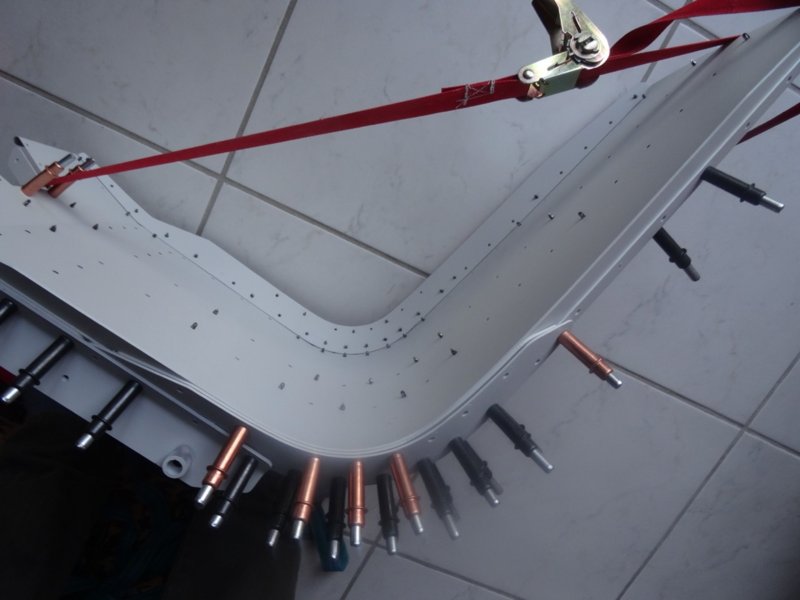
[ATTACH]52254[/ATTACH] [ATTACH]52255[/ATTACH] [ATTACH]52256[/ATTACH] [ATTACH]52257[/ATTACH] [ATTACH]52258[/ATTACH] [ATTACH]52259[/ATTACH] [ATTACH]52260[/ATTACH] [ATTACH]52261[/ATTACH] [ATTACH]52262[/ATTACH]
-
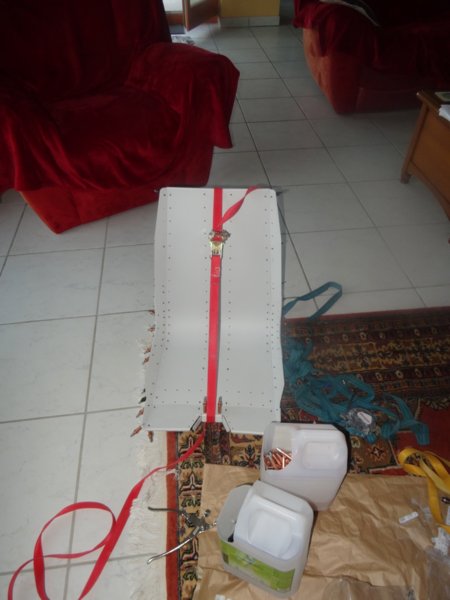
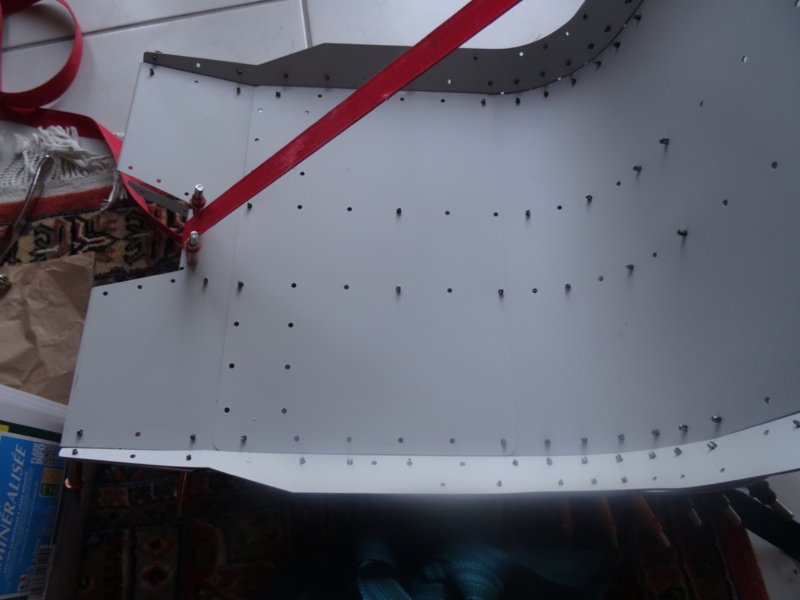
Finally getting on with things after a lazy summer. I now have the elevator, rudder, fin and all flatirons done, just the end caps to put on the rudder and fin as well as the elevator.
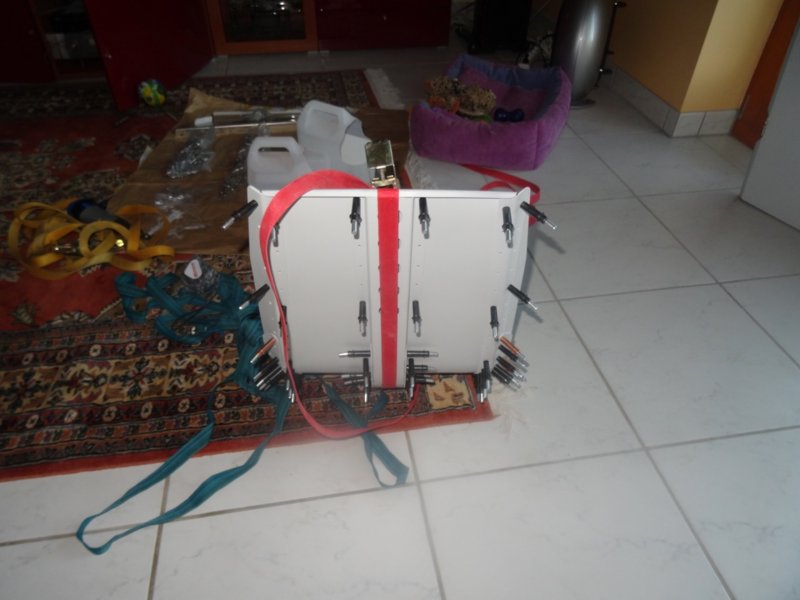
More recently i have been assembling the seat this week and it is quite complicated with some serious bending of aluminium required. The instructions are ok but there is precious little information on what size and type of rivet to use and where. I had 5 or six different types and and still see to be missing one size! Any advice or experience welcome.
-
 1
1
-
-
A lot more than I have done? ;)
-
Just a heads up for those that have recent Savannahs with the new flush fitting filler caps, there is an update that you will receive in the post to revise the vent tube. The kit has two new caps, keys (more keys) and a number of flex tubes and screws to take the vent tube out of the wing skin.
Very impressed with the service .
-
Wll in the end I put them back on the shelf for another day. I will however try again soon as a friend of mine has proper tire lube and a tire press he uses for motorbike s. The idea is to warm the tires, loads of lube and a big lever on the press. I will let you know if it works....$
-
InFrance refurb 912 is 10,000 euros (give or take), A new one is around 17,000 and up. There seem to be many certified end of life engines in Germany that you could then get refurbished but really need to know what to look for. I have seen quite a few here: Helmuts UL-Marktplatz
The whole engine thing is a big headache and there really aren't many options. I like the Motor and some of the more unusual conversions such as the BMW but servicing and parts can be a real pain.
-
Wow! I went through this thought process with drones. Built my first drone from wood and bits off eBay and a basic flight controller. Eventually upgraded to latest GPS then fully flight planned version and was explaining all the great features to a friend. "Yes you can sit at the computer programme it go off and fly anywhere you want taking pictures as you want and it will return and land itself on the balcony, whilst I sit here drinking tea!!??" Hang on why am I doing this? Takes you back to basics if the tools become the objective I have lost sight of why I am doing this.
-
The other advantage here is that you don't have thousands of euros of gear left in the plane waiting to be nicked! I love the Garmin and Dynon displays but I fly to enjoy the view and feeling of freedom not to watch TV and spend my time working through menu after menu. The Extreme seems to give all I would ever need. Did you fit the servos? I heard that part isn't working yet but the software seems to have a basic auto pilot.
-
Fired mine up and the display is excellent even outdoors on a sunny day. It has loads of features (perhaps too many). My only thought is that without the AHARS(?) and compass it is a bit limited if you want it to replace most of your instruments. That said it is super light, well proven and even though I went for the MINI version it is large enough to see clearly. I am starting to think that big glass panels are not for me and I would prefer a dedicated navigation box like the Garmin, my Extreme and a couple of basic backup gauges for AS and ALT.Not crap I love mine. Most other aircraft pilots and owners are also very impressed with them. I would suggest that you do fit a analogue ASI...I find I tend to use it more now just for landings when I pull the flaps on..its easy to see in your periferral vision the white arc for max flap extension speed -
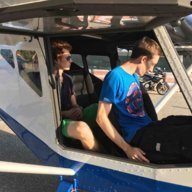
Quietly watching in the wings taking notes and preying that I don't forget when it's my turn ;)
-
Hi Thomas
are you going to fit a parachute? (is it compulsory in Germany?) If so when will you buy it? I am no where near that stage but I am already worrying that I will miss installing something during the build....
-
I guess it depends on the kit, the Vans and Zenair seem to offer the option to buy complete tool kits, whereas the ICP offers some items but all. I have only just started and so far have bought many useful tools some essential such as the rivet squeezer (DIY versions work too) edge roller, and frankly almost anything else I fancy or catches my eye. Then I have also spent money on preparation products paints and corrosion protection some good some not so good. I have already bought the minimum equipment including radio and Transponder. Other major costs I know of :
1 Propellor
2 Parachute (deferred to the end of the build)
3 Paint job
4 Entry fee for hangar space
5 some kind of EFIS/nav device (deferred as late as I can resist to benefit from future developments)
6 Insurance
.jpg.7fa29c84618b91791988e32a1e687ecc.jpg)


 I love mine. Most other aircraft pilots and owners are also very impressed with them. I would suggest that you do fit a analogue ASI...I find I tend to use it more now just for landings when I pull the flaps on..its easy to see in your periferral vision the white arc for max flap extension speed
building my Savannah-S in germany
in Savannah
Posted