

rmorton
-
Posts
290 -
Joined
-
Last visited
Content Type
Profiles
Forums
Gallery
Downloads
Blogs
Events
Store
Aircraft
Resources
Tutorials
Articles
Classifieds
Movies
Books
Community Map
Quizzes
Videos Directory
Posts posted by rmorton
-
-
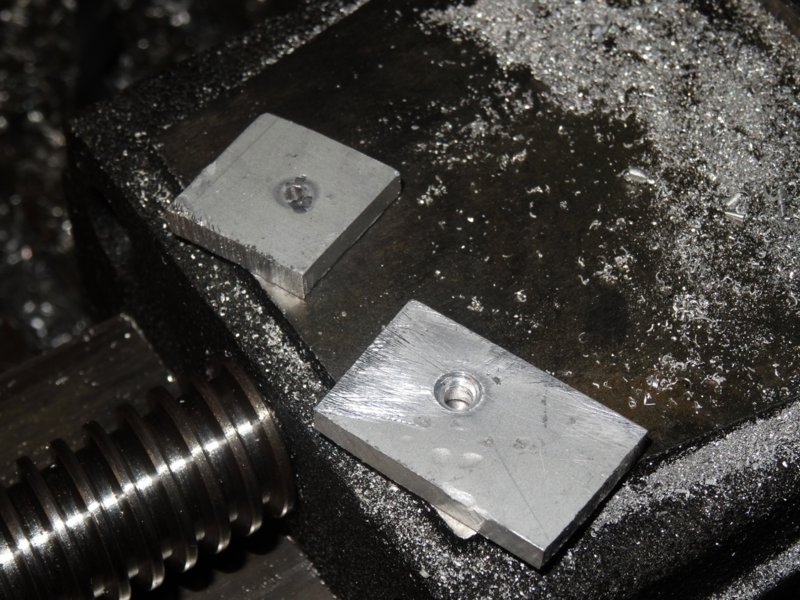
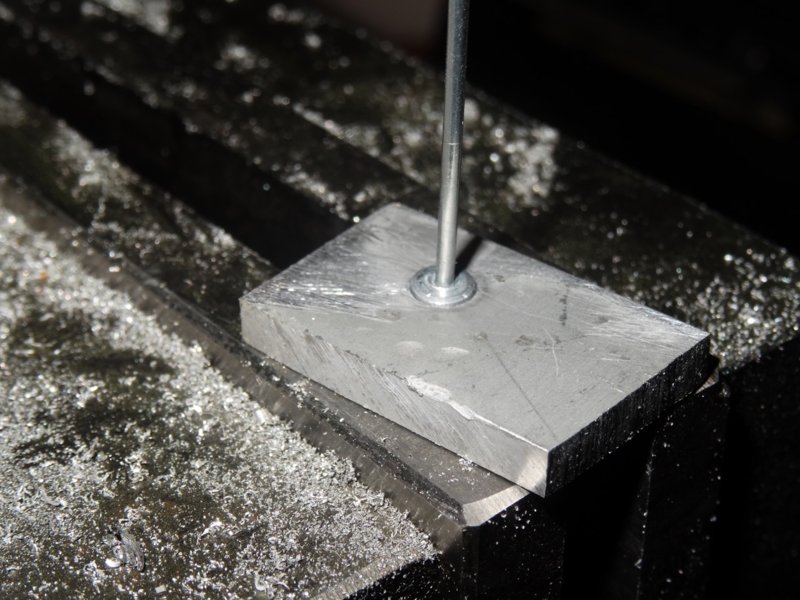
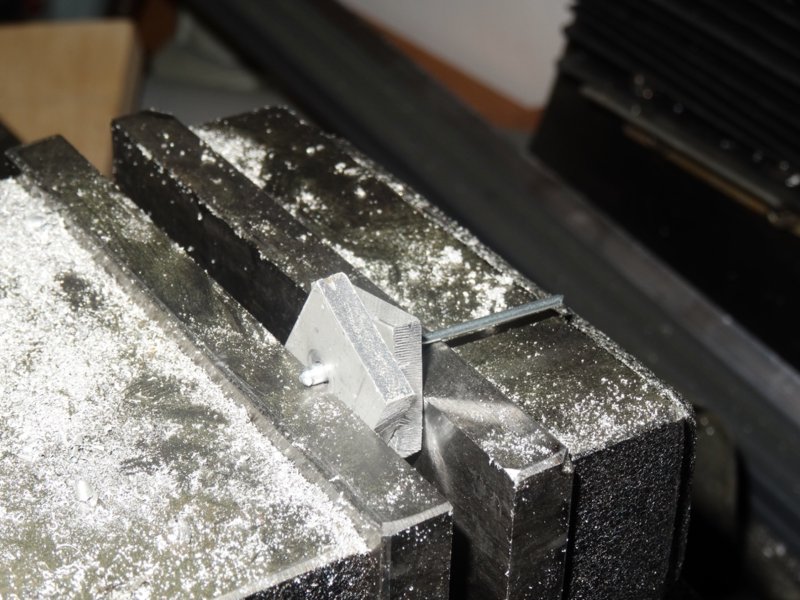
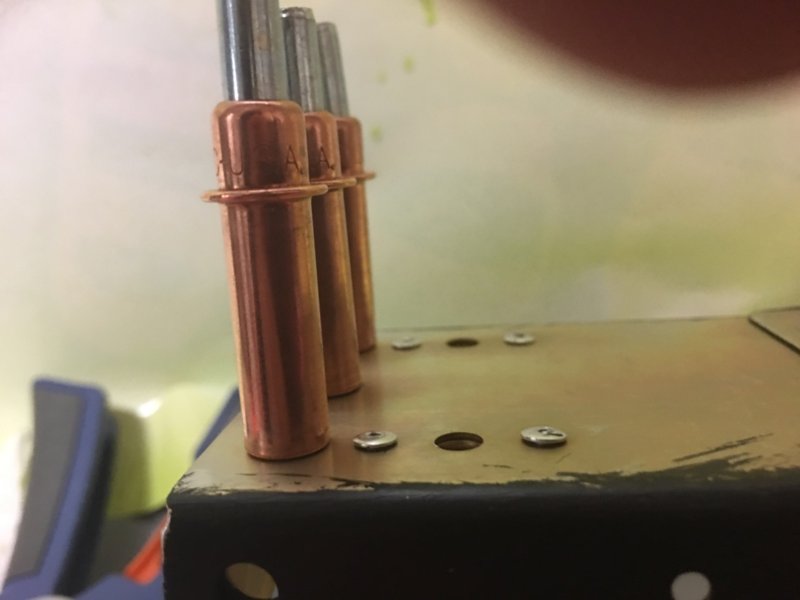
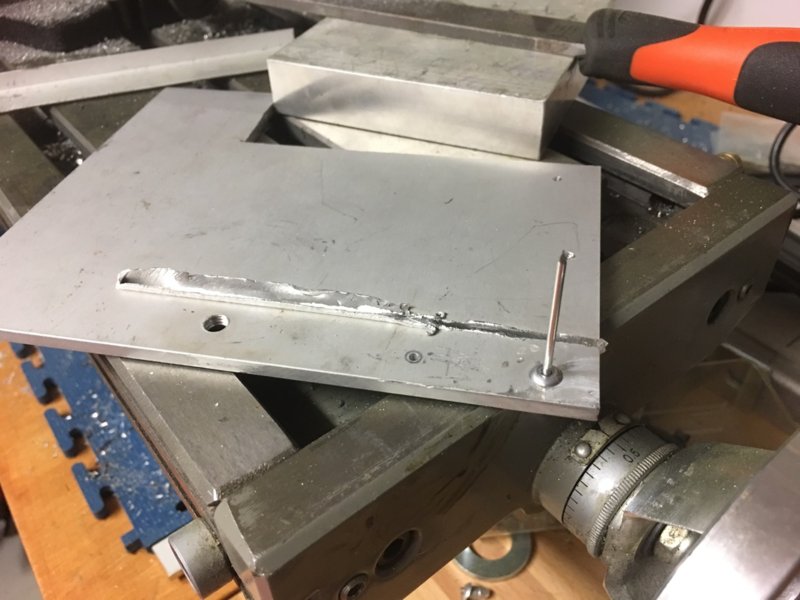
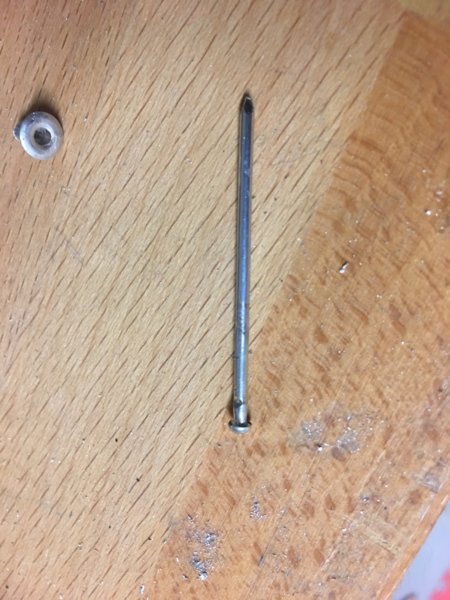
Thanks to Major Tom and Bob for the flat head rivet trick, This is how I did it:
Two small squares of hard aluminium 4mm thick. drill one with a hole just big enough for the rivet mandrel and one with a hole big enough for the rivet and countersink the hole.

Place the rivet in the larger hole and slide the smaller one over the mandrel.
place in a vice and tighten, turn the plates over if needed.
That's it flat head rivets made easy.
-
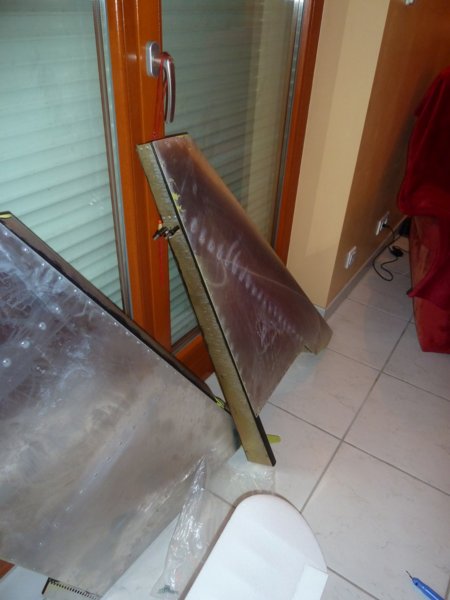
And now the almost finished thing:
-
And some more of the frame :
-
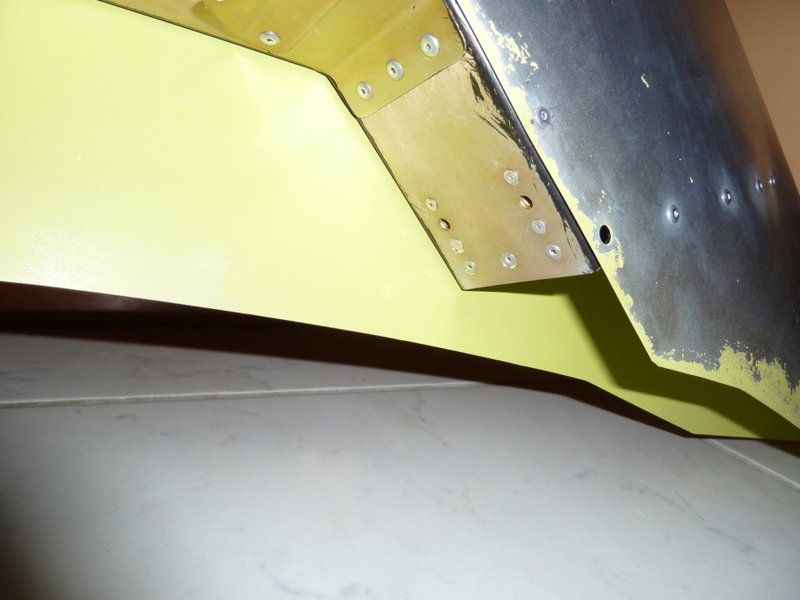
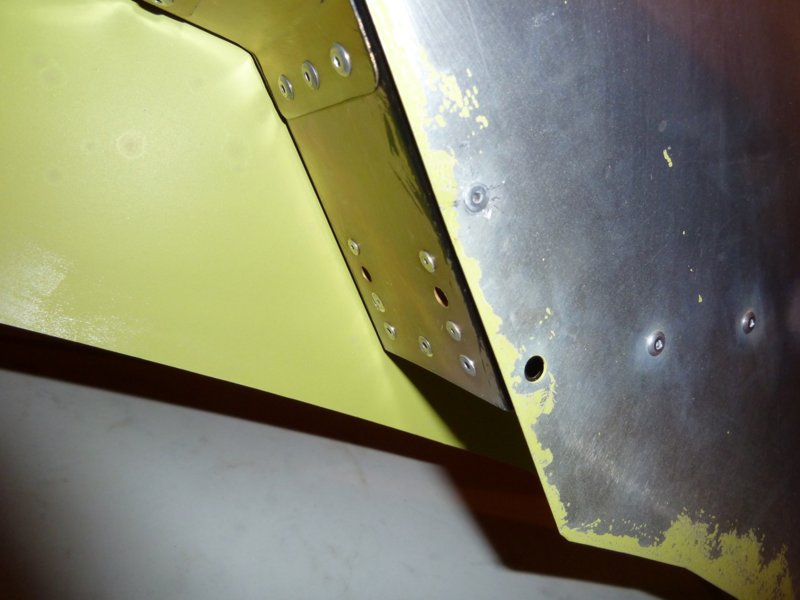
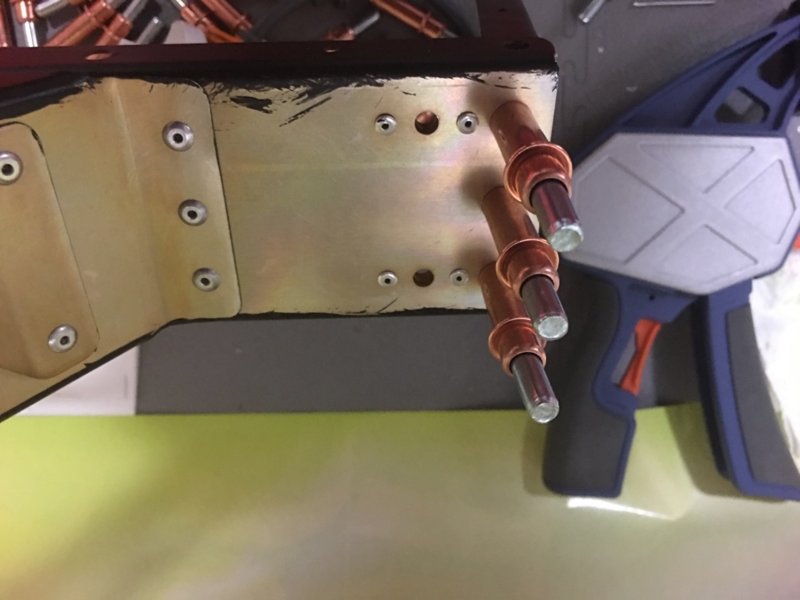
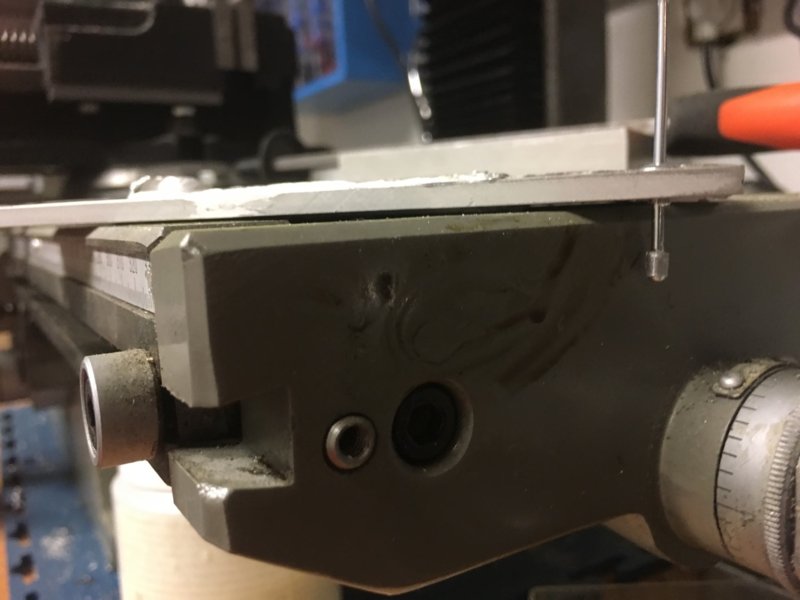
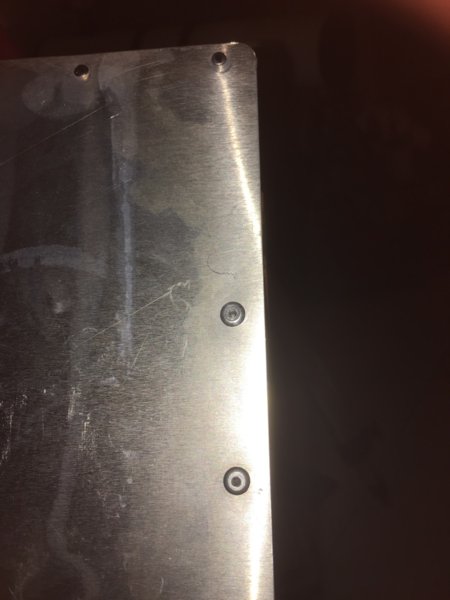
Fin is now complete apart from the rivnuts. The skin is a little wavy and some rivets were a very tight fit but over all it went well.
-
That is understandable, and it is time well spent. I think it is important because the tail is held on the two captive nuts and the face of the spar must be flat against the fuselage former.
-
:) five more rivets to redo! and I had countersunk the holes as best I could.
-
Indeed that is what ICP said to me, "start with the tail its easy and gets you used to how to work" It is true some parts of the manual are difficult to understand or there are important things missing, I have found that the exploded views in the parts catalogue at the back however often show the assembly more clearly.
-
Will pm later.
Thank heavens for Ibob!! I thought of trying something like that and he has already done it. I love the way he has described exactly what happens. Start with enthusiasm, search for parts, enthusiasm drops, get on internet, no result, improvise, finish, elation!
-
Hi Thomas
we are travelling similar paths here,I have completed the rudder and hope to advance the fin this weekend. Do you have a link to the thread on the flat head rivets? I am really stuck with them. I also found it difficult to countersink the spar as it is too thin so I think I will have to redo my two captive nuts at the base of the fin!
I bought a rivet tool from Otelo.com which was reasonably priced, but haven't tried it yet and it only does unto M6! Just found some M8s in a bag,,,..... arrrgghhh
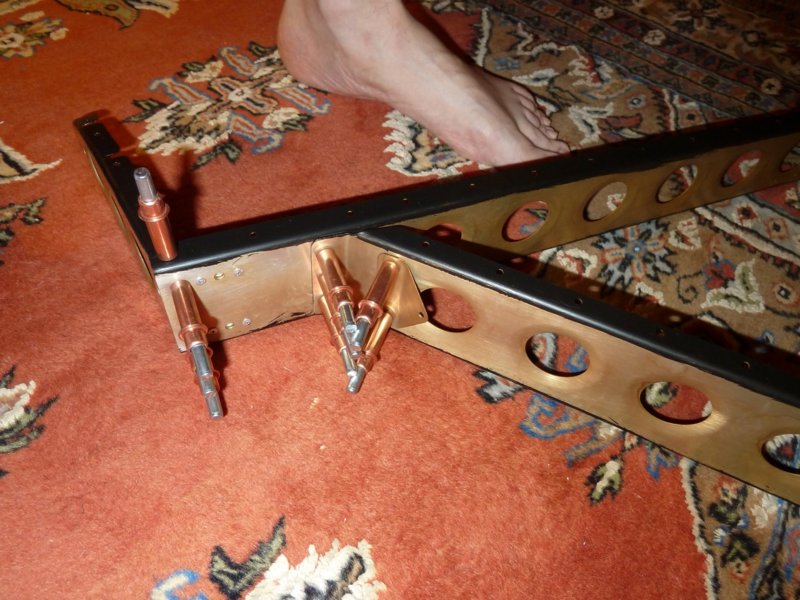
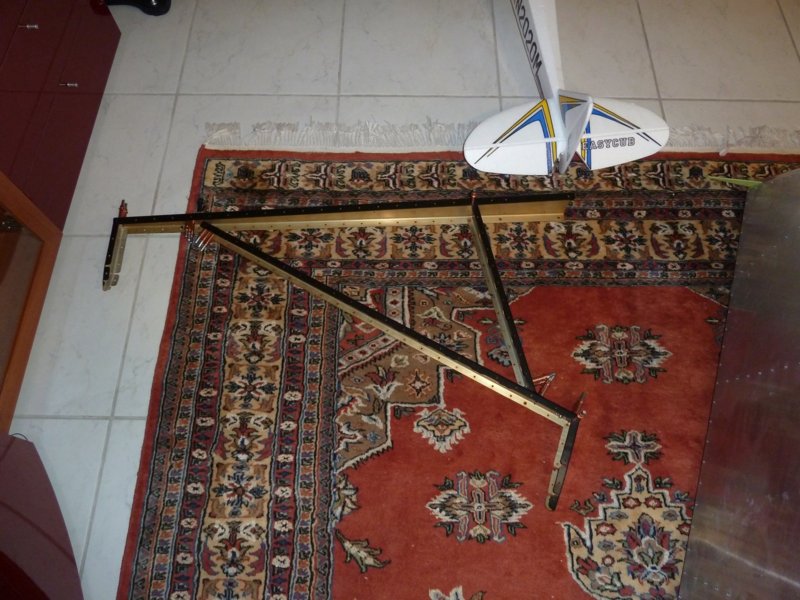
I have also just started to find the parts for the horizontal stabiliser and will attach that next.
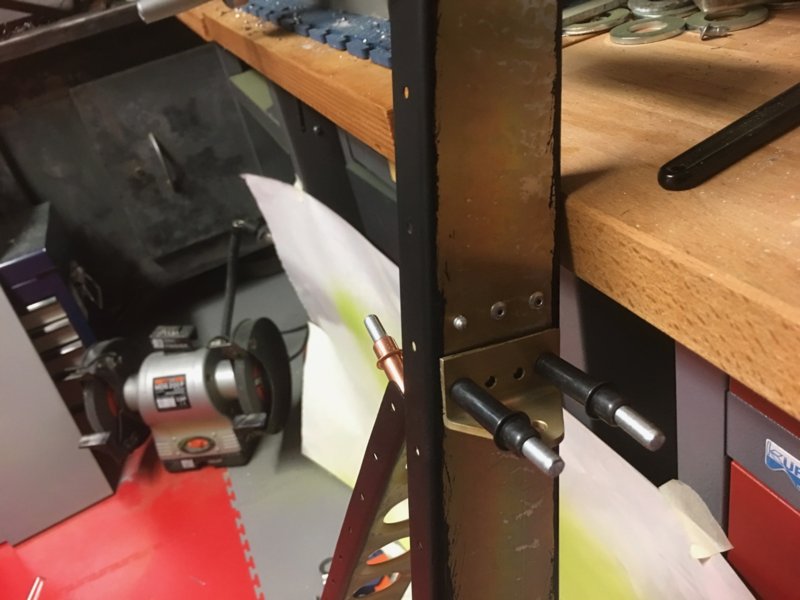
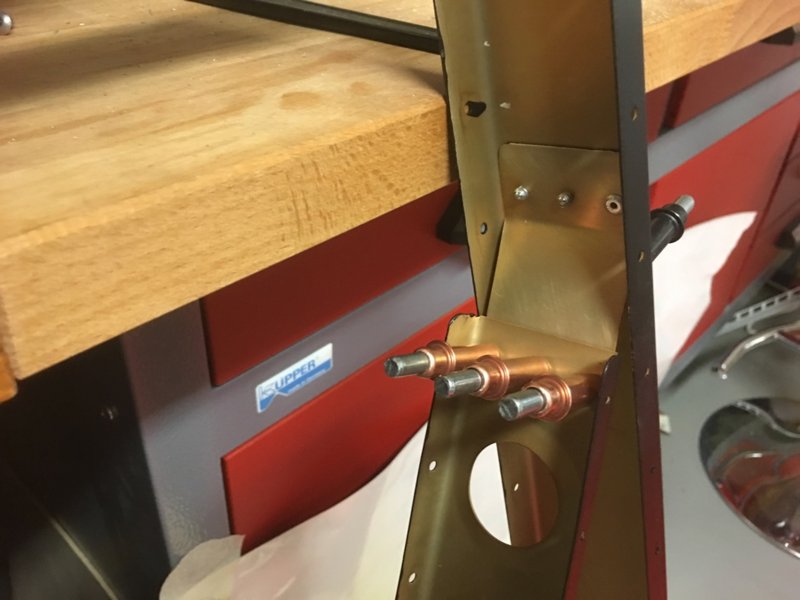
Give me a few minutes and I will take some pictures of that upper bracket and strut connection to see if it is correct.
-
Hi Thomas
you are doing well! What is the trick for the "missing A3 rivets? I countersunk the holes then used ordinary ones but they do stick out a bit! Just received my grey paint so will try it out this weekend. I can't seem to find a good clear photo of the upper hinge bracket either so I am guessing with mine at the moment.
What is your last photo of?
Keep up the good work ;)
-
It looks like you made the same order as me for Browns, except I only ordered one set of cleo pliers and regret that now.
The bent part doesn't look too bad it would be worse if it were a wing skin or rib. You are certainly more organised than me and I am sure when you start will go a lot faster. Don't worry too much about the nuts and bolts they are generally very well marked and as I found last night the "missing M4x10mm hex head bolts were not numbered but in a bag with an Italian name on it. It pays to be patient and if get stuck and can't find something, just leave it for a day or two and then start to search again.
-
No more riveting in the nude for me then, not getting those little blighters in my Feng Shui
-
I didnt realise you had to sweep up! Better get busy
-
 1
1
-
 1
1
-
-
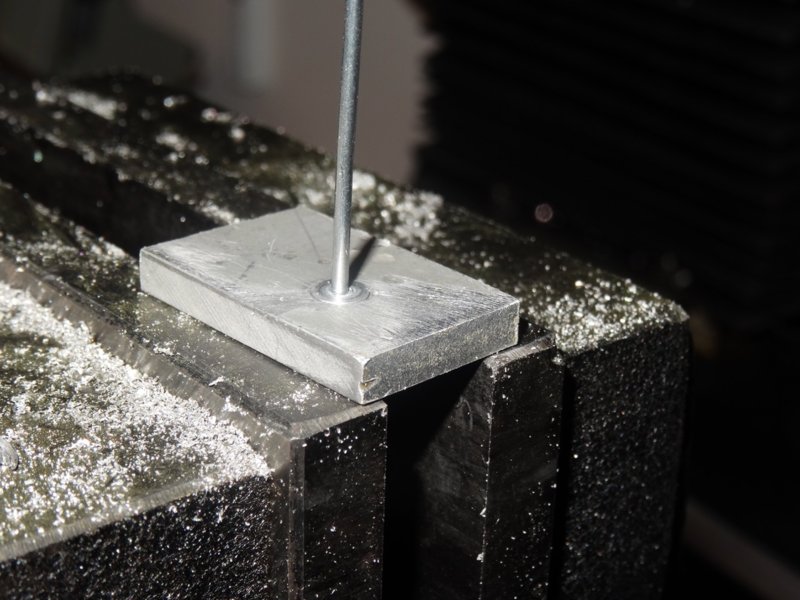
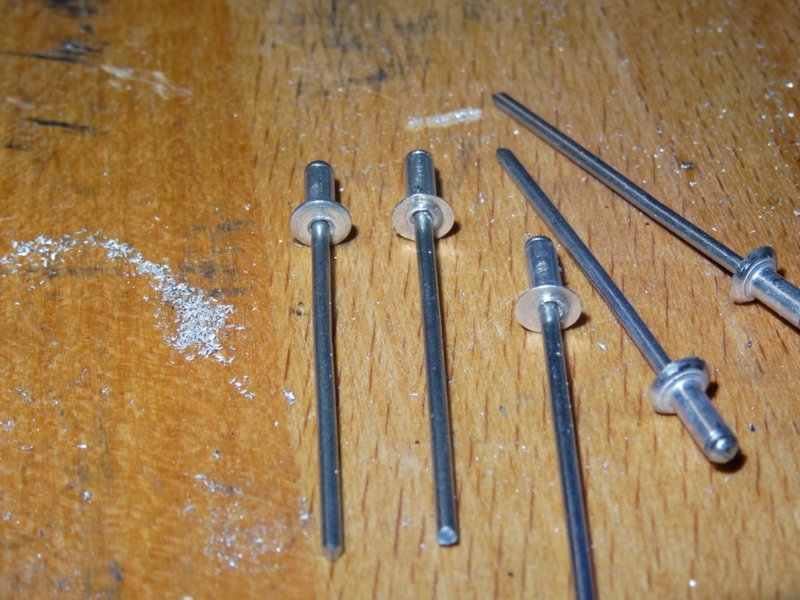
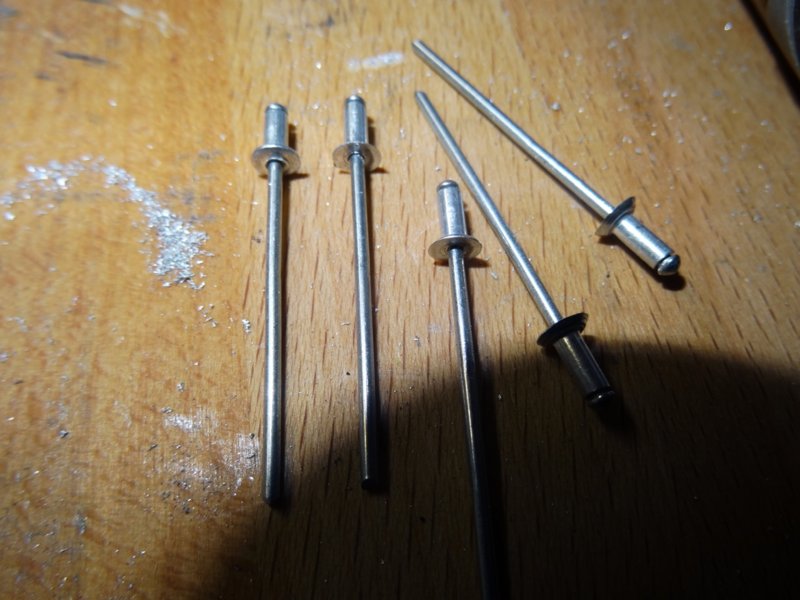
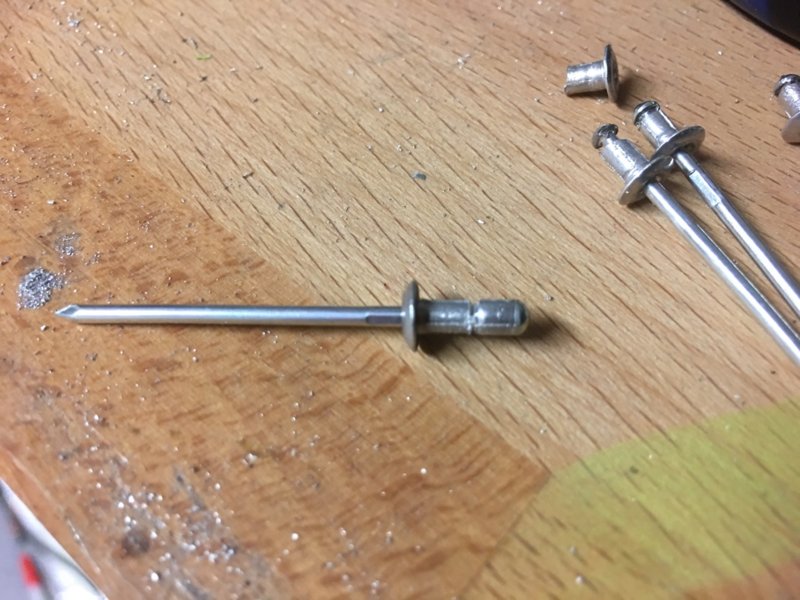
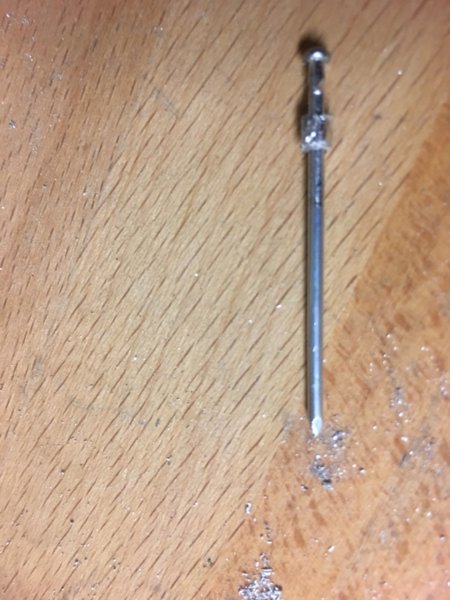
I am making slow but steady progress and have now assembled the rudder apart from the lower skin and one or two rivets that clash along the trailing edge. As suggested elsewhere on the forum you need to "shorten" a few rivets to get them to fit. So I hope the following is useful. (you can buy 6mm long rivets but not round where I live and I couldn't wait for the post)
After a couple of less than successful attempts my preferred method was as follows:
1) make a cut at roughly the length you want the rivet to be, I did this using a razor saw and rotated the rivet, it is also possible to score the rivet with a heavy duty craft knife, but this resulted in several bent rivets for every successful one. Be careful not to cut into the mandrel.
2) I drilled two holes in some scrap metal, one the diameter of the rivet and the other the diameter of the mandrel. Place the rivet and the larger hole and knock out the mandrel with a hammer and remove completely.
3) Remove the waste rivet material from the mandrel with pliers and reinsert the mandrel into the shortened rivet head. It is a good idea to file the head flat where you cut it and then debut the end so the mandrel fits easily in the hole. Leave the rivet head in the hole to support it while you gently tap the mandrel back in place. Be careful not to squash the rivet.
That's it, the only issue I can see is that when the you break off the mandrel you can see the stump in the head of the rivet and in one case it protrudes and needs filing back.
-
 1
1
-
-
It's starting to look good already! In your travels through the list and packets have you managed to find any flat headed rivets? If so where were they? So far that is the most difficult part to find for me. At first I also thought some instructions were missing but so far the only one I really can't find was for the parachute installation kit, but I have a copy from several kind folk on here. That said there isn't a parts list for it and I will have to see if the straps were supposed to be included or if they come later. Good luck
-
Not got that far yet but I am wondering if I should collect the "empties" or just sweep them under the carpet? As I was riveting away on the fin and rudder, I was wondering if it would be any advantage to fill the holes left in the rivet head before painting? Just a thought
-
How far back has that gone Mark? do you have a big gap behind the spinner?
-
I thought the same about the all the thick black plastic end caps when I picked them up, but when I weighed them they were only about 850 grammes so you wouldn't save much compared to the effort needed. For now I have decided to do pretty much everything as standard and work on modifications later, that way I get in the air sooner. I do think that eventually the cowl would be a good weight saver and as you have seen you could do much to enhance the quality of the finish.I dont' worry much about the fiberglass parts. It will work out just fine. Sure, you could make them 20% lighter and/or 20% stronger. But for what? The parts are good enough and not to forget affordable. I don't think it would be worth it to redo the parts using carbon and other hightech. To much work for to little output. There are just 2 pair of parts that I might, just might reproduce in fiberglass. That are the the tips oft the elevator/stabiliser. They seem quite thick and heavy for there size, esp. compared to the superlight alloy skin. I have the stuff to do it lying around, so no extra costs.Or is the weight needed? Could think of weight in the back to balance the plane, if noseheavy. Or to counter vibrations. -
I wouldn't worry about the tires they seem to come like that, my problem was I couldn't get them on the wheel as you need a tire press, so this will have to wait. The rest seems identical to mine but I didn't need the box for the frame. I see you too got the flush fuel caps. Its very exciting and sometimes a little frustrating but definitely worth the effort!
-
Thanks Tucano I will try to find them and if not will have to order some. What type of head are they? I assume the round button type with an allen key
-
Was the second box for the cabin frame? I can't see anything in the instructions for the seat. Cant wait to hear how you get on with the wheels, I am leaving that one alone for now :)
-
What options did you order? I am definitely missing some instructions, e.g. parachute installation kit (kindly provided by people on here) Adjustable seat and seat assembly otherwise it is mostly straight forward. I cannot find the UC04010 Internal Hexagonal Screw M4x10 to save my life! If you find yours can you let me know where they were please ;)In order to check for missing parts and to sort things into chapters I put the manual, sparepart list e.g. into our office scanner.It tock an hour, but now I have a serchable pdf of everyting. At least in theory. Unfortunally the OCR had big problems with things that have no meaning, like part numbers... to bad. It helped anyway. You just have to try an o instead of zero...I started to sort/check parts by the spare part summary. It works, but I allready got 10 parts, with numbers not in the list...!?[ATTACH]48545[/ATTACH] [ATTACH]48546[/ATTACH]
-
There is no short cut to checking the parts and I seriously doubt you can get through the lot in 14 days. So far (and I am still finding bits I thought were missing) I haven't even got through half of it! Still don't hesitate to ask for specific bits you can't find as I may know where to look and vice versa!The Eagle has landed.... the boxes are in perfect shape, no damage.So first step is to check / count / sort the parts. I was told by my distributer, I have 14 days to report any missing or damaged parts. Later on, there would be no warrenty.What is the best way to do it? I was under the impression, ICP would provide something digital to do it. A pdf file could be easily serched. Exel would be great.
How did you do it???
[ATTACH]48515[/ATTACH]
-
While waiting for tools and checks and avoiding preparing bare metal for paint or poison, I decided to measure up and draw the dash of my Savannah so I can play fantasy avionics. I hope you can read the attached files, not sure they are perfect so will need to print them out sometime to check. Hope they are useful. Ok just tried to upload a DXF and a DWG but no idea how? I can email them if anyone wants a copy


SAvannah kit 2 comming home tomorrow :)
in Savannah
Posted
Indeed but thanks to you I was able to do this at all. Sadly having read everything I could on the build of this plane, I seem to have done the typical male thing of just opening the box and having a go, then re-read the instructions! Thanks again for all your posts they have saved the day on more than one occasion already :)