

Kyle Communications
-
Posts
6,669 -
Joined
-
Last visited
-
Days Won
100
Content Type
Profiles
Forums
Gallery
Downloads
Blogs
Events
Store
Aircraft
Resources
Tutorials
Articles
Classifieds
Movies
Books
Community Map
Quizzes
Videos Directory
Posts posted by Kyle Communications
-
-
Hi Winsor68
Thank you for that blast from the past I really enjoyed it...my first glider flight was in a kookaburra off a winch launch at Beaudesert when I was about 18 I think. It was frightening that first time then I did a few other flights over the years until the mid 80's when I went to Kingaroy and ended up with about 80hrs in gliders. It was a great time in my life those days
Mark
-
HI Glasair
It may very well be snorked its just very unusual for a eprom to die thats all
Mark
-
Hi Glasair
If you can get a eprom to me I have a high quality eprom reader/ programmers here if you cant get access to any we use them for radio and other electronic stuff I do here. The original eprom I wouldnt think would have "burned out" . A resistor burning out usually makes it resistance go high that usually makes any voltage drop ....not increase to pop a eprom. Are you sure it is the Eprom? I would more than likely be looking at the power supply to the eprom or some other fault like that
Mark Kyle
-
Mine arrived on last Friday as well..some good flying excursions reports
Mark
-
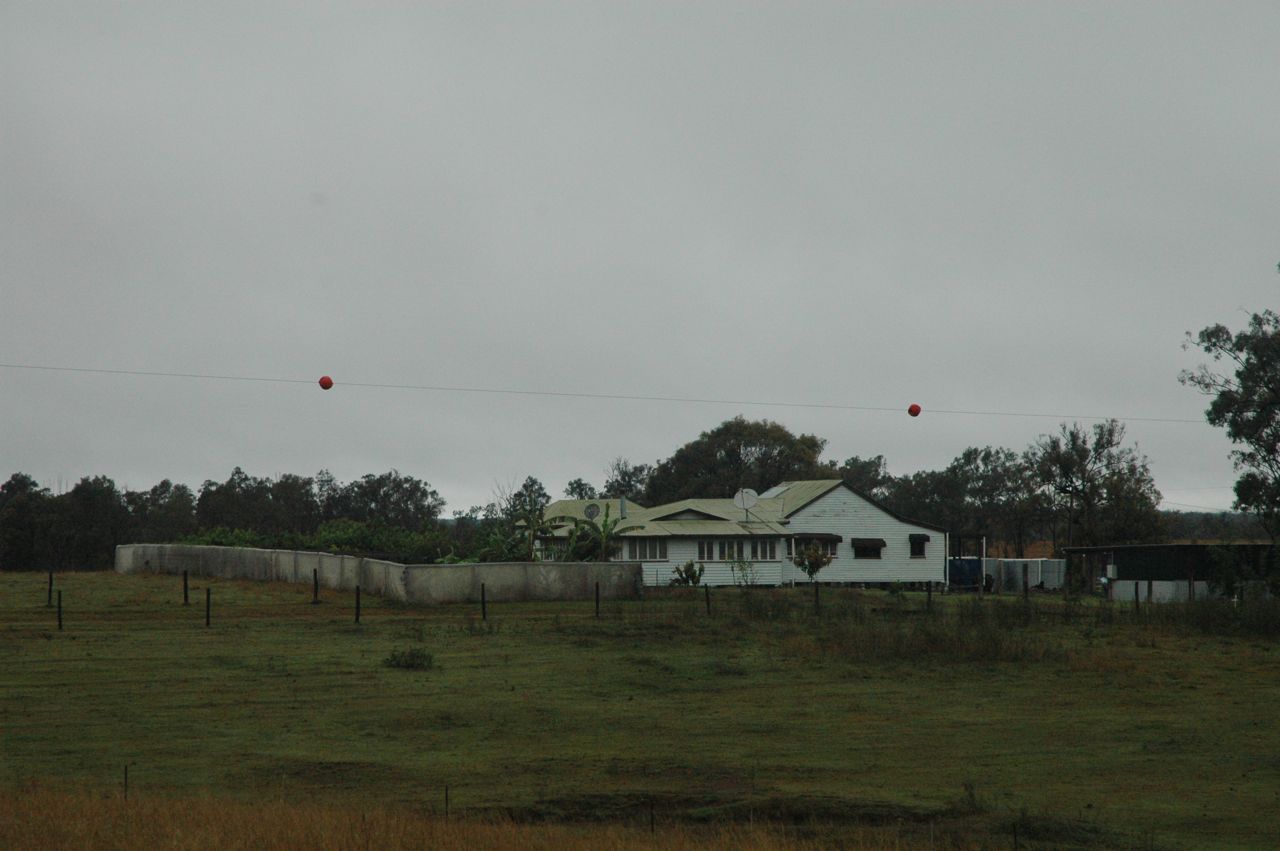
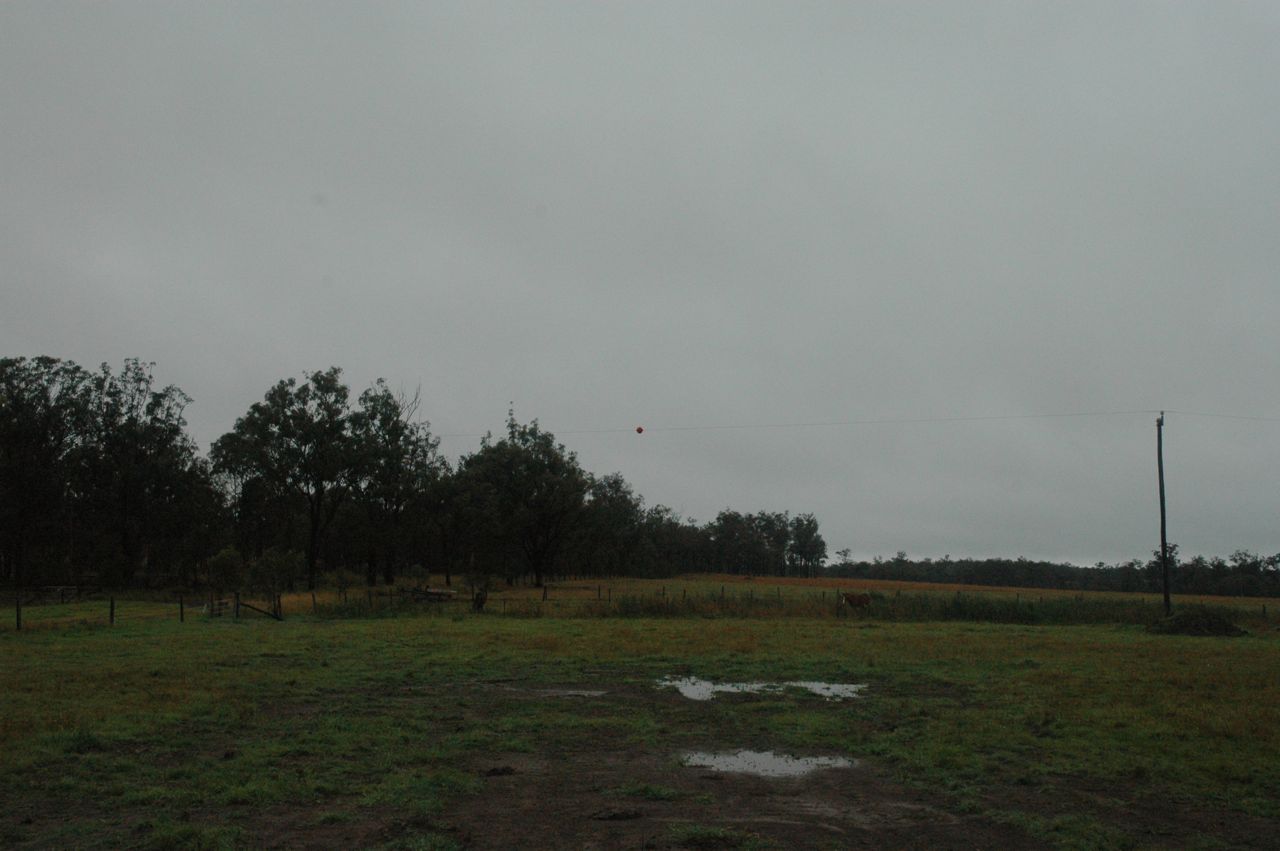
I recently put some strips in at my property and at the end of both strips only at the southern end I decided to get some orange balls installed on the lines. I know they are there even though my Savannah is not completed yet to use the strips I would never forgive myself if someone either decided to land there or had to perform a emergency landing came to grief on the 11,000 volt SWER line...A single line is even more dangerous as you basically can't see them. I contacted Ergon and tried to get a reasonable price to get them put up basically they said tough luck you want them you pay for them. So just over $2400 later I now have 3 balls on the line. Two on the main strip and one on the cross strip. They have the hide to charge $600.00 just for the 3 plastic 300mm diameter orange/red balls there was a $1400 charge for the labour and almost $500.00 in capital expenditure fees.
The house is the next door neighbours and is about 150mtrs south of the power line it looks a lot closer than it really is. I was really dissapointed with Ergon's attitude but I had no option but to cough up with the total cost
Mark

-
Its a no show here for my mag either and I am not out in the boonies
Mark
-
Hi Michel
Thanks for the info on do it yourself strobes thats great. I am in the electronics business so will look at doing the pcb's and making some up to see how they go. Although my french is very poor its been 40 years since I did french at school :(
Will have to use a translation webpage
Mark
-
Hi 80Kts
yes I did a lot of searching around and there is really very little in the way of savannah blogs especially on this later version. Also the dual tanks is really only a aussie thing apparently and it makes sense of course because of the tyranny of distance in this country. The first set of tanks did take quite a while especially losing a day on the first attempt then re thinking what I was doing. I am pretty happy with the way it has finished up although I am hunting around for the sight gauge stuff but really thats just my own preference. Also having a lathe and milling machine and a CNC mill here I can also make any special bits I want. The other thing was there was no second set of sheet strengthener strips for the second tanks I looked everywhere but I had the spare skin tensioners left over from the second tank space so I have just used one of them for the back edge of the tank hole for the skin you just cut off the tabs that went over the ribs and re drill all the holes.
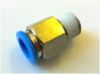
The sight gauges I will head off tomorrow down to the local festo shop here and get some 1/4 inch festos to fit and seal over the alu tubes coming out of the wing and get the same thing in 8mm for the glass borasilicate tube and machine a small coupling block to mate the two at right angles this will give me a nice fitting unit at the right distances and also they are great connectors if you have never used them because they seal so well. We use them on our model jet aircraft for all the fuel and air systems in the jet aircraft they never leak and last for years
Mark
-
There are some really nice android powered tablets around now has anyone seen or is using aircraft apps on them. The Pioneer, the Archos, the Samsung and Zenith plus heaps more.
Is there a repository of aircraft apps around?
Mark
-
Hi ian
I can just imagine you both sitting there making vroom vroom sounds and leaning into the turns :)
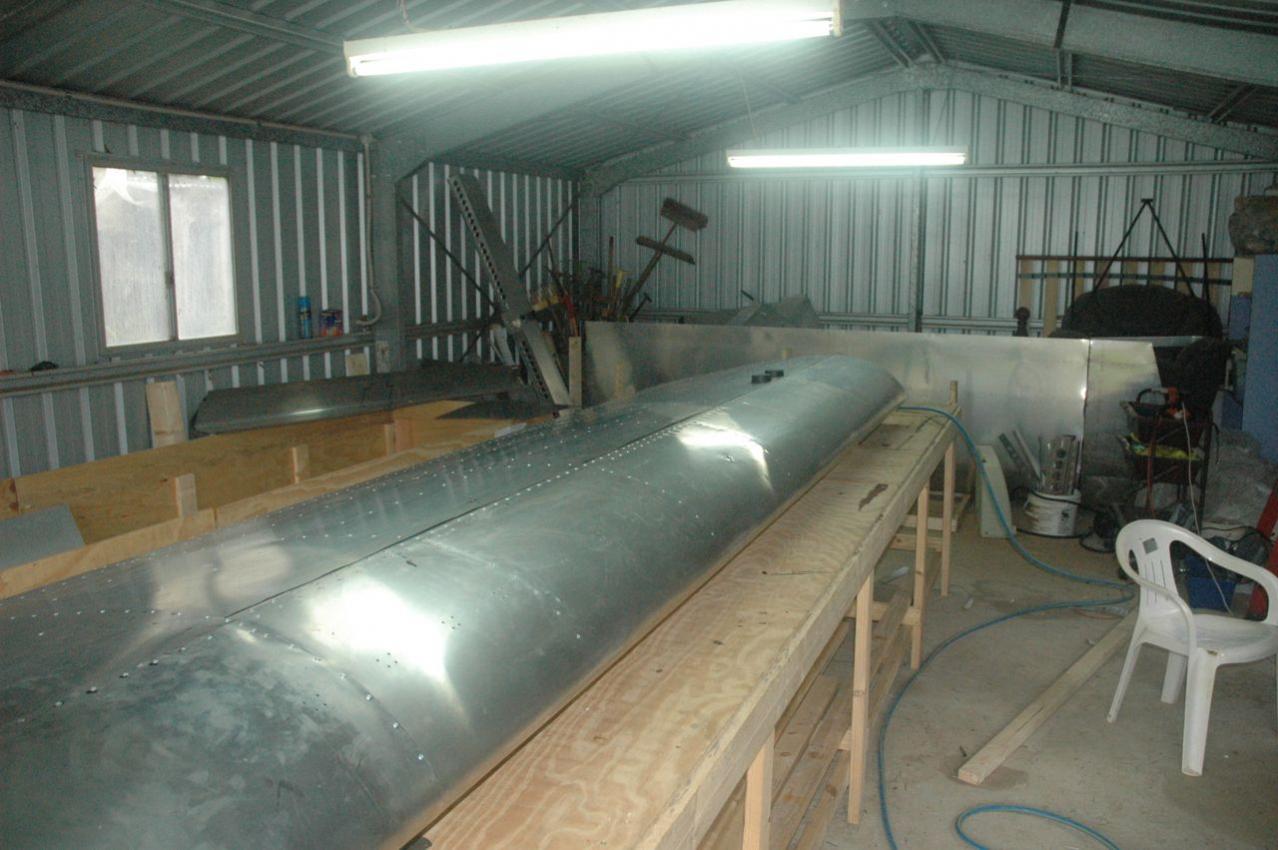
Reg Brost seems to be the only one who can get the rivnuts that size I chased around and no one had them. Reg sent me 150 of the nuts and 150 of the 10mm ss philips head screws. I think he said it was about 70 per side and its about right. You will need a set of rivnut pliers too i got them from Reg as well its a nice set you will need them for the wing strut attachment covers as well. The other wing is almost done just have to fit the tanks and wing tips to that you can see it in some of the pics sitting in a rack I made so it wouldn't get damaged. I thought of carpeting the table but opted not to as metal filings can get into the carpet and scratch when you move stuff. In the wing build you never need to slide anything its mainly just blocked up off the bench as you assemble it and turn it over a few times as you will have clecos underneath and on top at the same time also the strut mounts need to be kept off the bench. You also need to make sure your bench is flat and level otherwise you can get a warp in the wing also adhere to the sequence of riveting the skins...its a bit cryptic but basically you start in the middle and work out to the edges in a equal method row by row. I went to Bunnings and spent an hour trying to get straight pieces of timber to use as the blocks....they cut everything so green now its a struggle to find straight pieces of timber
Mark
-
Hi All
Was up at the farm again on thursday for the final inspection on Friday..and yes we are now finally passed so now the work can begin :)
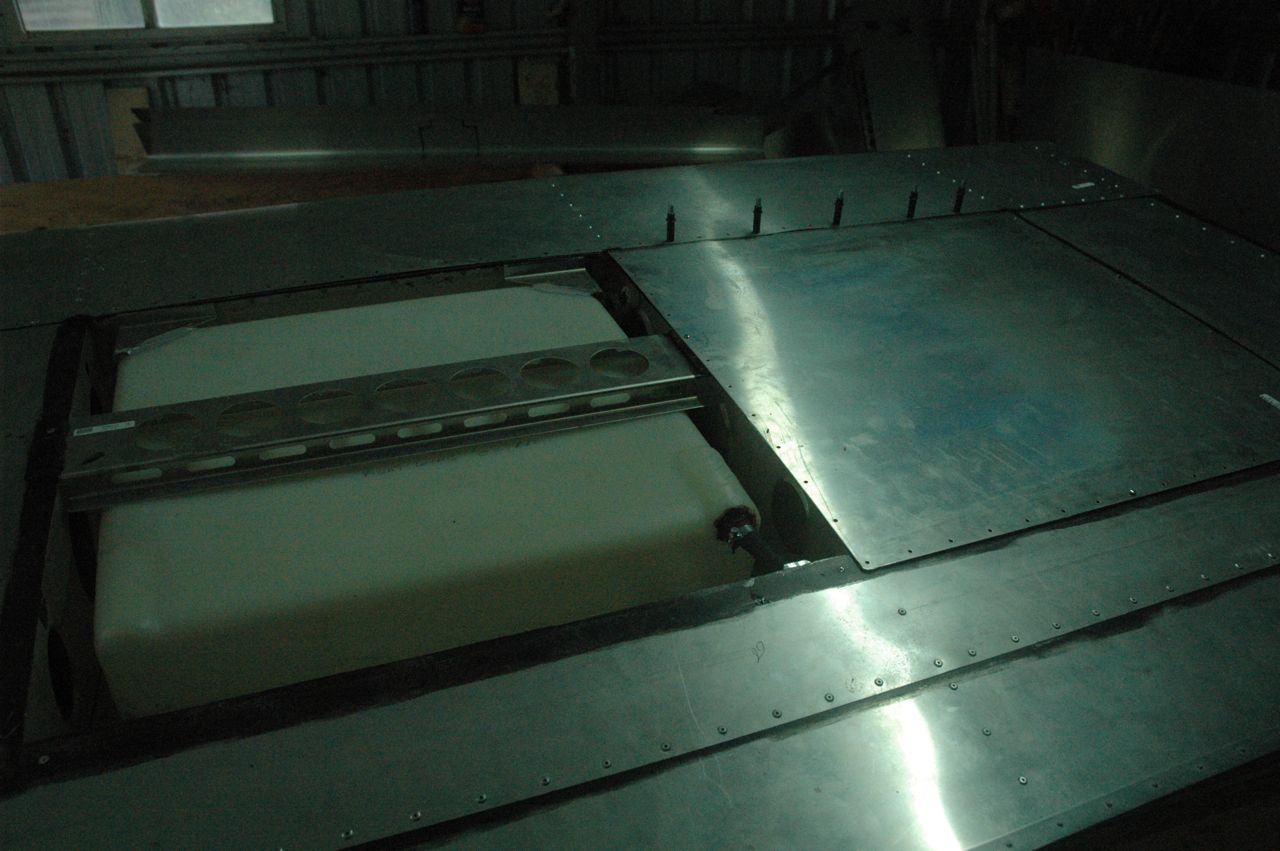
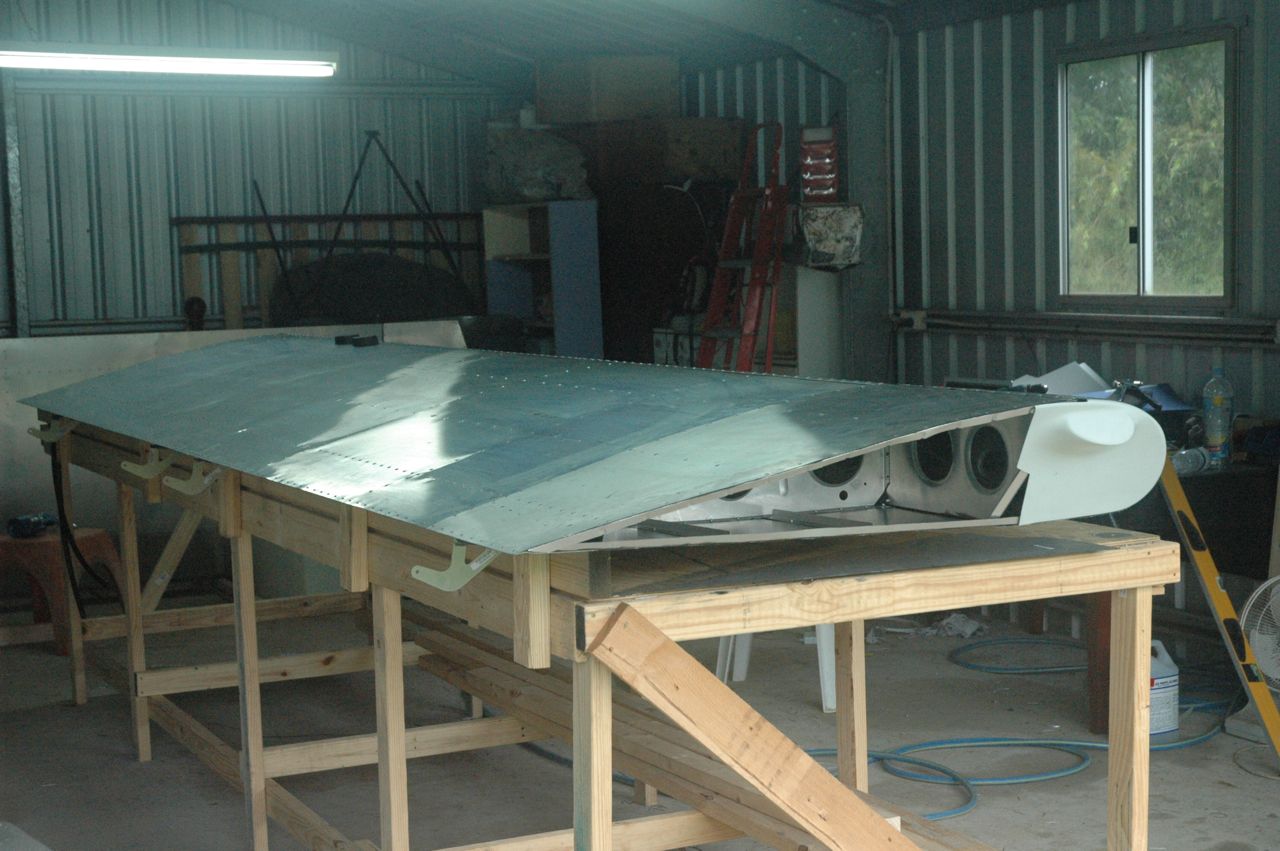
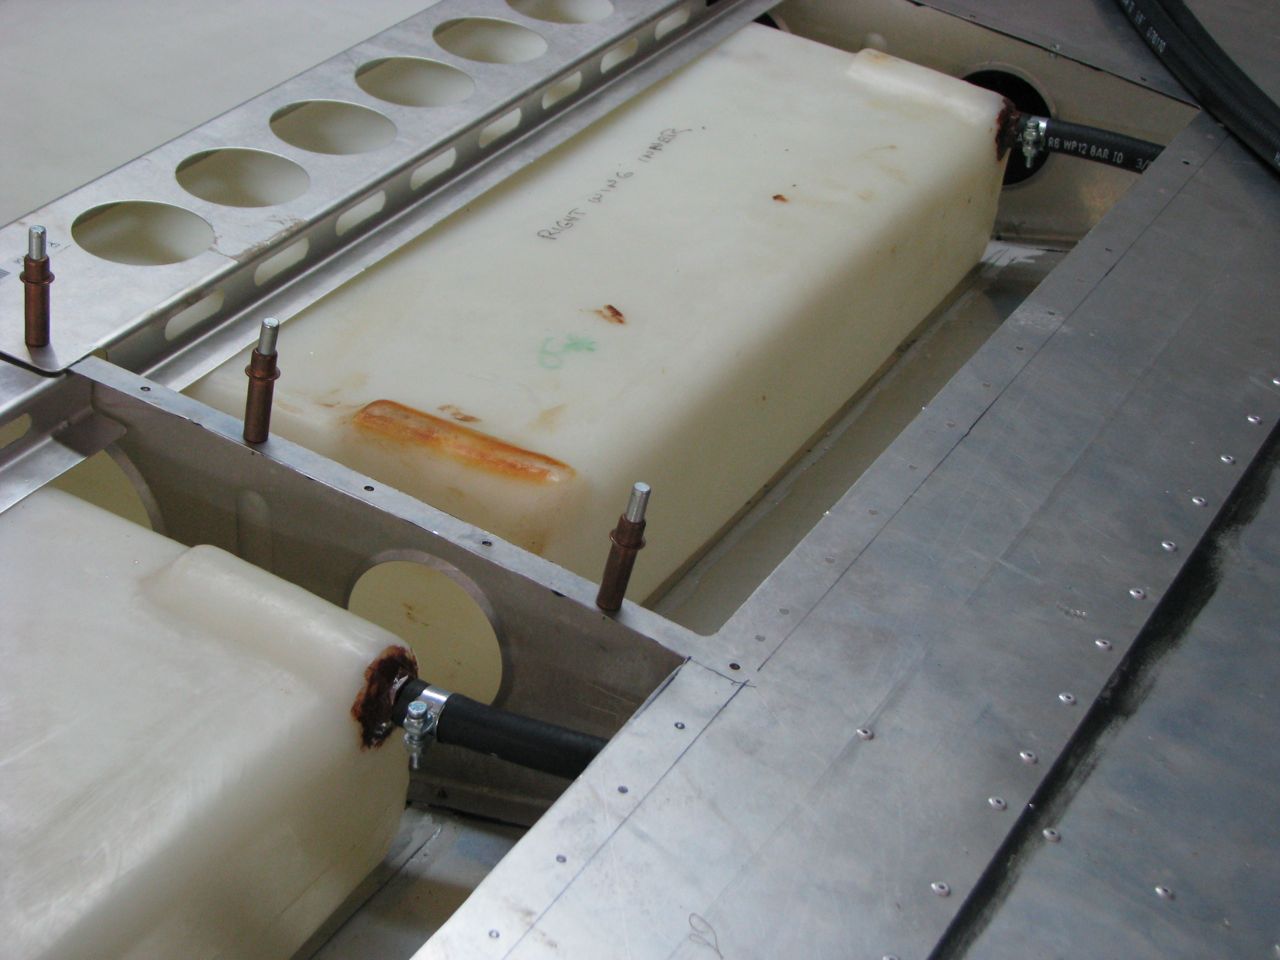
Got back on saturday morning here so managed to get there today to do some more work on the fuel tank install. Its finally pretty much finished except for the sight gauges which I will chase up this week. If you are riveting the tank skins then there isn't any real issue but if you rivnut them like I have so I can always have easy access to the fuel tanks if there is any leaks etc just be careful on using the rivnut pliers. I managed to break the mandrill the last time I used it the 3mm rivnuts are quite small and it doesn't take too much of a hamfist to break the thread off the mandril. I didn't chase another up but managed to stick it in the lathe and claw back the 7mm or so of shaft I broke off and it works fine. Well enough to do all the rivnuts for the wing so far so be warned do not put too much pressure on the pliers after you feel the nut collapse. Once it collapes just leave it at that. All the rivnuts also had a drop of loctite on them to make sure they stay solid.
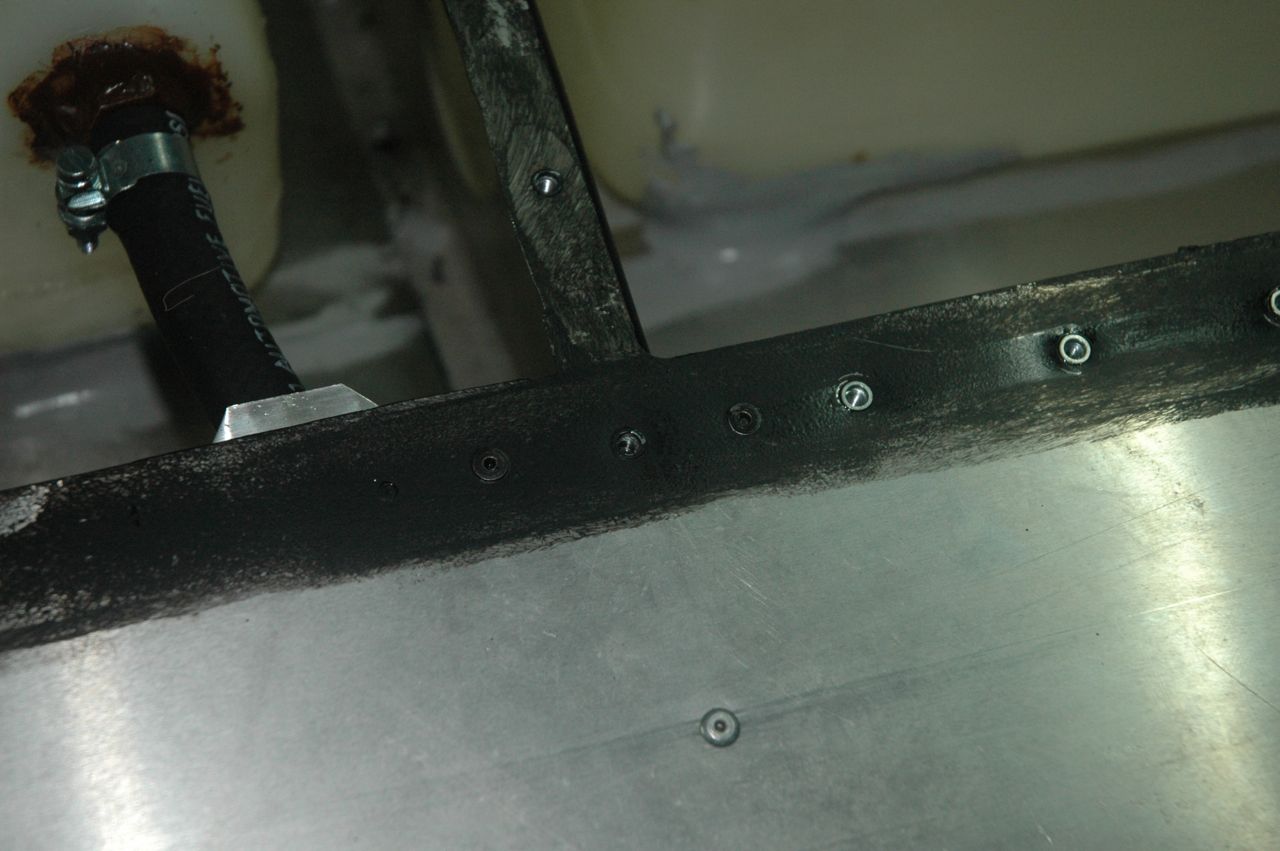
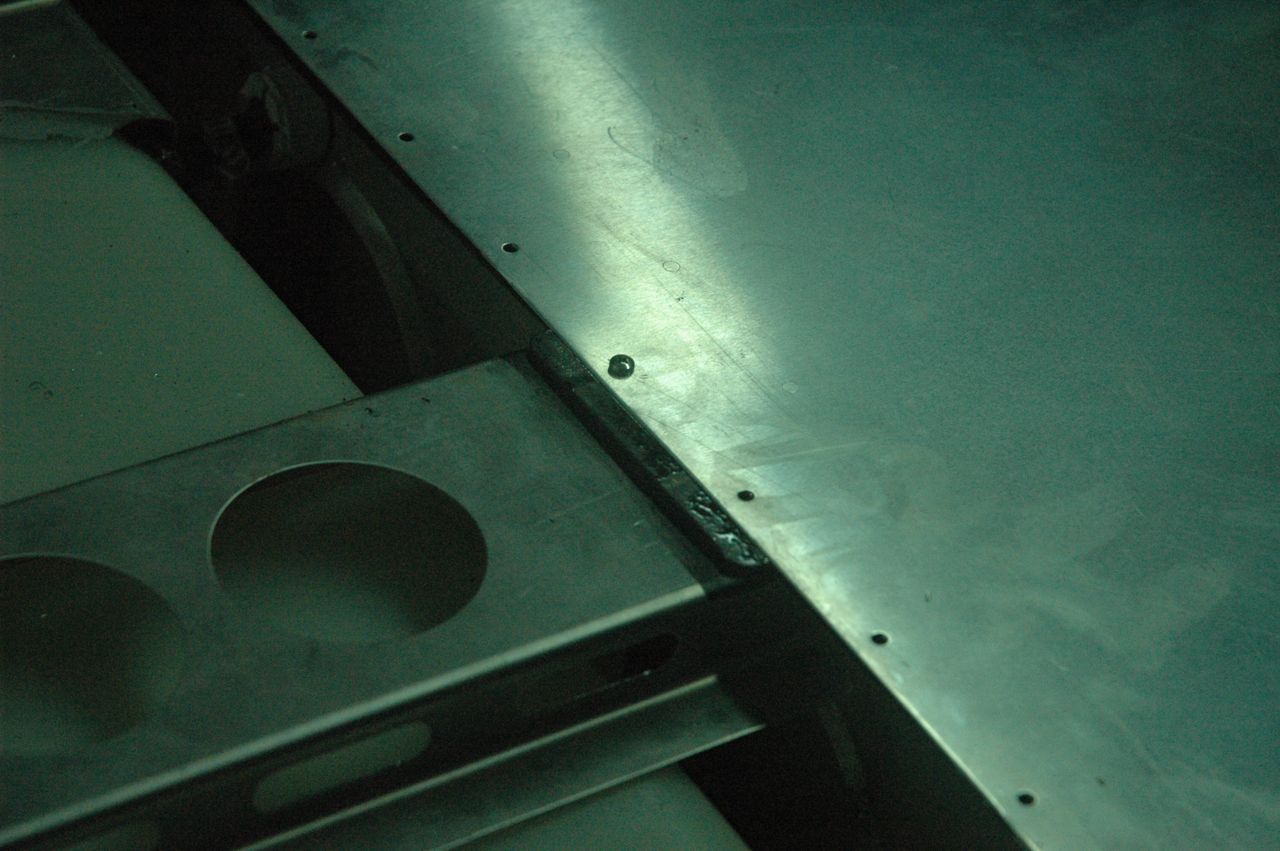
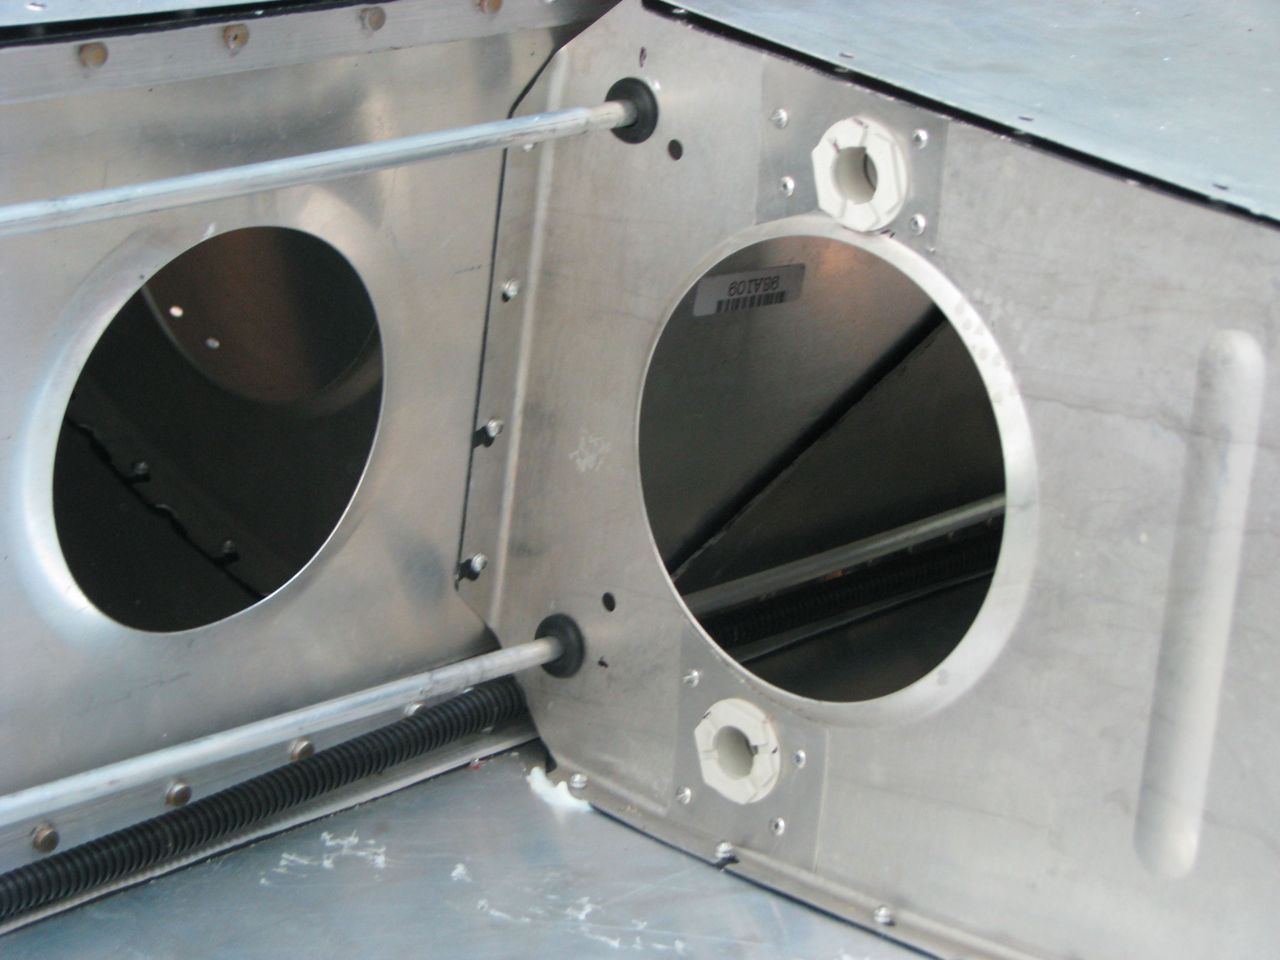
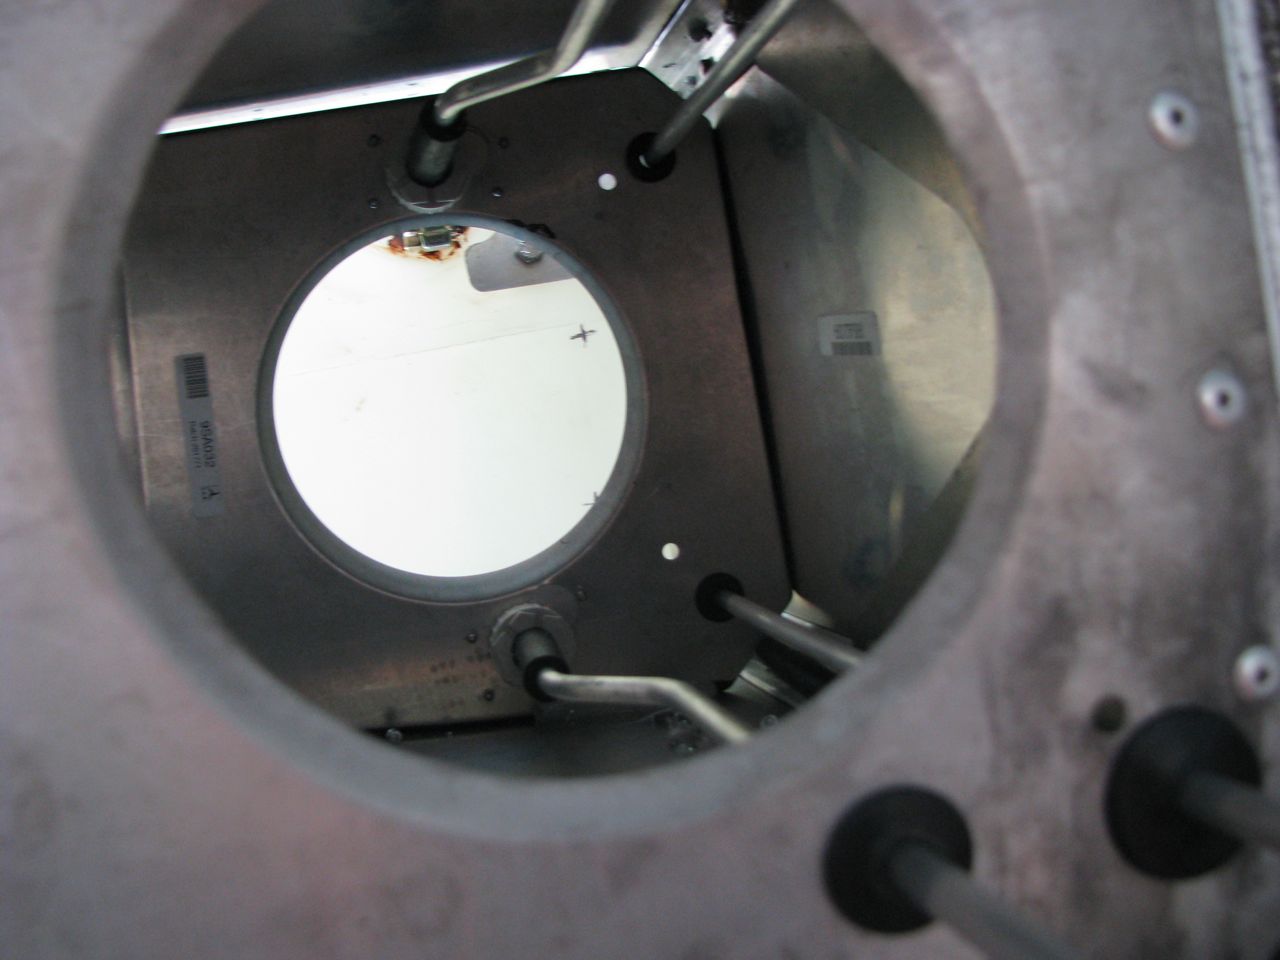
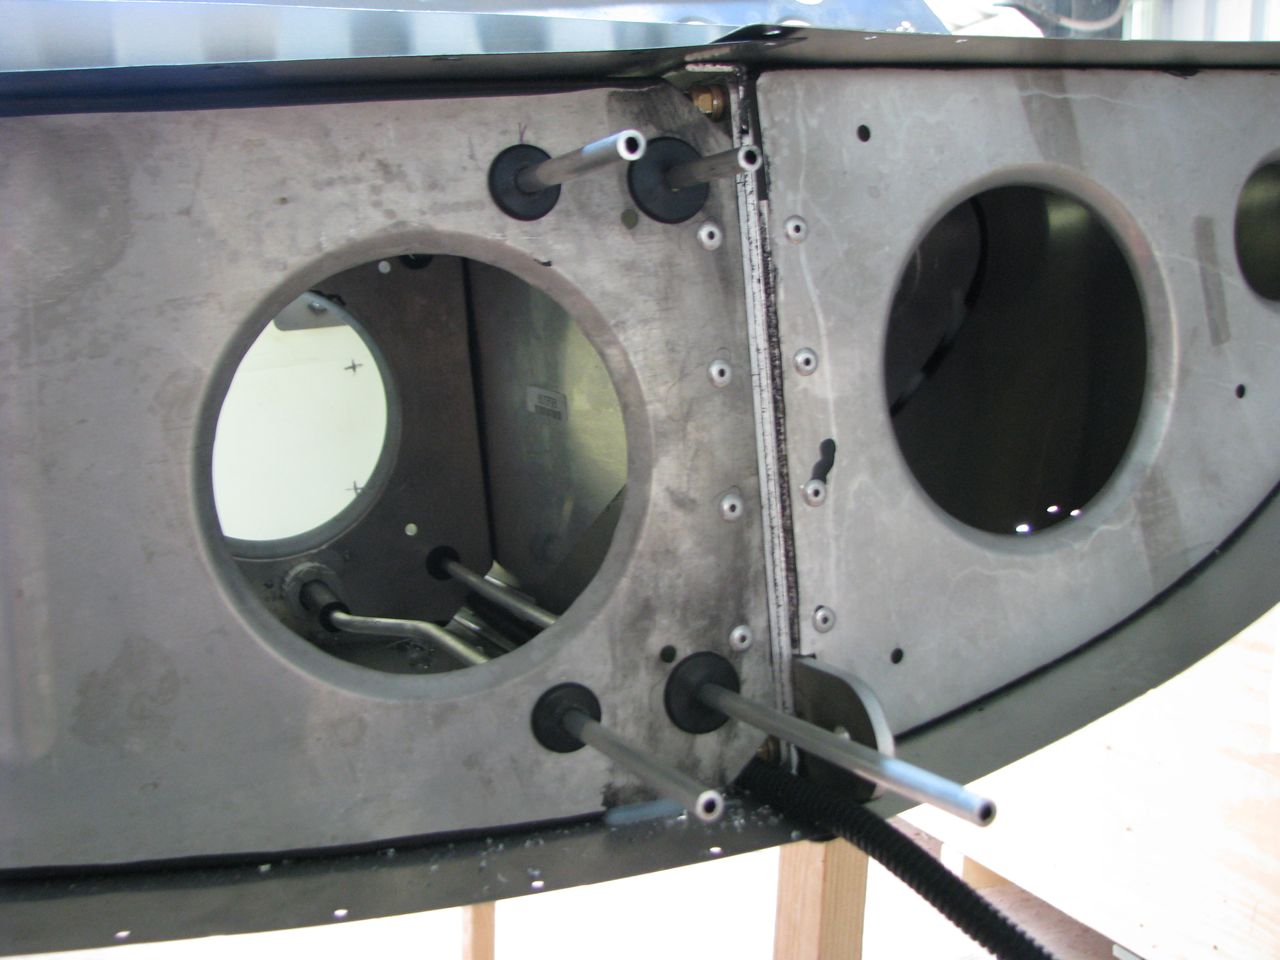
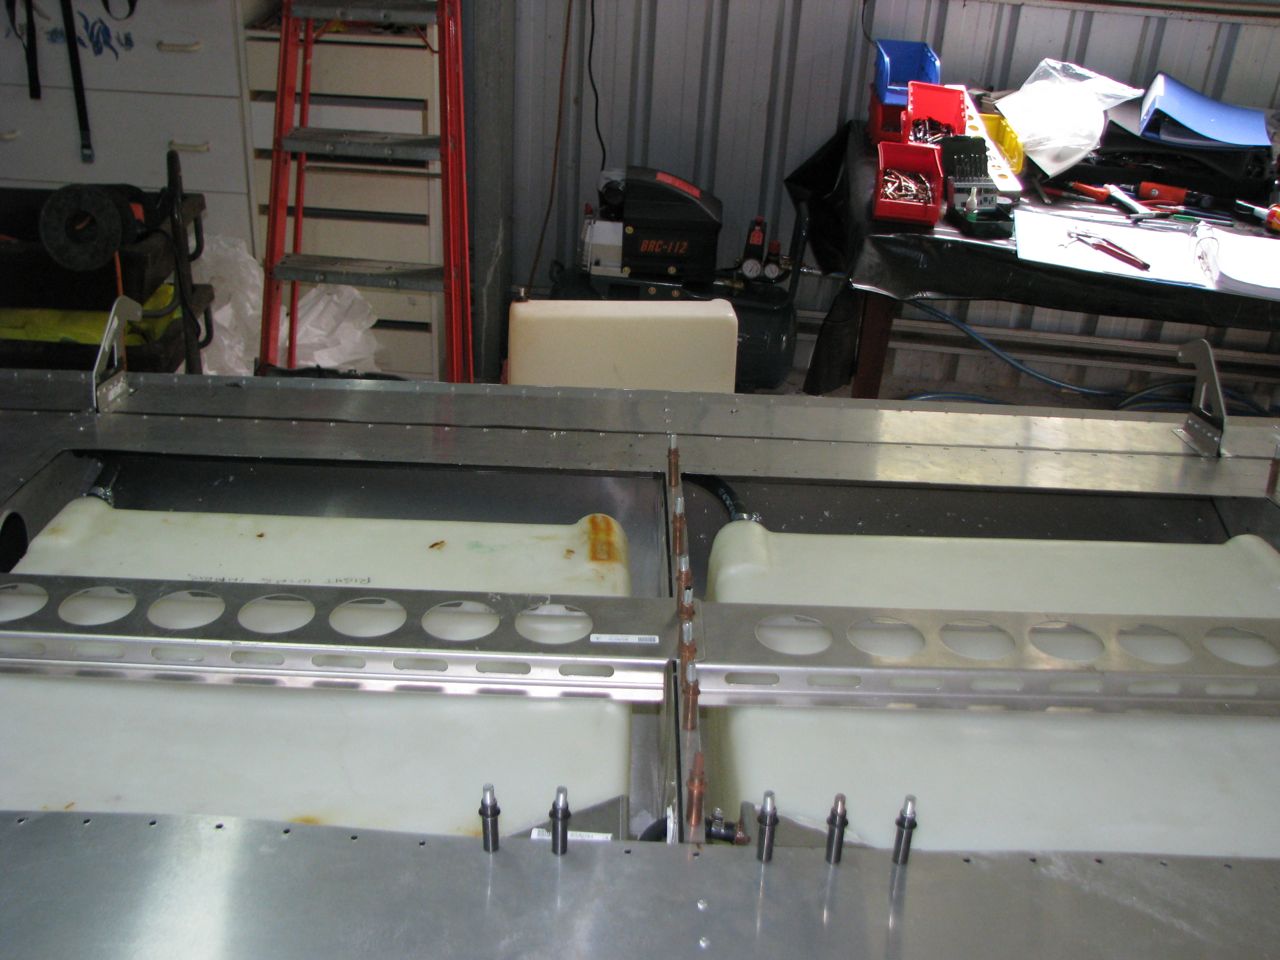
The main issue to work out was the arrangement of the support crossbars and how they would be held with rivets and rivnuts. The bar over the inner tank is under the rib edge so the rivnuts are placed into the crossbar so that the bolts go through the skin then through the wing skin then through the top of the rib edge then they screw into the rivnut mounted into the crossbar. The centre of the 2 tanks on that rib is similar except the bolt goes through the tank skin then the inner tanks crossbar then the wing skin then the rib top edge then into the second out tank crossbar with rivnuts placed on it so it becomes a nice sandwich. The outer part of the outer crossbar just gets clamped between the tank skin and the wing skin hopefully all the pics will help to explain it.
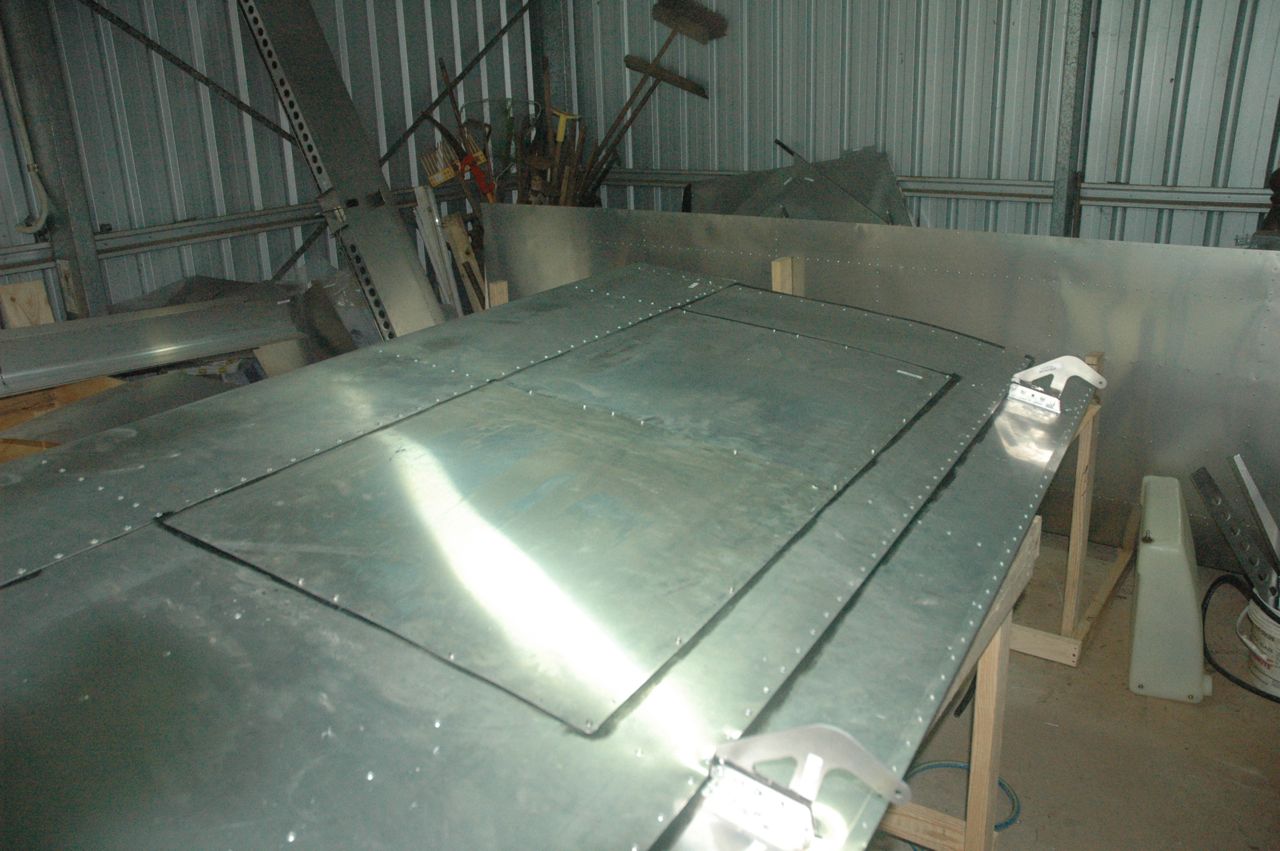
I have put a few of the screws into place to hold the bars and some of the skin as I will come back to these for a final check once I have finished the rest of the wing off well to how far I will go with it until the final bits. I will need to get someone to give me a hand to roll the wing around to dislodge any small metal filings and cast offs that I may have missed during construction then i can vacuum and blow it all out so the wing will be squeaky clean inside. So after this I will then place the last of the wingtip skins in place and also seal around the tank filler caps so any spilt fuel does not get into the tank area. Then its onto the tank install into the left wing.
The tank install certainly has been a mission...I was told that but of course until you have done it you think its easy. There is not much information at all around on how to fit the extra tanks. I have done it the way I thought best and easiest also to be maintenence friendly and functional. I am sure it could be done other ways but after the first try failed I think this way is easier using the conduit guides and the alu tube.
Ian you are motoring along with the fuselage I think once its on its wheels thats a big event :). I have no idea about that extra box you found yet as I haven't really done much reading on the fuselage construction yet as that is a major effort just by itself...by the way if that is you in the photo you are the spitting image of JG :)
Mark
-
Australian reputable supplyers....now thats a nice way of putting it. I can give you a few names who may well be so but they are NOT authorized to sell Icom Australia products in this country or Vertex for that matter and do NOT sell the versions that definately comply with the australian rules. Ask that supplyer if he has or can get a copy of the ACMA approval for the product he sells/imports.
The only real way to be sure you are buying a correct approved version is to buy from a authorized dealer. If you want to find your closest dealer either look on the relevent website for australia for that manufacturer or ring them to find out who you closest dealer is. The price difference you see is because the dealer is importing the radios from a source outside australia. Either they are doing it directly or they are importing from their parent company overseas. The stock they sell does not go through the Australian Icom or Vertex company.
Icom Australia 03-95497500
Vertex Australia 03-95182113
Mark Kyle
-
Hi All
Finally got to do some work on the Sav yesterday...suffering withdrawal symptoms lately its been almost 3 weeks since I was able to get to do some work on it. Cant wait until I transfer all the bits here then I can do bits and pieces at any time.
I wanted to get the tanks all finished on the right wing but I managed to snap off the rivnut mandril for the rivnuts so I will have to get another one to finish that off but at least all the plumbing is now finished and I just have to do them next time and I can start the fuel tanks on the left wing. I was told the tanks take a lot of work and they sure do but of course its a critical part so time and care needs to be taken.
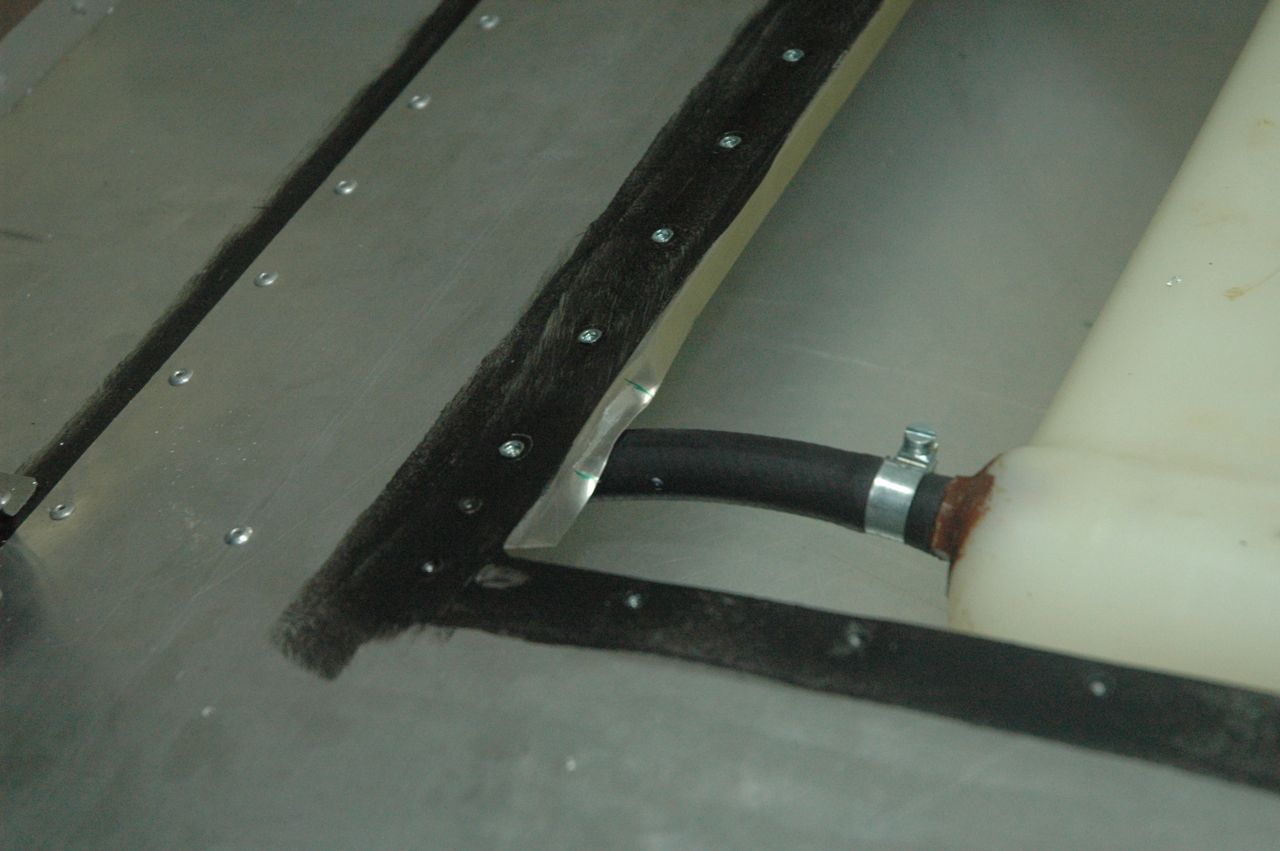
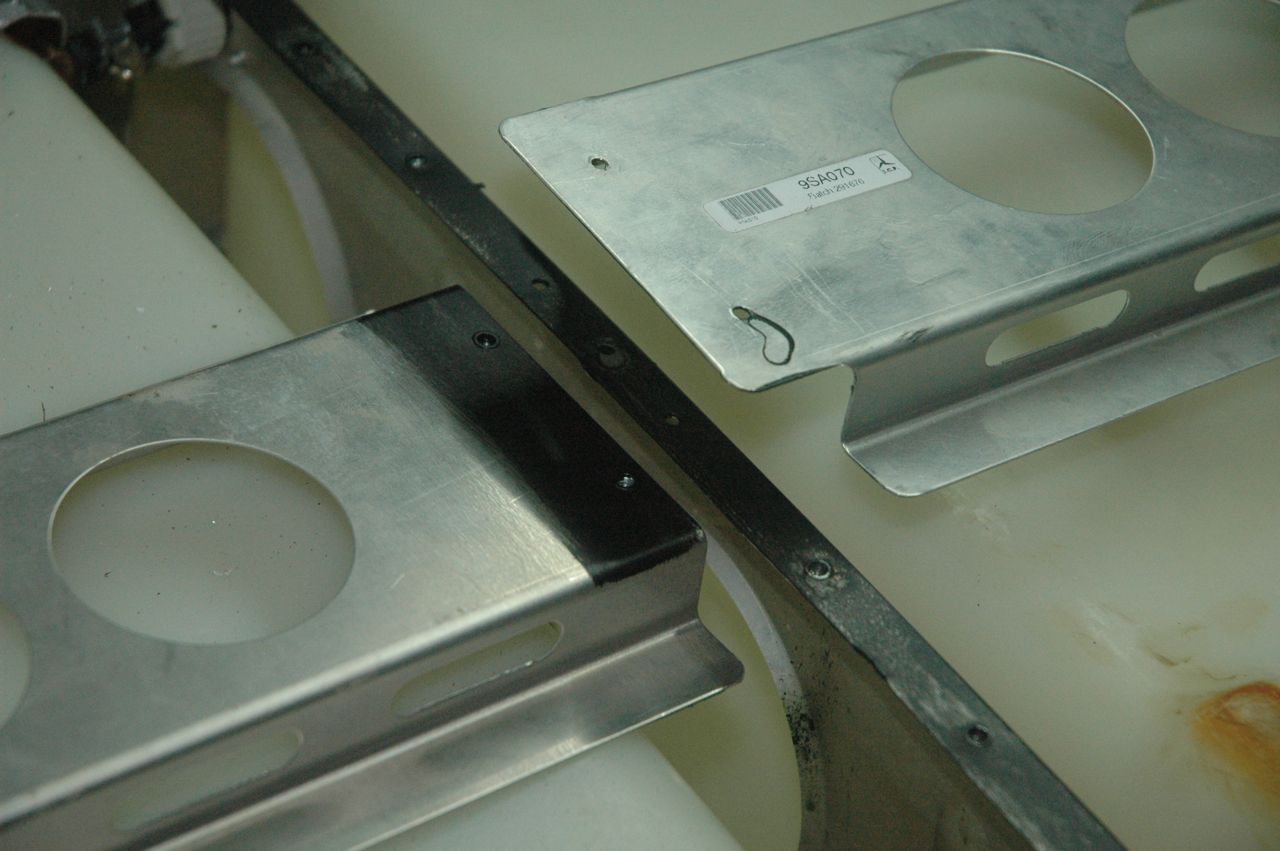
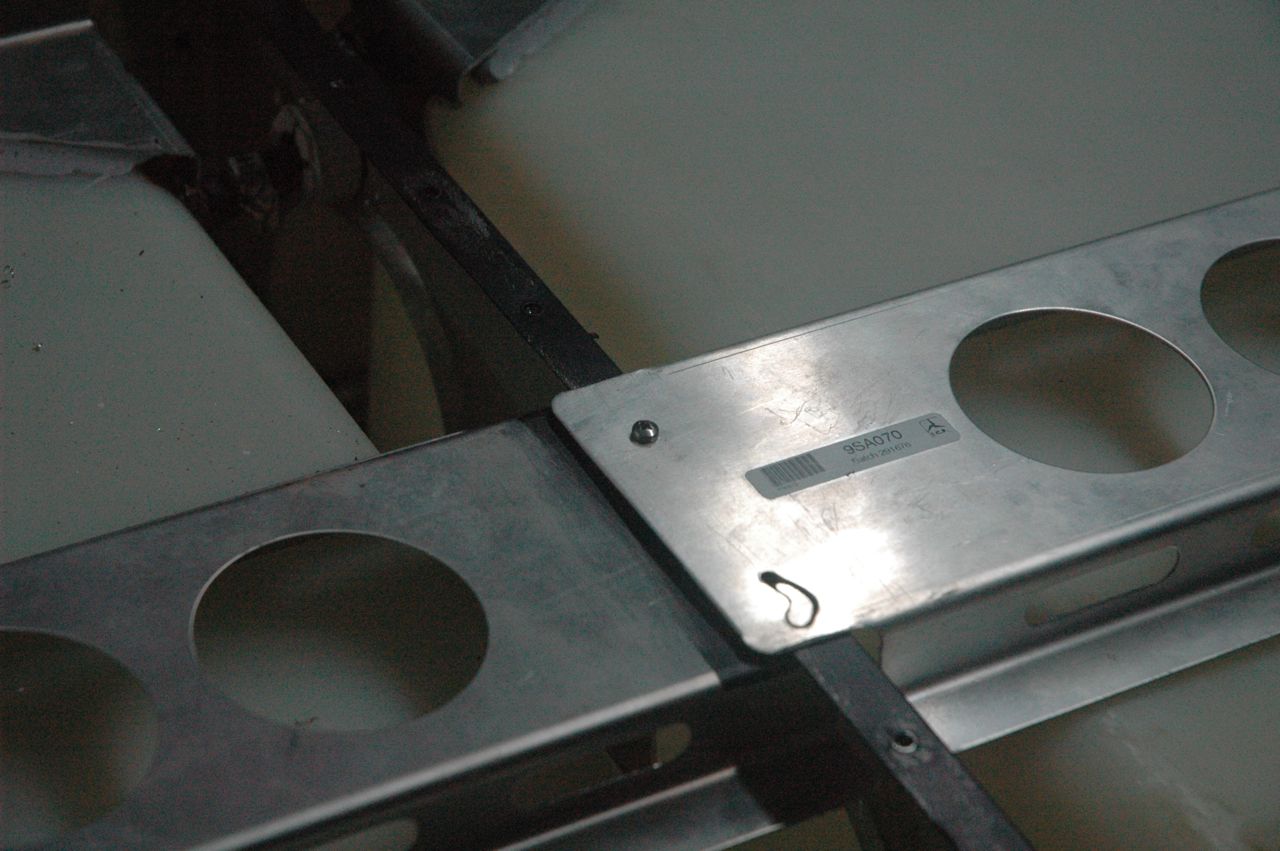
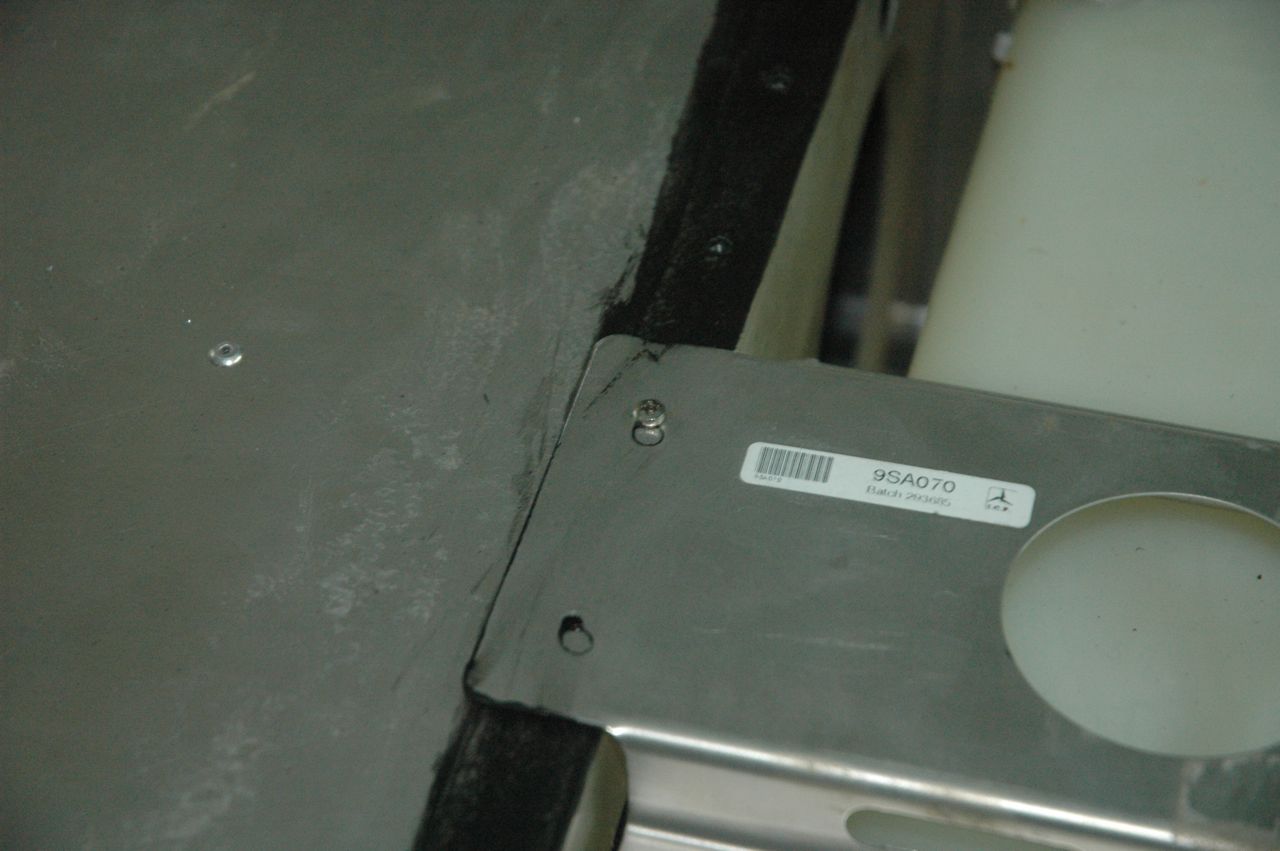
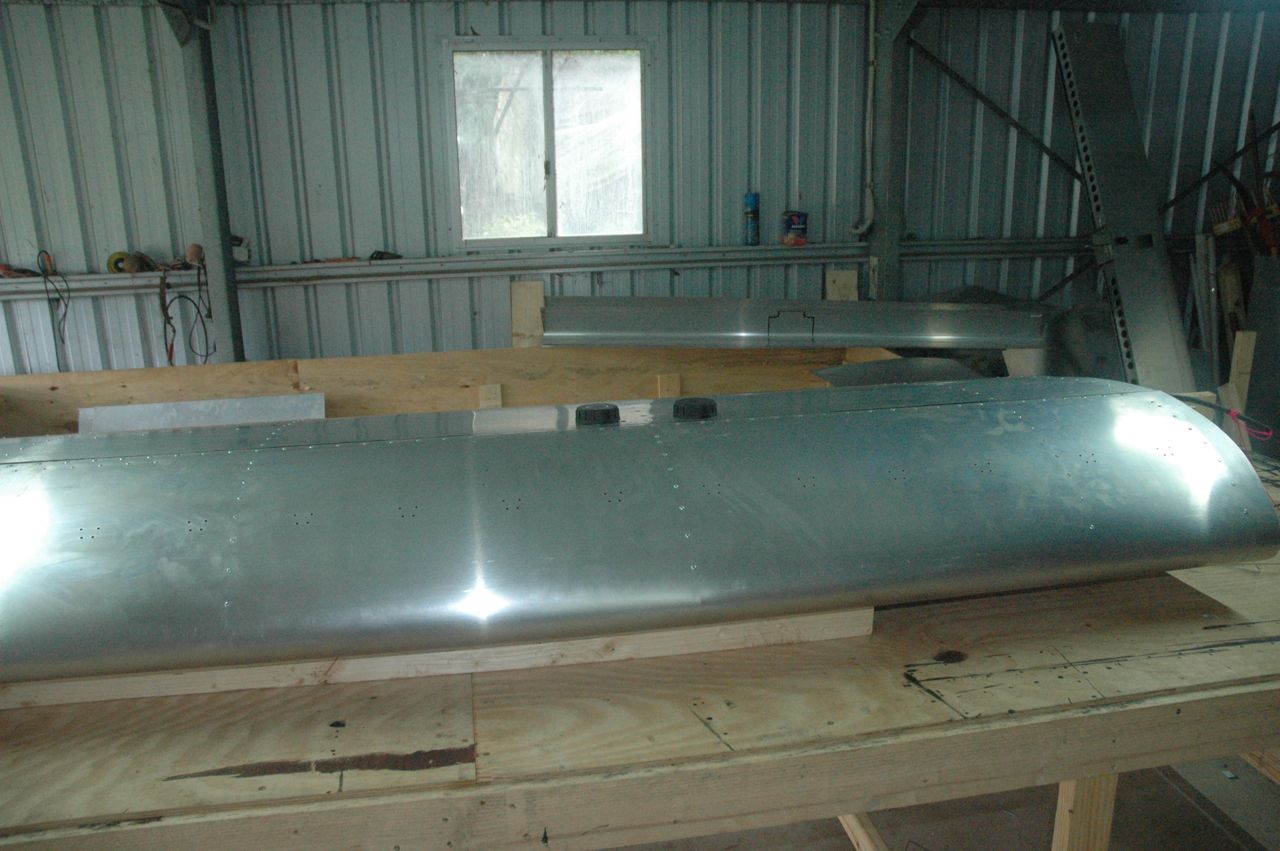
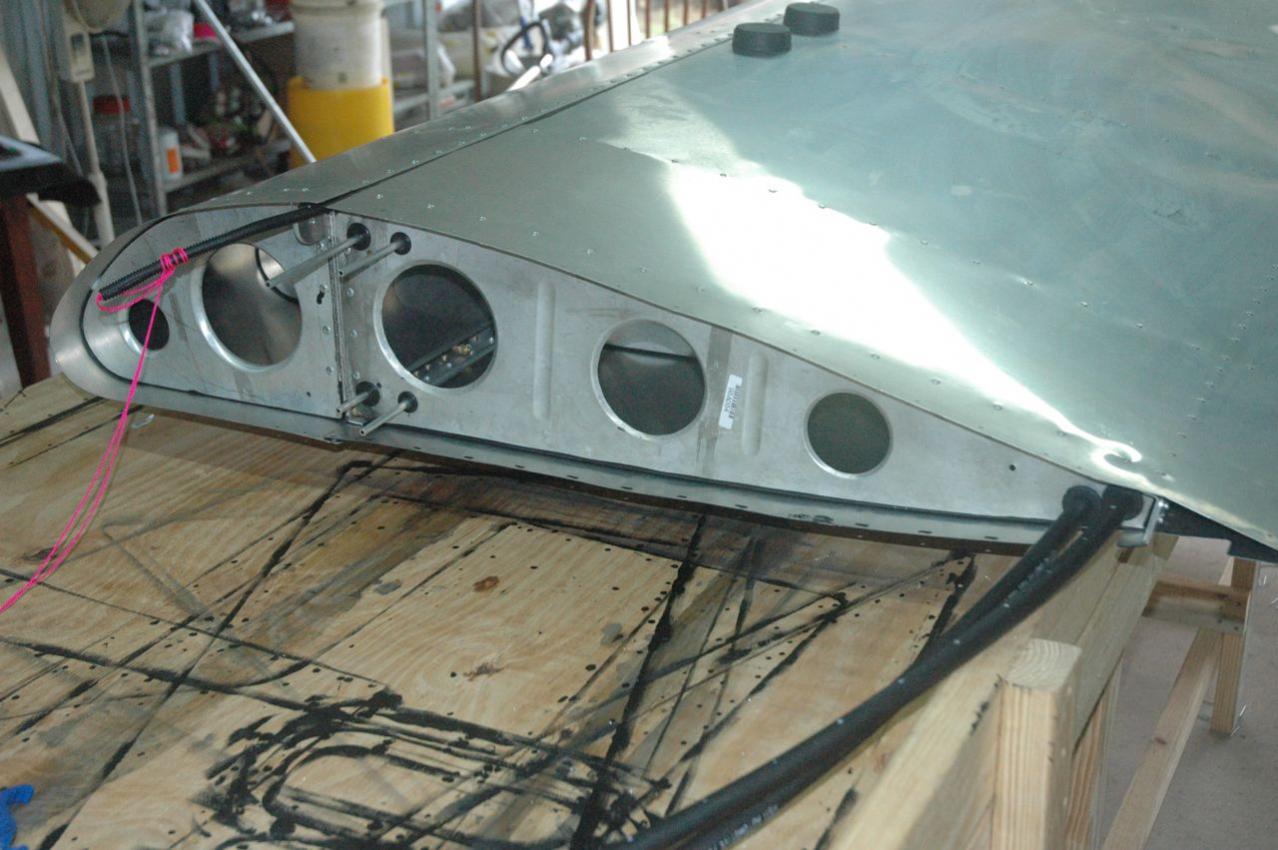
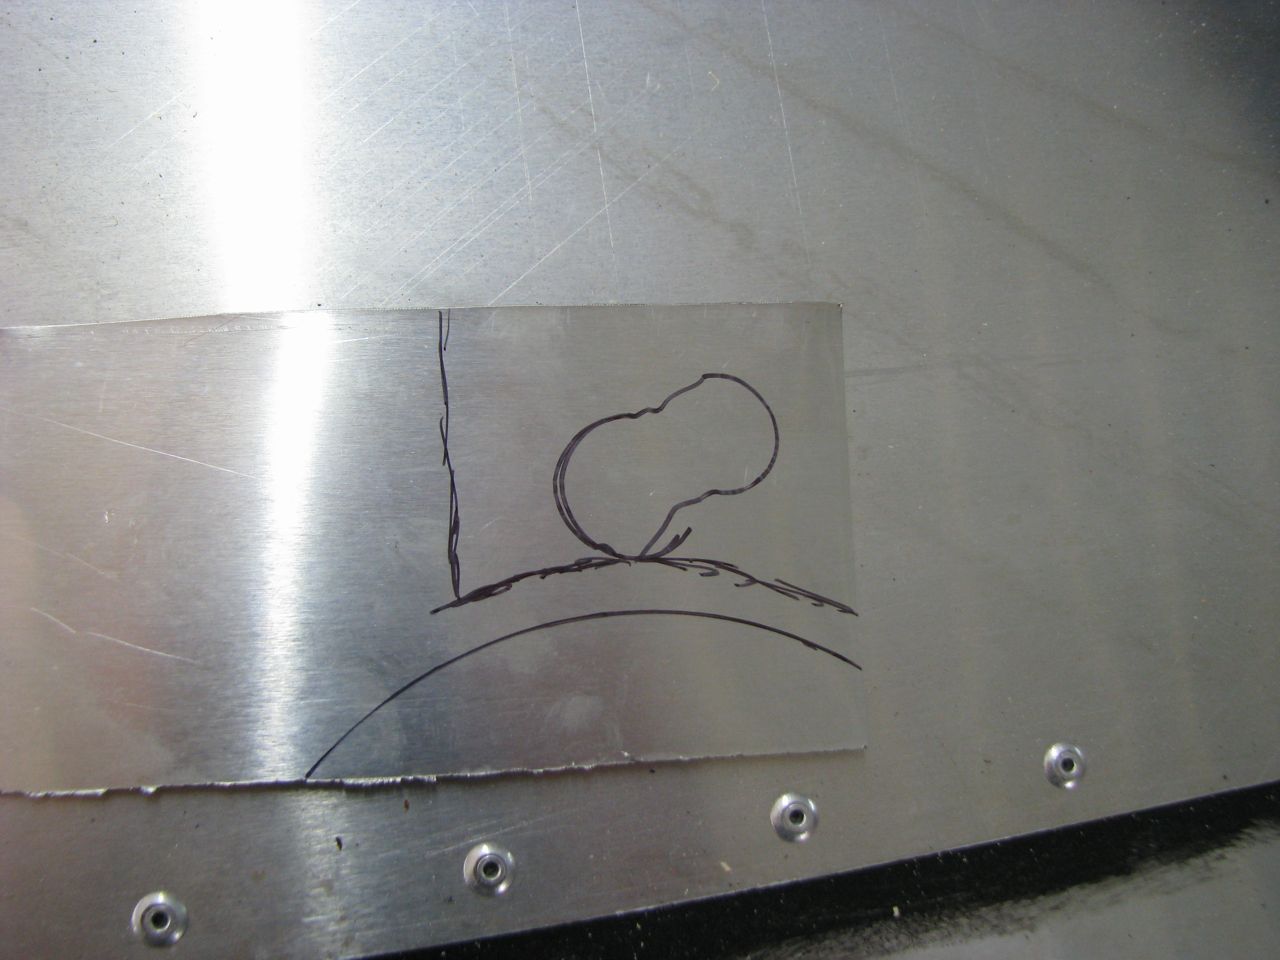
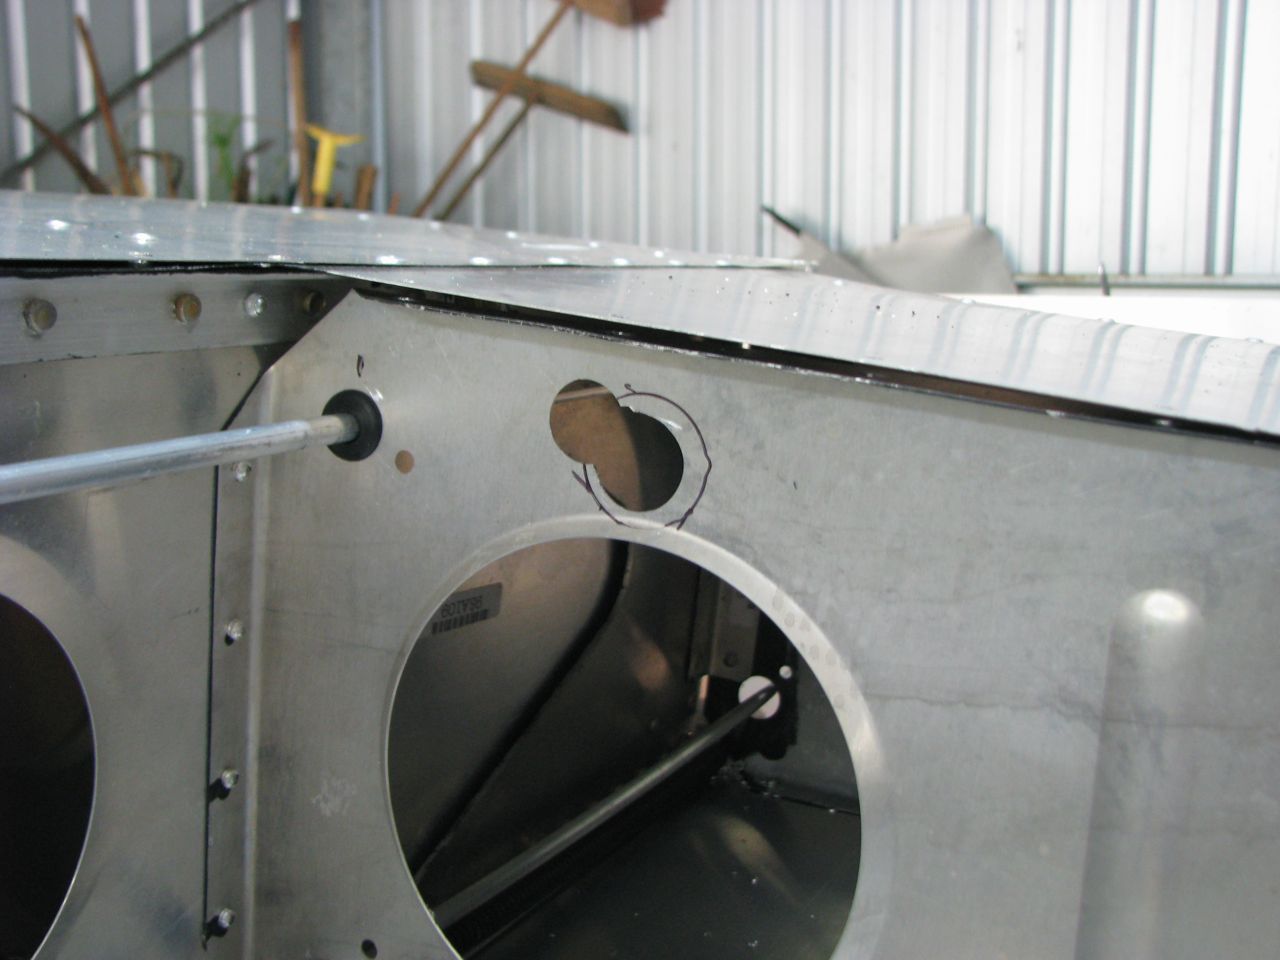
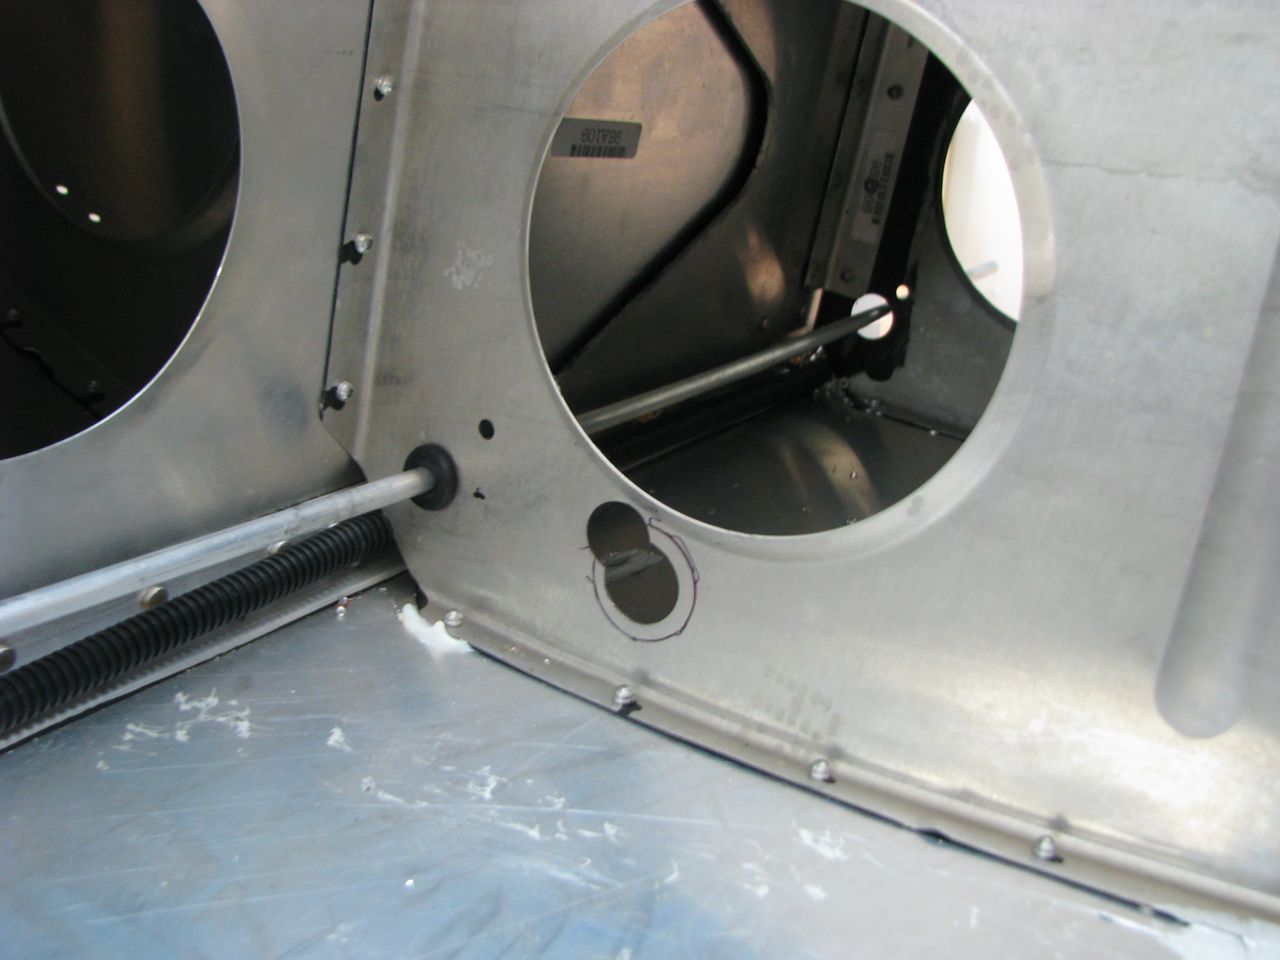
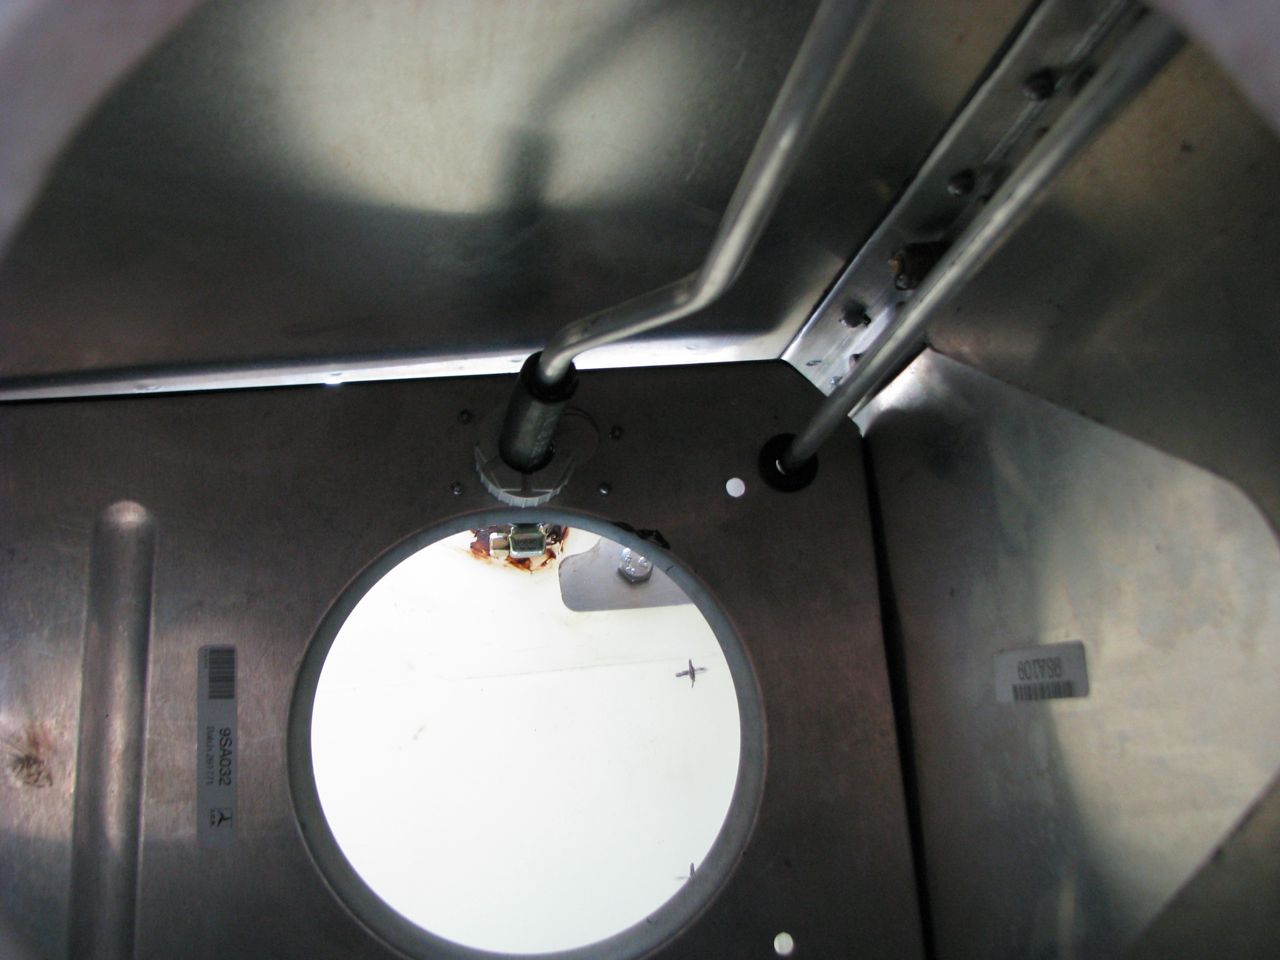
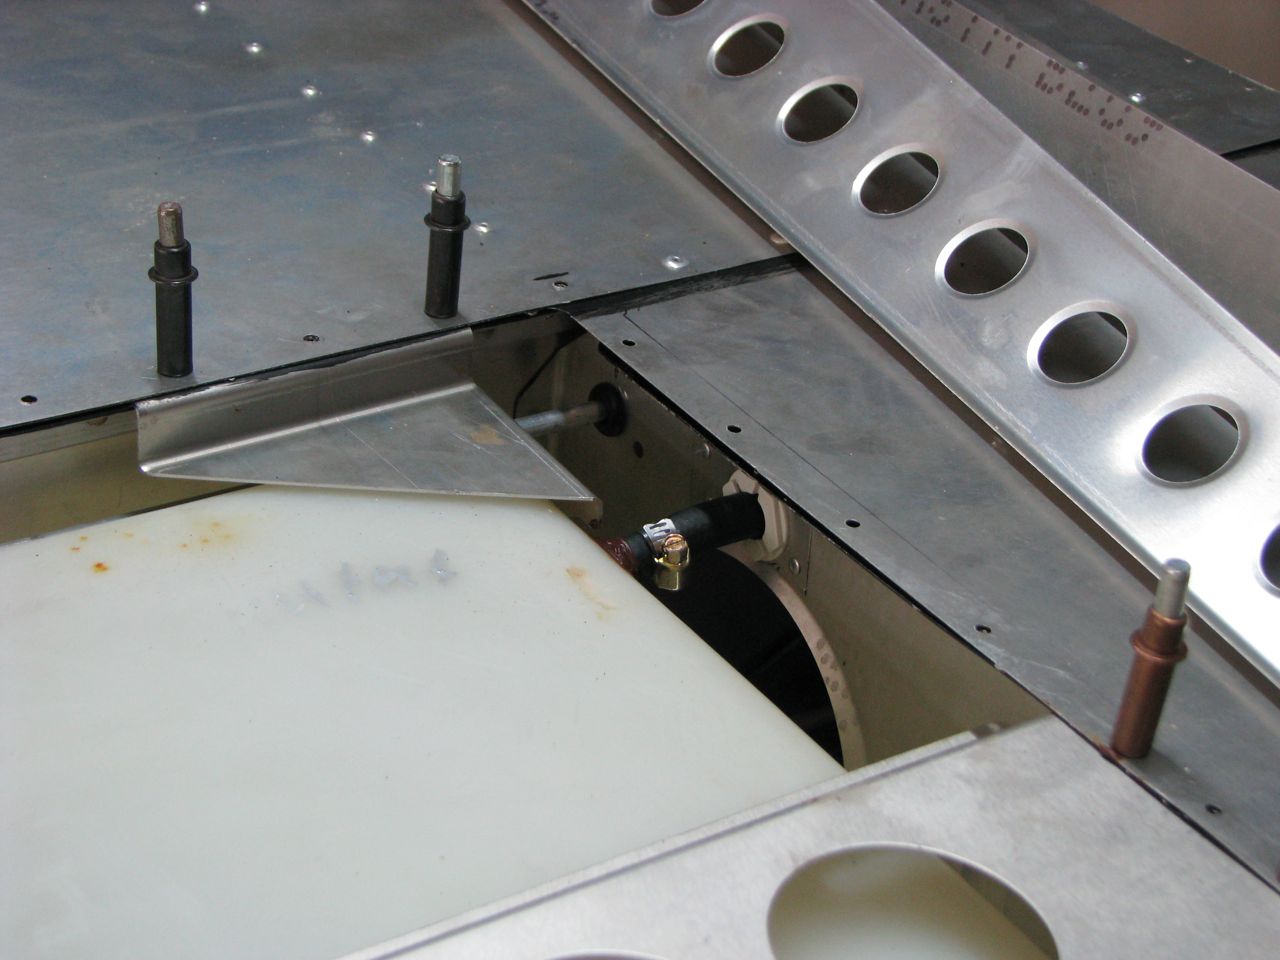
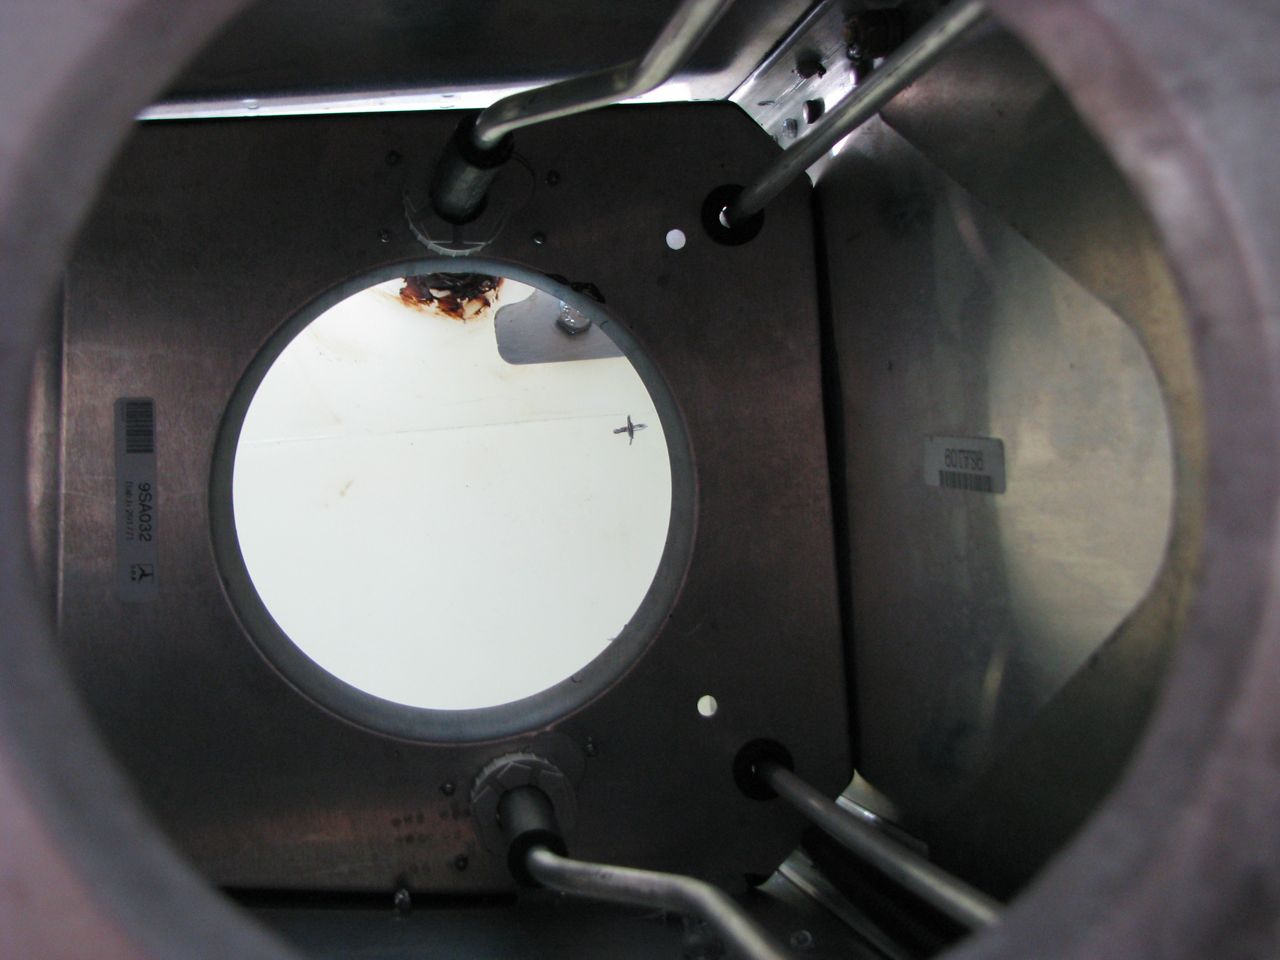
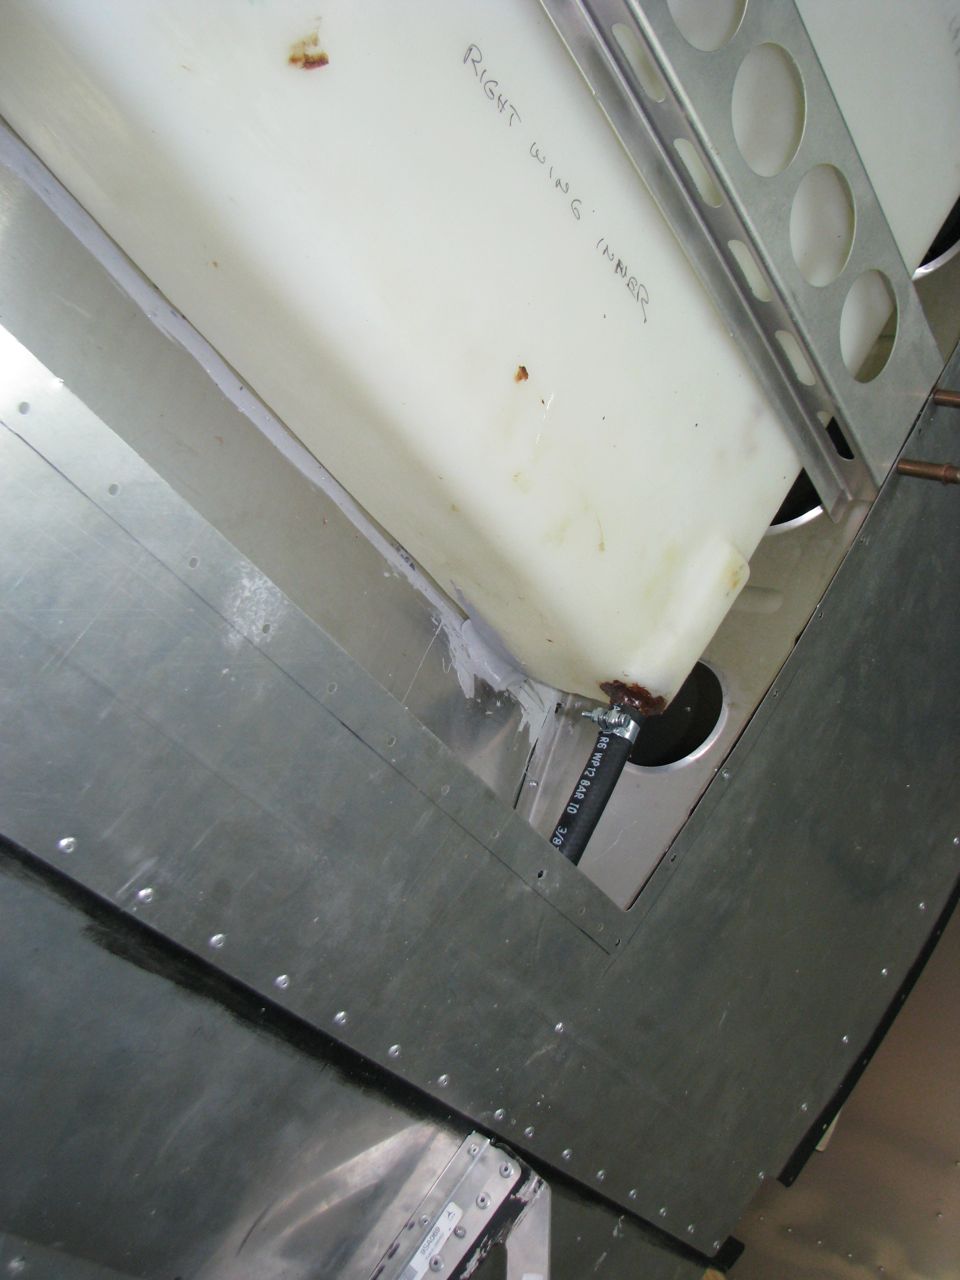
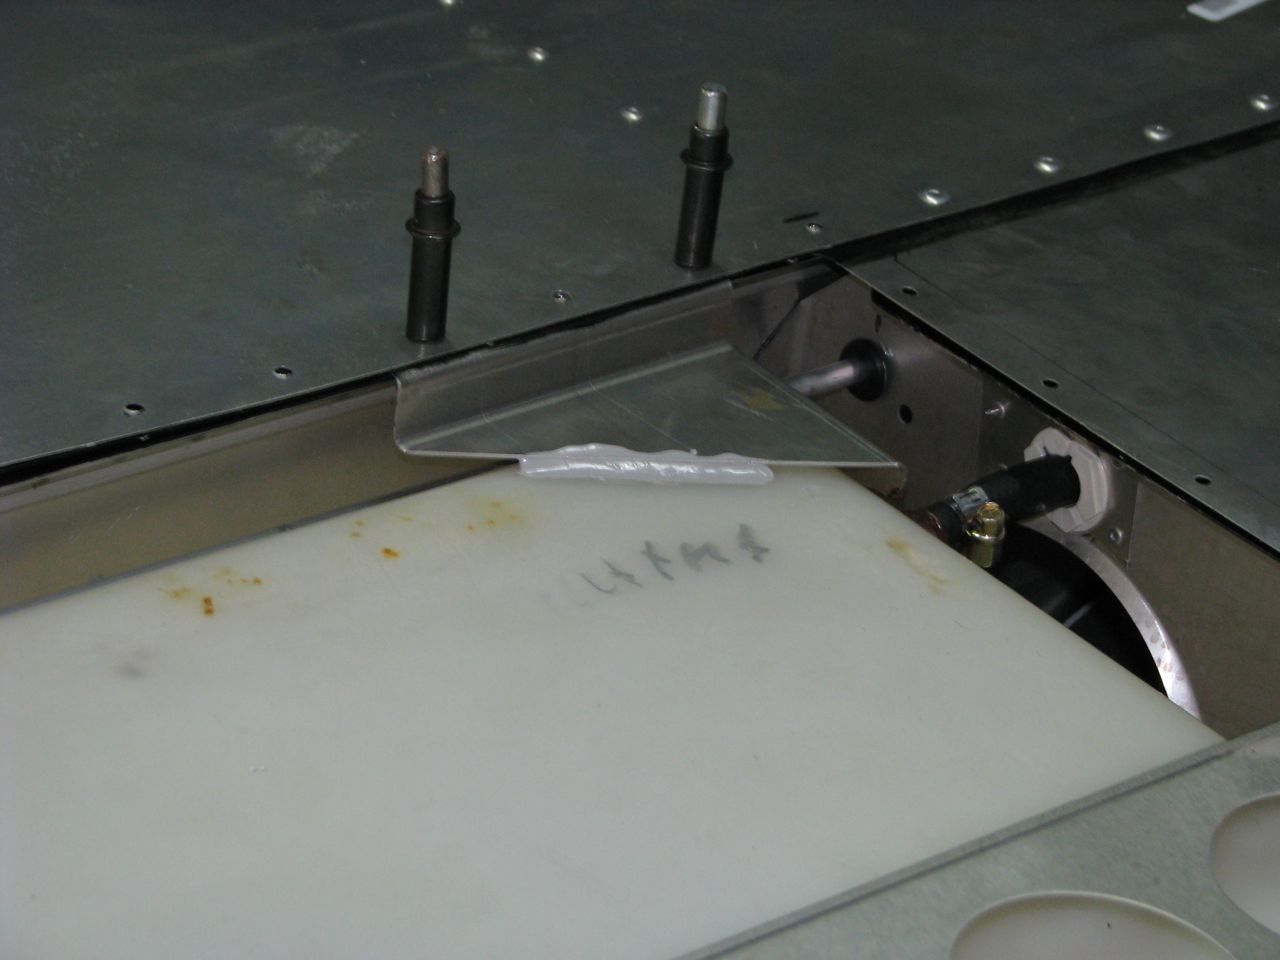
I had the outer tank plumbed and the tubes to the root ready it was the inner tank I finished off yesterday. As I have said before when you fit the gauge fittings into the tank using the measurements in the manual the holes don't line up so to make a nice straight entry through the rib you need to redrill the holes. This then leaves a pretty big hole so I elected to make up a support plate. The pics show the plate and how I marked it up I cut it out to make it fit then redrilled the hole in the support plate to make it a nice fit. I have used the electrical conduit fitting through the inner ribs where the fuel hose goes to make sure it wont rub through and it supports everything nicely. The inner tank I used the 1/4 alu tube as the outlet so I can fit better sight gauges. The outer tank tubes are closest to the main spar and the inner tank tubes are further to the trailing edge at the root rib. The rubber grommets for the outer tank are larger because that hole is already in the rib and I made the extra 2 holes for the inner tank tubes smaller so you can see the smaller grommet used. These grommets are all from Clark Rubber. I just have to put on the clamps for the inner tank tubes on and I just bent those tubes to make then fit nicely and come out of the root nice and straight. I have run Sikaflex at the rear edge corners of both tanks and to the top skin this should hold the rear of the tanks nicely as there crossbars that hold the tanks quite firmly anyway and I also put a little on the forward tank holding brackets as well. When I have done the final fixing of those crossbars I will run a bead from the edges of them to the tanks as well. I will order another mandrill for the rivnut gun but in the mean time I think I can modify the original so it will work
As there is no instructions on how to fit the extra tanks I am very happy with the way I have done it and it should all work nicely when I have sorted out the sight gauges I will post all the details on those as well
Mark
-
To be quite frank...Yes
It will NOT have a approved power supply for charging the unit also it may not have had any internal modifications done by Vertex here if it required any to be compliant with the ACMA rules and approval certificate issued for the Australian version of the VX-220 and because it was not sold by the approved body in australia that can prove the particular unit and serial number does comply with the ACMA regulations
Regards
Mark Kyle
-
Back in the mid 1980's when I was regulary flying gliders out at Kingaroy two guys started a flying school with a IS-28 it was Dave Smart and John Fairbairn. I did a weeks course out there then and learnt so much in that week it was worth every penny and really kick started my gliding abilities. Dave Smart had his own tiger moth it was silver in colour and was modified for aerobatics because when you went inverted the engine would stop because the fuel was gravity fed (iwas told this)..anyway Dave had a tank made so when it was inverted the engine would keep going :). I went for a aerobatic ride with him that weekend armed with a super 8 film camera. I still have the footage somewhere it was a blast I will never forget it...especially holding the camera with both hands and hanging upside down in the 5 point harness filming the 8 point rolls and all the other aeros from the front seat....RIP Dave Smart he was killed in a traffic accident about 3 years later he was a really nice guy such a pity...only the good die young they say
Mark
-
I am not sure actually about transponders...it would be a good question for the ACMA...BUT I am pretty sure it will probably be ok because it is not really for use on the ground only in the air so there are some other rules that may apply regarding that. Also because it would be a industry standard in worldwide aviation it may very well comply./..the only sure way would be go to the ACMA website and ask the question. Or of course you could just go with the flow and use what they specify its all a can of worms now days it used to be a lot simpler once
Mark
-
The only real way to be sure you are compliant is buy it from a Authorised australian dealer for the radio company's office BASED here in Australian. Both icom and Vertex australian arms are great for service and legal requirements they always follow the law here. just check your supplyer is a "authorised AUSTRALIAN dealer from ICOM australia or Vertex Australia
Mark
-
When a radio company or even Joe Bloggs from down the road wants to import and sell into Australia "legally" they must submit a unit for testing to make sure that this radio meets or exceeds the published specifications required in this country's legislation for radio transmitters in what ever band it will work in. This process costs a lot of money and it is only for that brand,type and specific model of radio. There are a lot of brands and a lot of models and all MUST go through this process to be approved. Last time I heard it was around $15,000 to $20,000 to get a radio approved.
Mr Micks pilot supplies gets his stock from Mr whoflungdung out of Guandong province and sells it to someone as a great radio. Mr ACMA is doing his rounds at the local airfield/hangar and stumbles across this radio and think wow this is another ring in and hence the process screwing the unsuspecting pilot to the wall.
All countries around the world have their own specifications they require for transmitters to comply with. It turns out Australia requires usually a better spec than most other countries its not by a lot but it can make significant differences when it comes to adjacent signals and also harmonic radiation. These specs if they are not adhered to can upset or impede other radio services including emergency radio services. This is why the rules are in place.
What gets on my goat is the importer should be the person who bears the pointy end of the stick they are the ones flouting the law. The law here is it is the end user that cops the fine not the company that didnt give a SH*t and just wants to make a quick buck regardless of the rules.
its no different with RAA rules how would you feel if someone came along and just started flying his own aircraft without any regard for circuit direction or safety or any compliance or inspection of the machine he is flying over public areas?
But he sells this aircraft really cheaply because he can import it for a great price and make a big profit because he doesnt spend any money making sure it complys with the rules
Mark
-
Hi
The Vertex VXA-220 is the only vertex HH that is approved for air and ground use...when it is bought from a authorized Vertex australia dealer as overseas versions may not be approved because they are different
Mark
-
Hi Maj
You mentioned the "Kool" props where can you get them from in OZ or do you direct import them
Mark
-
Now that is funny...I enjoyed it this morning while slurping up a coffee
-
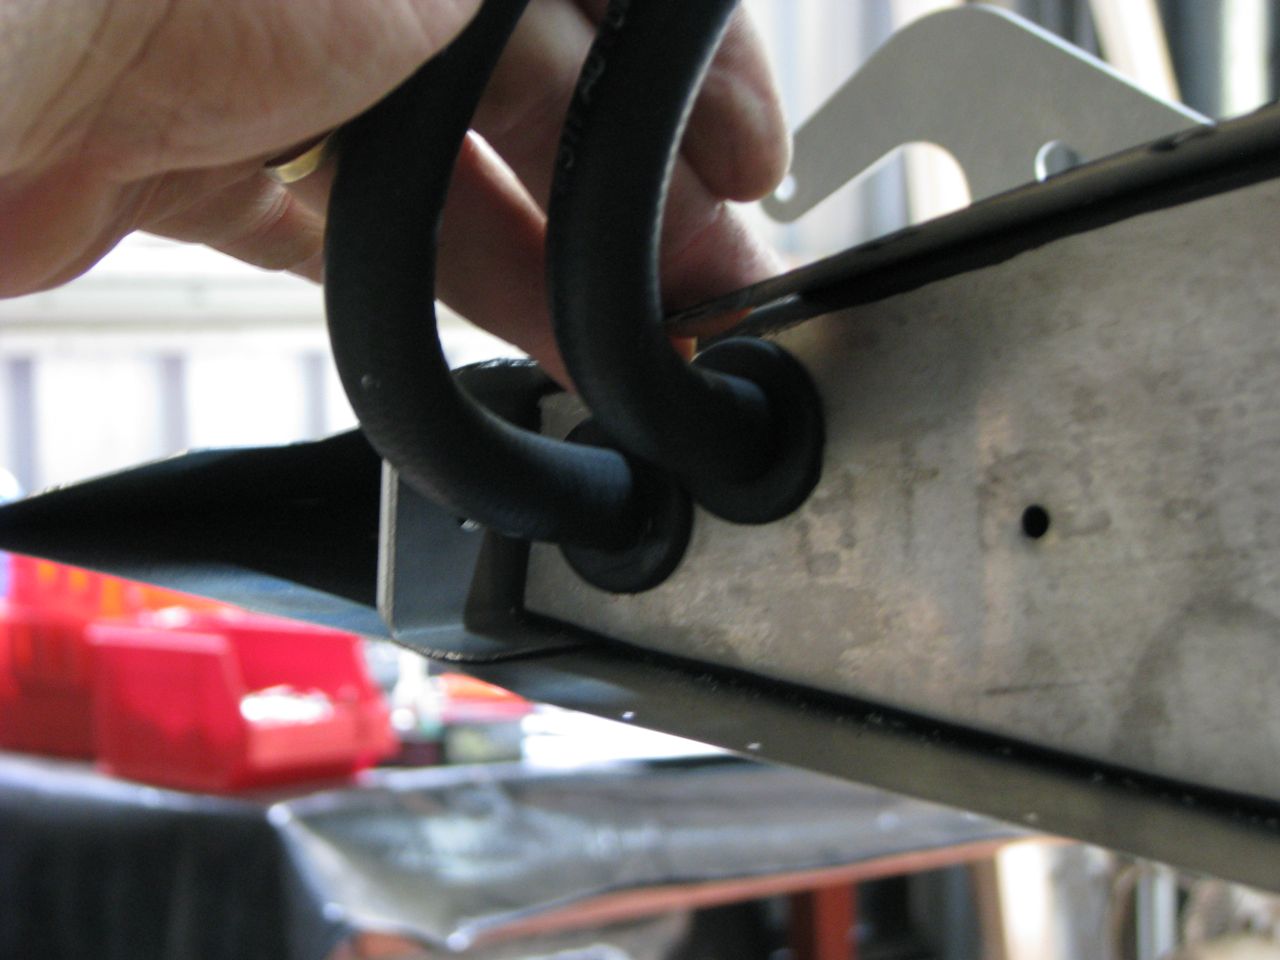
Hi Ian
You havent done anything wrong. Steve the LAME who is building one down the road tells me this is normal as he has struck this as well, you have to bend the elevator control rod so it doesnt hit. Ring Reg Brost if thats who you got the kit through. I am told this is "normal" and this is what you do. You are really powering along I wish I could devote more time to mine at the moment but work has been ballistic this last couple of weeks....got to take it when its around at the moment. Everyone seems to be the same one week work is overflowing the next its a famine
'
Mark
Mark
-
Hi 80K
all the tanks feed into the "reserve" tank the one with the indicator on the dash its behind the seats. You can add an extra switch to totally control then each side. The 2 tanks in each wing will have 1 switch on it to switch between each outer and inner tank on each wing so then they will come to a tee which feeds into the reserve so that at all times both sides feed into the reserve. In one side you could then have a switch which will of course then separate the sides so you can control the fuel flow 1 tank at a time. Not sure if I will go to that extent yet as it can be added later anyway. I just like to be able to separate each tank and decide which one flows and when. It would mainly be used if you ever get a leak in one tank or a issue with a tank
Mark
-
Hi Kingo
what do you plan to put the engine into?....would go pretty well in my savannah :)...what do you think it has cost you so far the youtube video is pretty awesome especially using the forklift
Mark
Another NEW Savannah XL on its way
in Savannah
Posted
Hi Everyone
Well its been just over a month since my last post and I can tell you I have had withdrawl symptoms. I got a chance finally to get back to the sav today. Work and family commitments and a heap of other stuff before xmas and then we went up to the farm for a week on new years day and got a heap of work done up there including rescuing my dam from breaking its wall but thats another story and of course the rain here last week saw me digging trenches and other stuff to stop water going into my sheds..never seen so much water flowing over in and down our place here at Burpengary..but we got off very lightly compared to most others around the river and those poor souls in Toowoomba and the Lockyer valley.
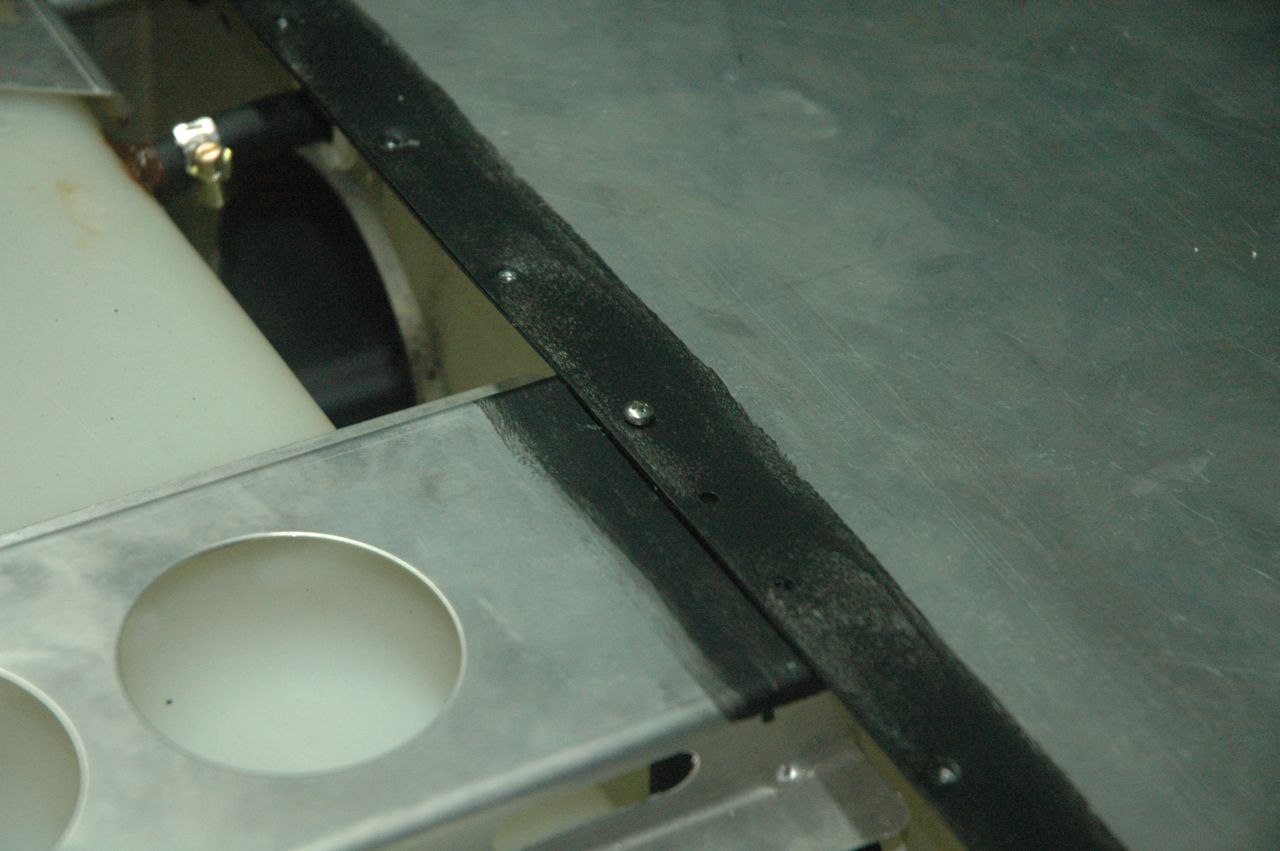
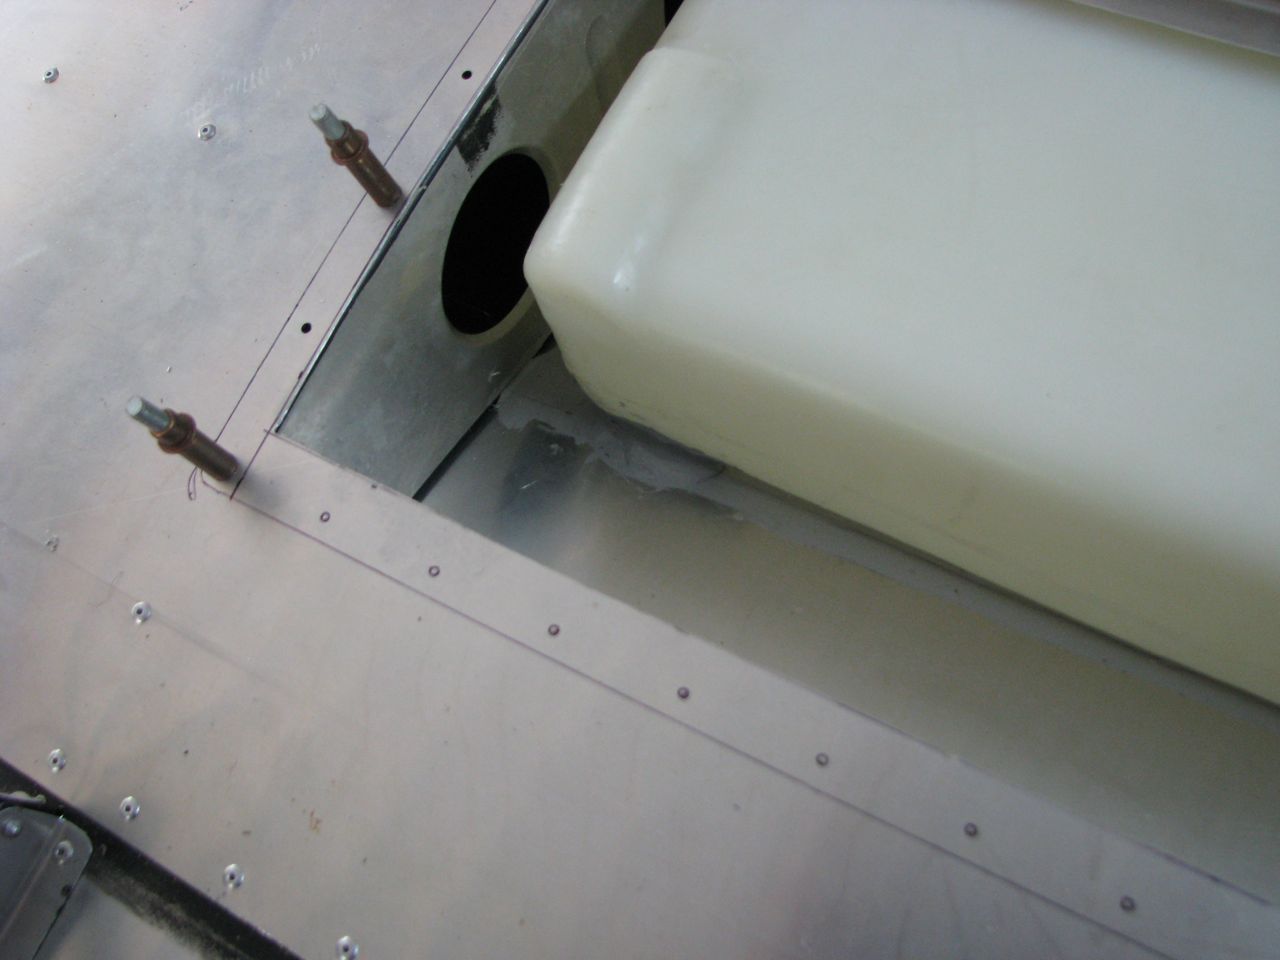
I have to say installing the extra tanks is a bugger of a job it takes a lot of time and a lot of fiddling around. I hate to have counted how many times I have had all 4 tanks in and out of the wings...but the light is at the end of the tunnel finally after today. I got the alu tubes hooked to the outer tank and then proceeded to put the fittings into the inner tank for the fuel gauge. Now because I am using 4 sight gauges I was 1 fitting short so I made one up on my lathe came out pretty good really and it was just like the supplied ones just it had a round nut instead of a hex one. The main thing I wanted to show was I moaned before about the sight gauge fittings not in the right place when you go by the measurements in the manual. You have to open the holes out in the ribs and then I have been plating the holes so the internal strength is still in the rib. On the tank picture you can see the black niko marks which are the manual measurements but the blue marks are where the original holes in the ribs are you can see how far out they are and why you need to extend out the holes the conduit exit guides really do make the hose transition through the rib excellent. So I fitted and sealed the 2 gauge fittings into the tank and left them to dry tonight then I will fit the tank and that wing is pretty much complete. Then it onto making the flaperons and elevator then its onto the really big job of the fuselage. I should be able to make that here at my house so will be able to work on it regularly pretty much a few hours each day or night so progress should be much quicker.
Ian...the brauniger weighs 1 kg. I see you have made a new carbon dash plate I got some 1mm alu sheet and have cut it out to shape but have not fitted any gear into it yet. The 3 Belite gauges have arrived I am going to fit and I am seriously considering a flat gyro compass in the dash as well. My dash will also have a angled downwards "glovebox" in it so I can have maps and other essentials in it and so they wont fall out on takeoff its angled down it will just be a open front but will have to think about some sort of flip or sliding cover so prevent all this falling out when practising stalls etc as the sav nose angle is unbelievable when doing stalls.
Mark