

Kyle Communications
-
Posts
6,598 -
Joined
-
Last visited
-
Days Won
95
Content Type
Profiles
Forums
Gallery
Downloads
Blogs
Events
Store
Aircraft
Resources
Tutorials
Articles
Classifieds
Movies
Books
Community Map
Quizzes
Posts posted by Kyle Communications
-
-
Hi Maj
You mentioned the "Kool" props where can you get them from in OZ or do you direct import them
Mark
-
Now that is funny...I enjoyed it this morning while slurping up a coffee
-
Hi Ian
You havent done anything wrong. Steve the LAME who is building one down the road tells me this is normal as he has struck this as well, you have to bend the elevator control rod so it doesnt hit. Ring Reg Brost if thats who you got the kit through. I am told this is "normal" and this is what you do. You are really powering along I wish I could devote more time to mine at the moment but work has been ballistic this last couple of weeks....got to take it when its around at the moment. Everyone seems to be the same one week work is overflowing the next its a famine
'
Mark
Mark
-
Hi 80K
all the tanks feed into the "reserve" tank the one with the indicator on the dash its behind the seats. You can add an extra switch to totally control then each side. The 2 tanks in each wing will have 1 switch on it to switch between each outer and inner tank on each wing so then they will come to a tee which feeds into the reserve so that at all times both sides feed into the reserve. In one side you could then have a switch which will of course then separate the sides so you can control the fuel flow 1 tank at a time. Not sure if I will go to that extent yet as it can be added later anyway. I just like to be able to separate each tank and decide which one flows and when. It would mainly be used if you ever get a leak in one tank or a issue with a tank
Mark
-
Hi Kingo
what do you plan to put the engine into?....would go pretty well in my savannah :)...what do you think it has cost you so far the youtube video is pretty awesome especially using the forklift
Mark
-
Hi Ian
I was thinking that it could be easily broken but after thinking about it they are way up in the wing root and out of the way and reasonably protected there wouldn't be any issue. This would make life easier as you can buy push in festo fittings like they use in the top of the tank screw caps for the breathers for the tanks. These fittings can be easily made to fit to the end of my 1/4 inch alu tubes coming from the tanks and the glass tubes will have nice seals then I also think you can get the glass tube in a toughened format as well. I will chase this up this week and see what I come up with
Mark
-
Hi Ian
That particular box you are talking about is scarey I must say. I can tell you that the extra tank corner mounting brackets are in there that maybe some you haven't recognised. One of the big things with this kit is finding all the parts. I have had several times when I could not for the life of me find some parts. But eventually they are actually there its amazing how you miss them about 3 times after getting everything out and sorting through them. I would hate to think how many hours I have spent looking for particular brackets etc. The next thing you have to decide is how to mount the engine cowl wether you have the back side of it either above or inside the fuselage firewall area. Some guys seem to have it flush others inside not sure what I will do when it comes to that part I think I will just keep looking at as many as I can and decide then.
JG
thanks for the heads up on the Lexan and fuel...I will do some research into how I will do it...I want the look of clear glass but don't want any glass in there so I will ask a few people I know about what to use but I am sure I can make anything I need to make the couplings to the sight gauges. It helps when you have a 4 axis CNC machine at home :). Also had a think about the fuel return as well I may have to put another entry into the tank for it as having a "T" in the same line will give a false reading of level while the engine is running but not of course when the engine is stopped. I will have a fuel switch system so that I can switch each tank in each side individually basically its 2 switches each one will switch the outer tank and inner tank on each side
Mark
-
I almost forgot...the wing I am working on is the right wing. The main tank in that wing doesn't have a sight gauge as it is used for the fuel return from the engine....mine will have the fuel return will go into a "T" on the top input to the tank it wont make any difference to the operation but I will know exactly how much fuel I have in all 4 tanks.
Ian
looks like it was raining cats and dogs there...I don't know how you are building the sav in that trailer...I couldn't fit in there with the plane or either i would have a crook back from being hunched over working on it. I am blessed to have a 6x6 mtr pretty much empty garage to build mine in so far and the fuse will hopefully be done over here as I have created a lot more room in my big shed it is 12x7.5 mtrs. I will leave the wings and tail feathers at the other garage until they are needed. You are really powering along with the fuselage how many hours so far do you think you have put into the fuselage
Towering CU yes just ring me 0408724272 and you can certainly come and have a look....I will be spending a bit of time up at the property I think after new years but should be around. The sav is currently over at upper caboolture being built but please feel free to ring me and come and have a look
Mark
-
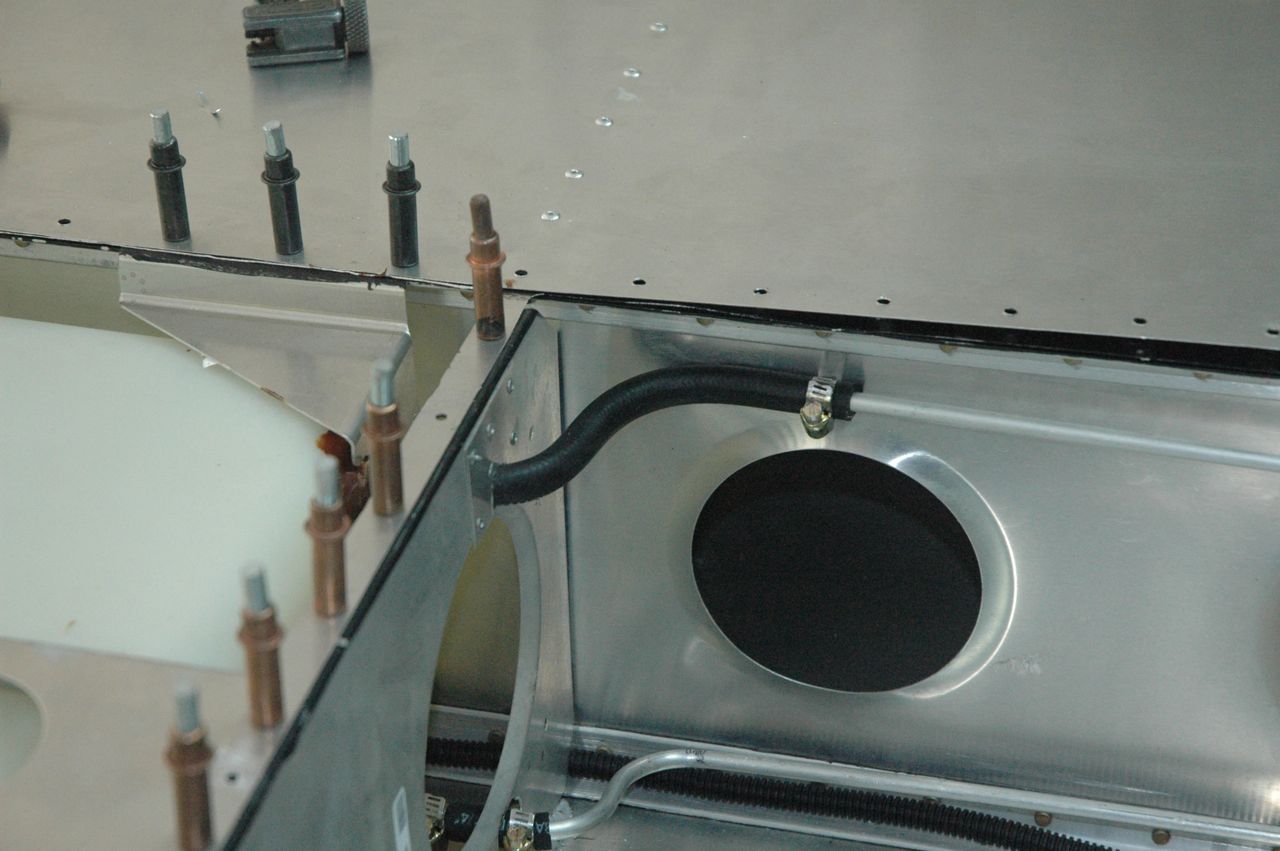
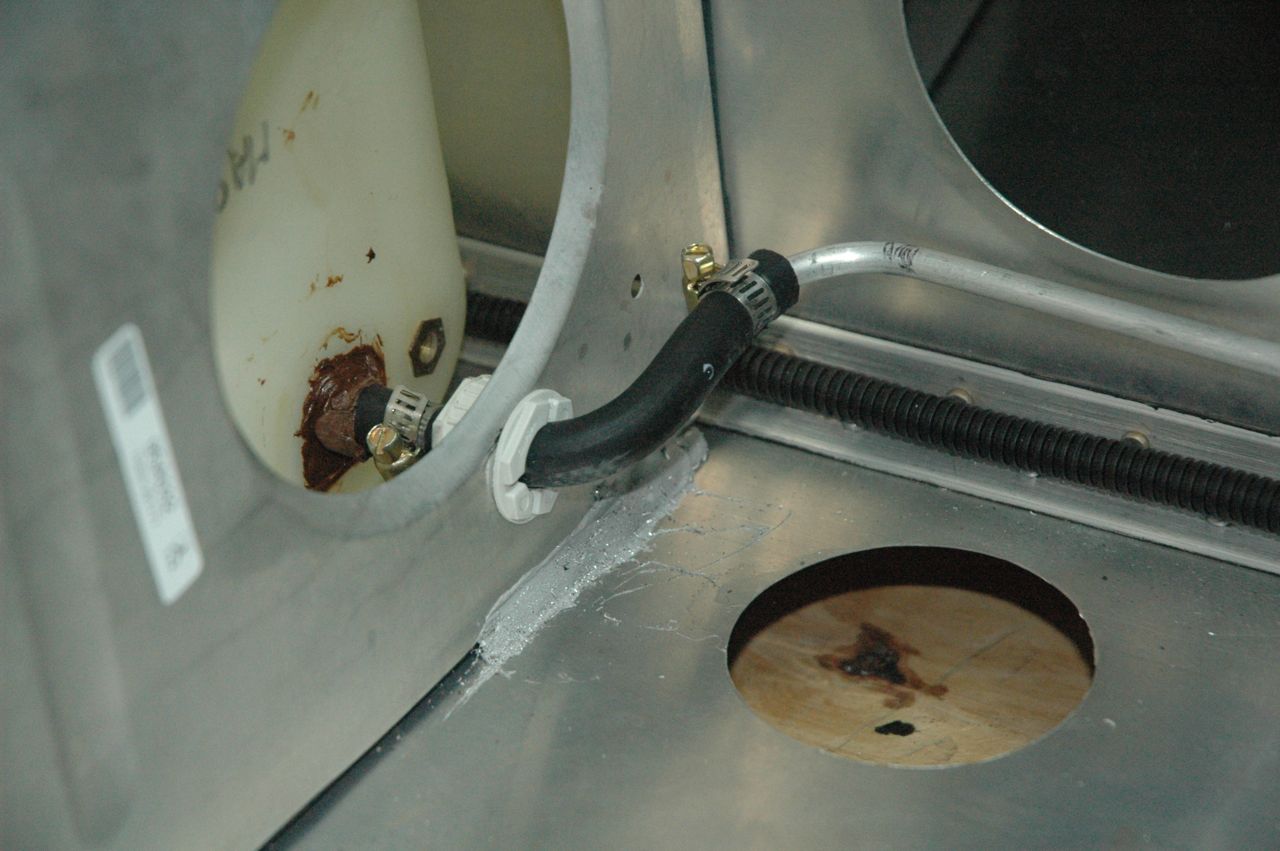
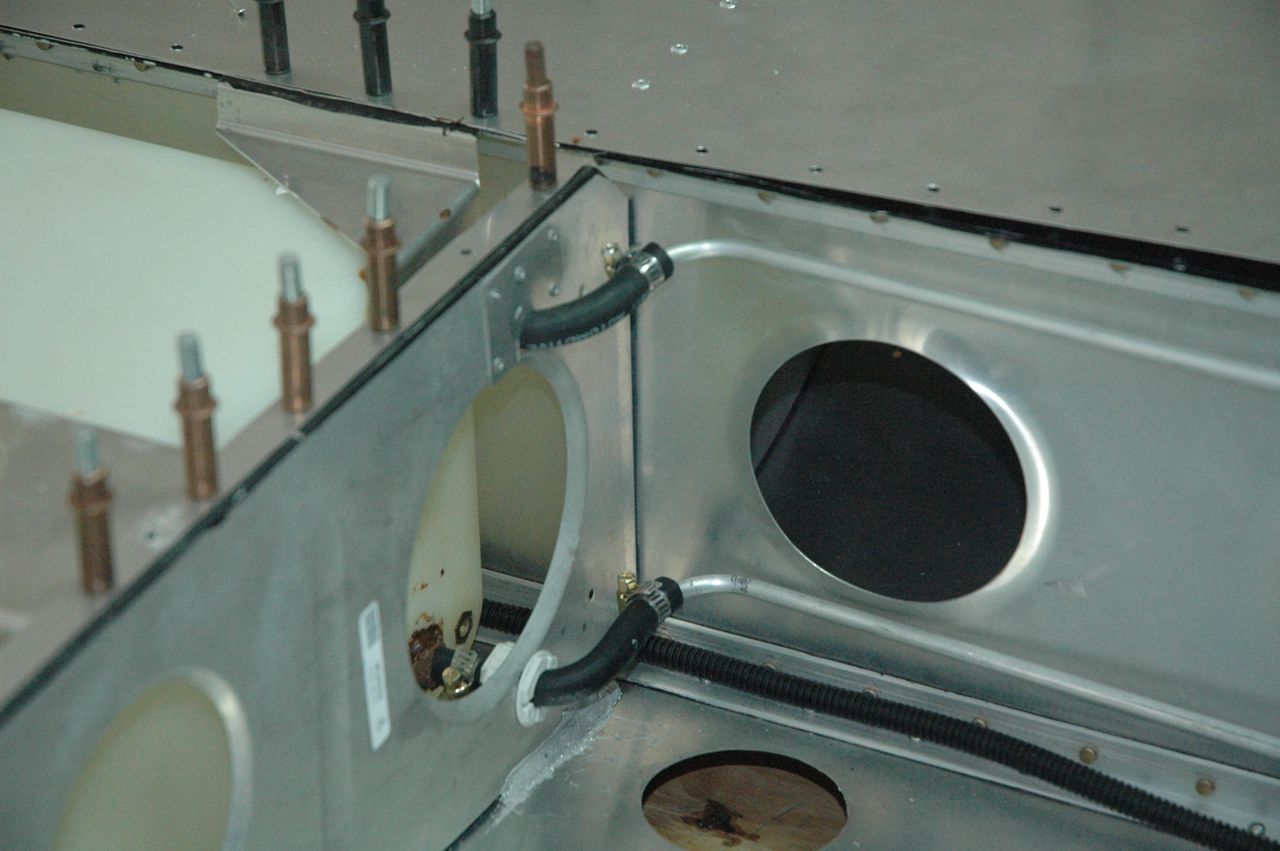
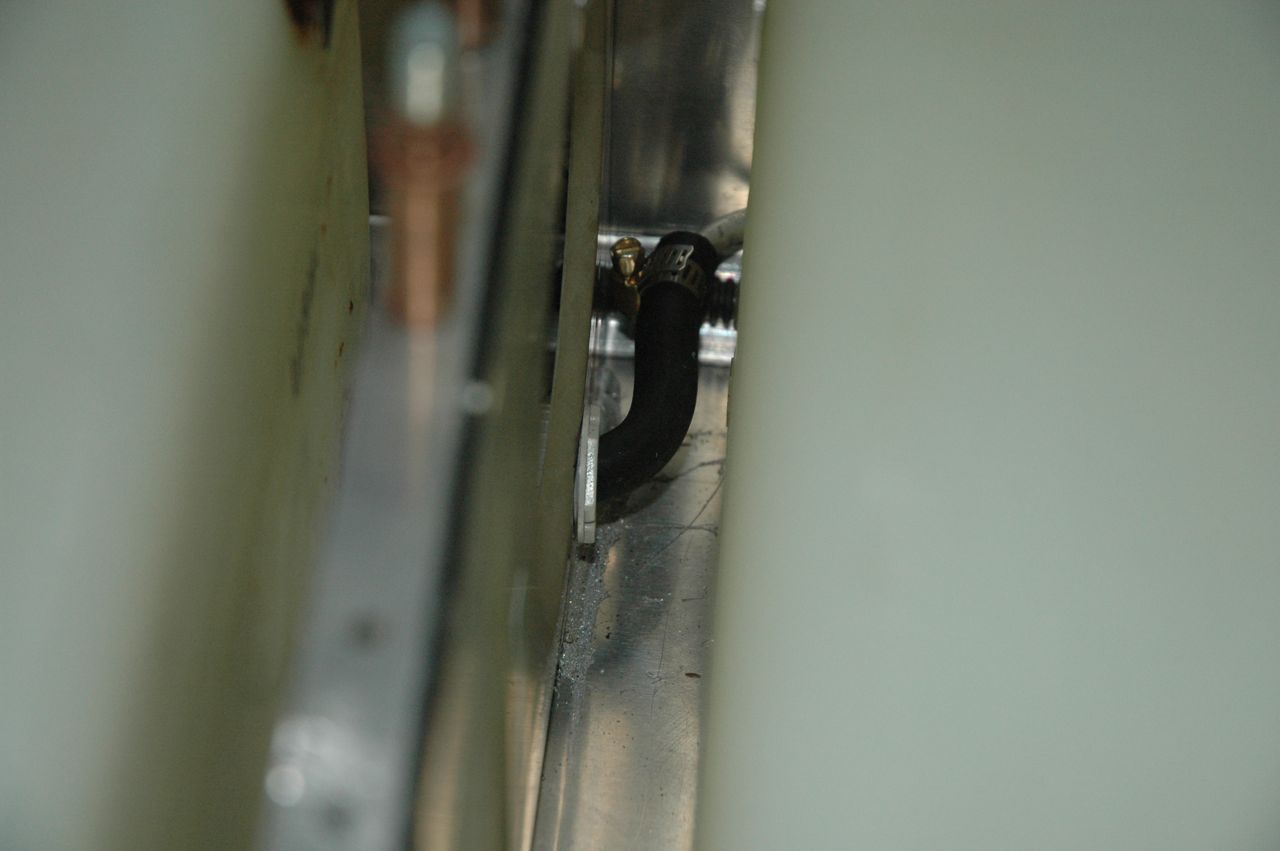
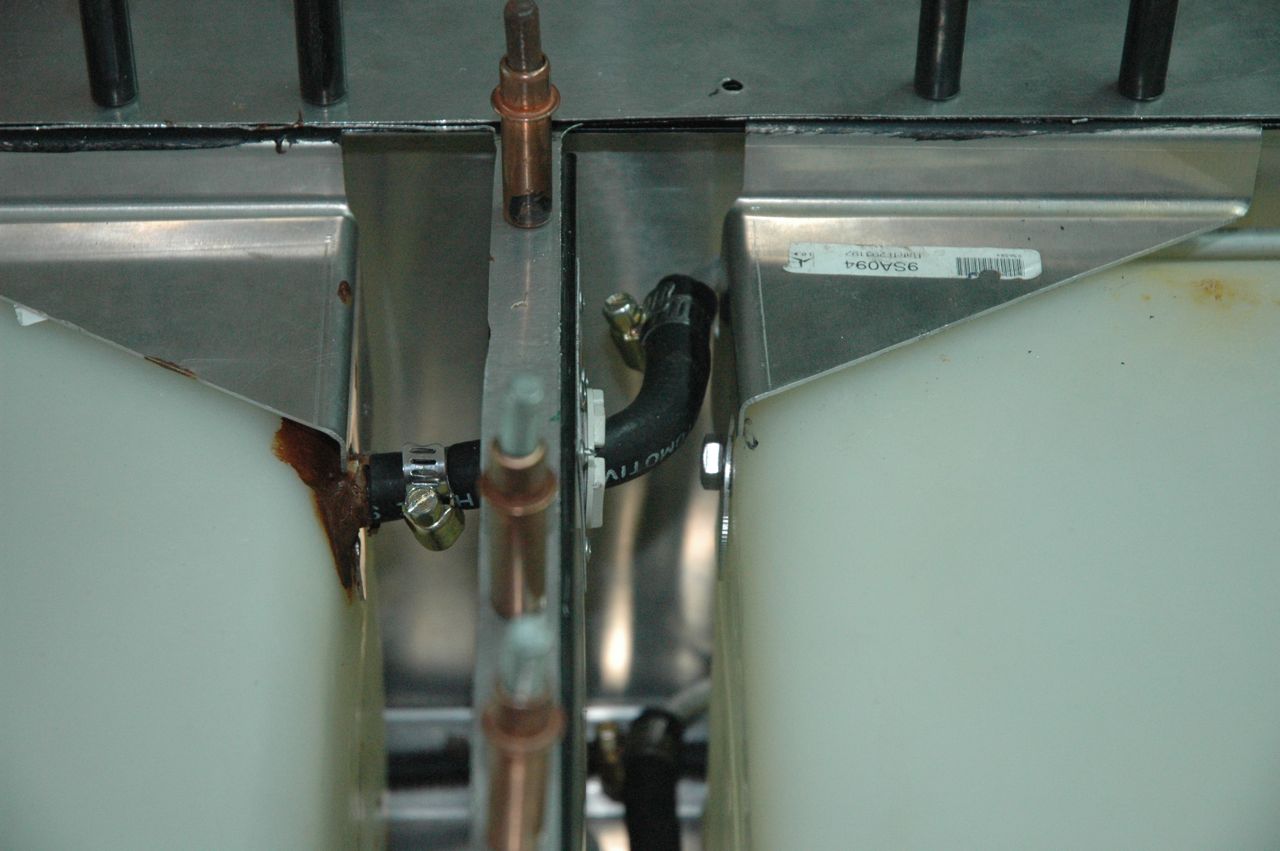
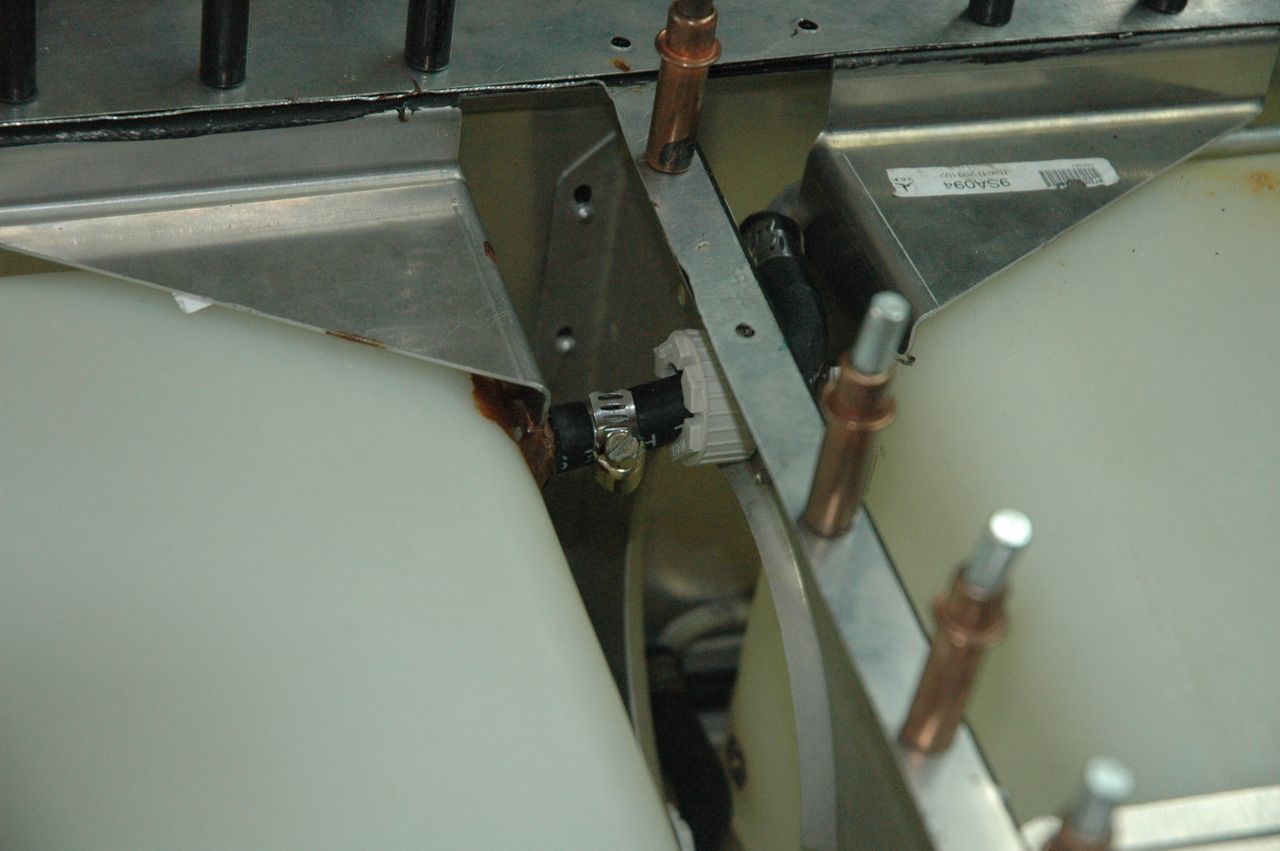
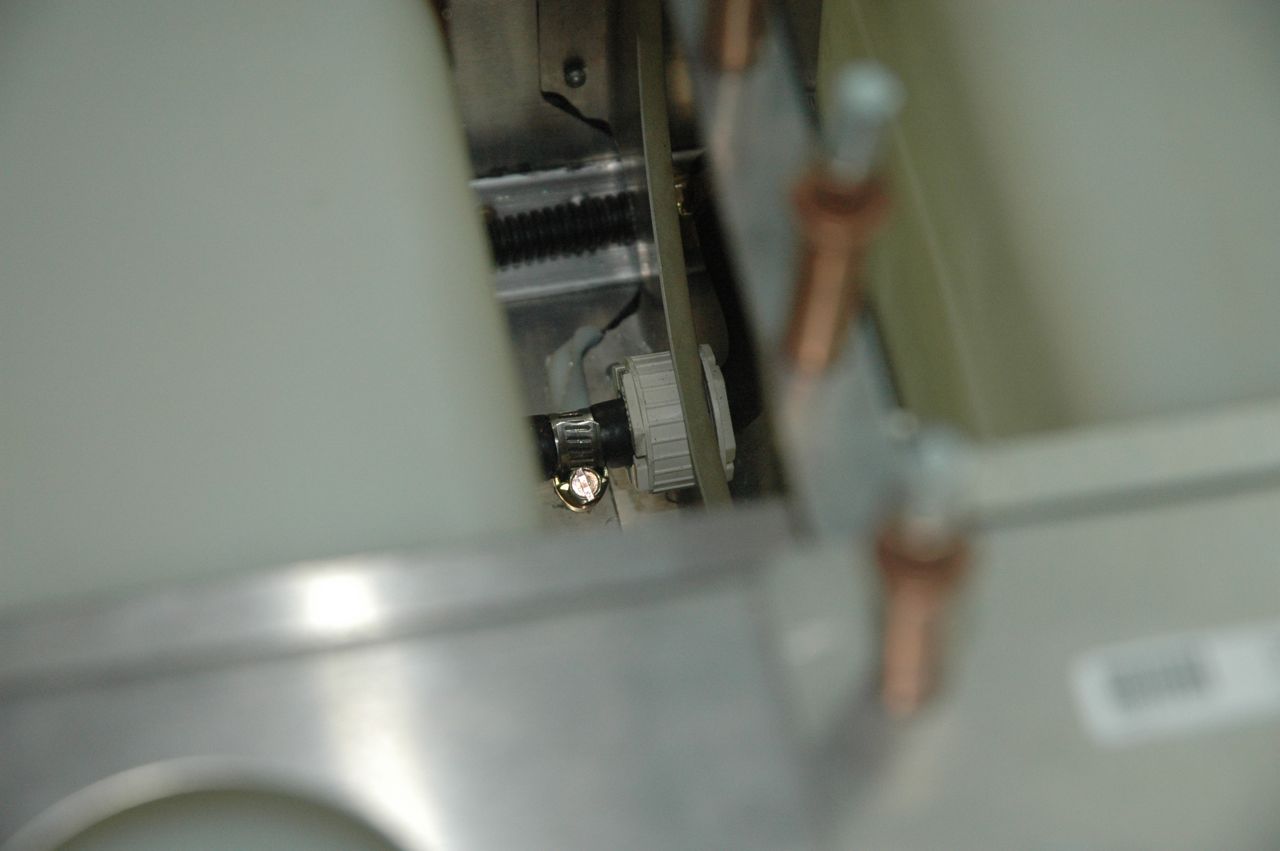
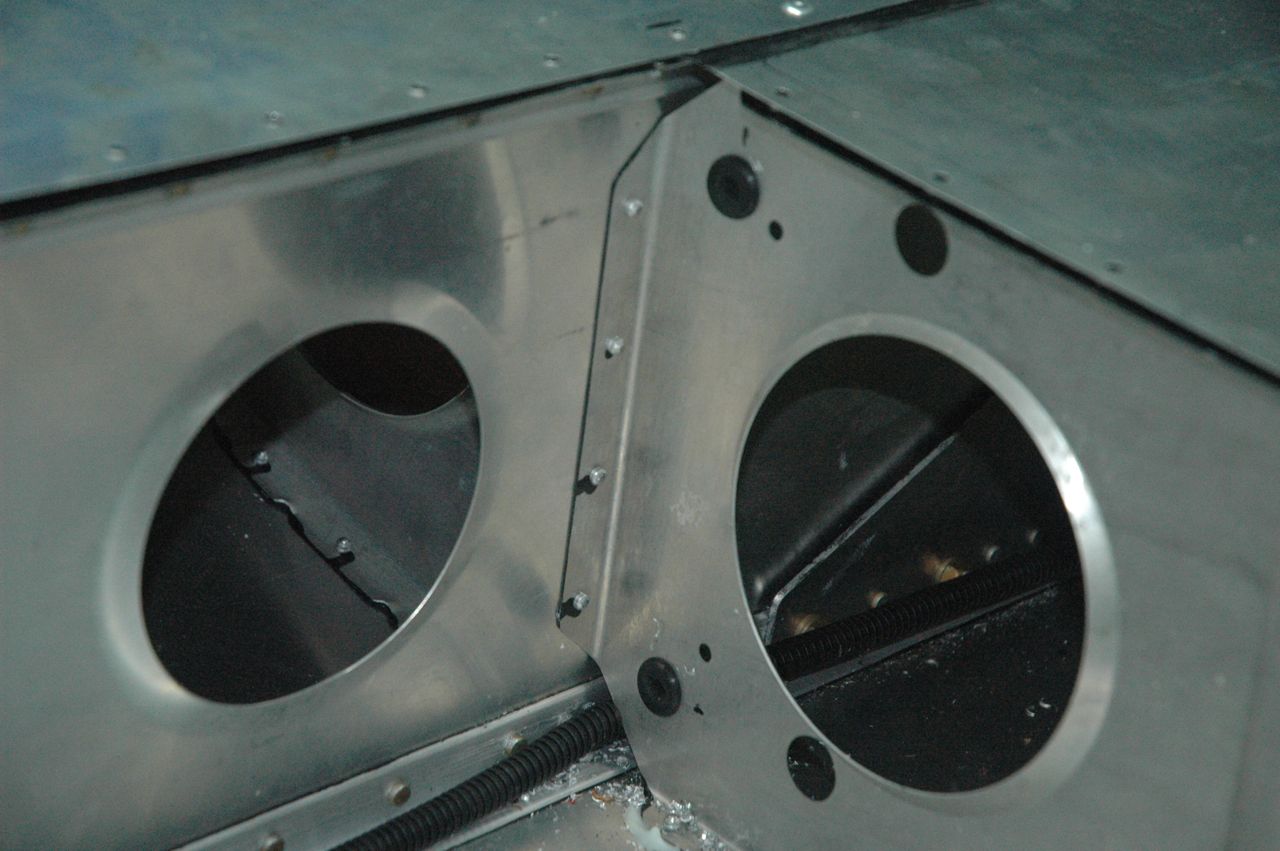
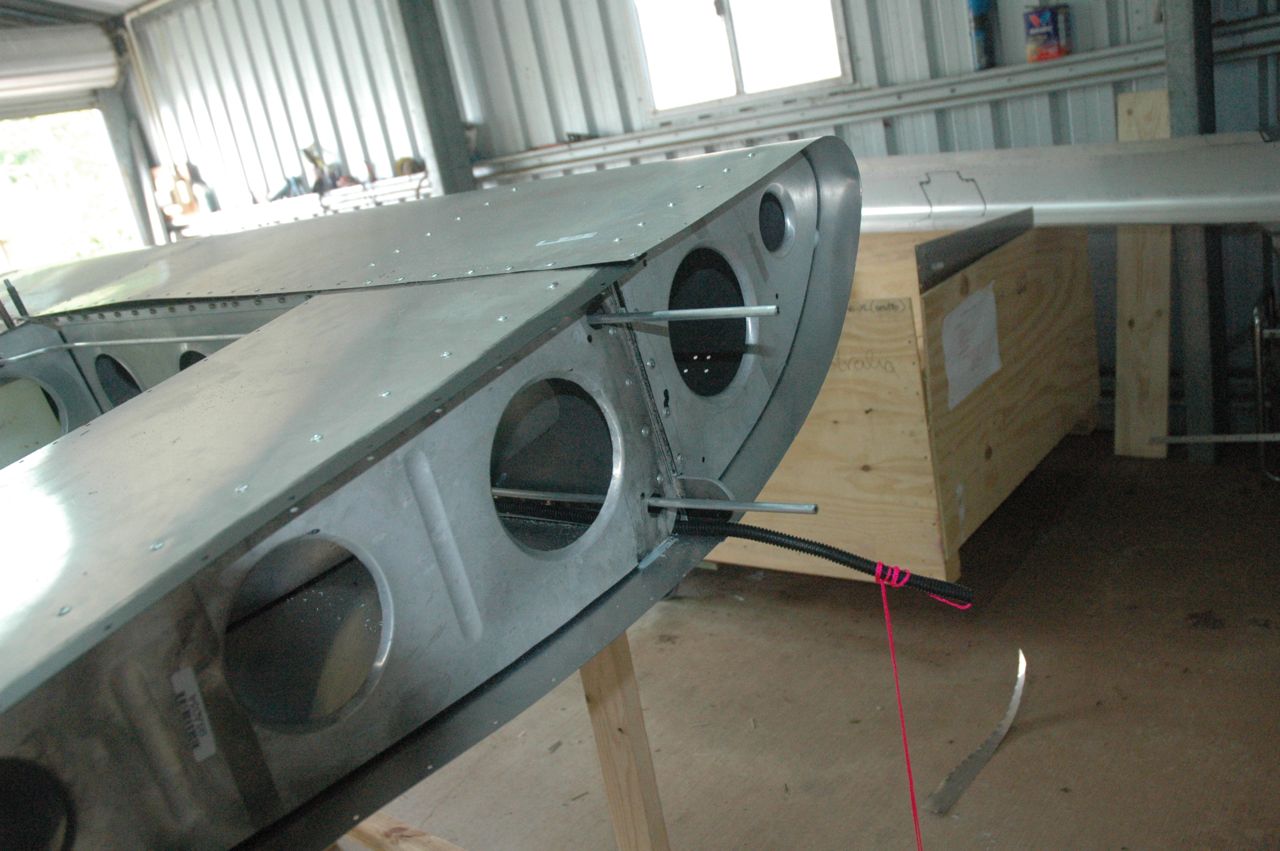
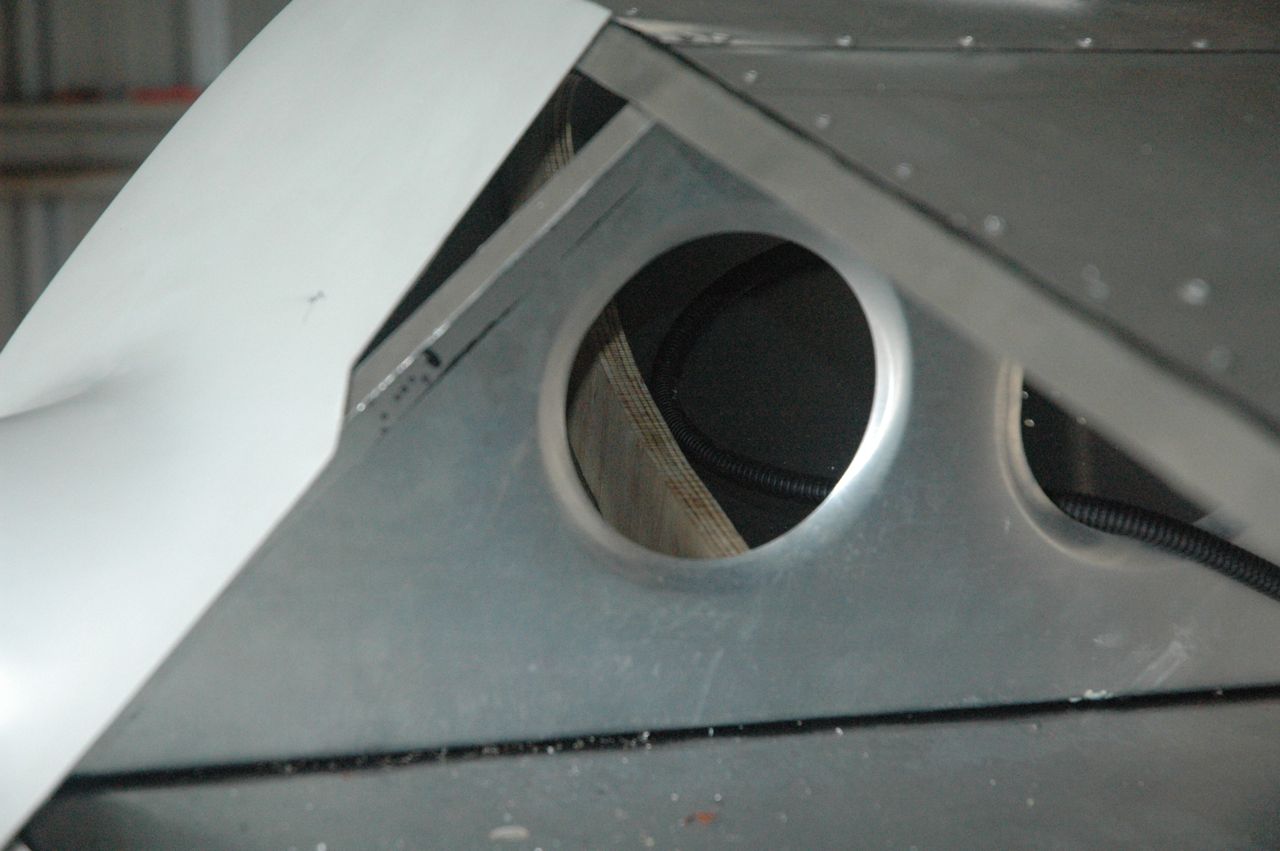
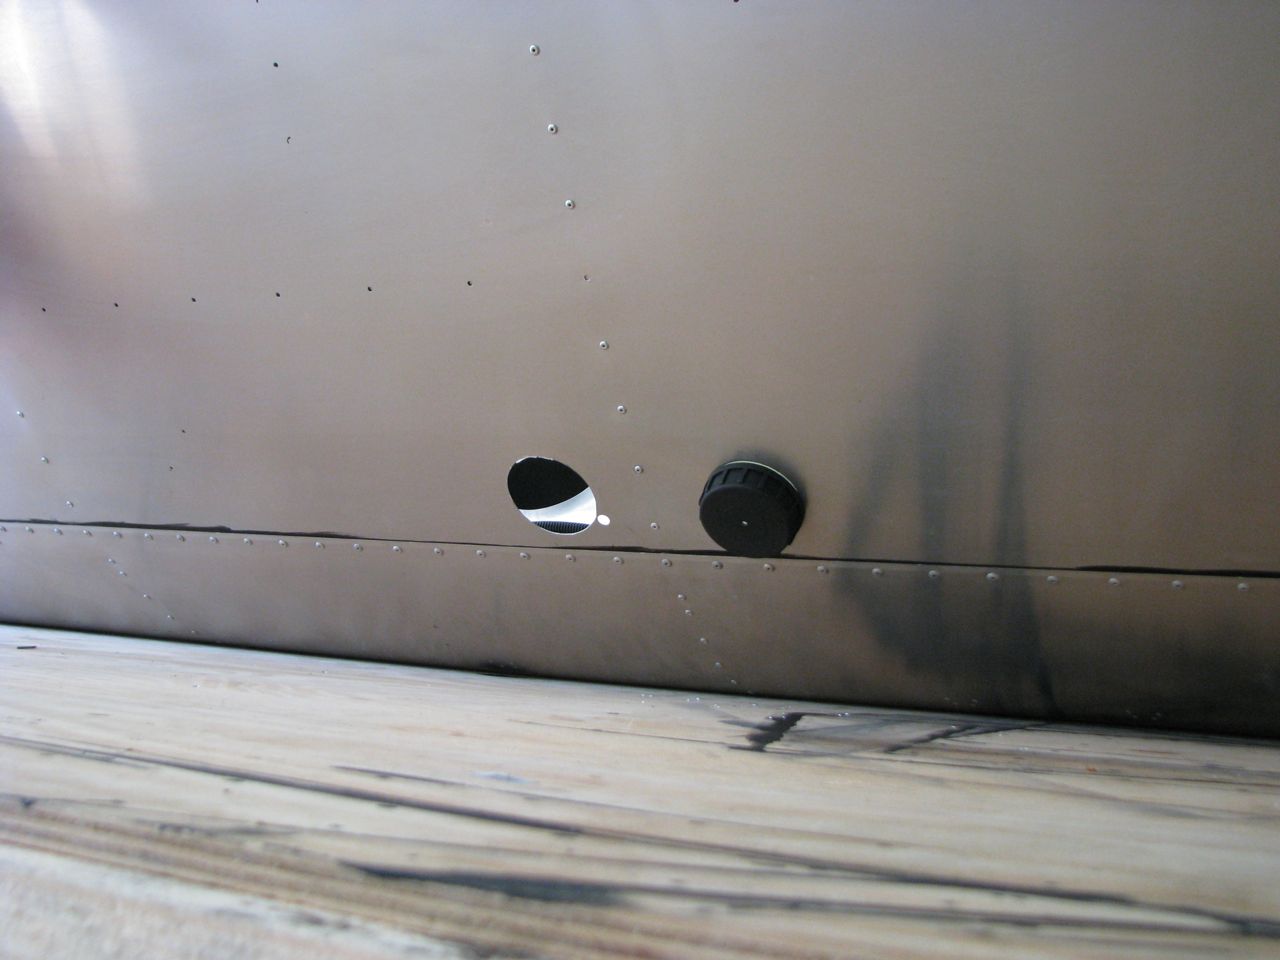
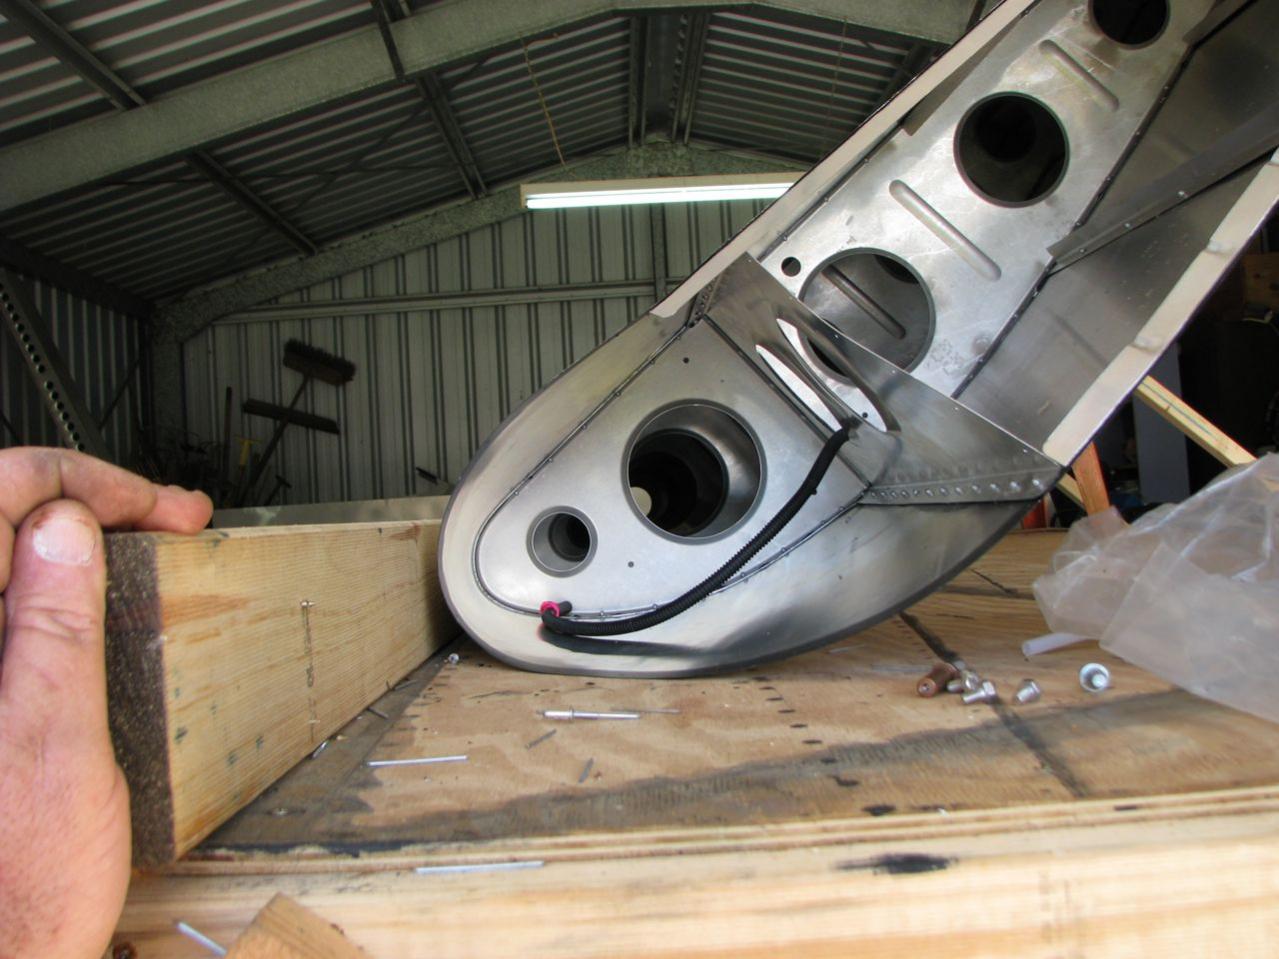
What I ended up with was this
I wasnt happy with the way the tank indicator fitting were placed into the tanks...dont use the measurements in the manual do it by trial and error and marking it will be much better and save a lot of extra drilling and filing and fixing...you will note I have had to put 1 small filler piece in because the hole got what I consider to be a little large. I thought I would just have the 1 bend in the alu tube and use the actual fuel tube to do the bend around the tank. This worked much better so I had some nice conduit feed throughs which the fuel tube fitted nicely through and would make a perfect grommet for the rubber fuel tube so it couldn't be cut or rubbed on through the ribs. These worked so well I will use them in the different sizes for all the rubber fuel hose. The pics are pretty much self explanitary as how it has ended up...I think a much better job all round and probably a bit safer against rubbing. I will check a few more things and clearance around the tanks and maybe might just buffer the tubes with some neutral cure silicone if I need to I will take some more pics of that.
Mark

-
Hi Everyone
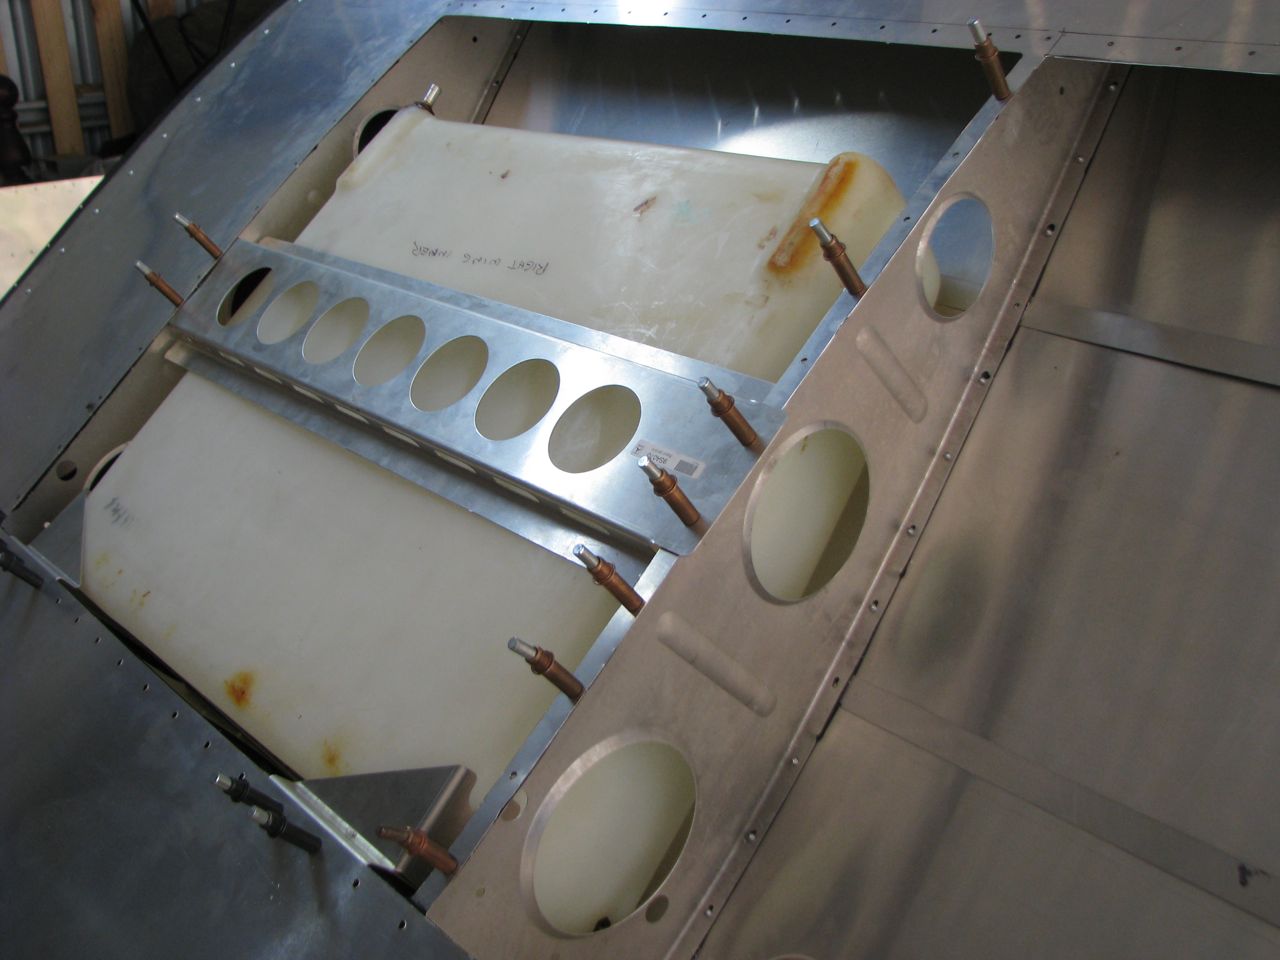
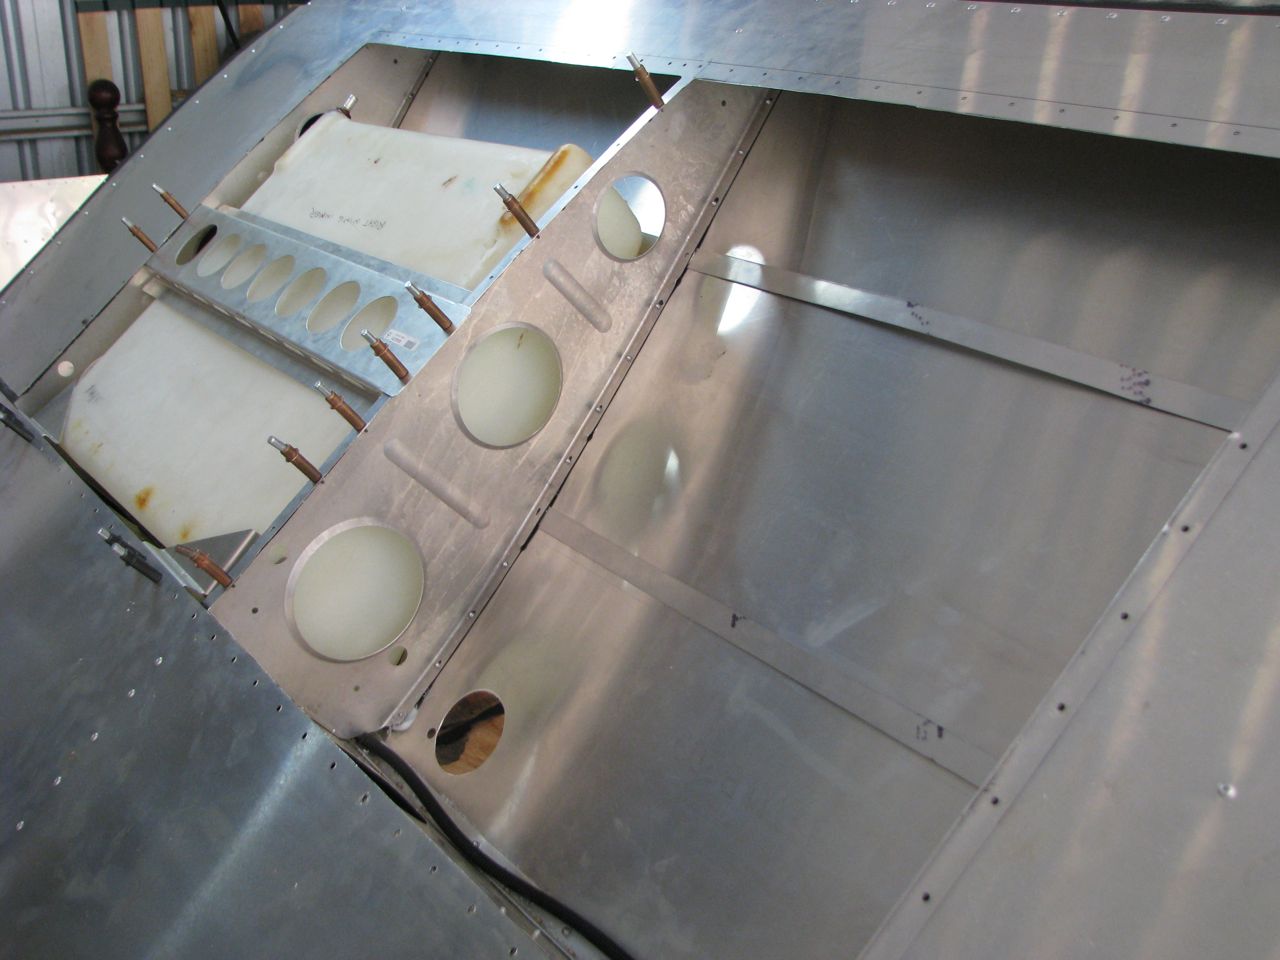
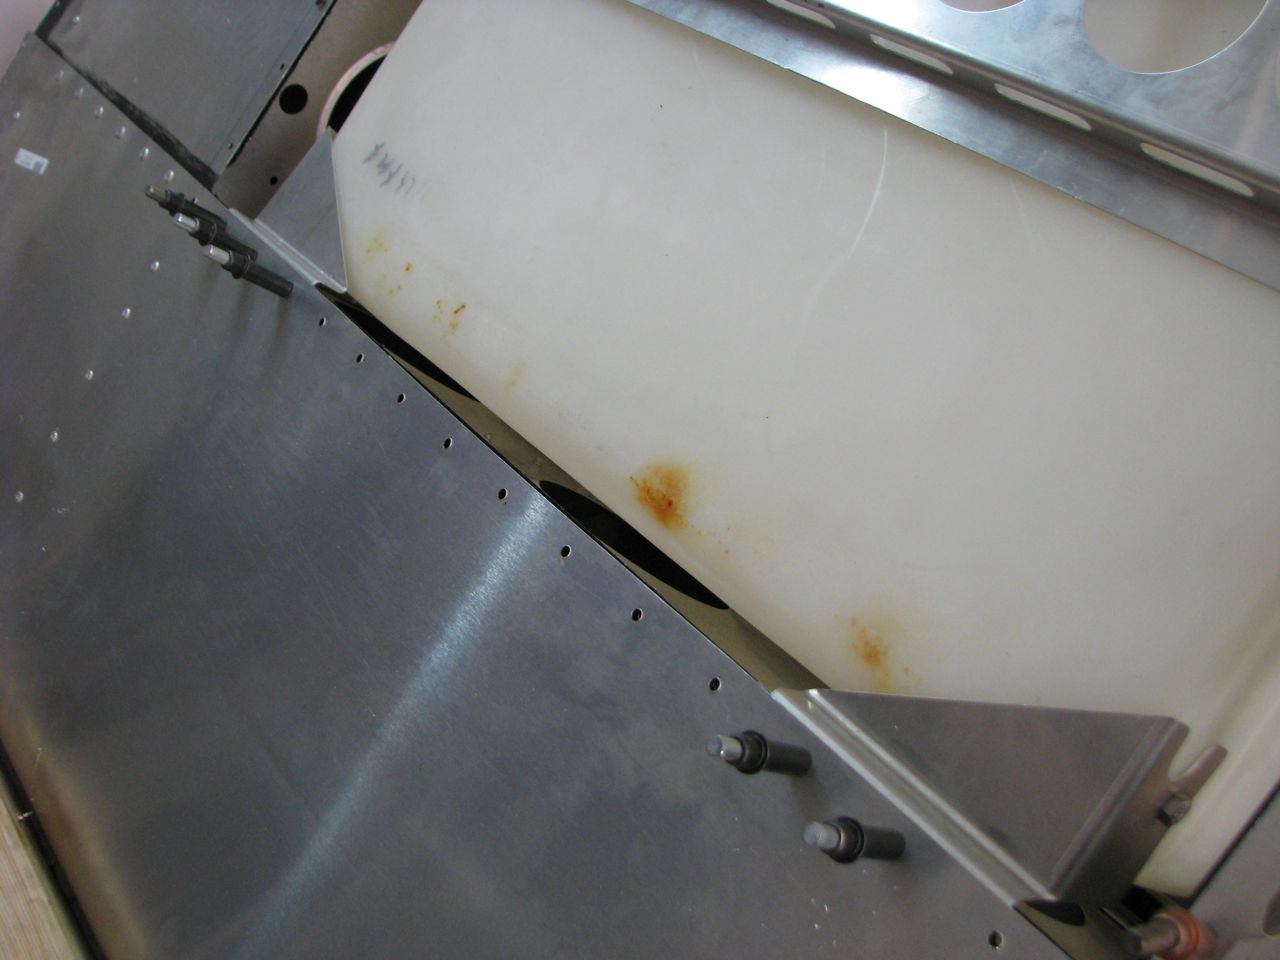
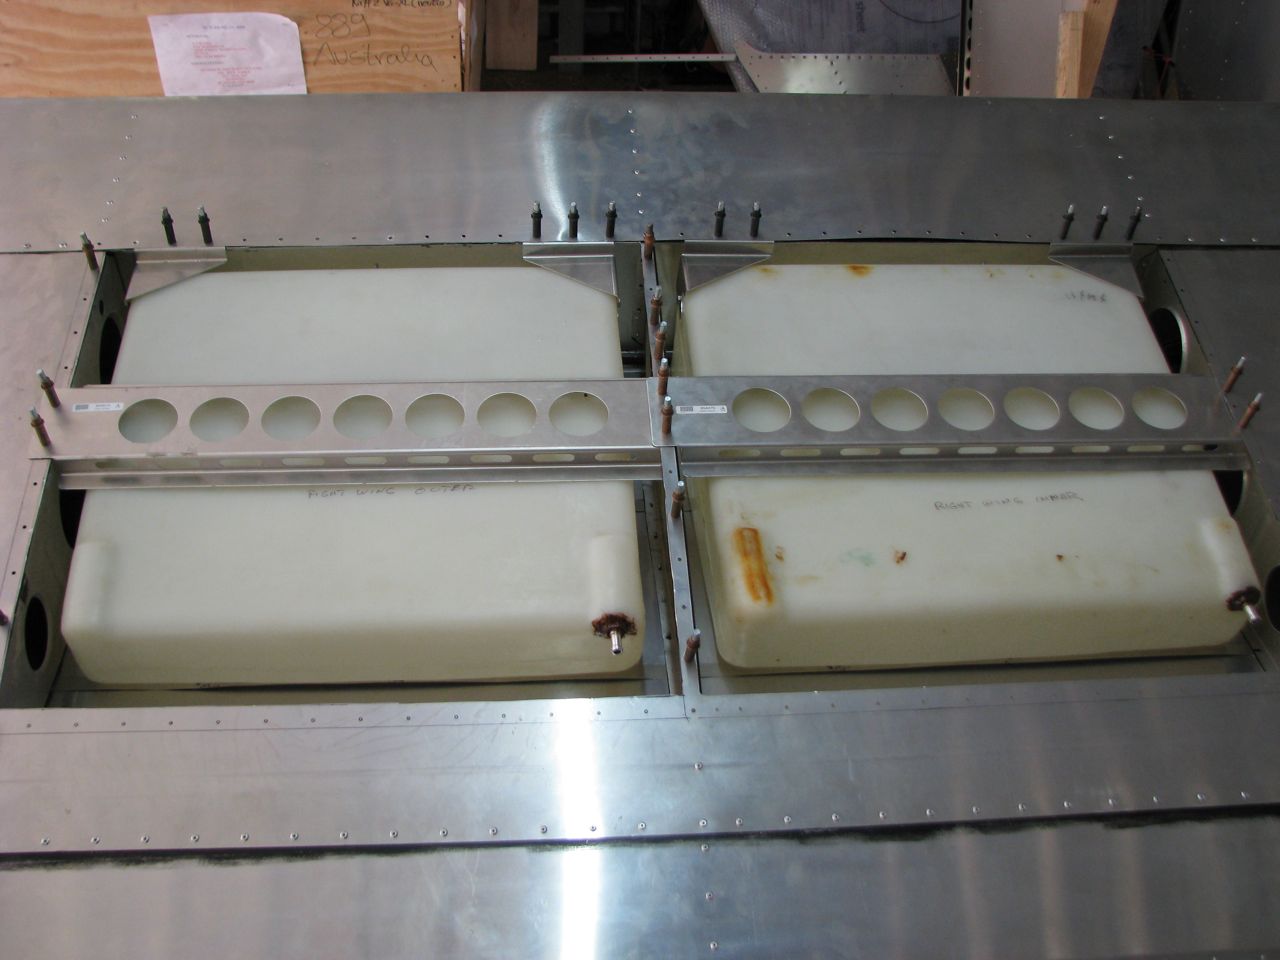
I came back from the property early so I had time to work on the tanks today. What a mission it was too. I was told a couple of ways to install the second tanks and thought that sounds easy enough... well maybe not. I will go through my first attempt then do another post with what I ended up with.
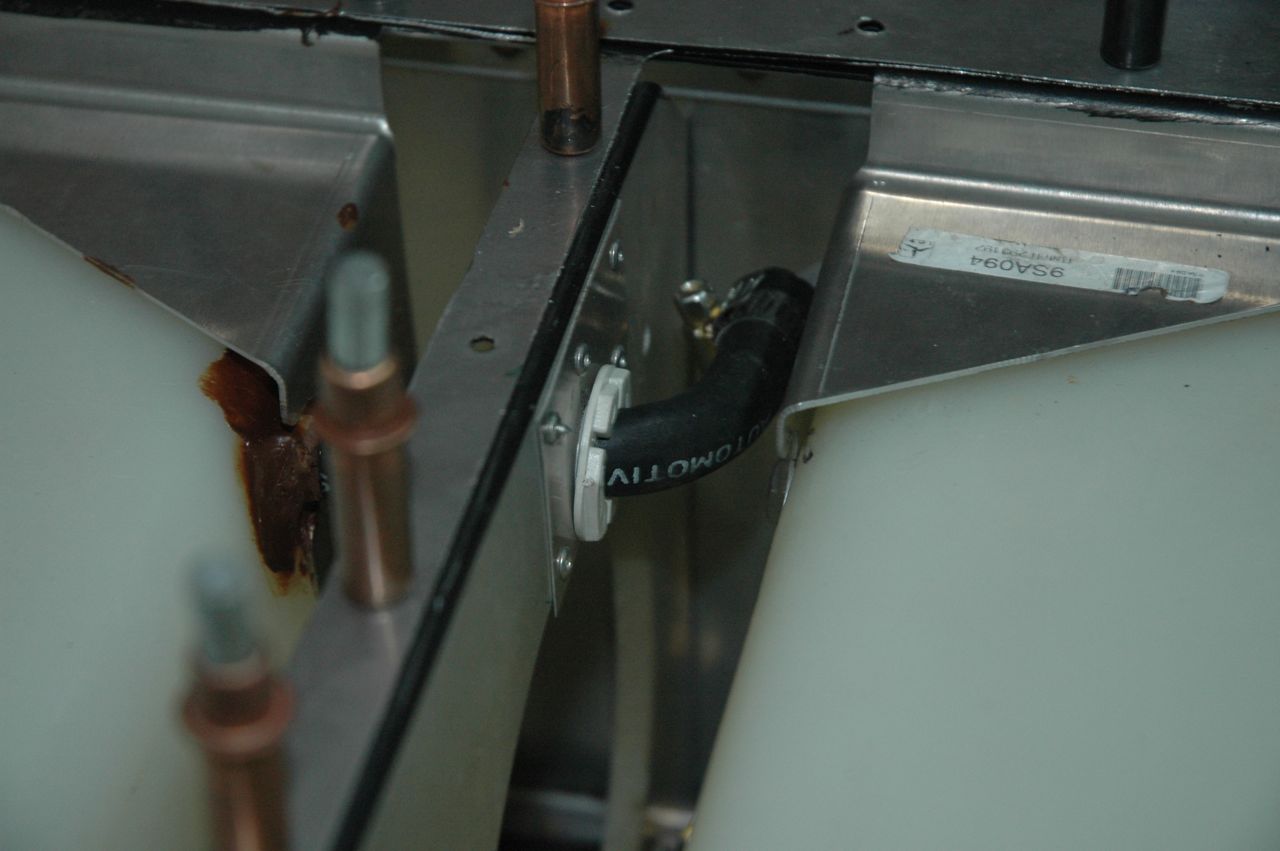
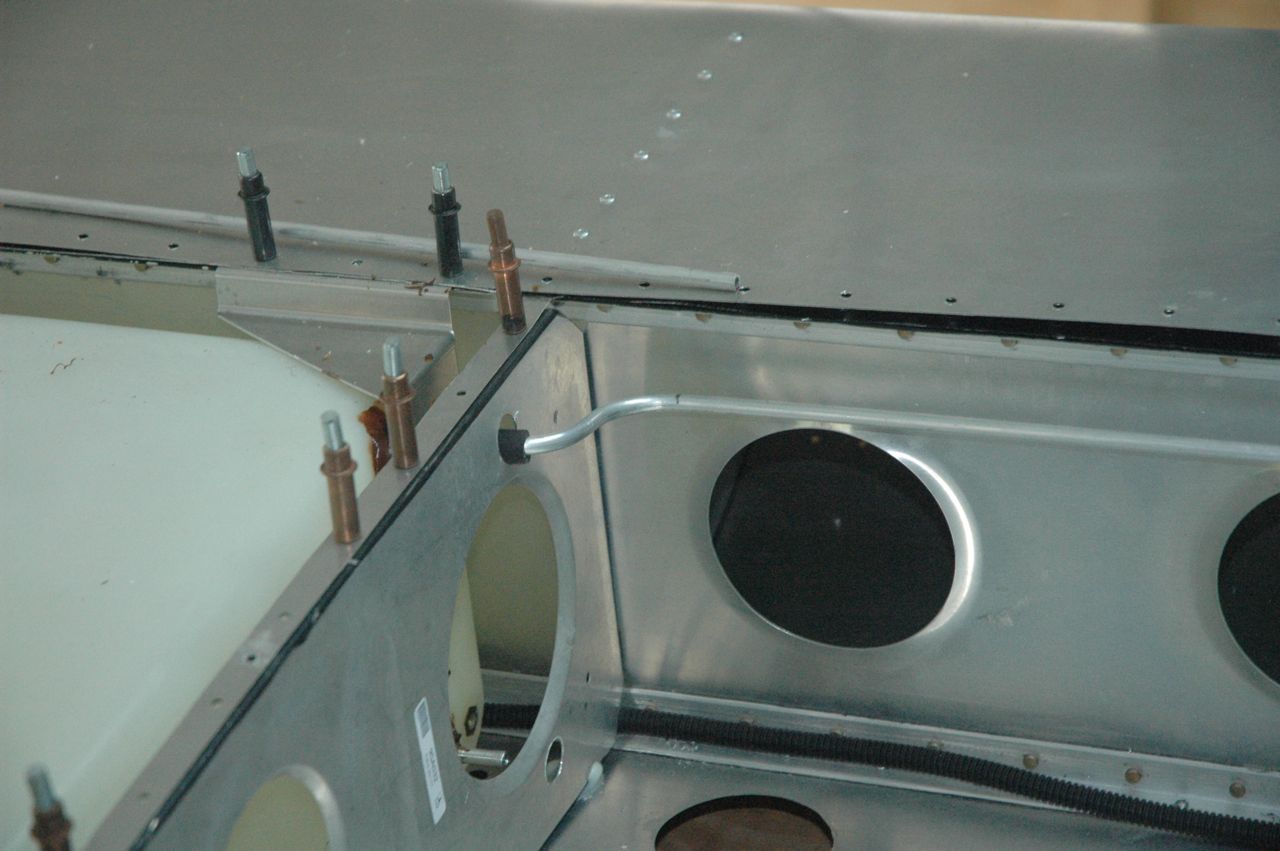
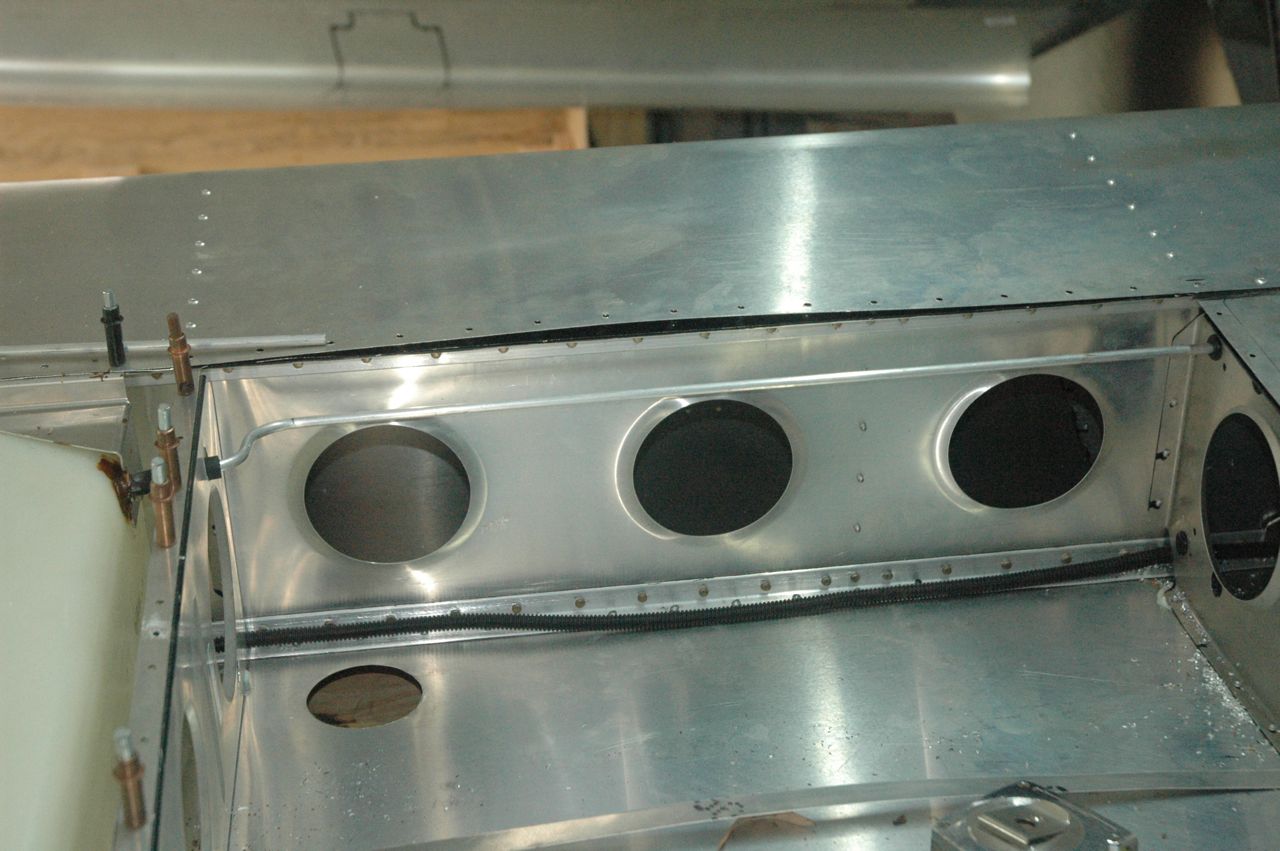
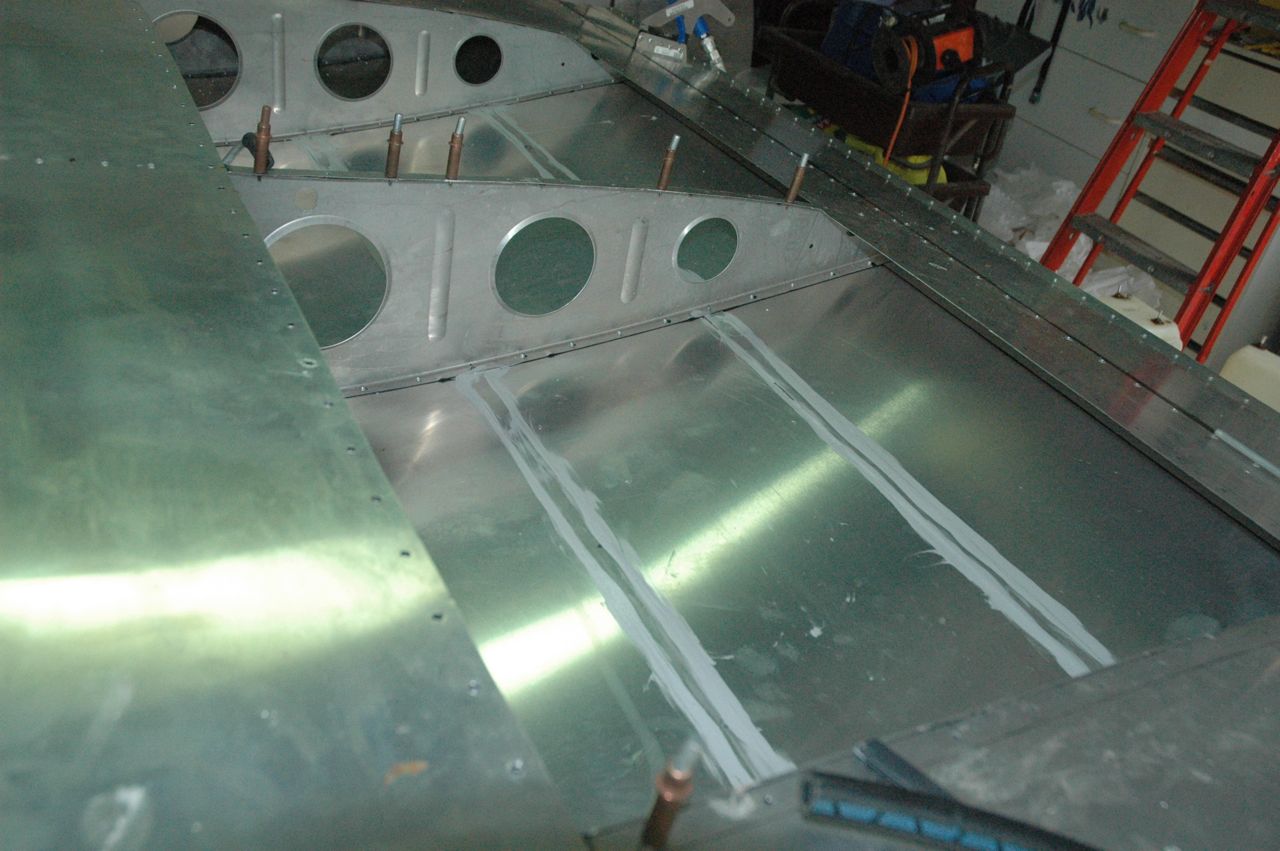
The extra tank I wanted to supply the fuel indicators by alu tube as I am not keen on the white tube they supply in the kit. I want to maybe use lexan tube or similar so I can actually see the fuel and having 1/4 inch alu tube I think will give me better options if not it is just as easy to fit the Rislan tube to the alu anyway. I got some rubber grommets from Clarke rubber but they were blank ..no hole in them so I could drill out to the size hole I wanted into the grommet for a nice push fit. I marked and drilled out the holes for the grommets in the second root rib and the tubes come out the pre made larger holes in the root rib. I will drill 2 new holes in the root rib for the main tank indicator. Then I bent the tube using a bender I go it from Autobarn which works like a treat too. You can see what I was trying to do with some nice funky bends it all looked really great and I kept it as close as i could to make it fit past the main tanks. I had it all fitted up but the main tank fit was not good too much pressure on the tubes and the tank so I decided to go another way..that was about 3 hours down the tube :(.
You will also see that I cut strips from sheeting scrap from the tank holes to make 2 skin tensioners to cover the holes cut in the skin. Most guys just fit a strip over them with sikaflex but I made mine go under the other just like as if there was no extra tank there I also made a second set for the main tank and did the same so they are all locked by rivets to the wing skin. All 4 strips are sikaflexed as well so they wont move or slip and give me a lot more strength there than just the skin
Ok another post shortly for the final version
-
Hi Ian
Wow you are really moving along with yours..I am going up to the property tonight got the final plumbing inspection tomorrow once that is done and passed I have the council out of my hair and then the "improvements" can start up there :)
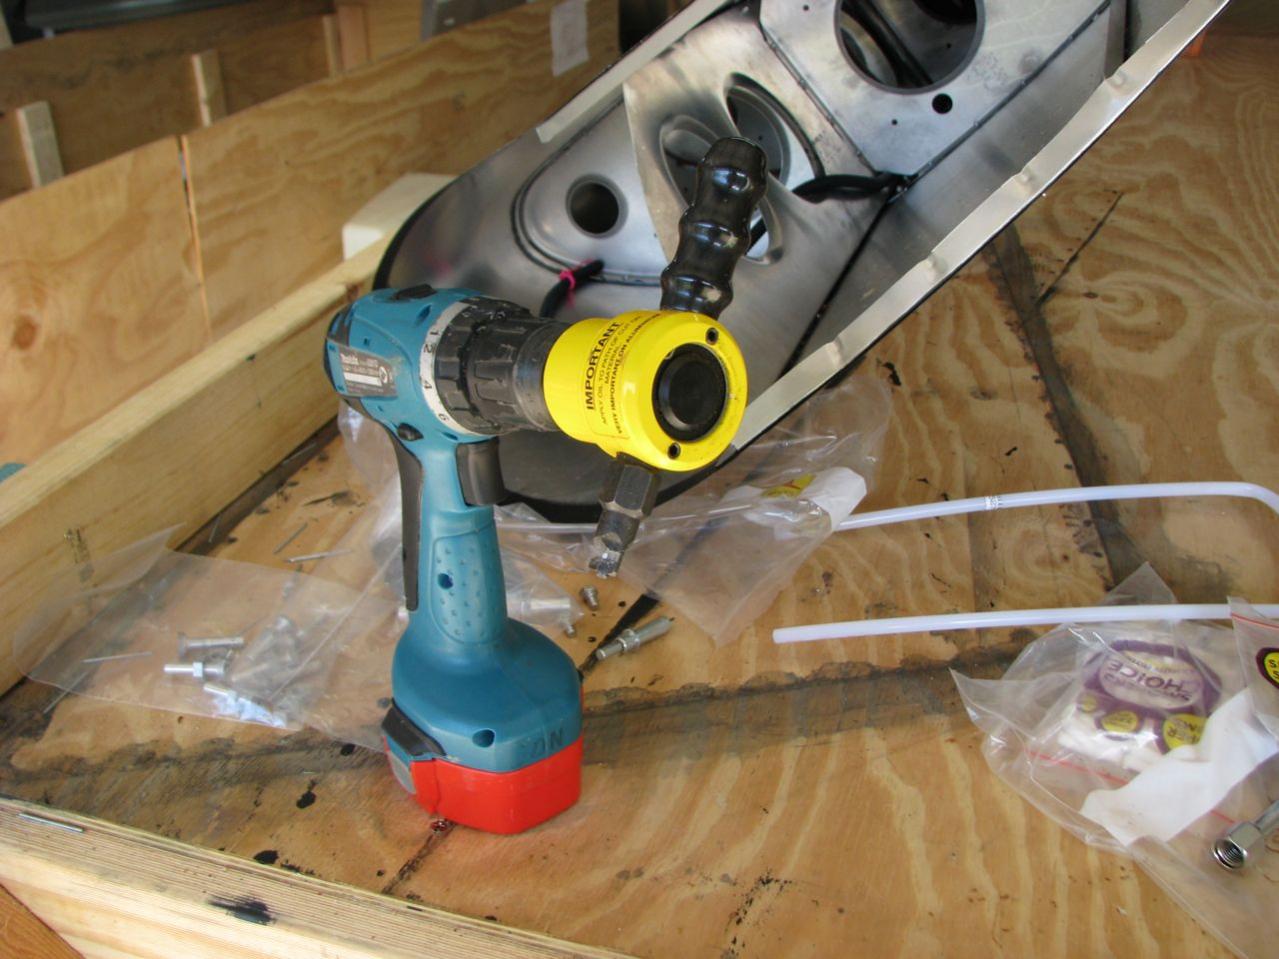
I bought a compressed air metal knibbler from Trade Tools direct for $68 last week to do the second wings tank hole for the extra tank and also the new dash as mine wont have the standard panel. Tried it here yesterday on the new panel and it was really smooth so don't have too much finishing now just a little filing and it will be ready. I wont get a chance to work on mine until next weekend again :( the only thing I am trying to chase up is a 1/4 tube bender to get the fuel sight gauge done for the extra tanks will get it next week and then I should have the tank installs done on one wing anyway the other wing will only take half the time as this one.
Nice pic of the local area and yes looks like you have had plenty of rain there...it is supposed to rain down this way starting today
Mark
-
I just looked at all these specs today between the VG XL and the S version and I would also like to know how they can change the specs so dramatically by just rounding the 4 corners on the rear fuselage. They even state that is the only difference...wings are not any stronger neither are the wing mounts one is led to believe
All specs below are in knots
Just found on the ICP site new specs for the XL I have included them as well as the older specs previously advertised
original specs latest website specs
VG\XL "S" XL
Stall flaps 26 26.46 26.45
Stall no flaps 30 30.7 30.77
Cruise 75% 90 96.65 95.57
Max speed 95 106.9 106.9
VNE 108 118.8 107.99
4 rounded corners can not make this much difference I think there are a couple factory built ones out here now ( scratch the one in Gladstone now) does anyone know how true these specs are as they are substantially different at VNE
bugger the formatting changed when I posted the specs
The first number is original XL specs posted the next number is the "S" from the icp site and also the last number is the updated specs for the XL from the icp site
Mark
-
Hi Ian
I am leaving the fuselage until last as it is the biggest job also takes up a lot of room. I am building mine at the moment over at the mother in laws place and once the wings complete with tanks done and all the tail feathers will stay over there stored and I have finally made a nice lot of room here at my place so I can build the fuselage here also it will mean I can work on it pretty much any day where at the moment I am only working on the plane about every second weekend. As regarding the donga I think one end of it will be opened up :). You are certainly flying along with yours. I would have loved to do mine here when I started but I have way too much crap in my sheds here
Mark
-
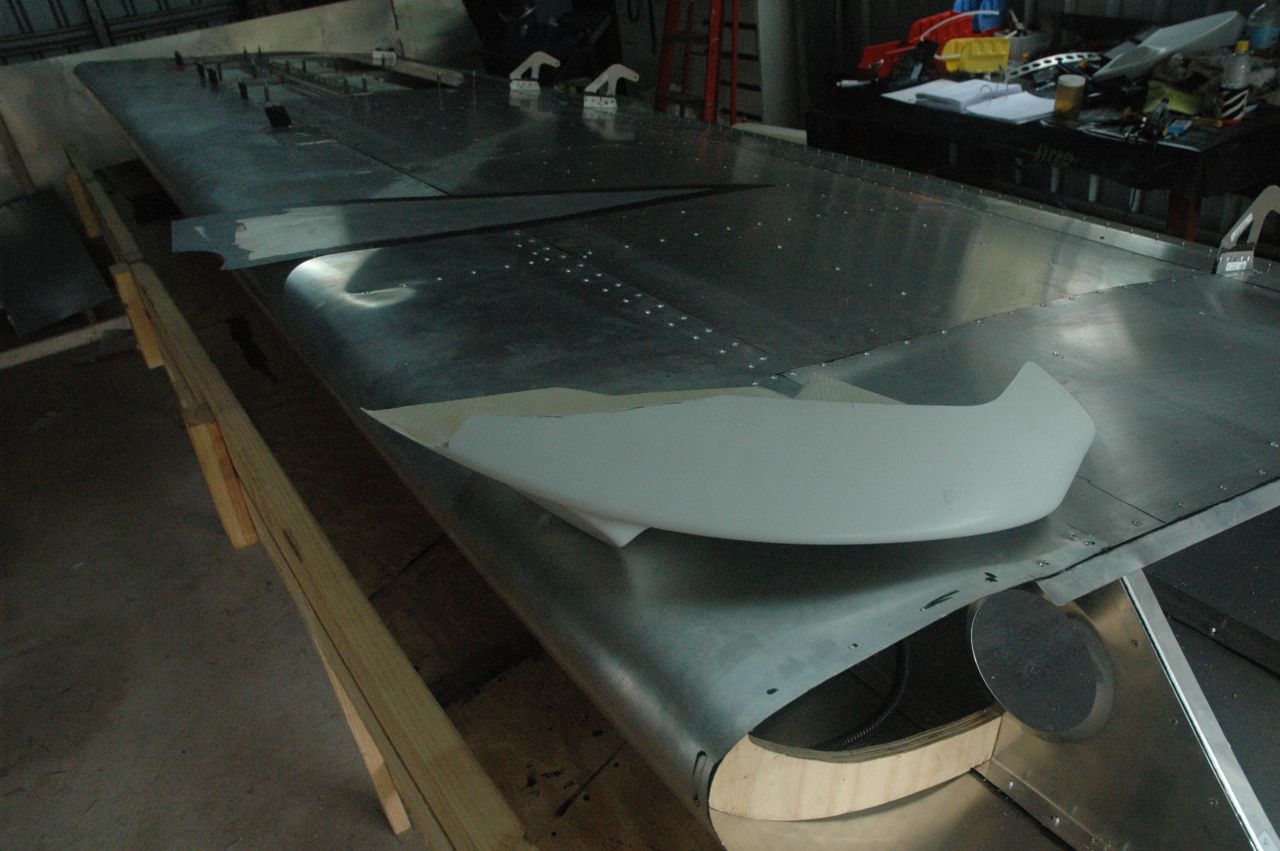
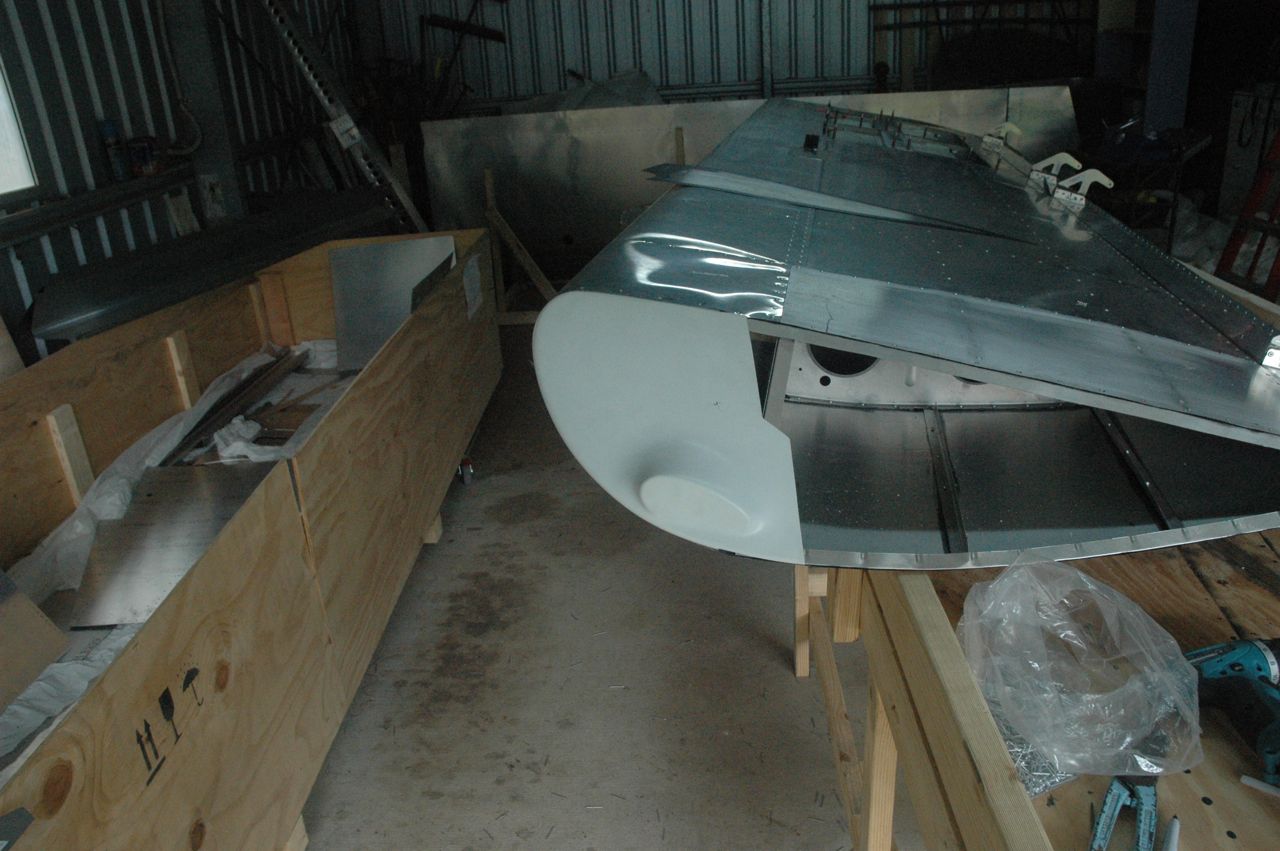
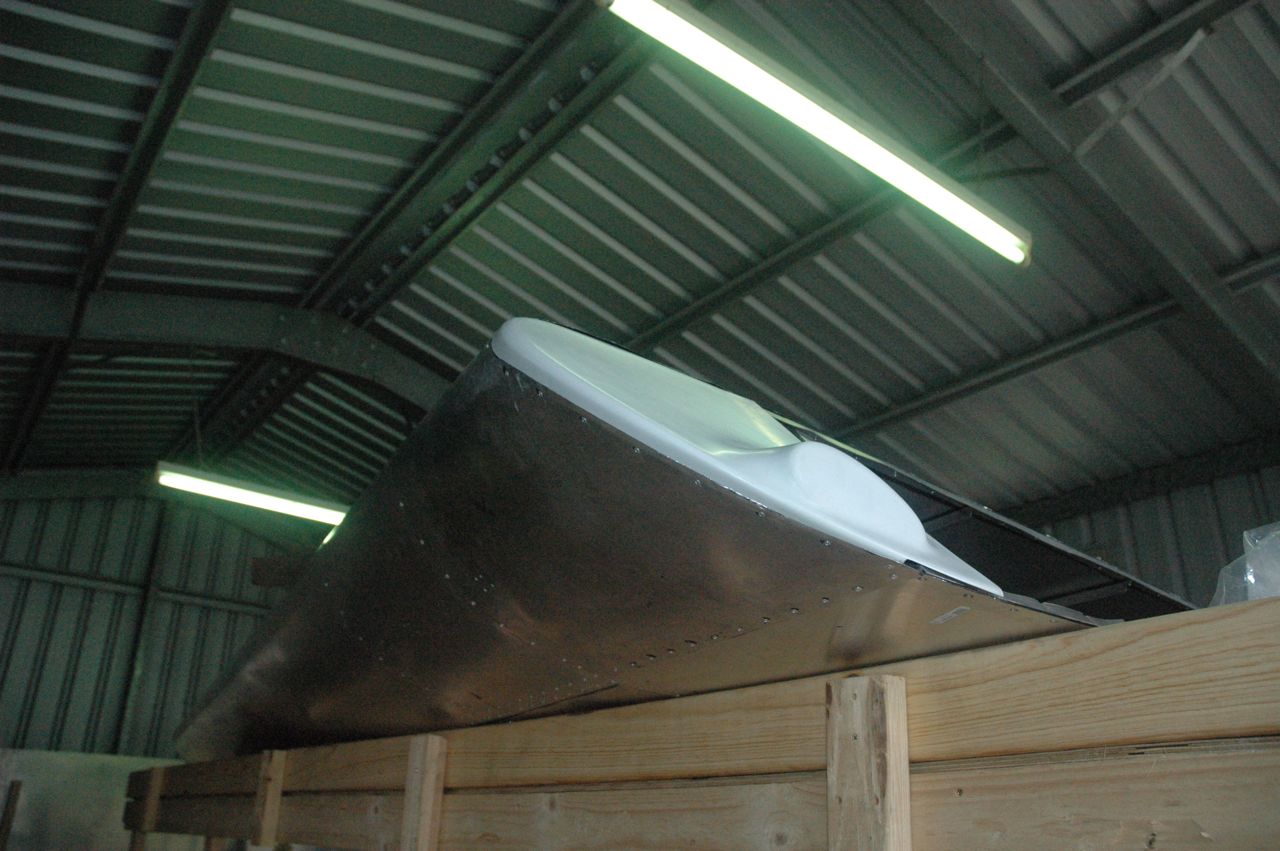
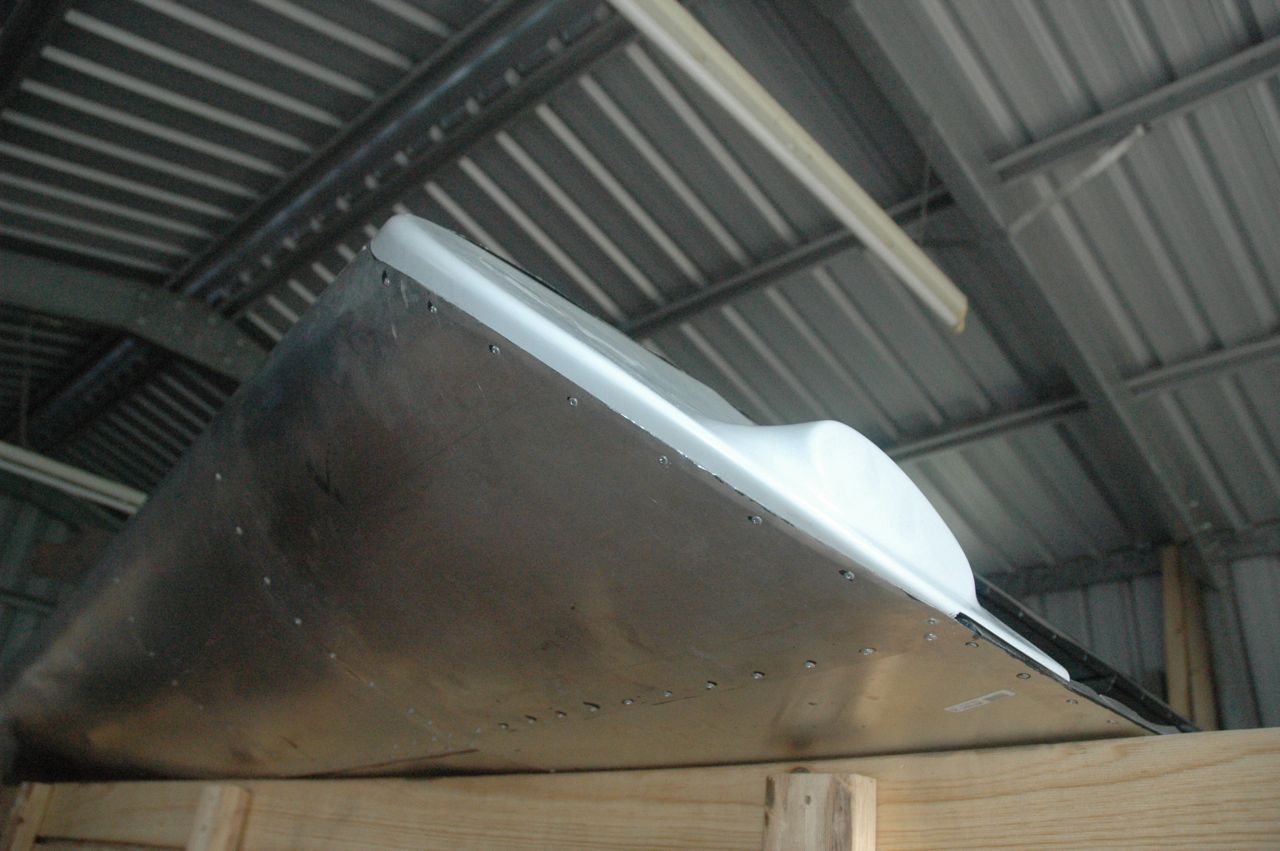
Hi Peter
yes it did..I remember posting a month or so ago about how trying to fit the tips had big knobs on it...and it is true but using this former its a dream now. So easy to do the only part you have any issue with is how much to the relief on the fibreglass to cut away. I did it all by myself with no extra pair of hands so this will tell you how easy it was...literally took me 15 mins to do where as before I mucked around for 2 hours. So making a former is the trick for anyone who is doing a build
Mark
-
Hi guys
Didnt go up the property this weekend the council ring on thursday when I tried to arrange to meet them 2 weeks ago so will go up next weekend now for the final plumbing inspection..thank god.
Anyway this gave me time to do a bit of work on the sav again. I have put the rest of the fittings into the fuel tanks now and sealed them over also looked at what extra gear I will need to do the pipework and tube. Have got a 1/4 inch tube bender ordered so i can bend the alu tubes for the second tanks also I might just have a small piece of larger hose onto the extra tanks then mate it up to a 10mm piece of alu pipe to run the second fuel lines at the trailing edge inside the wing I don't like the idea of flexible hose on that tank flopping around but will see how that pans out.
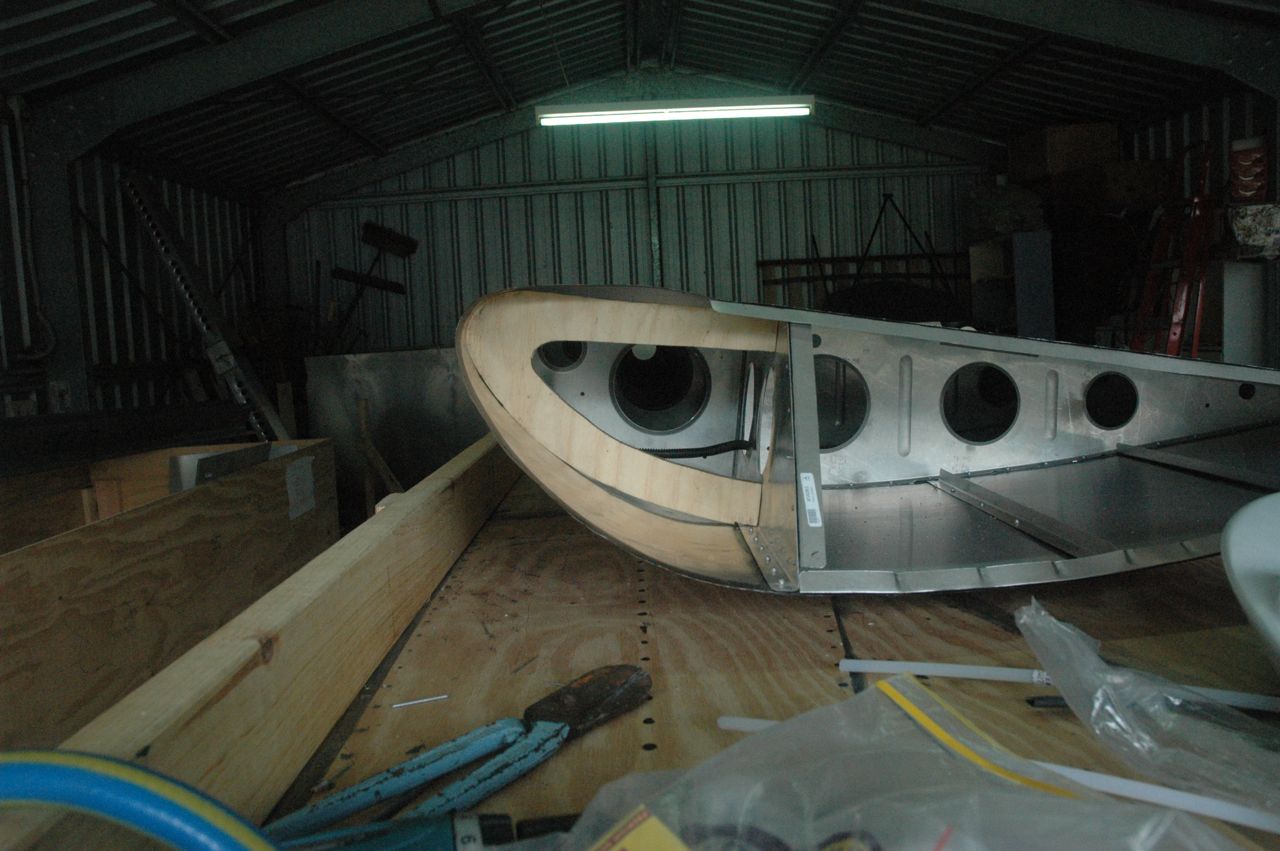
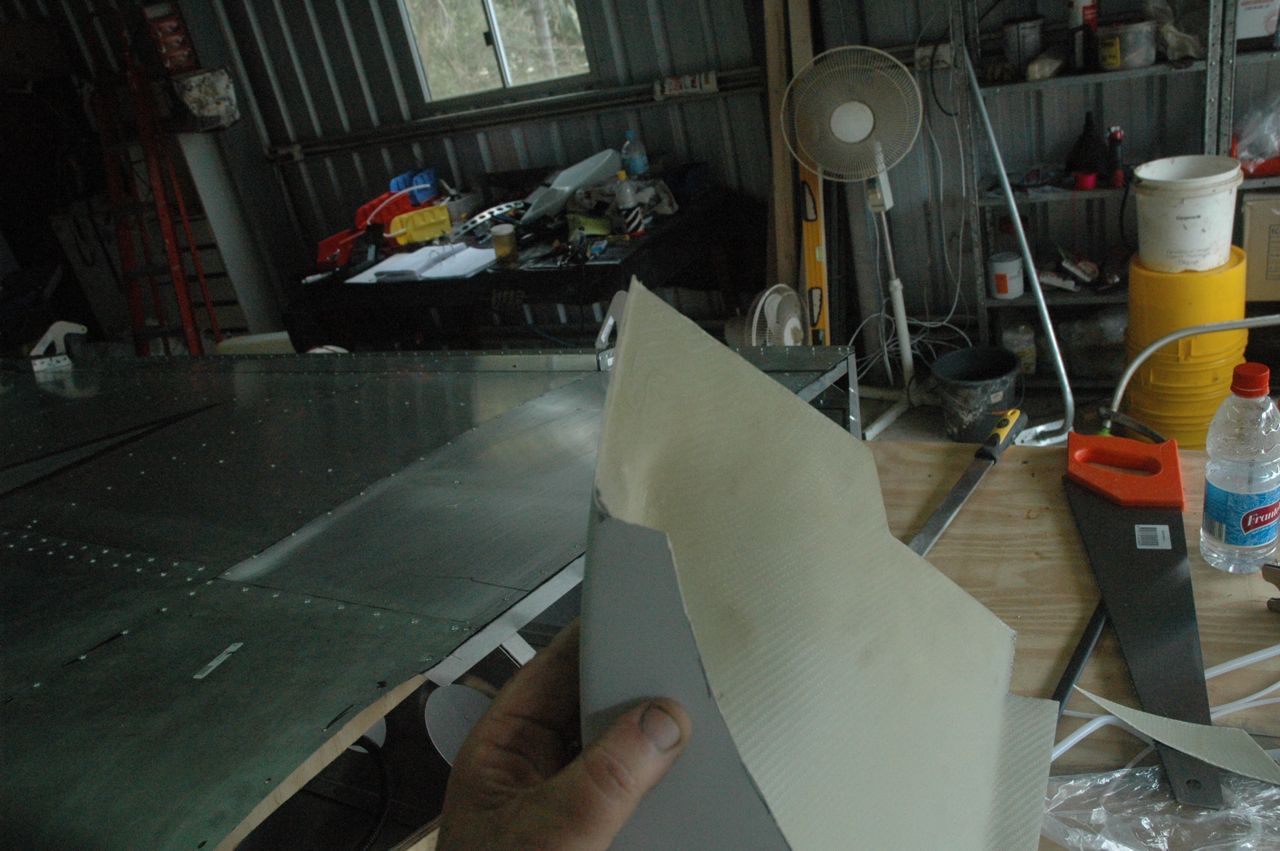
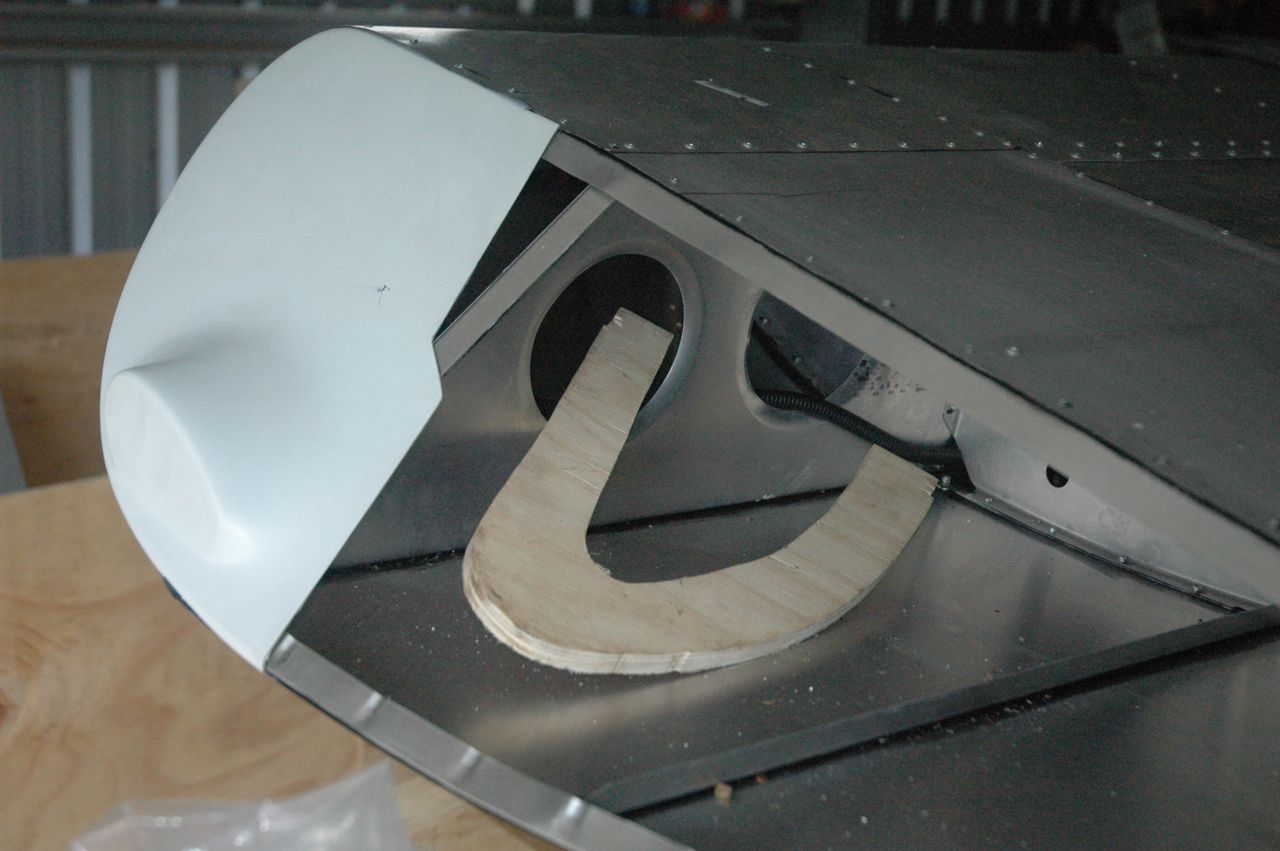
The big thing I did was sort out a easy way for those fibreglass tips. I spoke last week about making a plywood former to slip into the nose skin to help form it to the shape to put the tips in. You will see by the pics I made one after taking a template of the nose rib at the root of the wing it only took 3 mins on the bandsaw. I had it the right size straight off and put it in up against the main spar and slid it around and it pulled the nose skin perfectly then it was just a matter of cutting away the excess glass on the tips to make it fit between the strengthening bits on the tips. The hardest part was trimming the fibreglass and with a dremel with a good cutting disk on it made light work of it. It was so good it was easy to hold the tip in place while I drilled the holes for the rivets. All in all I am pretty happy with the way it turned out. There is a couple of small gaps in 1 or 2 places where I had relieved the fibreglass but a small wipe of filler will fix these easily. The main thing is you can leave the former inside until you finish the riveting then you can put your hand through the first hole in the spar and shift the former sideways then you can manouver it out of that hole and its out. I have to say just making that former made a real crappy job extremely easy
Mark
-
 1
1
-
-
I wonder if this was the same guy who had the bingle at Kilcoy or someone else?
AN ultra-light plane has flipped in a gust of wind during take-off and crashed near Gladstone, injuring the pilot.
Fire and ambulance crews responded to the crash at Wurdong Heights, south of Gladstone, about 3pm today.
A 49-year-old man, believed to be the only person on board, was taken to Gladstone Hospital in a stable condition.
Police said the man was attempting to take-off in his Savannah model aircraft - an ultra-light recreational plane - when a gust of wind "interupted the plan".
The plane then cartwheeled 200m down a hill before coming to rest in a paddock.
A Department of Community Safety spokeswoman said the man had soft tissue injuries and lacerations which were non-life-threatening.
-
Anyone know about this it was in the Courier Mail this afternoon
N ultra-light plane has flipped in a gust of wind during take-off and crashed near Gladstone, injuring the pilot.
Fire and ambulance crews responded to the crash at Wurdong Heights, south of Gladstone, about 3pm today.
A 49-year-old man, believed to be the only person on board, was taken to Gladstone Hospital in a stable condition.
Police said the man was attempting to take-off in his Savannah model aircraft - an ultra-light recreational plane - when a gust of wind "interupted the plan".
The plane then cartwheeled 200m down a hill before coming to rest in a paddock.
A Department of Community Safety spokeswoman said the man had soft tissue injuries and lacerations which were non-life-threatening.
-
Hi 80K
Outback Aircraft
[email protected] is his email
From what I can see the new style trim tab is a design development on later models. the manual hasn't had a full clean out there is still a lot of older slat info and VG info also VG XL info. It really needs a english speaking person to go through the manual and translate the italenglish into english. I would have though Skykits or similar in the USA would have done it but it would be a massive job to do. if it was done right it would just be the best aircraft to build. The diagrams and drawings are very good its mainly only the text also I would like to see some order of build incorporated as well
The name change is due to me being on the supplyer forum now
Mark
-
1
-
-
Hi ian
I have done the same with the manual it makes life easier the other issue is finding all the parts in all the boxes :). Reg tells me to make sure you put loctite the red stuff on each rivnut when you install it this should stop it from turning also, I will just wipe a thin smear of vaseline on the SS screws when I install them this will stop that and of course give them another smear when the covers come off. The ribs are not that wide and you have to take the holes out to 3/16 anyway to put the rivnuts in. I am lucky because I have a few guys locally that are building or have built Savs so I get to ask these questions and often look at them. Please ask anything if you have any doubts at all or even just for clarification you dont want to make any mistakes if possible
Mark
-
Hi Ian
The tail feathers go together really quickly and so do the wings really. Not sure if you have done the fin yet but there will be a small packet of countersunk 3/32 rivets for the bottom of the fin post you must make sure they are flush its in the manual its very ambiguious in the manual they don't tell you the rivets are there you will see some pics on this thread about it, it caught me and had me running around for a while until Steve told me about them
I didn't see the electrical cable coming out of the stab did you put it in for the trim servo?...I forgot mine but at least I found that before I had gotten too far and I put it in. One thing with the manual I am not sure if you noticed is that after the main pages that show construction there is another parts list and drawings that are for the XL version they are the next section about 20mm behind the first 100 plus pages just before the divider in the manual. These are for your model so you have to sort of jump between the 2 sections to decipher the correct parts. I will get all the tank plumbing bent and ready and take some more pics before I complete the tank section and sikaflex it all in. Reg Brost has sent me about 150 rivnuts and SS screws for the tank cover sheets they should be here this week that will be a tedious job drilling the holes and installing those but I think its much better to be able to unscrew the slower skin tank covers that to rivet the covers. This week I am going to get this former made to try out the tip idea to see if it makes it easier to fit the FRP tip in. Peter a prospective builder/buyer of a Sav came over for a look at mine on saturday and we were discussing it he came up with the idea and it sounds pheasable so I will give it a squirt and see how or if it works.
Mark
-
Hi Dazza
I sat in the first factory built one that is up near Gympie when it arrived and the twin stick version isnt that nice. Even the owner is a bit dissapointed with it but he lives with it. He thinks he should have got the single stick one. The twin sticks are really close into you crotch and they are very low down as well and seem to require a lot more force due to the lower mechanical advantage
Mark
-
Oh I forgot...the bloody tips I have includes 2 pics in the previous post one of the root rib and the other of the distortion in the tip nose skin which is the reason it is so hard to do the fibreglass tips. I have taken a cardboard template of the rib its easiest done at the root rib. I will cutout a 10mm wood template of the outside shape the skin side basically then cut out the inside so it will sort of look like a horseshoe then I will fit the template into the nose skin area at the tip which will form the skin to the shape it should be this will make it easier to fit the tip cover in. When its in I can stick my hand in through the hole in the mainspar out at the tip and fold the template around so it releases and I should be able to pull it out through the hole in the spar at the tip then I will fit the main wingtip cover sheet...hopefully this will work will let you know and take some more pics
Mark
-
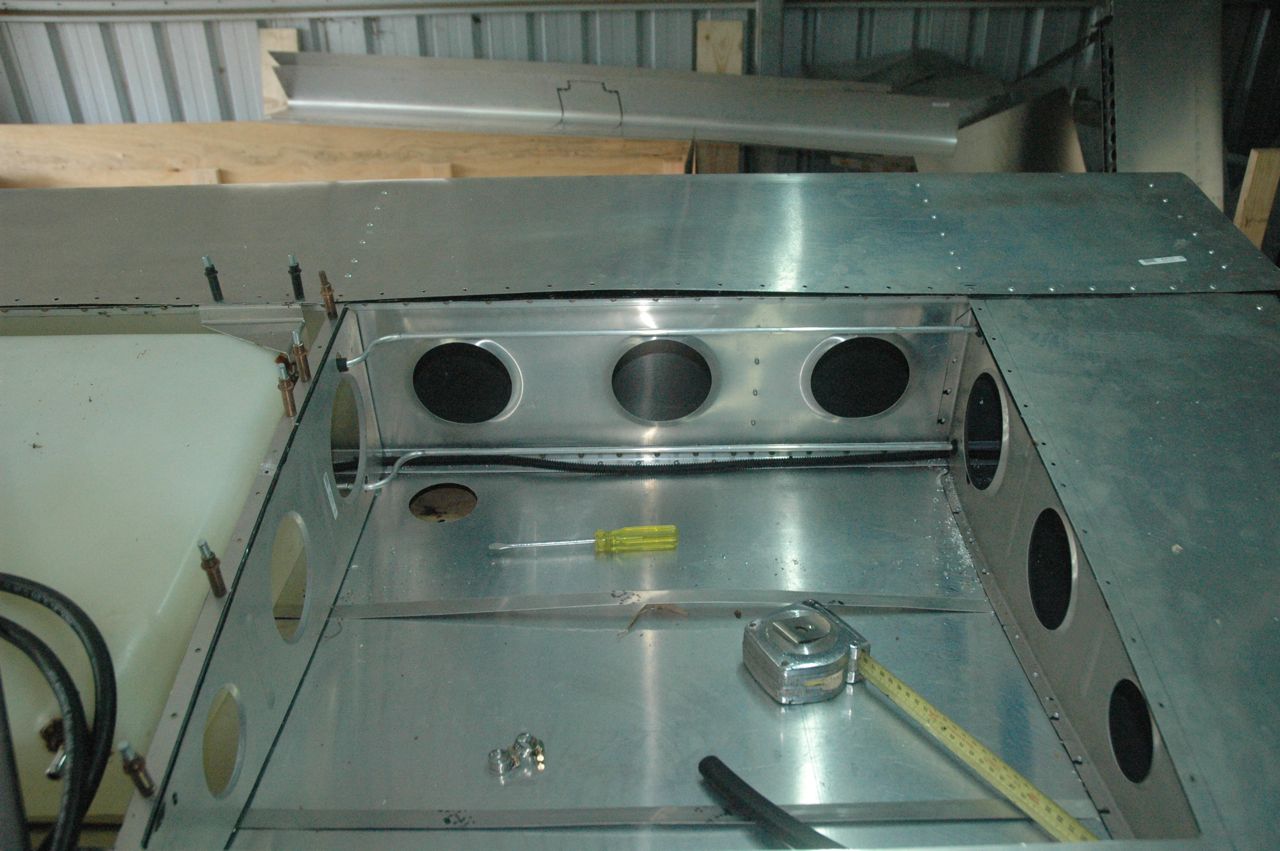
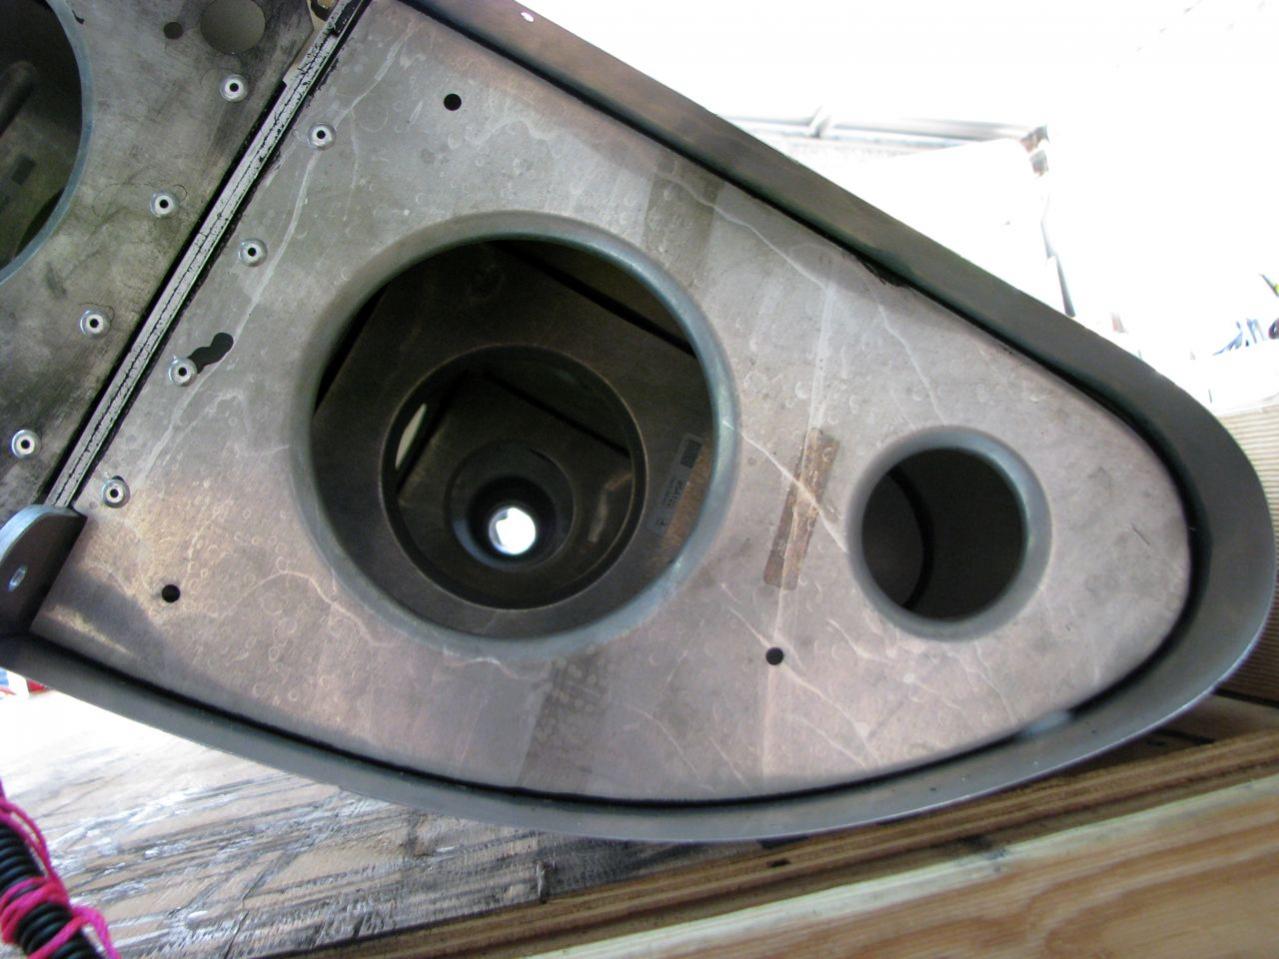
Managed to get some work done this weekend. I am up to doing the fuel tanks and most I have talked to tell me its the other worst job on the whole aircraft and I must say it is. I started to cut out the second tank area and it was proving very tedious then I had a brainwave I bought some years ago a knibbler attachment for a drill. . I used that today and it was magic just attached it to my battery drill and it was excellent and easy. Put the other main outlet fittings into the rest of the tanks and started to get everything sorted with the right wing tanks. I am having both filler caps close together so marked out where the hole needed to be and triple checked my measurements got out the 70mm hole saw and went for it. It came out pretty well. My plan is not to mount everything permanent until I have everything cut and ready especially for the longer feed pipes from the extra tanks. I needed to mount up the tanks to see where I need to drill holes in the ribs and run the 1/4 inch aluminium tube from the outer tank to where the sight gauges will be, I will have 4 sight gauges for all 4 tanks There will need to be some tricky bends done but it should be ok. The two bars that go across the bottom of the tanks to hold them in seem to be pretty tight and the top of the tanks do press hard on the top skin of the wing but doesnt seem to be too much distortion of the top skin. There is a lot of work fitting the tanks I expected to get more done on them this weekend but slowly slowly catchy monkey I suppose. Will be away next weekend up at the property again and got a lot of jobs on this week so wont get back to the Sav for about another 2 weeks :(
Mark
-
Hi Ian
This weekend will be big one working on the Sav. Been tied up lately with other stuff but I will be working on fitting the 4 fuel tanks this weekend also will be taking another look at the tips again. Spoke to Peter Elliot at Gympie airport last weekend on the way back from our property he has just finished his XL and as at his landing on sunday had 7 hrs on her anyhow I asked him about doing the tips and he said it was the worst part as well. So I will try to see what I can do this weekend on them. I will take plenty of pics also with the tanks as well there isnt too many pics of that part of the install around either. I know what you say about enjoying the build I just love doing it as I have said I think its great therapy for stress relief :). Keep us all informed with your build there are lots of ways to do things and I am always on the lookout for better ideas and ways to do things as well
Mark


Difference in Icom Radios
in Instruments, Radios and Electronics
Posted
Hi
The Vertex VXA-220 is the only vertex HH that is approved for air and ground use...when it is bought from a authorized Vertex australia dealer as overseas versions may not be approved because they are different
Mark