
bobcharl
-
Posts
151 -
Joined
-
Last visited
Content Type
Profiles
Forums
Gallery
Downloads
Blogs
Events
Store
Aircraft
Resources
Tutorials
Articles
Classifieds
Movies
Books
Community Map
Quizzes
Videos Directory
Everything posted by bobcharl
-
Getting rather frustrated waiting for this registration to be processed. Mailed the original application on April14. Had a query to which I responded on May 9. I sent an email (not too abrupt I didn't think) last week enquiring of progress and received an email (not too abrupt) advising they "hadn't got to it yet". Is this about par for the course? How have others got on? Bob
-
Peter, I wonder if Maj. is close to the mark with his avgas suggestion. Refer to the article in the R A Aus magazine June 2010 ( before it was called Sport Pilot) on P.34. In brief, a group of Savs travelling together each had this problem after filling with Avgas. The problem rectified itself after reverting to Mogas. Does anyone know if there is a difference in the Specific Gravity of the two? Bob
-
Well done Mark. Hope you have better luck second time around (with the first "öther woman" of course) Will be interested to hear more about the pitot, I put mine in the specified location and was not aware that there was any issue with that. Bob
-
Replies in sequence: Mark, thanks for trying for the rubber. I ended up salvageing the old one and it worked out OK. 80K . Soon as that rego arrives. Keenaviator: Thanks Laurie; Your Jab looks very smart by the way. RA: Yeah, tempting, but as I am a law abiding citizen......... Cheers, Bob
-
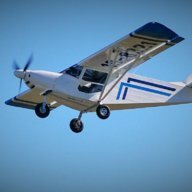
Well, Savannah completed and final inspection done. All passed except for a loose bolt and an altimeter needing recalibration. Both rectified, registration application posted, and I wait, not so patiently, I'm afraid. It will be on display at Natfly this weekend. Will now try to upload a pic of the beast. Cheers,

-
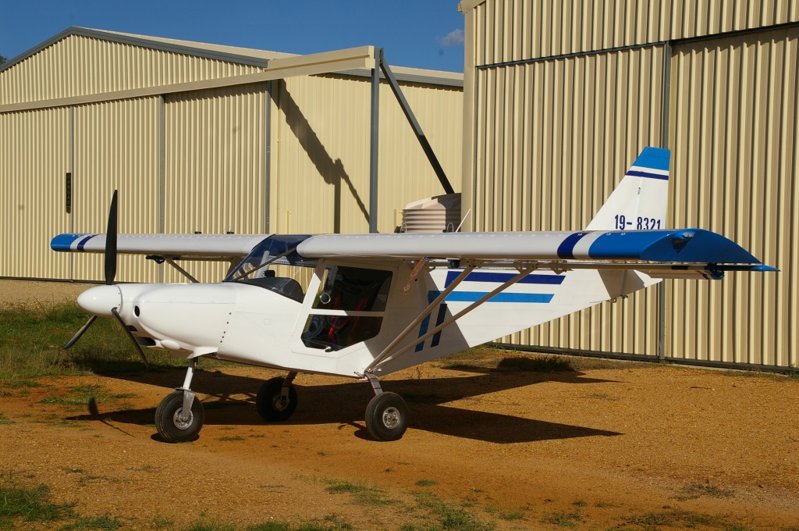
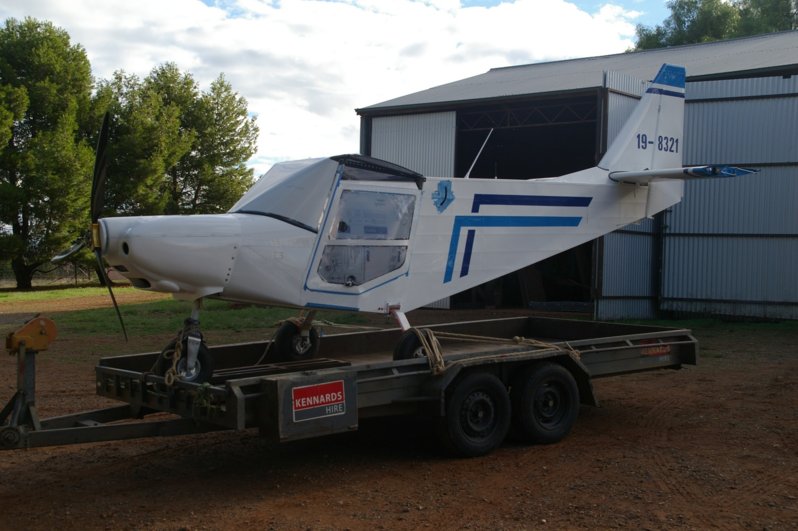
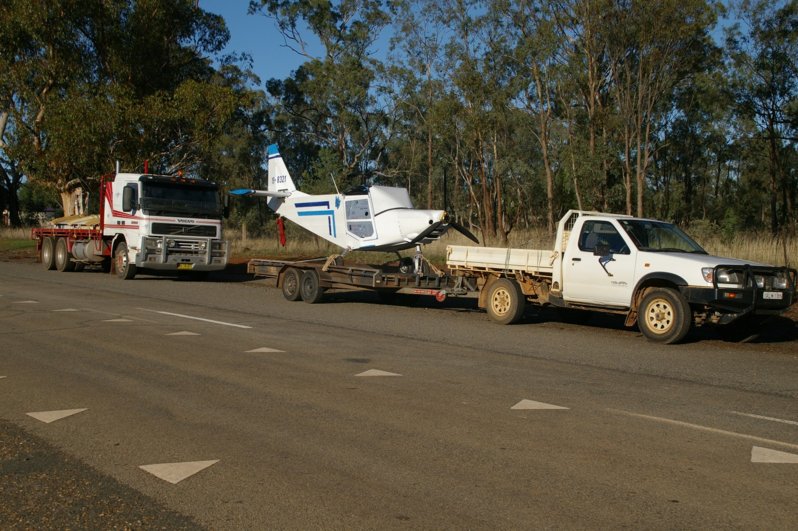
Hi All, Another update. Windscreen went on fine. Suppose it should when it is an exact replica of the first one Time has arrived to transfer my project to an aerodrome for final assembly and test flying (after the registration process that is)'Temora is the new (temporary)home. The shift went very well with a tandem trailer for the fuselage and a flat bed truck for the wings. All transported well and unloaded without a scratch. Wings and flaperons all installed and is starting to look like an aeroplane, all this as per the pics. Don,t know why this program loads the pics out of sequence sometimes. Now have the fairings from the wing to the windscreen to fit and a few smaller jobs to do and I will be getting close to that final inspection. Cheers Bob
-
Just to see if I can get a pic to post.This one from a little while ago. Bob
-
Yeah terryc, Not surprised, I have come up against this a few times. Bob
-
Hi All, Progress continues: wings, flaperons and cowl all painted, only the rego. numerals to be painted on the wing in the morning and painting is finished. what a red letter day that will be. The engine cowl fitted after lots of trials and errors, but I am quite happy with the way it has turned out. Still got my windscreen to do and then the three point door latches to go on and I am getting a few boxes ticked. Would post a pic of earlier progress while the wings were on but I am running a new windows program and I cannot work out how to resize the files. Hopefully next time. Bob
-
Dan, These fasteners certainly look to be the goods. I would have seriously considered them had I known about them at the time. The fact that they cope with a range of thicknesses is great. Bob
-
Thanks Mark, I wonder is there any chance of them getting it or should I go ahead and resurrect the old one? Bob. (Wasn't sure how to reply; hope you get it on this thread!)
-
Hi Mark, Fitting it on the outside. Did look at fitting it inside but that looked like being a real nightmare, and made removal more difficult. Puzzles me how ICP can design 95% of the aircraft so well, but stuff up the other 5%. Bob
-
G'day all, Christmas and New Year all out of the way and back at my project, but of recent times its been so hot in my workshop that only mornings are being worked. Mounted the wings and connected up the fuel system and all worked fine. Flow to the 6lt tank is excellent even at very low fuel levels. I did have concerns about this, but having tried it I am extremely confident.Changes between tanks in all sorts of empty/full combos works well. One big step forward : fired the Rotax up a few days ago. First start only required a couple of seconds cranking, now it only takes a bump on the starter.Have pitched the prop and done a few run ups and all seems great. I know its all happened many times before, but I got quite a buzz out of all this. Decided to remove the wings for painting and it was then that the gremlins moved in.Wings were off and stored and fuselage back in workshop and decided it was too hot for further work so closed the doors and left. Next morning I was dismayed to find the windscreen shattered down the right hand side. Seems the heat,(42 that day,no doubt more in the workshop) had expanded the fuel in the return pipe and dribbled it down the screen causing the shattering. You could say I was shattered too, because I had spent such a lot of time fitting the thing, and was quite pleased with the outcome. I was able to source some polycarbonate locally which I am assured is of the same specs as the original and have prepared a new one using the old one as a template.Still to install it. Got my engine cowling back with its exhaust blisters on it. Fellow did a top job of them. There are some good tradesmen still about if you can find them. I still think ICP should do a better job of the lower cowl in this respect.Presently fitting the cowling,a job that really has knobs on it. but as Riley said in his post it does look as though "it'll happen". More useless info next time, Bob
-

Savannah Incident At Caboolture
bobcharl replied to Cosmick's topic in Aircraft Incidents and Accidents
Hi Mark, I'm a bit slow to catch up with things sometimes, in this case the mishap with your Sav.( I'm not a regular reader of "Accidents and Incidents). As others have already said it's pleasing to hear Mick and Andy waked away but I was saddened to hear of the damage to your Savvy. However you seem to be making excellent progress with the repairs.I'm sure you will have it back in mint condition and in the air again before too long. All the best, Bob -
Just a quick querie someone may be able to help with. I notice some have used a fastener with a diamond shaped backing plat to join the top and bottom of th engine cowl.(don't know what they are called but same as a dzeus fastener but with the addition of a backing plate and a spring). Question: how is the plate fastened to allow the two inside surfaces to meet but still look good outside. A countersunk rivet set from the inside would work but would look crap outside. Bob
-
Hi All, Just a brief entry after a long absence from the site.Got the tail feathers painted and fitted without any dramas. As I mentioned earlier the windscreen was a different matter.Eventually got the thig on in a manner which will mean it serves its purpose. A remaining problem was to fit the cover strip between the screen and roof. The guru advised me to keep the uppr profile of the screen as flat as possible to aid the fitting of the piece that goes between the wing root and the screen. After lots of trouble I think I got close to it, but I am still not looking forward to fitting them. Been wiring and plumbing the motor and all was going well untill I cam to the oil pressure sender.Because I bought my kit much earlier than the motor, my motor was supplied with a sender not compatable with the VDO gauges in the kit. Only gauges suitable are larger and of different appearance and would hav spoilt the panel, so have decided to go back to a VDO sender. Has anyone had trouble with these?End result is I have a Honeywell sender worth about$250 on the web going real cheap if anyony is interested.Have had a quick trial fit of the engine cowling and the best I can say is it fits wher it touches, yet touches where it should not. Have got a fibreglassing guy in town putting on the exhaust lumps. Next step is to mount the wings so I can check out the fuel system. Wonder what happened my "brief" entry? Bob
-
Yes RA, only found out about the ICP option after I had my metalwork done, and then I was committed to making my own tip. At $200 I dont think I made very good wages! The fact that ICP have picked this up should indicate that it has some benefits in the handling of the aircraft. I know some had complained about lack of rudder authority in low speed, high AoA, configurations.About the only negative comment I have heard about Savs. Bob
-
Hi, Back again after an enjoyable few weeks in sunny Qld. You Qld-ers really know how to turn on some beautiful weather.Great to catch up with Mark K. and Mark G. again and to see their finished aircraft, which I had not seen since mid construction. A pair of very attractive Savannahs indeed, and you should both be proud of them. Also pleased to meet "Cosmic", nice to now be able to put a face to a name on the forum. Back in the workshop, I have been making lots of work for myself. Decided to make an extension on the rudder,not an original idea by any means, but I don't think it is patented. Had a few attempts before I got the metalwork to look half respectable, but the real fun started in coming up with a new tip. Thought I would get the original rudder and fin tips welded together and found a plastic welder who reckoned he could do the job, but all he did was botch the whole thing up. Ended up getting some advice on fibreglassing, which I knew nothing about, and made a mold and created a fibreglass tip which doesn,t look too bad. But the whole thing took so much more time than I anticipated in the beginning, that there were many times that I would have scrapped the idea if I had still had my original rudder and fin tips. It will really need to have some benifits come flying time! Have fitted the cabin roof after having to seal the original holes and re-drill it along the two diagonals. With all the more complex aspects that ICP does a great job of, one has to wonder how they get such simple things wrong. The windsreen has been on and off several times and I think it is about ready for a final fit. Just waiting for some fine weather to get some more painting done. Regards, Bob
-
Hi All, Sorted the problem with my ill-fitting fin. Spoke to the guru and it turns out its not a problem at all. Seems the skin on the fin is a bit oversize and needs to be trimmed to form a neat fit over the stab. when the edging strip is applied. Why couldn't the manual explain that? Gettin a little bit of painting done along with some plumbing on the motor. Its been too cold for painting ideally,( 10 deg max sometimes) but I have been using some fast hardener and it seems to be OK. Taking a break for a few weeks and going up the Qld coast in search of some warmer weather. Cheers, Bob.
-
Hi All, A red letter day today, installed the Rotax! There is certainly no spare room when manouvering it into the ring mount. In the end had to slightly modify the bracket supporting the electronics at the top right rear to provide clearance. Everything else looks OK but I haven't gone any further than to connect the hoses to the water pump. I am preparing the tail feathers for painting and in between coats will work on the windcsreen and then the motor. Just noticed tonight when doing some trial fitting that the area on the fin which bolts to the bracket rivetted on top of the stabilizer seems to have the two nuts rivetted on a hole too high. The diagram in the manual shows them as I have fitted them and the size of the holes would indicate this position also. They would not be too hard to shift so long as doing so does not put the fin out of alignment with respect to the rudder hinges. Has anyone else had this problem? Regards, Bob
-
Mark, Thanks mate . Your help is much appreciated. Would have liked a vertical card compass, but had to economize somewhere.If the magnetic one is not satisfactory I can still change later. Bob
-
G'day All, Well I am back after a rather long absence for reasons which had nothing to do with aviation.Great news about the 600kg upgrade, looks simple in the extreme, but can't figure out how two extra holes in the strut mounting plates makes the whole thing stronger, even with a plate in between, but then I'm no aeronautical engineer. Installation will be easy, but I wonder how easy will it be dealing with RAAus. Second wing now nears completion (as the pic shows)then its back to the cabin to install the windscreen.I'm obtaining a different rubber sealing strip for the lower edge which should be much better than the one supplied. Then to cover the panel top and mount the compass. Does anyone have a method of mounting a compass to give a reasoable degree of accuracy? More posts later. Bob
-
Thanks All, Was aware of the requirements re 50 deg and 100 deg. I was really trying to find a system of reaching t/o temps quicker in the cold morns we get here in southern NSW. Thanks again, Bob
-
Hadyn, Love that paint job, really looks smart! Bob
-
Thanks for the comments guys. Mark, I have read JG's comments on oil temp and it seems he didnt find a thermostat improved warm up time noticeably, presumably because while the thermostat reduces flow from the cooler it does not reduce flow from the oil tank which seems to operate like a tower cooler. UL, did you find that covering part of the cooler didnt reduce warm up time even though it raised in-flight temp? To confuse the issue further, I spoke to the Rotax rep at Natfly who said if I were to read the Installation Manual thoroughly enough I would find that Rotax do recommend an oil thermostat, and yes they do,(for operation at low temps). This fellow also made the comment that while he felt that oil temp at t/o was much more important than cyl. head/coolant temp, he could see a benefit in a coolant thermostat to limit temp drop during long glides. I will do some more research before deciding what to do. Bob


.JPG.03c0b9a85caeb36992cffa2ba06d7459.JPG)
.JPG.bcdd79f90a8439fd4e3f722100ab3b92.JPG)
.JPG.f3430a52918a02132ba19462de39b849.JPG)
.JPG.0c0116d185672df4e73705af83b366df.JPG)
.JPG.e61c16f39547e589f0d03765c221ff22.JPG)
.JPG.29428209b88571e848d6374d0807ac61.JPG)
.JPG.5470ddaa314638fef08a1b2b16176d67.JPG)
.JPG.56436635656763e1ba8a0c8286424cc1.JPG)
.JPG.08b7f2c3d624d62c170ee448e69ae621.JPG)
.JPG.c1e13508877893f4cc76993b09438b8a.JPG)