
bobcharl
-
Posts
151 -
Joined
-
Last visited
Content Type
Profiles
Forums
Gallery
Downloads
Blogs
Events
Store
Aircraft
Resources
Tutorials
Articles
Classifieds
Movies
Books
Community Map
Quizzes
Videos Directory
Everything posted by bobcharl
-
Have various reports of 912s motors having difficulty achieving satisfactory oil and water temps in a reasonable time prior to takeoff. I am considering installing either (or both) an oil thermostat / coolant thermostat to alleviate the problem. Has anyone had any experience with either (or both)? I would appreciate any information. Thanks, Bob
-
Hi All, A little more progress lately. Have started the second wing which is the last main component to be done, but have run out of rivets. I was hundreds short. While I was waiting for them I decided to backtrack a bit and fit the tips to the stab and elevator which I had left until assembly. Following the good advice of others I decided to fit them with rivnuts to facilitate removal later if required. Best way I could find of transferring the hole locations in the supporting strips to the plastic tip (and it would be the same if they were riveted ) was to securely fix a piece of clear plastic film (same stuff as used for laminating documents) to the main structure overlapping the row of holes. Then drill through the plastic film into the holes. Lift the film and insert the tip into place underneath the film and drill through the holes already in the film. Works like a charm. Then the holes in the supporting strip can be enlarged to take the rivnuts. I found this was best done using a step drill because they do not drift off centre the way a conventional drill tends to. Hope this may be of use to someone. Regards, Bob

-
Mark and Rick, Thanks for your suggestions: acouple of good ideas. Bob
-
ADVICE REQUESTED!!!!! Re my earlier post (1 Oct 2012) about the overhead lexan panel and the blind I have made to block out the sun. Was flying a Jab the other day and took the trouble to look at the extra visability that would be available if the roof was clear. Seemed to me that the extra visability may not be of great advantage as where I really needed to see, especially in the circuit, seemed to be right through the wing. Which brings me back to my original thoughts about painted lexan or a metal roof. Heres where I need the advice: (a) Has anyone used an alu roof on a VG XL and was it easy to fit? (b) Has anyone painted the lexan (assuming lexan can be painted) and what shade? I am assuming it would need to be a dark colour to block the radiant heat. © What was the outcome of either of the above? Did it solve the heat issue? Perhaps my blind is still an option? All opinions appreciated. Bob
-
Maj. Thanks for your words of ecouragement. Alwys good to read some positives. rankamateur, yeah, adouble tank cover would be great,along with a double hole. Bob
-
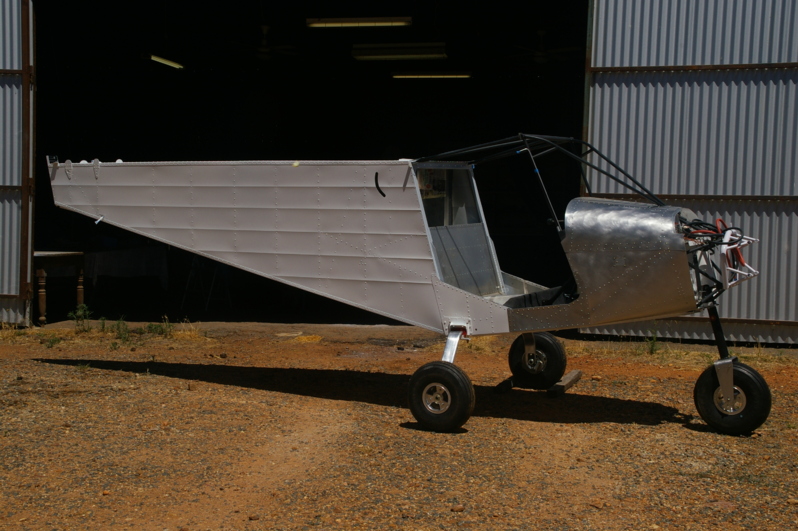
G'Day All, Well, a lot more work and a little more progress.Made up my mind on a design to break up that slab side a bit. Have to admit that it is not an original on my part but I didn't mind it, it was within my capabilities and I can live with the outcome. Quite a bit of work masking it up though; takes almost as long as the painting. Then to the right wing.All relatively straightforward until I decided to be a bit adventureous with the covers on the fuel tanks. I wanted to be able to remove the covers completely by screws/rivnuts rather than to have the forward edge riveted to the main spar. Decided to install a support along the front to carry the cover after cutting the front edge off the cover. This support goes between the lower skin and the spar. Then it required fitting rivnuts to the support and drilling the cover to match.(the original front holes having been removed), as well as installing rivnuts around the perimeter of both openings. Whilst the front edge does face the airflow it will be shielded by the nose skin which will sit a little further out. Took heaps of time but I am satisfied with the result. The fuel system will be quite simple. The two tanks are connected together and will operate as one and be serviced by one sight gauge, the other wing being set up the same. The two sides will feed to a tap junction where it will be possible to switch to left, right, or both. Hope the pics go some way to explaining my ramblings.Would love to be able to post the pics in a sequence of my choosing but is not the case.I'm sure you will sort them out. I can't even start a new paragraph tonight. Computors! I hate 'em. Now it's off over to the coast for a couple of weeks.Regards, Bob
-
Hi Odd, It seems there may have been a mistake in the packing of your kit at the factory. I am building a VG XL and it is only supplied with brakes for the pilot. There are no fittings on the passenger side rudder pedals to take brake pedals and cylinders. Did you intend to fit brakes for both pilot and passenger? Regards, Bob
-
G'Day All, After a long absence ( or so it seemed) helping my son harvest those crops I reported helping him sow back in May, I am at last back to some savannah building. Have got the rear fuselage painted, mostly quite satisfied with the result, except for one small area which means one portion I will probably do again.Fitted the main undercarraige and then the wheels and eventually it was time to get it off the bench and onto its wheels. I've now got a bench to start constructing the wings on, in between more painting. All the other components are made. Some jobs like fitting the windscreen and fitting a fuel system into the wings are keeping me awake at night, but I suppose it will just be a matter of time and patience,lots of both probably. Merry Christmas and a happy New Year with plenty of enjoyable building to you all. Bob
-
Thanks Hadyn and Mark, Had the piece in Marks pic sorted but as mentioned the fit-up is not the greatest, but was concerned that the front of the opening may not be covered completely by the screen and was actually starting to design a piece to cover the front as you have done Hadyn. Great minds must think alike. Bob
-
Hadyn All appears to be going nicely. Would like some advice if you could please. Where the two forward members of the cabin frame enter the front fuselage and then bolt to the firewall/engine mount there appears to be two pieces used to cover in the opening. I have the rear piece, what covers the front of the hole? A part # would be great. I cannot find any reference to this in the manual. Thanks, Bob
-
80K, So far as I am aware the ICP manual does not give any info on painting so can't answer your question. Mark, Am only using Scotchbright so am not getting any scratching, seems to be only removing that bit of surface tarnishing so it seems I might be close to the mark. Thanks, Bob
-
Hi All, Just a brief update. Both doors are finished and seem to fit well but have not fitted the hinges yet. Have tossed around what to do with the cabin roof area. It's designed for a european climate no doubt, not an Aussie summer day, but the visability afforded would be a definite advantage. I considered making an aluminium copy of the lexan sheet, then considered painting the lexan, but both ideas would be rather permanent. Finally decided to fit a normal household holland blind just above the luggage compartment opening so it can be drawn forward when required and hook on the front cross member of the roof. Only had to be cut to size and shape and the end result seems fine. If it is unsatisfactory it will be easy to remove and discard. Am now commencing to prepare the fuselage for painting. That black goop takes removing: acetone works OK but evaporates so quickly on a warm day that unleaded petrol is nearly as good. I am glad I did some masking to limit the spread of the stuff. Have started scuffing the surface as has been suggested to me. Haven't a clue what I am doing re painting and am just following various lines of advice. Would someone please check out the result in the photograph and tell me what you think. Cheers, Bob
-
Hadyn, Re the undercarriage support plates I don't have much to offer you except keep trying. I understand exactly what you are getting at, because I had lots of difficulty with mine too. I kept levering through the bolt holes and fitting a bolt whenever able and eventually got the bolts in. My difficulty was compounded because for some reason which I cannot recall I had installed the seats leaving said brackets till later, Made it so much more difficult.There are instances when the manual is right. I do remember reaming the rivet holes on the sides to get the rivets in. I spoke to a fellow who works in an aviation workshop in town about this practice and his comment was "don't worry about it, we do it all the time". He supported this by saying that a rivet should have clearance in the hole before setting, and even quoted a formula (which I don't have) to calculate the clearance. What do others think? Please get your project ahead of mine, Hadyn, then I can get some advice from you. Regards, Bob
-
G'day All, Time to update you on my progress Eventually finished the wiring,(firewall back anyway). Took me no end of time: as an elctrician I would make a handy plumber or something else. However all seemed to check out with a multi-meter and then powered it up and all worked fine. Cabin frame on and engine mount and front leg fitted as well . Got a door assembled and masked ready to dismantle and apply black goo. Masking is tedious but less so than cleaning the excess off afterwards. There will not be much happening in the next few weeks: am off on a trip to Birdsville and surrounds. Not flying unfortunately,have flown there but never been via land before, so am looking forward to it. Cheers Bob
-
Robert, I am having trouble with the rudder hinges on my XL not aligning. Do you recall whether your hinges on the rudder were in line. Bob
-
Hi All, Thanks Steve, thats the measurement I wanted to compare.Mine measures the same so I am quite puzzled as to why the three hinges dont line up. The top two measure the same distance as each other from the longeron so its not either of them at fault.Its a while since I made the rudder, but as I recall it all fitted together very nicely. Methinks I may have to make a new control horn to solve the issue. I seem to remember somone on a thread somewhere this in site talking about excessive rudder hinge wear at fairly low hours.Seems to me that could be one outcome if it was assembled under pressure with the hinges out of alignment. Must see if I can find that post. Thanks for your interest too Mark. Bob
-
Haydn, I ran out also, but got more from Reg quite promptly. Bob
-
Hi All, Sorry about my typo in that earlier post. Try 12 July instead of 21 July. One has to be so careful on this forum doesn't one? Haydn, thanks for your efforts in checking. The S rudder must be quite different to the XL if you skin over the top(bottom)of the horn. ra, yep,thats what I am after. Bob
-
G'Day ra, Refer back to my post on 21 July on this thread. The pic should explain all Thanks, Bob
-
Mark, Mine is an XL. Realize Haydn's is an S, but didn't think the rudders were different. Don't go to too much trouble to get a measurement Mark, it may be a bit awkward in the assembled position. thats the reason I was hoping to catch Haydn before he assembled his.I will also check lower hinge part nos. to be sure we are comparing apples with apples. Bob
-
Haydn, Fuselage looks to be coming along well. You seem to be making good progress. Back to my rudder hinge story. Tried to take some pics through the hinge holes but lack of depth of focus prevented me from coming up with anything meaningful. Suffice to say the hole in the bottom hinge is almost a full hole diameter too close to the rudder. As Mark says, I dont know how this could be possible, unless the horn itself is faulty. To help me check this, could you measure the distance marked "x" in one of the pics attached. It's hole centres to hole centre. Hope I am not being too much trouble. Bob
-
Mark, Re your petrol leak problem,I have just started looking for a petrol resistant sealant for threads and flanges but have not found anything in which I would have a lot of confidence. Seems a petrol resistant washer inside the tank would be better than under the nut which would still leave a pathway along the thread(unless a thread sealing medium is used) A local firm which deals exclusively in petroleum handling equipment and fittings say nothing beats ordinary plumbers teflon tape for a petrol resistant thread sealant, but I am not yet convinced. Does anyone out there know? I feel sorry about the damage your leak has caused your lovely paint job, Mark. Bob
-
Haydn, Yeah, had that problem too and solved it the same way as you. This problem is different. I just didn't explain myself very well. The central points of the three rudder hinges are not in a straight line, almost as though the hole in the bottom hinge is not located accurately.It will be quite obvious if you look through them from one end if there is a problem. Thanks, Bob
-
G'Day Haydn, Noticed you have finished your rudder (amongst other parts). Could you check the alignment of the hinges and post the result please? I have a problem with mine, and I'm pretty sure its the bottom hinge at fault. If yours is OK, I would like to compare some measurements to confirm this. Hope I am not imposing on you too much. Bob
-
Can't master posting pics.See if this works for above post. Bob

.JPG.0b5815fb5978cdeb8f5f04271eba3fda.JPG)
.JPG.fb0e5a738381a56a16e3ad37c161ba04.JPG)
.JPG.c260b970da62ecf631a4e16f595a9634.JPG)

.JPG.716a66a5c3c1099767dcf5198429bed1.JPG)
.JPG.d900c37bd3ea53307e032479aa4b517f.JPG)
.JPG.1ab52661a78af2ff7b237bc60bc8ac67.JPG)
.JPG.14b19fb9d32ea831e7cad76b1166ed50.JPG)
.JPG.5177acf1474d8cb8b8b93707c0fbb245.JPG)
.JPG.b8c00cff2168ee0eb0725f9eeec7185b.JPG)
.JPG.c1403b0899fef797736a1d3166ec3784.JPG)
.JPG.ae9c2067b4b11186a7e72ea47baa1224.JPG)
.JPG.26e3f06ea72ece82dd1606d50d5504a8.JPG)

.JPG.17bde96bb1c6ff1bc74d92cf1fdf2ebf.JPG)
.JPG.4cffb40186eb9a209142dce907eddb69.JPG)
.JPG.23cedf38b4f774de37ed5b506d404175.JPG)
.JPG.fd93161b2d7c8cf2f04f9a8de4a5bed9.JPG)
.JPG.94bec61c0368cffff6722cb2baf4fb1c.JPG)
.JPG.b43ccc452069aef4611f25eafee7a735.JPG)
.JPG.a835c579e3b40a67a0303676ec85be17.JPG)
.JPG.fa023abb231f6e11add689318a1d9828.JPG)