Jump to content
  • entries
    19
  • comments
    37
  • views
    5,165

About this blog

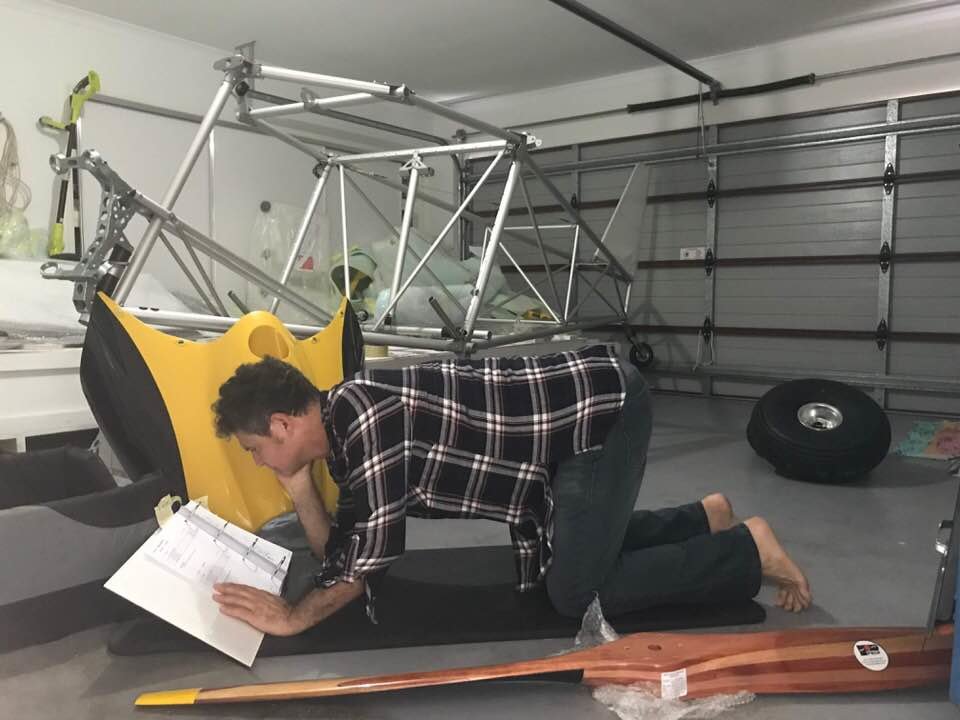
My adventures in building the Skyreach Bushcat LSA kit


But first, time for some indulgence!


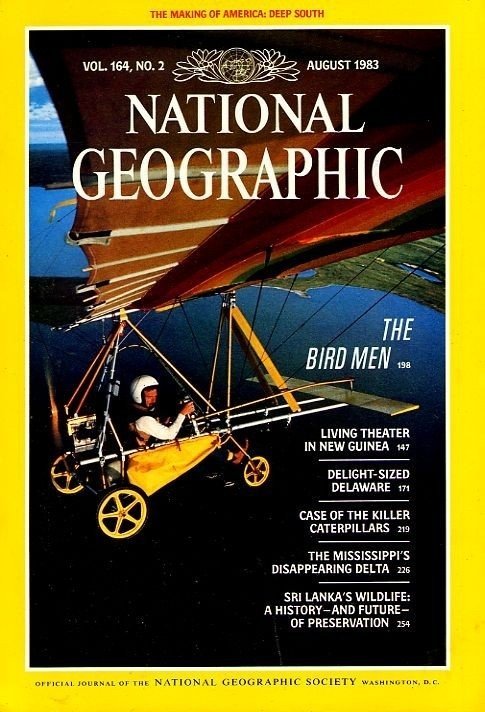
Thirty five years ago, I was given a copy of National Geographic magazine. The cover story was on ultralights. I was besotted by the idea of these 'personal flying machines', particularly the Pteradactyl and Quicksilver MX, but I had a funny mindset back then. Even to the extent of thinking that since we didn't live in the USA, ultralights were out of my reach. Not just that, I lived in Darwin, Australia which as a 14 yo felt like an even less likely place for ultralights. Where were the green forests and New England architecture for me to soar over!


Ten or so years later, having pretty much forgotten about ultralights (as I knew them) I learnt to fly in a Piper Warrior. I got as far as GFPT and then ran out of money, and steam.


A couple of years ago I started thinking about the 'real deal' again and the idea of constructing an ultralight and did some investigating. And lo and behold, Quicksilver (and the MX) were still around! But only just. They were going through the process of changing hands, and also Rotax had stopped making the engines used for them. Anyway, I discovered this new type of licence (RA-Aus) and decided to re-learn to fly and convert my GFPT. You get a lot more value for the price. At the same time, I was pointed to the Skyreach Bushcat as a possible kit to build. You might think the Bushcat is a far cry from an MX, but it is still aluminium tubes, brackets and fabric. Just with a Rotax 912 swinging the propellor instead of a chainsaw motor! But it will totally scratch that itch I had all those years ago. And also, I can take my partner up with me, and it doesn't just have to be at the break of dawn ?

If you are starting out building the Bushcat review this blog from time to time to see where I’m at.


So let’s build a Bushcat kit!


1.thumb.jpg.ef7221c57b0e249d7dbd0ab2ee7ed0de.jpg  2.thumb.jpg.e79f4253638cc9d9688b38350d1979c4.jpg  3.thumb.jpg.f8697fdda590deadeffc88395426d2e6.jpg

Entries in this blog

19. Brakes update

I put it off for a while but I finally contacted the factory about the brake pedals as they were binding such that when you had full right rudder the brake pedal wouldn't move. They sent out an update kit and I swapped the faulty parts.   Last night I finally got around to bleeding the brakes. I had a hell of a time. Couldn't do it 'bottom up' I assumed because of the cheapo oil can I was using. So I decided to bleed them the regular automotive way. Still no joy. Then I started to thin

danny_galaga

danny_galaga in Aircraft Build

18. Section 65-66

Some more work on the wing. I first slid the sail over so that the mylar pocket wasn't folded over. Fitting the mylar stiffener looks easy, but there is some sort of sticky residue inside the pocket it slides in, presumably from when it was sewn together. I was stumped for a bit until my smarter half, Joanna pointed out that if you half roll up the mylar lengthways it won't touch the edges. Slid in easily then ? . Then slid the sail over some more so that I was now looking at the back of the myl

danny_galaga

danny_galaga in Aircraft Build

16. Section 59-61

There were two left hand wing brackets. While waiting for a right hand one to arrive, instead of building two left hand wings I built a wing rack. Because I'm building in a two car garage I need to be careful with space. Therefore I made it so the wing is about 760mm off the ground. That way it can sit against the fuselage and over the undercarriage (where the LE tubes are in the photo)   Rack is just built from a couple of dollies, 35x90 pine and a bit of bracing. No glue, just screws

danny_galaga

danny_galaga in Aircraft Build

15. Section 49

Installing the firewall.   In section 23 I mentioned you need to leave the wooden fairing spacer in place. This is why! Without it, the firewall pieces are not the right shape and won't fit. Which I didn't realise so I experimented by trimming off about 2mm from where the firewall pieces meet the top of the engine mount thinking it might shift into place. It still didn't make sense so it was time to email Eddie the Engineer at the factory. He then told me the fairing spacer should stil

danny_galaga

danny_galaga in Aircraft Build

14. Section 44

I had a hell of a time setting up the throttle arms. This was part of my tantrum in the previous post!   But basically you can avoid a lot of time and stress by being really careful fitting the armrest plates. I didn't make them conform closely enough to the curve and they sat a millimetre or two off the armrest. The problem there is that the throttle arms have a bend in them and there isn't much leeway for error. Where the arm bends, it rubs on the plate, causing way too much friction

danny_galaga

danny_galaga in Aircraft Build

13. Thoughts so far, or great expectations

I have not been enjoying this build.   but I need to elaborate.    A programmer friend once told me that I would be an excellent beta tester because I always seem to find that combination of inputs that seizes up the computer.   I am also a creative person. Often if i make something, it comes out of nowhere. The last major thing I built was this arcade machine running MAME:   http://forum.arcadecontrols.com/i

danny_galaga

danny_galaga in Aircraft Build

12. Section 43

As good a point as any to post an updated picture. The battery was a dam tight fit and im not looking forward to having to replace that one day!    Putting on the undercarriage and wheels was pretty straight forward. Be aware that some of the items come pre assembled even though the manual has assembly instructions. Things like the disk brakes definitely need tightening up and Loctite used.   the seat backs had a hole too small for the clevis pins so I needed to drill them ou

danny_galaga

danny_galaga in Aircraft Build

11. Section 23/24

The fairing is a bit of a struggle to put on. You will need to ‘stretch’ it on. Note here that the bolts that weren’t fastened in section 6 should be removed before fitting the fairing. The manual doesn’t mention this. If you thought it was hard putting the fairing on, wait until you realise you need to take these bolts out and have to take the fairing off again ?   Note: once i fitted the undercarriage I found that the slot it fits into on the fairing was not even. Hard to

danny_galaga

danny_galaga in Aircraft Build

10. Section 22

You need to put ten grommets into the fairing at this stage. Go to the bedroom and grab yourself some water based lube, some of these are tough little buggers to insert ?    so tough in fact there was no way I could get the two medium sized grommets in the holes. They were 10mm holes. I ended up drilling them out to 12.5mm and they were still the hardest to get in! Those two are for the battery cables.     I should add that that at this point (kit # 231) they still

danny_galaga

danny_galaga in Aircraft Build

9. Section 20

To lace up the fuselage sail I stuck with my ghetto work bench. By strapping the front down, I was able to lace most of the way from back to front. The last quarter or so I was able to reach from inside the fuselage. I concede that I may have to put it on a stand soon but for now this let me crack on ?  

danny_galaga

danny_galaga in Aircraft Build

8. Section 17

Detail section 17   installing the first bit of trilam on the skyreach bushcat.   ive never been good at lacing my shoes so this will be a challenge ? but at least I can make it easier to thread the lace with some superglue on the end and rolled between wet fingers to make a ‘needle’. I’ve now perfected my technique. Ignoring the fluffy end of the string I soak about a 10mm section with superglue. When it has set I cut it on about a 45 degree angle. Then a bi

danny_galaga

danny_galaga in Aircraft Build

7. Section 11

Detail section 11.2   In my correspondence with the contact engineer he told me I will have to trim a little off two bolts on the tailwheel spring so that the rearmost diagonal braces will fit. I used a Dremel so took the barest possible amount off.   I corresponded a lot with the engineer recently because there was a lot of head scratching with those fuselage diagonals. It should be that you may have to coerce the pieces a couple of millimetres to get them in p

danny_galaga

danny_galaga in Aircraft Build

6. Section 9

Detail section 9   left side upper fuselage tube has two threaded holes. Also, make sure you put the turnbuckles in in step 2 before you do step 3 (which ties the two tubes together aft) otherwise you won’t be able to put the Clevis pin in. How do I know this?  

danny_galaga

danny_galaga in Aircraft Build

5. Section 8

Detail of section 8.2   there are bushes that go inside the bottom tubes where the tail wheel spring mounts. These are a tight fit so what I did was wrap the tube in thin card and then get some vice grips. I wound the vice grips up to just touch the card. And then just enough more to just compress the tube. Not enough to even see. Then I placed the bushes in place with pointy nosed pliers and put the bolts in to hold them in place. When the vice grips were released the tube springs

danny_galaga

danny_galaga in Aircraft Build

4. Workspace

I am building the Bushcat in a two car garage. Skyreach recommend something a bit bigger. So not heaps of room. Right now I’m using two of the long crates as a bench. They are sitting on some mini castors so I can move them around. Once those two are decanted they can go out and the fuselage can stand on its undercarriage in the same location. There will be an awkward phase though because the wing components are in the larger of those two crates. Jo doesn’t know it yet but her car

danny_galaga

danny_galaga in Aircraft Build

2. Section 2

For this section you need to rivet some aluminium strips along the bottom. Later they are used for lacing the fabric. I can tell you now a ten dollar pop rivet gun won’t work!   So I got this bobby dazzler for the rivetting. Kingchrome, forty bucks. Does the trick and should see me through this build since there are only a few rivets here and there in the Bushcat  ?    

danny_galaga

danny_galaga in Aircraft Build

1. Without further ado!

Note: this build is for the taildragger version of the Skyreach Bushcat, so bear in mind some sections may be a little different to the tricycle version.   So I won't be posting every time I screw a nut onto a bolt. Mostly I will highlight points of interest, tricks and solutions and general thoughts. Also I am discovering that I am needing 'special' tools sooner than anticipated, so in this first post I will list any special tools/materials and the section of the Bushcat build I first

danny_galaga

danny_galaga in Aircraft Build

×
×
  • Create New...