Bigglesworth Posted September 5, 2007 Author Share Posted September 5, 2007 Awesome BW.You could have drawn some more expensive gauges. You're right about doing it in the factory. Everything at your fingertips. Advice, tools, materials, jigs, benches, more advice, a finished one to compare it to (invaluable). The compressor alone has saved me from rivet elbow. You won't be far behind though - if at all. You work bloody hard. Walked into a Mitsubishi dealer yesterday with a feeling I'd find the right colour there so I could give the code to the paint guys. There were only 3 cars in the showroom, but one was perfect. Not many bronze cars around, but there it was. It's called Fusion. As a Buddist friend would say, "it was meant to be". Glad you found the colour, doing better than me there. Do you have any idea of paint types and additive you're using? I am still (weeks) waiting for a definitive answer from the nearest Spies Hecker dealer with a quote. (I want top quality [i bought a Cheetah, obviously I want quality] and he has no idea what to tell me to put over the fabric. I think etch primer with flex-add will do but.....). As to air compressors; I have one on hand. I would give up otherwise. Well......maybe not, but it would be slower. I don't want to find my colour on a car. Small town, someone is bound to say "oh, you copied that beaut ute that whatsisnames cousin bought off whatderyoucallim's uncle" And I don't want to have to say yes. Also I have never seen a colour like I will use. I haven't told all painting details yet. ;) I will try to keep up, but I think delivery times will force me to lag behind. Still, a few months is a pretty quick time to finish a kit. Godspeed with your building. Link to comment Share on other sites More sharing options...
slartibartfast Posted September 5, 2007 Share Posted September 5, 2007 Glad you found the colour, doing better than me there. Do you have any idea of paint types and additive you're using? Nuh. Another bonus. Garry has lined up the painter and will be getting the Sierra painted there before mine to give them something to practice on. Such a nice guy. I have talked about requirements, but forget the details. Along the lines of adding some placticiser for the fabric bits. Check the Stits website for the fabric clues. Good info there. Link to comment Share on other sites More sharing options...
Bigglesworth Posted September 5, 2007 Author Share Posted September 5, 2007 Stits says "USE STITS OR YOUR PLANE WILL CRASH, DON'T JUST USE CHEAPER PAINT" or words to that effect. That is helpful when stits won't paint the metal. I will be fine, Garry's doesn't even have flex in it Link to comment Share on other sites More sharing options...
Bigglesworth Posted September 5, 2007 Author Share Posted September 5, 2007 Ian is a legend for this Morgan Aeroworks section ;);) Link to comment Share on other sites More sharing options...
slartibartfast Posted September 6, 2007 Share Posted September 6, 2007 Stits says "USE STITS OR YOUR PLANE WILL CRASH, DON'T JUST USE CHEAPER PAINT" or words to that effect. Mmm - just checked their site and you're right. The good info must have been somewhere else. Link to comment Share on other sites More sharing options...
kfowler Posted September 7, 2007 Share Posted September 7, 2007 just a little note to say that i enjoy reading your post very much i will be building a cheetah in the very near future does the cheetah fly as good as very body say Link to comment Share on other sites More sharing options...
Guest danda Posted September 8, 2007 Share Posted September 8, 2007 I have been following this building process from the first post and all it's done is to re-enforced my love for the aircraft kits Garry is producing thanks for letting us share in your joy. TOP STUFF Don Link to comment Share on other sites More sharing options...
Bigglesworth Posted September 10, 2007 Author Share Posted September 10, 2007 Thanks for the comment, Don. It was actually your article in the RAA mag that was the clincher for me buying my plane. You quoted that Bible verse "but they that wait on the Lord shall renew their strength. They shall mount up with wings like eagles.........." Isaiah 40 And when I randomly opened my Bible the night after I read the article, I read that exact chapter. What was I waiting for?:) I was thinking of putting that verse on a placard on the dash, just to always keep in mind who keeps this plane n the air. Link to comment Share on other sites More sharing options...
Bigglesworth Posted September 10, 2007 Author Share Posted September 10, 2007 Odds and sods More time wasted on birthdays last weekend; another 21st. That took all Friday night and a lot of Saturday, but it was worth it I suppose. Now back to the plane. Lots of time spent on things like filling, sanding and more of the same. I got the undercarriage leg finished to my satisfaction the other day. That means I know how much Vinylester resin I have left, and can use the rest to double proof my fuel tank. Then that is finished. Those 2 things have been bugging me since I started, either with ugly bubbles or with leaks. I mean, who wants leaks in a undercarriage;)? In the way interesting things I got done, I got some acoustic insulation on the firewall. I am using a form of lead vinyl which is very good, and very heavy. So not much of it. I tried sticking it on with a standard glue stick, not the best, will wait to see how it dried. I started on the fabric covering 'be' Started with an elevator. First made sure everything was sanded. Then cut out the basic shape of fabric, I used pinking shears since I think it makes a stronger bond. I had a hard job finding a pair of pinking shears, not even the sewing shops had them. Eventually my boss's wife found a pair which she kindly let me borrow ;). Once I had the basic shape, I wrapped it around the elevator, and cut it the exact shape. Including the compression joins. Now here I made a major error with minor consequences. (Um, isn't it always the other way). I have never fabric covered before, and the instructions are minimal, so I didn't thin the glue . This meant it didn't penetrate properly. For those of you who have no idea about glueing fabric; the glue is first bruched on the surface, where it dries almost instantly. The fabric is placed over it, then more glue is brushed over it and rubbed through the fabric. This reactivates the glue underneath and makes a strong bond. If the glue is not thinned (with acetone), it goes off before it gets through the fabric, and rubs into lumps, and uses too much glue. Anyway I think I can fix it up with a bit of thin glue. Also, I decided to heat shrink it already (I still didn't know I was wrong with the glue, I just thought I did an ordinary job, and hoped it would come better). This was fun. But it wasn't quite as good as I hoped. It took the major wrinkles out but not the small ones in the glue line. Maybe I can make sure they are stuck down all around, then sand them off. I'm hopeing. In any case, it should fly, it is mainly looks. [ATTACH]3577.vB[/ATTACH] I also got one wing walk in. A piece of offcut either side scribed to the wing curve and fibreglassed and rivetted to the rib. The rivets aren't in the original, but I like them better than just fibreglass. then one in the middle which sits on the drag spar and strut. Glassed all this in, and when it was set, I stuck the sheet of ply on it. Just used Balsa Cement. (can you tell I used to do a bit of modelling?) It holds my weight but that is not a fair test, I am a lightweight, will have to stand on it and hold a fuel can or something. [ATTACH]3576.vB[/ATTACH] [ATTACH]3578.vB[/ATTACH] I made the back for the parcel shelf. I knew this would be hard to get right, an internal scribe is a real . So I traced the profile of the bulkhead on it, then measured the extremes of what the back wanted to be. Turned out about 60mm all around. So drew that curve, cut it out; and it was close. Had to cut an extra 20 or so mils from around the middle of the curves. But this was just scribe and cut until it fitted. I could just glue it in where it is, but I want to make it removeable. I want to put 2 6x9 speakers in it, run them from a head unit CD player with 50watts per chanel, bridged to 100watts. Should be good. Anyway to make it removeable I will make brackets out of aluminium angle and glue these to the fuse, and screw the back to them. [ATTACH]3579.vB[/ATTACH] I put the 2nd wingtip together. [ATTACH]3580.vB[/ATTACH] Notice the difference in method from the first. I put a spacer in this one to simulate the width of the wing, and I only clamped it right on the edge. The first one was made too flat, and has a dip in underneath. Not big, but not perfect either. I also put more clecos in this one. Why not? I have plenty, and the holes are easy to fill. So basically that was my weekend. Apart from painting the instrument panel (grey hammertone, hides any defects [there wasn't any to hide, except in the painting; these don't get hidden]) and cutting out the top of the aileron. Need some rivets and 3/32 clecoes to keep going there. Oh, and I also got the fuel tank hole cut in the top deck. To find this, I marked a cross on the tank cap, measured where the hole should be, drilled a small hole here, put the deck on temporarily, then looked through the hole to find the centre of the cross. Took a few holes to get this, but once the whole area is cut out with a large holesaw, none of the other holes matter. I think that is about all. By the way of advice, if you run out of 4-4 countersunks, don't bother trying your local hardware, mine took 2 weeks to stuff everything up, just get them from Garry, lots quicker. (maybe not if you're in WA, kfowler may want to ignore this) I might get some sleep now, late night on the plane tomorrow. Link to comment Share on other sites More sharing options...
kfowler Posted September 12, 2007 Share Posted September 12, 2007 i won't think twice about getting it from Garry as it would be a lot quicker then trying to get them over here Link to comment Share on other sites More sharing options...
Bigglesworth Posted September 12, 2007 Author Share Posted September 12, 2007 Worked a long night on Tuesday, not worth taking photos though, nothing new was done, only the other elevator, and things like sanding off rivet heads. A couple of things: where I stuffed up the glueing the other day, I was able to correct that with pure acetone which softened the glue, allowing me to rub it through the fabric to get a good penetration. I could even soften entire areas and get wrinkles out of it. Well not all of them, it will always show that it was my first fabric job. The 2nd covering went better with the thinned glue. doesn't want much thinning, but it need some. Still wasn't perfect, the rounded corner at the outside of the front is a B***rd, it affects the rest of the sheet. But it will fly (I hope). Starting to organise things like electrics and motor, all nice and expensive, will have to work longer hours yet. It must suck to be rich, eh.. Hope to have a big weekend on it; my rivets have turned up, and my clecoes for the aileron. So no excuses. Just LeDoux it. (a saying coming from a famous cowboy/singer called Chris LeDoux). Link to comment Share on other sites More sharing options...
Bigglesworth Posted September 17, 2007 Author Share Posted September 17, 2007 Winging along Big weekend, no birthdays (none I couldn't avoid anyway). So I have my rivets, Yeeha, look out the 2nd D box. I cleaned off the bench which somehow had got way too full to fit a wing, then I got the wing from its precarious position of "just lean it here for now", and the sheet from "try to step over it until the rivets get here" and tied them together. Then I re setup the washout. (all those water lines;)) This time I wanted to get it done without ripples, so I put the ratchet straps back on, then clecoed up the leading edge so it sat hard against the rib. That left no clecoes for the spar ( I only have 25) so I just had to hope that was right. Started riveting the top of the leading edge, that all sat pretty good, except for 1 rib, very small ripples in that, but I figured I could pretend they didn't happen, and not admit to them. (Ummm, then why do I tell everyone on the net? Duh). Started on the bottom of the leading edge (the 'danger zone'), riveted from the front back. And.................. I got it !!!! No ripples! I am a legend!. [my boss wasn't so ecstatic "now she'll go better around one corner than the other since the first wing isn't as good"]:;)4: Riveted the trailing edge of the sheet next. I figured that that was what held the washout, so if that was right, the spar could do what it wanted. So lastly I did the spar. With all the other rivets in, it was just the time to find out my compound mistake. First part; I drilled the holes with a 1/8th drill instead of a 1/8rivet drill (rivet drill is slightly larger, the rivet expands to fill it. 2nd part; I coated the lot in etch primer, and it went into the holes,,,,,,, and I hadn't cleaned it out. So 90% of the rivets needed gentle persuasion to get in. That really made it fun:confused: In any case; it got done. And only then did I notice a grain of course sand in the D box:black_eye:, that'd be right. Not as bad as it sounds, it is in the first 'bay', and there is a gap between the rib and the spar, so at the right angle, it should come out. It flies at the necessary angle, so if I don't bother getting it out, it should fall out. I also made the wing walk, or part of it. This one is a bit more complex since the ribs face the other way, this means that the side supports can't be rivetted to them. It needed 2 extra supports, and relies on the bonding strength of fibreglass. Actually I could have used liquid nails, but I didn't have any on hand. So the other wing is takeing shape. Still a lot more to come. Link to comment Share on other sites More sharing options...
Bigglesworth Posted September 17, 2007 Author Share Posted September 17, 2007 ailerons from h**l, or somewhere else hot You know them things which make a plane rock its wings? (when the plane's rocking, don't bother knocking [shut up, not that]) Those ailerons which are taken for granted, are a real nuisance to make. For starters they use 3/32 rivets which means more clecos, then they need to be deburred, but clecoes get in the way of setting it up to drill the trailing edge and on top of that the ribs need to be folded, and the sizes are "find out yourself" and three quarters exactly.;) So, pick an average value for the angle of the front of the aileron, I said 65 degrees and that seems fine. Then trace the profile of rib 4 (root of the aileron) and work out a template. Then I put the wingtip on and did the same there. Great, now I have 2 templates, and still no rib. Okay. So now try to make a rib. Um, scrap that one, try another <and so forth and so forth> Finally, one which looks right. I found if i used 5/32 holes in the corners, it was easier to get precise folds in it than if I used a larger drill size. Then I made one for the tip. Nice size, bent the wrong way. Another, and another [for a long period of annoying time] Eventually I had a pair. Now I need 4 more, with nothing to compare them to. And since the aileron is tapering, the spaceing is not the same. I tried to work it out to mathematical perfection, but found the formula to be recursive, and I didn't feel like calculus at the time, so I approximated it, gives it a bit extra differential, but thats OK. Then came the fun part. I knew the measurements of the root and tip ribs, so i applied an even size decrease to them and found the size of the intermediate ribs. sounds simple, look at my calculation sheet, [ATTACH]3649.vB[/ATTACH] Then I found I had made the infamous 100mm mistake and had to do half of them again, [ATTACH]3651.vB[/ATTACH] So now I knew the size of the front and the top, and the angle was constant, and that let me make the other ribs. I spoke to Garry about it today, he said he just puts root and tip onto the aileron, then measures the others. Still my way is more fulfilling;) I had already trimmed the sheets to length, they are supplied pre bent, so that is some consolation. clecoed the ribs to the top [ATTACH]3652.vB[/ATTACH] put the bottom on and clecoed that. Now that has to be held while drilling the trailing edge, since they make [or hold against] the twist in the aileron. But when holding it in place, the cleco get in the way. So with a bit of trouble, I got 2 clecos into it from the inside. Then I held the hinges onto the plate with rubber bands, then got Lex to hold it inline with the wing while I drilled it. Drilled it at 2 inch centres, should be closer but it will do. Wasn't sure if it needed more holes, so I couldn't finish it the other night. but almost there :) Link to comment Share on other sites More sharing options...
Bigglesworth Posted September 17, 2007 Author Share Posted September 17, 2007 A few extras Once I had stalled on the aileron, I switched to other things, I put the back of the parcel shelf in. Made 3 brackets out of aluminium angle, screwed them to the ply, bent them to a bit sharper angle, covered the face with good ol' roof and gutter silicone, and put it into place, this should hold well. While I had the silicone out, I also put a bit on the the sound material. The paper glue idea didn't work after all, it needs air contact to dry, but the silicone is perfect, spreads very thin and all over the vinyl. Also noticed a problem with the fuel tank mount, so that needed trimming, and a bit of rubber over it. Also went over the tank mount and glued rubber over wherever it had rubbed through (the leaking fuel softened it in the testing phase, then it rubs through easily), So now it should be fine. Thats about it for the weekend. More soon :) Link to comment Share on other sites More sharing options...
Bigglesworth Posted September 20, 2007 Author Share Posted September 20, 2007 One Alien-leron finished I finished the aileron on Tuesday. 2 inches was good enough centres, so I was alright, just had to drill a few more holes, make the control arm, drill those river holes, drill the hinges, and that was about all. Then take it all apart, and clean up every hole. That took ages, lots of holes. Then riveted it together starting from the bottom moveing up. All was well, except for the trailing edge. I had put the rivets in the centre of the te strip, this meant there wasn't much space for them and had to be pushed in as they were being 'pulled'. Luckily I had the foresight to make the rivets staggered or there would have been trouble. So I got it all together. Then came the fun and games part of trying to het the hinges in the right space. The trick I found here, is make the rivet spaceing close; that way it won't mind if some of the holes are slotted because they were in the wrong place:confused:. Took a few goes to get it. And I'm not altogether happy with it. I made the aileron to match the ribs at either end, I should have made it to line up with the hinge plate. Now it lines up at either end, but looks too skinny in the middle. I think I will make the other the same just to have them equal, but I might even end up thinking they make extra drag, and make a new set for them in the very distant future. Also The trailing edge is a bit wavy, it is hard, because of the double taper of the wing, the ailerons have to be made in position, and then the trailing edge is free to be in all sorts of places. It should still fly ( I hope), So that is a major part done. Now I have to get the cable in, then do it all over again on the other side, now won't that be fun ? Link to comment Share on other sites More sharing options...
Bigglesworth Posted September 24, 2007 Author Share Posted September 24, 2007 Another Alien-leron is on Another weekend of work has passed, and this time it was interrupted by having to concrete an apron in front of the workshop. I only realised after I started work that I would need some form of ramp to get my plane in and out, and Lex said if I am going to do anything to his workshop, it better go the whole way since it has needed an apron there for ages. So that took Saturday morning, then on Saturday arvo, I started on the other aileron. It went lots quicker than the other one, especially since all the calculations were done, and I had made the wings close enough to the same to use the same measurements;). So I started it at about 1 in the afternoon, and by 3 in the morning, it was all drilled, cleaned and half rivetted together. Yes that time is not a typo, I had to make up for the lost morning somehow, and it was no picnic. There's no heating in the workshop and it was a cold night, I was wearing my jacket, and there was dew starting to form on it by the time I left. ;) But I got most of the 2nd aileron. A couple of procedure changes; I put the hinges onto the aileron early in the game, clecoed them from inside the box, then got 2 hinges on the wing side, clecoed on, and then I didn't need anyone to hold it while I set up the trailing edge. This seamed a good idea at the time (and probably is) but for some reason, this aileron has a ~3mm twist. . But it will work I think. Also got the cable mounts setup. These brackets are made out of 40x40 angle, cut to shape and holes in it, they are fun to make. Then I put the cable onto mount and the aileron, set everything to neutral position and marked its position. I cut a piece of 3 ply and glassed it onto the area for extra support. Next day I set it all up again, set the depth to wherever it seemed right, and drilled the mounting bolt holes. Only later on I realised that I should have made sure that the cover would fit over the cable mount. God was with me, and it did fit. That almost covers the weekend's work I think (other than preparing a large potato patch, but that is not of flying interest:confused:) I also did a bit of other stuff on the fuse, I have got most of the electronics already, the switches, cables, and a battery. Now I just need the instruments to wire to to give me inspiration to put them in. I have ordered a motor, which may be here in time for playing with next weekend. It sounds like not much an the weekend doesn't it? If I think of anything else I will let you know :) Link to comment Share on other sites More sharing options...
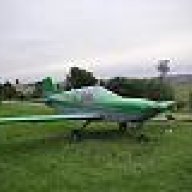
slartibartfast Posted September 26, 2007 Share Posted September 26, 2007 As per prior agreement, I'll chuck in a few pics of where I'm at. I had a week off paid work last week. Some intensive real work followed. As usual, too busy to keep current as things develop, but these are the latest pics. [ATTACH]3743.vB[/ATTACH] Dead sexy huh? [ATTACH]3744.vB[/ATTACH] C'pit taking shape [ATTACH]3745.vB[/ATTACH] [ATTACH]3746.vB[/ATTACH] Parcel shelf up top - always accessible. Luggage area below. Need to fold seats forward to access. We let Garry's dog ride in the parcel shelf during circuits on Saturday. I forgot she was there. [ATTACH]3747.vB[/ATTACH] Forward luggage compartment. That's where my tent goes. [ATTACH]3748.vB[/ATTACH] Getting cowled up. That's the Sierra on the left. [ATTACH]3749.vB[/ATTACH] The prop for the Sierra. 60/60 [ATTACH]3750.vB[/ATTACH] Me and the Cheetah alone at last. Not a bad area to fly. If there's nowhere else to go. [ATTACH]3751.vB[/ATTACH] The last time she's ever inverted. [ATTACH]3752.vB[/ATTACH] Wherever there's enough metal for drumming, I've deadened with foam and stud adhesive. [ATTACH]3753.vB[/ATTACH] Top parcel shelf too. [ATTACH]3754.vB[/ATTACH] Bottom of the cockpit. I've run tape everywhere there is a non-smooth surface touching the fabric. Rivets and nuts doubly. [ATTACH]3755.vB[/ATTACH] Left wing covered. [ATTACH]3756.vB[/ATTACH] An elevator and rudder with 2 coats of dope. Ripped off. Nitrate dope doesn't buzz me at all. [ATTACH]3757.vB[/ATTACH] The Sierra looking sexy. It got painted this week. A very intensive long weekend coming up. The end is in sight. Link to comment Share on other sites More sharing options...
Bigglesworth Posted September 26, 2007 Author Share Posted September 26, 2007 Jealous of Slarti Just green with envy that Slarti will be finished first. So less typing and more work, I'll let you work out what I am up to from these photos. There wasn't much to say anyway, I'm getting up to the generic stuff like switches and wires. WARNING: never let a gadget freak loose with a Jaycar catalouge and plans to wire an aeroplane, She'll be sporting rayguns next.:;)2: Jaycar doesn't sell a key switch, so I will have to get that from Altronics, good looking shop that, just a bit dearer, and I don't have the master catalouge for them, but they are Australian which is better. Back to work, someone get the whip out, I'm being too lazy (I work 4-5 days to pay for my darling Cowboy Up, and have to help at home, so no wonder Slarti is ahead, but I am still jealous). Link to comment Share on other sites More sharing options...
Thruster87 Posted September 26, 2007 Share Posted September 26, 2007 Howdy, Using adhesives on Alclad may cause problems due to corrosion if they contain chemicals which react with water to form acids etc or as an example silicon sealants may release acetic acid when curing.So for the long haul do check the suitability of all adhesives prior to use. Cheers Link to comment Share on other sites More sharing options...
Bigglesworth Posted September 26, 2007 Author Share Posted September 26, 2007 Thanks, I have only used it on the colourbond so far, but now I think of it, standard silicone isn't polycarbonate safe. I'll have to get hold of some waterbased silicone which is, that should be OK. Heat glue is safe, but it never worked for me, chances are araldite is safe, I will check. I don't think you can get waterbased silicone around here. We get it from Canberra when we need it at my building site job. Link to comment Share on other sites More sharing options...
planedriver Posted September 26, 2007 Share Posted September 26, 2007 Hi Startiblast, Real interesting post seeing the progress you've made. Does the kit come complete with the "midnight oil" required? Well done!! It's looking fantastic. Jealousy may not be a good thing, but mate, i've now got a severe dose of it, and i'm sure it's contageous. Link to comment Share on other sites More sharing options...
Thruster87 Posted September 27, 2007 Share Posted September 27, 2007 Howdy, In commercial aviation electrical cable ends are crimped rather then soldered to minimize fatigue cracking again for the long haul. Your kit seems to be coming along nicely. Cheers Link to comment Share on other sites More sharing options...
Bigglesworth Posted September 27, 2007 Author Share Posted September 27, 2007 Howdy, In commercial aviation electrical cable ends are crimped rather then soldered to minimize fatigue cracking again for the long haul. Your kit seems to be coming along nicely. Cheers Crimping works well on good quality lugs, but in my experience with modifying car electronics, these cheap lugs have a nasty habit of either coming loose, or squeezing the wire and weakening it, so I solder it, then put good quality heatshrink on it to give it a bit of support. I use glue lined 4:1 heatshrink, and it is a lot better. Besides, who needs electronics to fly a plane?. Link to comment Share on other sites More sharing options...
Bigglesworth Posted September 30, 2007 Author Share Posted September 30, 2007 Darn the wind Just a short summary or this weekend, need my sleep badly, I will be a wreck before this is finished. Got her outside and the wings on, drilled the drag spar mount. Garry says just put them where they fit, but I measured them, and found that they both were out a bit. I think the spars develop a slight curve in them when they are being made, both wings were out about the same amount, and in the same direction relative to the spar. Straightened them out before I drilled them. This means that it will be hard to put the drag spar pin in in future, it should straighten itself out I hope. While it was on, I put the aileron cables in, this was pretty easy. Then I started making up the control rod extensions, and had one made up when the wind picked up and I had to get her back inside. Derigging in the wind is hard for one person. So I got her back inside. got some brake lines installed, including some elbows which I had to get extra, it allows for greater adjustment of the pedals, and doesn't crimp the line. Then I made the other side of the cabin. I fixed this to the logerons with M4 screws so I could remove it later to add more cables. I didn't have an M4 tap, so I made one by cutting a slot in an M4 bolt. Works fine, even for the bolt in the steel frame. Then I focused on making the panels for the first section of wing. This is harder than it looks, and to make matters worse, it is visible in the finished product. I bent the front edge for extra strength, then fixed it to the ribs and D box sheet. I marked the trailing edge onto it, then measured 10mm in for a sensible lap. Snce this join is visible, I didn't want to have shear marks on it so I scored and ripped it. I ripped it downward so the edge actually has an inwards curve which hides the join, this makes it look a lot neater I think. Then I had to countersink all the holes and deburr them as well. So after 4 of them, there wasn't much weekend left. And I have to work tomorrow, no long weekend for me, I need the money. Link to comment Share on other sites More sharing options...
Bigglesworth Posted October 4, 2007 Author Share Posted October 4, 2007 A new joke: a Jab 2.2 'motor' </laughs uncontrollably> I got my new Jab 2.2 'motor' the other day. And some of the accessories which were meant to come with it, including a dead solenoid, half the amount of oil hose I ordered (and paid for), a choke cable that was too short by half, and a carby heat cable which was similarly inflicted. Other than that it also included various machining features such as a pipe clamp fouling up the carb intake sleeve, lovely large holes where the muffler was meant to seal, and the worst oxy cutting job on the muffler that I have seen for a long time. Not to mention that I requested a welded muffler and it came unwelded. Also the only documentation it had with it are 2 sheets of paper where they have checked off all the items that should be in the box; SHOULD being the operative word. Owners manual, checked but not there, Installation manual, checked but gone walkabout, Parts list, checked, but now I don't know which number to order for a parts list, And 2 sickers (sic) which also didn't turn up. Not that I would want to advertise the motor after all this, but I could change the wording a bit.....................um, God made S***, Jabiru gave it wings. (don't throw things at me, I have to live with holden drivers saying that about Fords) Another genius idea of theirs is their way of putting marking paint onto the cylinder nuts, they bridged between the nut and the stud, so a loose stud will not be noticeable.:confused: And it was really handy the way they didn't supply the mounting bolts, despite saying they included a mounting kit, I have had to use the prop bolts for now. And the Ram air shroud is going to need to be trimmed to fit, which helps.:;)4: So that all sounds like fun. BTW before all you Jab enthusiasts flame me for writing this, just remember that I spent $15000 on this box of tricks, and thats a lot of money for someone who earns most of that at $18 an hour for hard work on the building site. I have earned my right to complain. On the positive side, the gauges I got with the motor look sweet, now I need a few more (order sent off today). I wanted to get a key switch from this electronics mob which I don't usually deal with, so I made up an order to get above their minimum, and then they tell me that all I didn't really need is available, just the key switch is on back order. That helps.;););) Link to comment Share on other sites More sharing options...
Recommended Posts
Create an account or sign in to comment
You need to be a member in order to leave a comment
Create an account
Sign up for a new account in our community. It's easy!
Register a new accountSign in
Already have an account? Sign in here.
Sign In Now