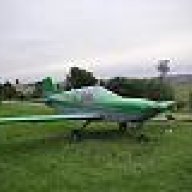
slartibartfast Posted October 8, 2007 Share Posted October 8, 2007 The latest on my baby. Well, nascent aeroplane perhaps. My wife doesn't like any comments linking the Cheetah and sex or women. Understandable really. [ATTACH]3905.vB[/ATTACH] Fuse covered. [ATTACH]3906.vB[/ATTACH] Other bits covered. [ATTACH]3907.vB[/ATTACH] Ailerons ready. [ATTACH]3908.vB[/ATTACH] Quick flight over Forster. [ATTACH]3909.vB[/ATTACH] [ATTACH]3910.vB[/ATTACH] Here's an interesting shot. This is Garry returning from the festival at Old Bar with his wife Christine on board. In the background is Arthur (Pylon500)'s hangar. I spoke to him on Saturday but I don't think he remembered me. We met briefly at The Oaks and he did all the talking. [ATTACH]3911.vB[/ATTACH] Panel laid out and ready to go. [ATTACH]3912.vB[/ATTACH] I made the seat back with in-built headrests. We'll see how the upholsterer goes with it. Should be awesome. [ATTACH]3913.vB[/ATTACH] "Do Not Run" seems like good advice for a Jab motor. [ATTACH]3914.vB[/ATTACH] Fitting and shaping the cowl. Took me a whole day to get right. [ATTACH]3915.vB[/ATTACH] [ATTACH]3916.vB[/ATTACH] Instruments in. Naca vents ready. Looking sweet. Cable stuff (choke, carb heat, cabin heat and fuel cock) in the bottom. Electrical stuff above - can be removed easily to work on new stuff. [ATTACH]3917.vB[/ATTACH] More or less finished building up around nose cone to compensate for the engine offset. Took me ages and lots of Q-Cel. [ATTACH]3918.vB[/ATTACH] Damn sexy profile. Oops - sorry darling. Link to comment Share on other sites More sharing options...
Bigglesworth Posted October 8, 2007 Author Share Posted October 8, 2007 Getting to the fiddly bits First, I appologise to Jabiru, the solenoid does work. Now I tell you that they are still hopeless. Does anyone out there know the official tension for the exhaust manifold bolts? Well if you do, please tell the Jabiru mechanics. I had to pull the pipes off to get to a bolt I needed drill a hole for, and some bolts were right, some were passable and one was loose and half out. Thats factory build for you. So now that I have the motor, I know the engine mount fits and is safe to weld the noseleg support to. I got Lex to do this since he can weld well. I made it so the engine mount bolts to the supports, that way it can be removed if need be. I also made a battery holder out of fibreglass. I made it minimal not so much for weight reasons but for the sake of cooling. A complete box will get the battery very hot which is not good. A lot of cars have special ducts just to cool the battery. I got a throttle control worked out. I didn't like the push/pull knob in Garry's and besides, they are too expensive, so I had a hunt for what I had lying around, and in the workshop graveyard I found a self-propelled lawnmower gearshift lever which had a nice rubber knob, and included a pivot. Just needed a hole for the cable fixing, and will need some friction washers. So much for Jab chargeing me about $169 for throttle cabe and fittings. I painted the engine mount with a spray tin of white I had lying around (I had bought it to hide the rust spots on my ute to get it through rego), typically I forgot to let it dry before working on it, and if you look close it has greasy fingerprints in it, but so what, no-one looks that far. I also found a nice lightweight oil cooler, was on my ute when it had the auto box in it, but I took it off when I put the 5 speed in, it should do once I clean the ATF out of it. I spent a fair bit more time wiring, I even found a 6 pin plug to match the regulator, and a 2 pin set to replace the individual plugs on the charge coil. The charge coil plugs actually fit straight into the plug body so no rewireing is needed. I fitted the tacho and wired it in, but no photos yet. I also put nice wall to wall carpet in it. This is proper machinery floor carpet which Lex just happened to have enough scrap that matched the paint. This should also cut down noise. Especially in the parcel shelf. I don't know why Slarti put foam underneath his when this is better looking for the same effect. I mounted the regulator inside the fuse to keep it cooler. It comes of a Kubota Ride-on mower and they have them mounter in as cool as possible place and they are not running electronics then. I don't like the controller, the manual says it produces 14 volts +/- 0.8:;)2:. It should be something like 13.8 +/- 0.2, then I would be happy. I just can't afford a PowerMate. Might see if I can get one of a car alternator, but I think the charge coils work on different standard voltages:sad: I got the nose spat made. The main problem I found with that was that for some reason I made my pivot extend too far through the spat, and so the bolt holding it to the nose leg tube, snagged on the spat covet when it pivoted. I ended up having to grind the nut down to half width, and a matching bit off the bolt. It still has sufficient thread to hold, and only holds shear. I also made the mass balance for the stabilators. I drilled some holes in the welded steel arm, then tied pieces of lead to it until it felt right. Increased the amount of lead to make up for spilleage, melted that while I set up a mould. I first tried to be tricky by casting it in a mould of foil, that way all was rust proof and neat, but 2 tries later I realised it didn't work: the foil was too weak. So I decided to use a small oil filter houseing, already painted on the outside. This worked good enough, except the paint burnt so I had to respray it. Now it is a little bit front heavy so I will have to cut a bit off. It is hard to tell since I made the tube hinge nice and firm. Also played around with lots of other things, but as yet haven't solved them so it is no point telling you now. Have ordered instruments and a few other things, just about to order a radio/com. Interesting, Xcom sells a filter Capacitor for $40, Jaycar sells an electrolytic Capacitor with the same storeage $1.</edit> Sorry, my mistake, Jatcar one is 2200, Xcom uses a 22000, even so parrallel 10 and it is still cheaper <edit> With the extra $39 I ordered this gadget from Jaycar which tell you the time, digital battery voltage, inside air temp and outside air temp. Sounded cheap enough. Other than that, I have been trying to earn some more funds, slaving away in the hot sun all day, the things I will do to get an aeroplane. Link to comment Share on other sites More sharing options...
Bigglesworth Posted October 8, 2007 Author Share Posted October 8, 2007 The Sierra and Ross's Cheetah were both started at the same time as mine, now it looks like I will finish last:crying:. So no more pussy-footing, it is time to put some real hard work into it. Cue a few all nighters. Problem is most of the work is in the organising parts, I reckon it is more than 51% of the work just to to the organising. Link to comment Share on other sites More sharing options...
slartibartfast Posted October 8, 2007 Share Posted October 8, 2007 Forgot to mention BW. I think we both have the newer Jab engine with the extended sump. It drops down a few inches from the old one and the cowl has to be cut to accomodate. I plan to cover the sump with foam and glass over it, then remove the foam. Heads up Cowboy-Up. Link to comment Share on other sites More sharing options...
Bigglesworth Posted October 10, 2007 Author Share Posted October 10, 2007 Keeping on Plenty of electrical wiring done including wires in the wings. For the strobes later on. Also lots of time spent ordering things, have got parts coming in all over the place. Got the nose wheel on finally, so she stands by herself, Also the carb head from Jabiru didn't fit, so I had to make one myself, probably not quite as good, but it should work. Made the mould but wrapping insulation tape around plastic peanuts, kept adding more peanuts until it was roughly right, vaseline to make it smooth, then on with the fibreglass. I'm getting good at this Fibreglass stuff, I must be, one of my mates has already asked me to fix a hole in his Kayak.:;)4: Working very hard, just need the wind to stop so I can take her outside and put the wings on. Lex go to go for a fly in a Sports Star the other day. He came right over the workshop to give me inspiration to keep working. I worked until past midnight (1:00 by the time I got the last orders written out for more parts [radio, yeeha]). Which doesn't sound too bad until you realise that I had to be on the job by 7:30 next morning. Link to comment Share on other sites More sharing options...
Bigglesworth Posted October 16, 2007 Author Share Posted October 16, 2007 All sorts of things, and a few others All sorts of things are getting done, wingwalk panels are trimmed to size and shape, When I checked out Garry's I noticed there was a small gap between the metal and the wood, felt really tacky. So I am trying to fill that gap with expanding foam. I oiled the metal so it wouldn't stick, sprayed it on the wood, and clecoed the metal on, not sure what it looks like, haven't seen it since. Got a compass. Since I can't get the ones I wanted, I got a $2 one from Go Lo. it actually seems to work. I think I will leave it in, get a vertical card compass like I wanted when I'm rich, and all the GA pax will think it is a DG and think that the $2 compass is rec. standard Got carb heat and choke cables working. Had to get them automotive grade since the Jab ones were way too short. problem is the auto ones aren't sealed, in push, the expand and there is a real danger of the carb heat not coming off, so I will put heat shrink over it and hope that works. I successfully made a better carb head than the Jab one, it allows movement 10mm in every direction which is enough. It doesn't really allow checking the air cleaner, but these things happen. It can be done, just not easily. Got 6 mounting holes drilled into the prop, a mate of mine made up a spacer to centre the prop flange on the prop centre hole, then I drilled them with the drill press. Worked well, my mate is good at turning, I had to fix up his 3-phase converter though; we blew it last time he did me a turning job. The holes ran out a bit, so I drilled it again from the other side. The first (good) side is the motor side where it need to fit nicely. Still haven't found a large drill to drill the holes for the flanges. Go the Pitot and Static in, just with cable ties for now, resin and flock when I find some flock. I think I will have to use talcum powder. (Baby powder for my baby). Thats most of the siginificant things covered. Pick the rest from Photos Got my key switch, now I need a key ring. There is a good 'Just LeDoux it' one at http://www.chrisledoux.com/store3.htm And I got the wood pieces around the spar entry points on. tapered these to. match the standard fabric line. glued them on with liquid nails. Also, I tried like to earn some more funds. not very easy. Link to comment Share on other sites More sharing options...
Bigglesworth Posted October 22, 2007 Author Share Posted October 22, 2007 Busssssssy Work has picked up so less time for the plane Got 99% of wiring done, all guages except alt. and that is coming. Got my Radio harness made up, but not tested yet since Ian hasn't had any headsets for me to buy yet, I also got the rudder covered, and when I was happy I knew roughly what I was doing with fabric;....................... I got half of one wing covered Fuse will follow next weekend I hope, wings will be finished covering during the week, Paint is ordered, and I have found a good colour. That was fun. Went to the paint shop and me and the bloke there had fun mixing up various tints, metals etc. until we struck something I like. Only in cheap industrial enamel for the top, and marine polyurethane for the bottom. They couldn't mix a metal into the poly, neither did they have a nice green. Actually if anyone wants real top quality paint, talk to Frank Galic at Gerald Slaven Holden in Belconnen. I asked him for a quote, and he really went out of his way to find out what product would work. Unfortunately I didn't want to spend $1800, plus more if I wanted pearl, since I would probably make spraying mistakes, and on top of that might need to remove fabric one day. So cheap paint, metallic but no pearl option, all up probably just over $300. A bit of difference. So thats about it. I got my instruments from Wade Air. Despite specifying a Jab, they sent senders for a rotax egt (just fits, but not properly), and both the EGT and CHT are in Fahrenheit, what happened to centigrade?) might get some sleep now, Link to comment Share on other sites More sharing options...
Ross Posted October 22, 2007 Share Posted October 22, 2007 Hi Bigglesworth I bought a small 8 ohm speaker, $14 at Tandy shop from memory, plus necessary combination plug & socket adaptors so I can listen to the radio in the workshop w/o using the headphones. Regards Link to comment Share on other sites More sharing options...
Bigglesworth Posted October 24, 2007 Author Share Posted October 24, 2007 Hi BigglesworthI bought a small 8 ohm speaker, $14 at Tandy shop from memory, plus necessary combination plug & socket adaptors so I can listen to the radio in the workshop w/o using the headphones. Regards Good idea, I would more likely use the speaker out and the hook that to an FM transmitter and pick it up on the workshop stereo, more modular. Then I can also send the VHF to the in-plane CD player when I get one. Electronics and gadgets are almost as fun as aeroplanes. Link to comment Share on other sites More sharing options...
Bigglesworth Posted October 24, 2007 Author Share Posted October 24, 2007 I got my rego numbers the other day; 5222. As in .222 the rifle favoured by roo shooters. The Triple 2 will be ready to fire soon. Link to comment Share on other sites More sharing options...
slartibartfast Posted October 29, 2007 Share Posted October 29, 2007 Been really busy. Won't be long now. [ATTACH]4164.vB[/ATTACH] Roughed and etched ready for painting this week. [ATTACH]4165.vB[/ATTACH] Got some bits back from the painter already. The bronze colour looks great when the sun hits it. [ATTACH]4166.vB[/ATTACH] The nose cone looks black until it catches rays. Check out the colours. [ATTACH]4167.vB[/ATTACH] [ATTACH]4168.vB[/ATTACH] Tim made a great little throttle mount for me. He's good at designing and building stuff from scratch. Just like his father. It puts the throttle right where I want it. [ATTACH]4169.vB[/ATTACH] Temporary canopy is finished and fits surgically. [ATTACH]4170.vB[/ATTACH] The end is in sight. My wife laughs at me because I've been saying 4 weeks to go for about 14 weeks now. Now it really is 4 weeks. Link to comment Share on other sites More sharing options...
Bigglesworth Posted October 30, 2007 Author Share Posted October 30, 2007 Flying high on Nitrate OK so Slarti, I have all my electronics done, and it looks like you haven't, but other than that, YOU ARE BEATING ME BIG TIME. Not to worry. Interesting thing about building a plane when you are a young bloke in a small town, everyone suddenly turns helpful. The local welding specialist welded up my muffler for nothing, I have a stack of tools on lend from various people all wanting to come for a fly. But to get to the interesting parts. I have got skins on the wings. Interesting thing happened there. ON the leading edge of one sheet, it kept developing ripples whenever the temp got below about 18 degrees. I asked Garry what the heck was going on, was told that the problem had happened to another bloke so it wasn't my fault (either that or we are both hopeless, I don't know who this other bloke is, so I won't try to guess). Anyway the only thing we could put it down to was dud fabric, and the only thing we could put the fabric down to was the metal underneath, so I glued the whole lot down and suck eggs ripples. I doped one side of each wing with 3 coats of brushed on Nitrate dope. It only wants 2 coats, but mine looked thin, so on she goes. I can't say if the dope made me high, I can't remember much of that night's work, all I know is that my camera has some interesting pictures of the moon on it:laugh: The fuse will be fun:cool: I finished my wiring, it looks like a rat did it, but cest la vie. Or, if your French, such is life, and spit out that snail:laugh: So then I could put the front deck on. Put foam under it. Picks up fuel spills, and deadens noise. Actually I didn't have any foam, so I used carpet underlay. Got the prop on. YEEHAAAAAAAAA Now I have something to kiss goodnight when I leave it :;)7:"one day we will be together for all time, but for now I must go":;)7: that sort of thing. I also put the cowling on. So, like, the plan is; put the top half on, mark it, put the bottom on to the marks, then put the top on. I can do that, sounds like fun. Yeah well, got the bottom sitting pretty, then the top starts playing funny buggers with me. started cutting bits off to try to make it fit but all to no avail, she weren't going, and that was it. So I sat down and had a good long think, trying to think of the problem on hand, and not of the fact that Carrie Underwood was on the stereo and if you have seen her you know Anyway I eventually worked out that when the twains were brought together, they magically increased in length (and puns here are in bad taste) and so I changed my plan, (and Cd) and put the halves together free, then held the whole lot in exact position, and with the other hand I drilled the new holes. And made sure I exactly picked up the old ones in the angle the cowl bolts to. So she's all on now And looks hotter than Carrie anyway.;) And now I can get the air intake in, and modify the bottom to cater for the bump that Jabiru decided to put on their motors. "The Bump in the Night":;)4: That'll do for now, and if you are wondering whether I was doing dope earlier. "I didn't inhale" :confused: I just got 2 coats on. Link to comment Share on other sites More sharing options...
slartibartfast Posted October 30, 2007 Share Posted October 30, 2007 Going great mate. You did well to use your original holes in the angle the cowls screw to. I had to make a second set of holes in both the cowl and the angle before mine sat right. Well done on the electrics. I had to wait until the instruments were painted. If the weather wipes out the Echuca flyin that's what I'll be doing instead. Want a sneak preview of what she will look like? This is the almost final version because she is in for painting this week. I was going to wait because there doesn't seem to be much interest, but I can't. [ATTACH]4176.vB[/ATTACH] That's actually Garry's Sierra with my paint and graphics, but it will look close enough to that. The colour isn't quite right. Think Mitsubishi VRX special bronze (called Fusion). The black ended up so nice on the spinner that I decided to use some more of it. I reckon it's on the pretty special side of ordinary. What do you think? Ross PS - I overdosed on acetone while cleaning off all the texta and 6061 stamps before scrubbing and etching the other day. I know how you feel. Link to comment Share on other sites More sharing options...
Bigglesworth Posted October 31, 2007 Author Share Posted October 31, 2007 D*mn that is one sweet paint job, if it can be realised. 2 questions; Just how much is it going to cost, (just so I feel better about mine, in cheap enamel), and what brand/type. Also, those rego numbers are not the required distance apart "must be more than 1/4 of the width" and solid or is it that no-one cares for the regs, and I can have fun with mine. Let the funny numbers roll. Also, is that Cheetah graphic in vinyl or paint? Link to comment Share on other sites More sharing options...
slartibartfast Posted October 31, 2007 Share Posted October 31, 2007 That's more than 2 questions. Glad you like it. My wife and I love it and that's the main thing. At least 70 people have looked at this thread since I posted the pic last night and not a peep. I guess they all hate it and didn't want to say. So polite on this forum. 1. Paint about $4000. Graphics about $600 - it is vinyl. Upholstery about $1000. Don't know what kind of paint really. Automotive metallic with pearl and stuff with plasticiser added. 2. I know. I have since sent a copy of the rules for rego numbers to the graphics guy so he can get them right. The rules also say that there has to be 2 inches clear around the numbers so I checked with Chris Kiehn about the paw. He said it was fine. Oh - it can be realized. Cheers, Ross Link to comment Share on other sites More sharing options...
Guest Flyer40 Posted October 31, 2007 Share Posted October 31, 2007 At least 70 people have looked at this thread since I posted the pic last night and not a peep. I guess they all hate it and didn't want to say. So polite on this forum. I was going to comment but I knew you'd tell me off for being offensive. ;) Actually I really like it and my wife is quite inspired by it. She's been dreaming up paint schemes and I haven't even chosen a plane yet. Link to comment Share on other sites More sharing options...
slartibartfast Posted October 31, 2007 Share Posted October 31, 2007 I was going to comment but I knew you'd tell me off for being offensive. ;)Actually I really like it and my wife is quite inspired by it. She's been dreaming up paint schemes and I haven't even chosen a plane yet. I really hope you don't hold that against me. Just doing my bit to keep the place friendly. I find it quite a difficult job. Still up for a fly in it? Glad you and your wife like it too. We all need a little validation sometimes. My wife was heavily involved in the design. It has evolved a lot over the last few months. Ross Link to comment Share on other sites More sharing options...
Bigglesworth Posted October 31, 2007 Author Share Posted October 31, 2007 My paint is lots cheaper so that makes me happy, am worried that the fabric might need to come off, and there goes thousands of dollars of paint. Rego numbers what about this, with properly spaced numbers, and genuine font. [ATTACH]4190.vB[/ATTACH] Link to comment Share on other sites More sharing options...
Bigglesworth Posted October 31, 2007 Author Share Posted October 31, 2007 Have sent Bundy an email asking for permission Link to comment Share on other sites More sharing options...
slartibartfast Posted October 31, 2007 Share Posted October 31, 2007 Haha - nice. You take a design and really rum with it. Link to comment Share on other sites More sharing options...
PaulN Posted October 31, 2007 Share Posted October 31, 2007 Love the colour and artwork Ross ... can't wait to see her in the flesh. Great stuff ;) Paul Link to comment Share on other sites More sharing options...
Bigglesworth Posted November 4, 2007 Author Share Posted November 4, 2007 Canopy on It took me from midday until 2:40 next morning, and it still needs a bit of finishing, but I go a sure 'nuff canopy. The reason I worked so late is because I have it on good authority that Garry took three days for the Sierra canopy, Tim and Slarti took 6 days (but most likely got a lots better job which will be thrown out when the conversion to molded comes through). And to cap it off, when I spoke to Garry earlier that day, he said I wouldn't get it done. And I work very well indeed under competition. So there it is, not the world's best canopy, but hey, all it has to do is block the wind, and maybe rain. My trick to going so much faster is simply that, while at work on a reno, I pulled up a heap of cardboard lino underlay. Perfect template material. Sit it over, trim with scissors. Throw the first one away, fold next in half to get it symmetrical etc.etc. Then make it rough fit the front bow, cut out the real one with about 10mm margin of safety (is neccessary with the different properties of polycarbonate). Put real one over, bend front bow to fit (about 20 times, lots of censored comments there) all sitting fine, RIVET. Then the tophat. Then sides, more templates for sides. Actually, I got it that symmetrical, both sides are cut to the same template. And there you have it. Nowhere in that operation did I have anyone giving me a hand at all (who would at that time of night). Then I found out the problem. Having made it flatter, the front came further forward, this means it touches when it is opened too far. so full open is not very far. Not too worry: a: it doesn't affect flying b: the molded canopy is on the way c: it could be fixed with new pivot arms d: NO FAT PEOPLE ARE ALLOWED IN ANY CIRCUMSTANCE ANYWAY:laugh: So thats getting there At the moment, the undercarriage is off, and I am halfway through fabric covering the fuse. And doing the cowling simultaneously (with my other hand;)) Got some AVGAS and oil today, might get some action out of the motor soon. Sleep now:keen: Link to comment Share on other sites More sharing options...
slartibartfast Posted November 5, 2007 Share Posted November 5, 2007 Hope you got some sleep BW. Here's my weekend's work instead of going to Echuca. [ATTACH]4230.vB[/ATTACH] That's it. Echuca would have been better. Of course I did get to fly the Sierra. The fuse is back and looks great. The wings go in tomorrow. The graphics guy will join me on Saturday and we'll work a little magic together (in a totally non-homoerotic way). I have asked Techman about that silly yellow sticker. If he approves, Jerry the Graphics Guy will replace that with some sensible text saying something like "Warning: do not fly in this aeroplane. Ever. You will die." Or whatever it is supposed to say. The way I read the tech manual, we don't have to use the silly yellow sticker (SYS for those who love acronyms). The text is the important bit from a legal standpoint, and the pre-flight briefing of course - where again we inform our victim that they die on their own cognisance. Mmmm - shouldn't post after beer o'clock. Link to comment Share on other sites More sharing options...
Admin Posted November 5, 2007 Share Posted November 5, 2007 Ross, Chris has gone away for 2 weeks - I hope that doesn't impact your graphics Link to comment Share on other sites More sharing options...
slartibartfast Posted November 5, 2007 Share Posted November 5, 2007 In that case, has anyone else got away (passed final inspection) with a non-standard rendition of the warning placard? Link to comment Share on other sites More sharing options...
Recommended Posts
Create an account or sign in to comment
You need to be a member in order to leave a comment
Create an account
Sign up for a new account in our community. It's easy!
Register a new accountSign in
Already have an account? Sign in here.
Sign In Now