Ross
-
Posts
729 -
Joined
-
Last visited
Content Type
Profiles
Forums
Gallery
Downloads
Blogs
Events
Store
Aircraft
Resources
Tutorials
Articles
Classifieds
Movies
Books
Community Map
Quizzes
Videos Directory
Everything posted by Ross
-
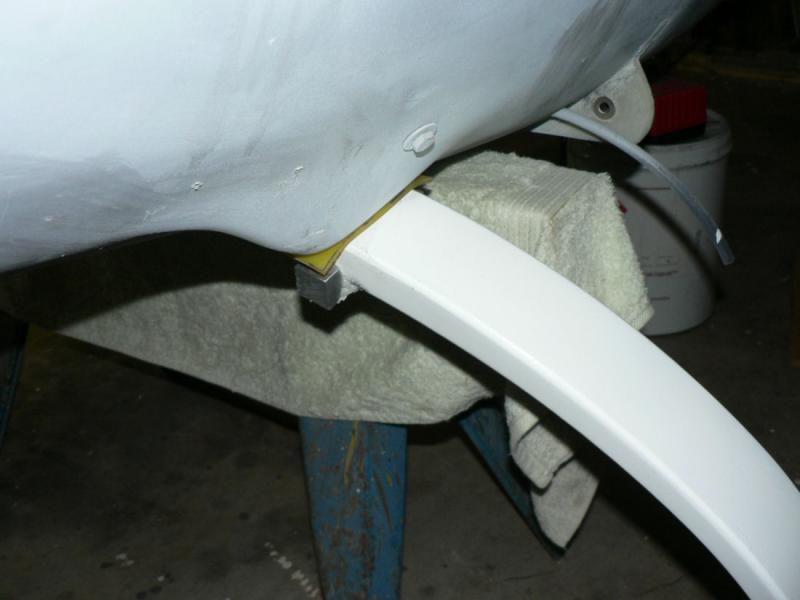
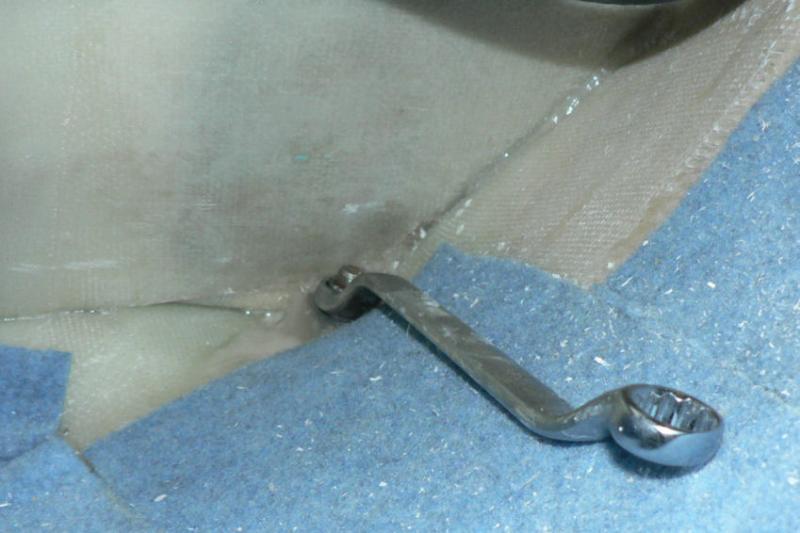
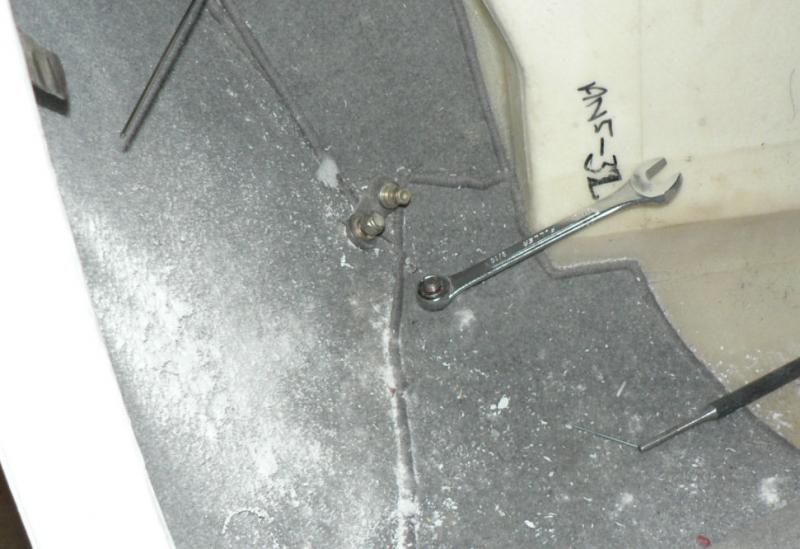
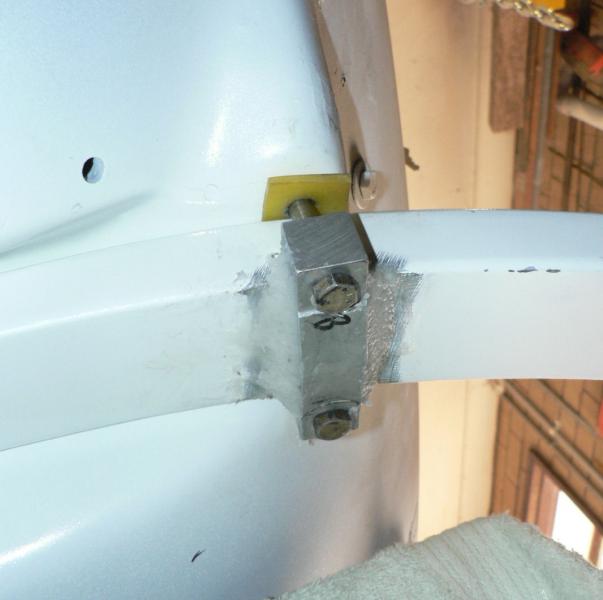
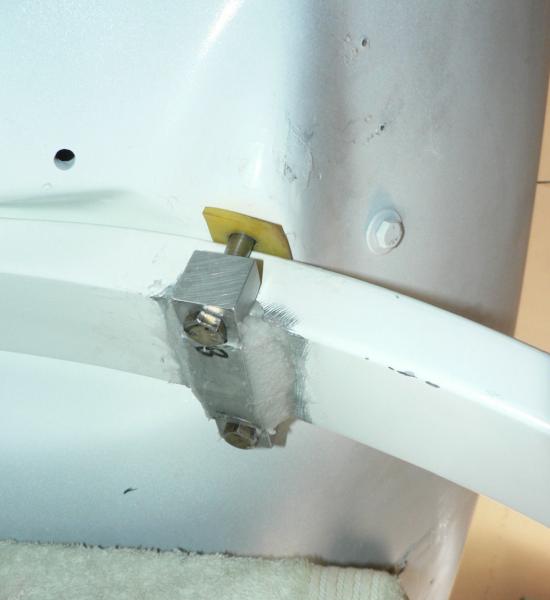
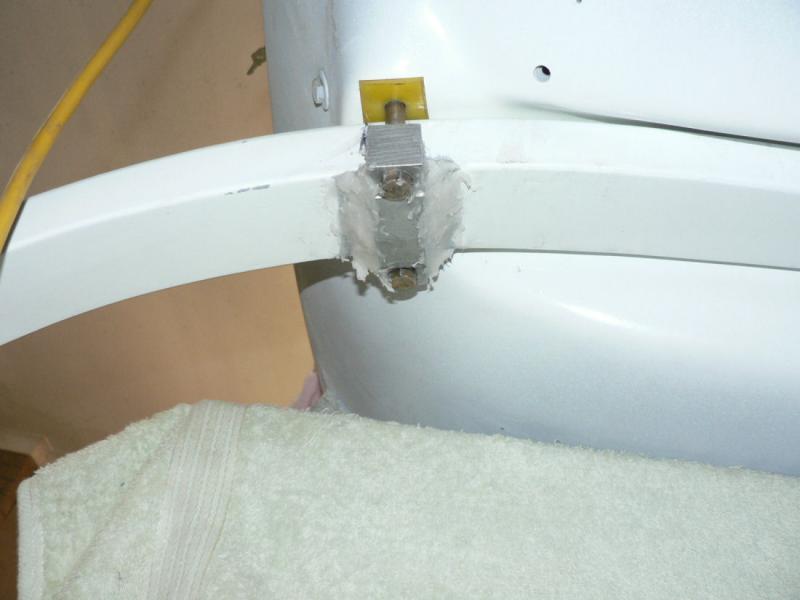
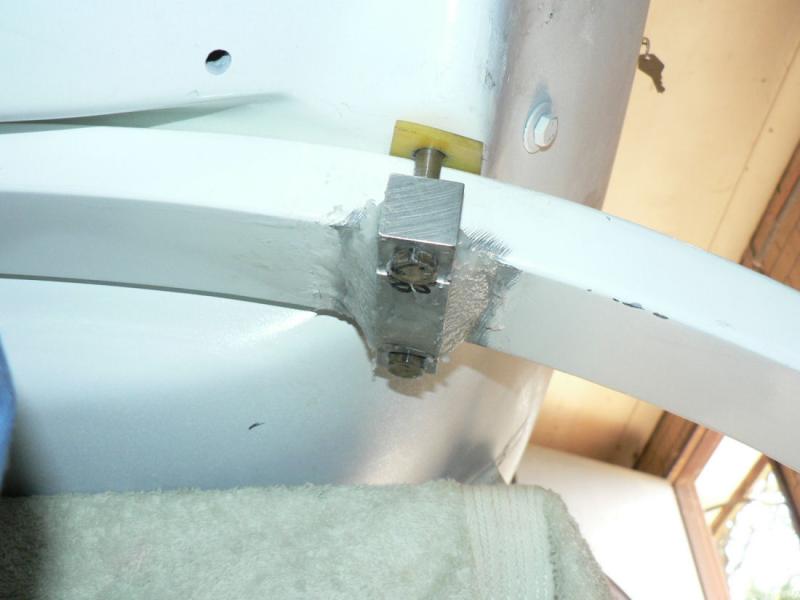
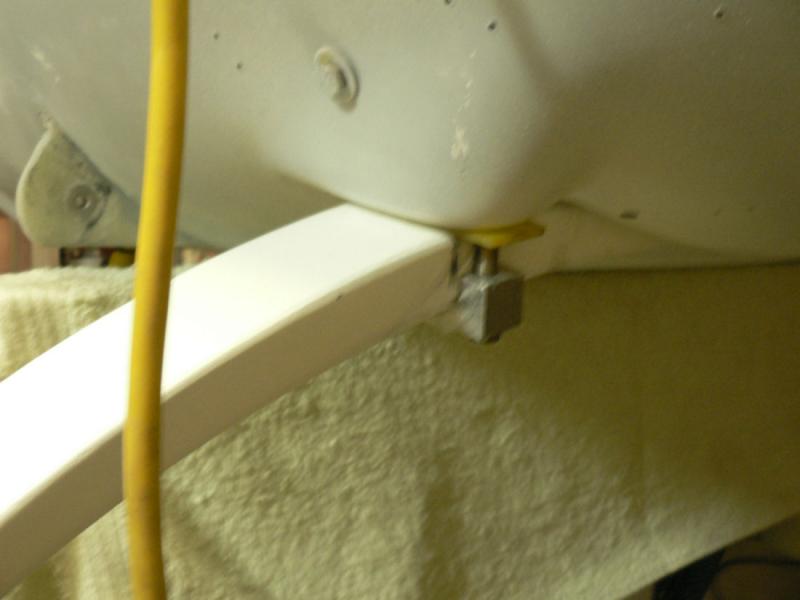
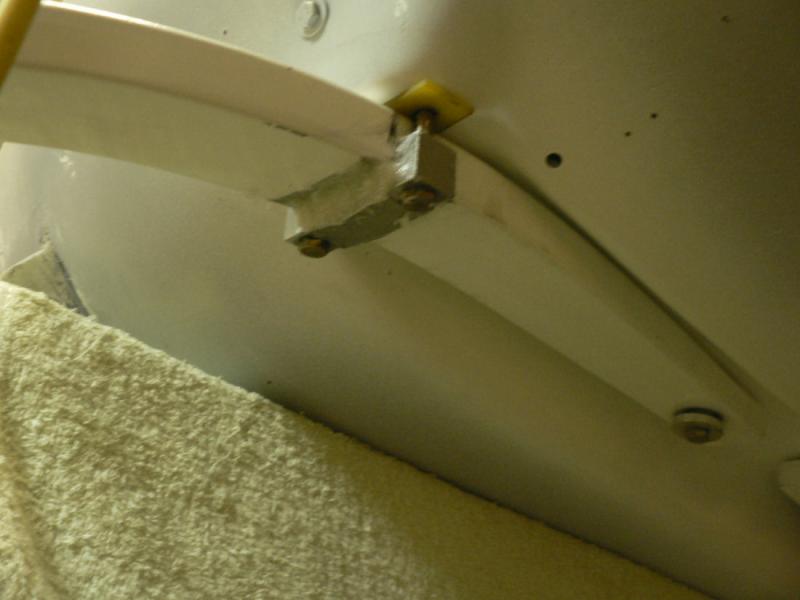
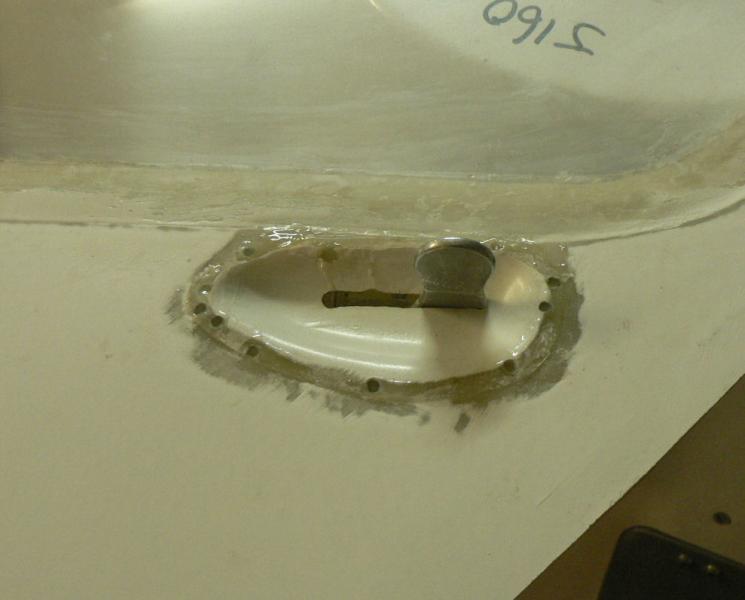
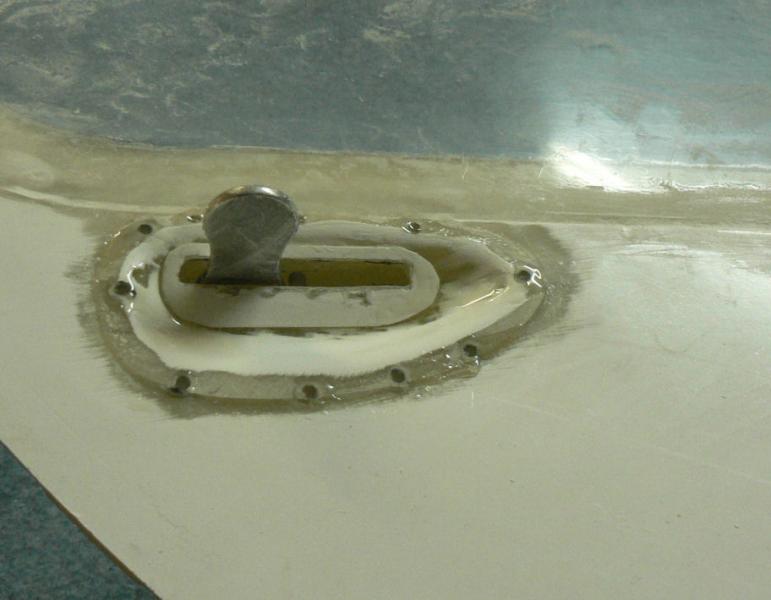
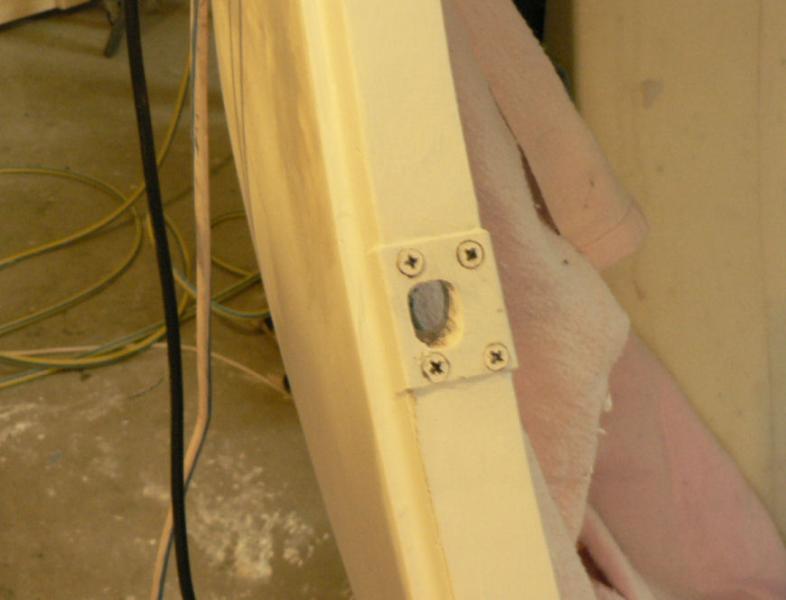
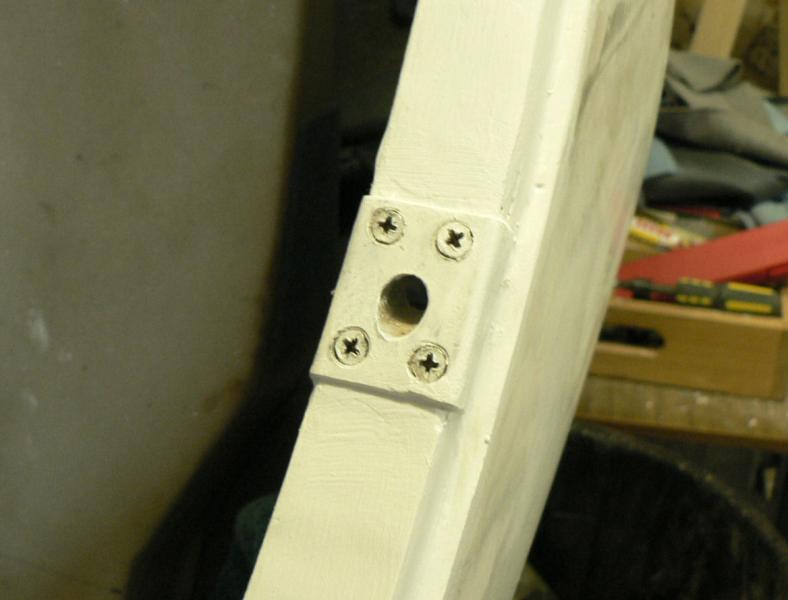
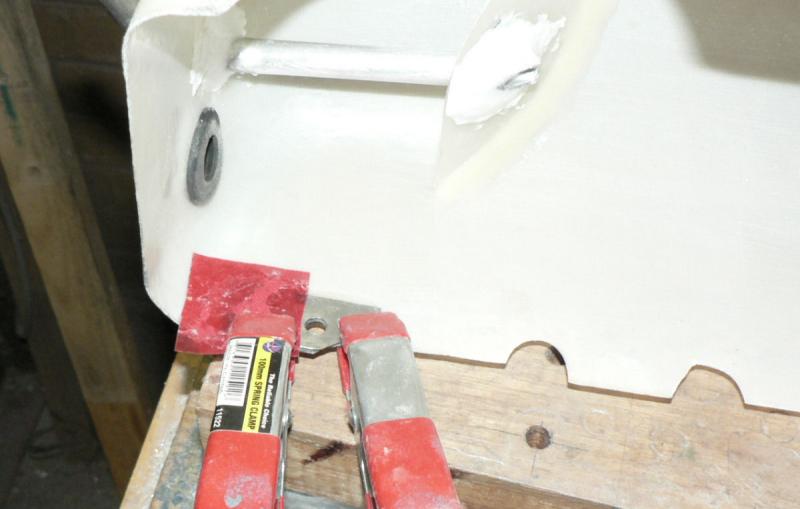
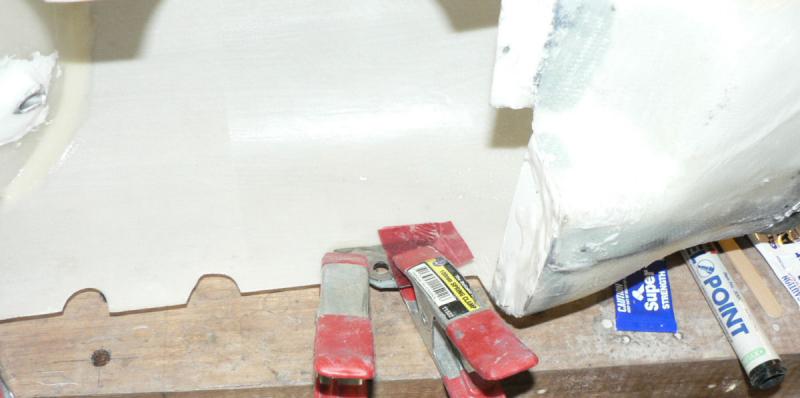
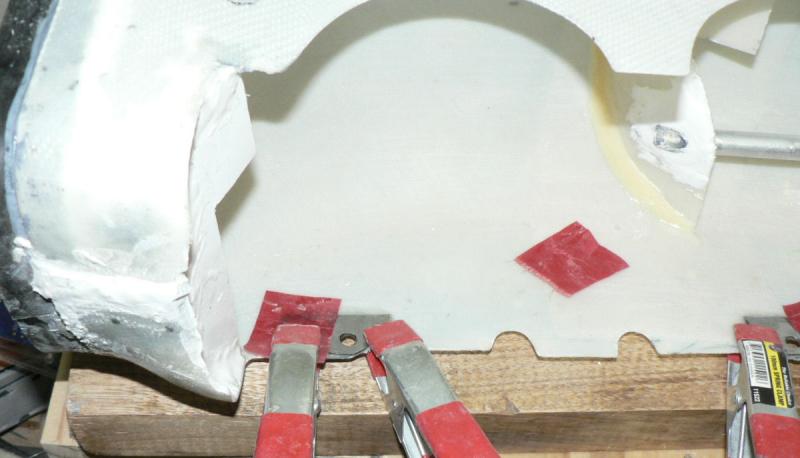
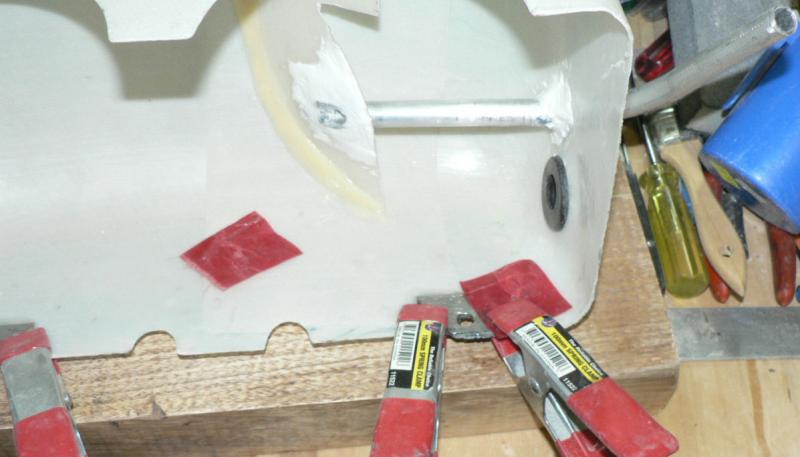
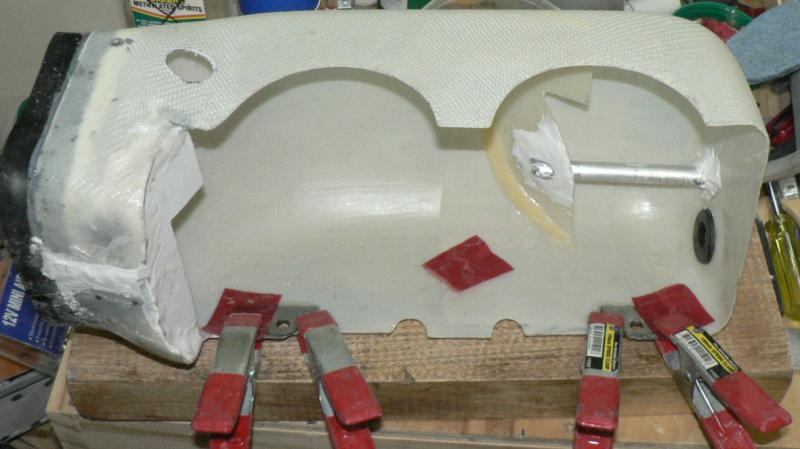
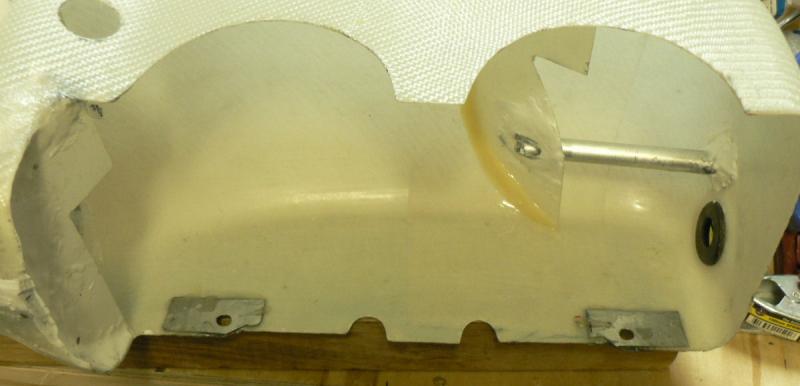
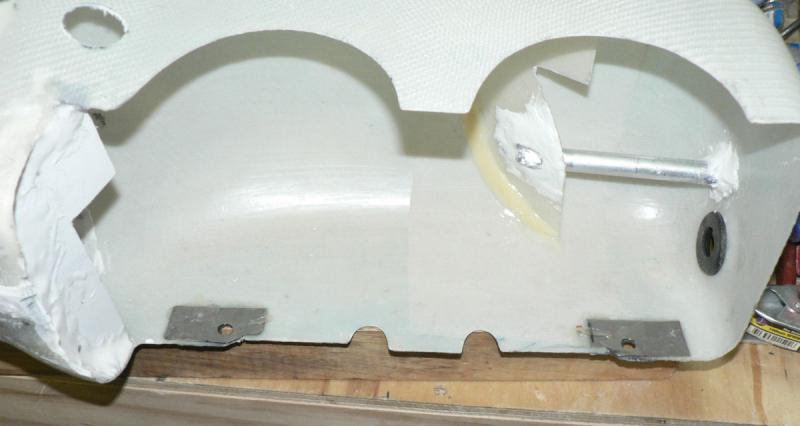
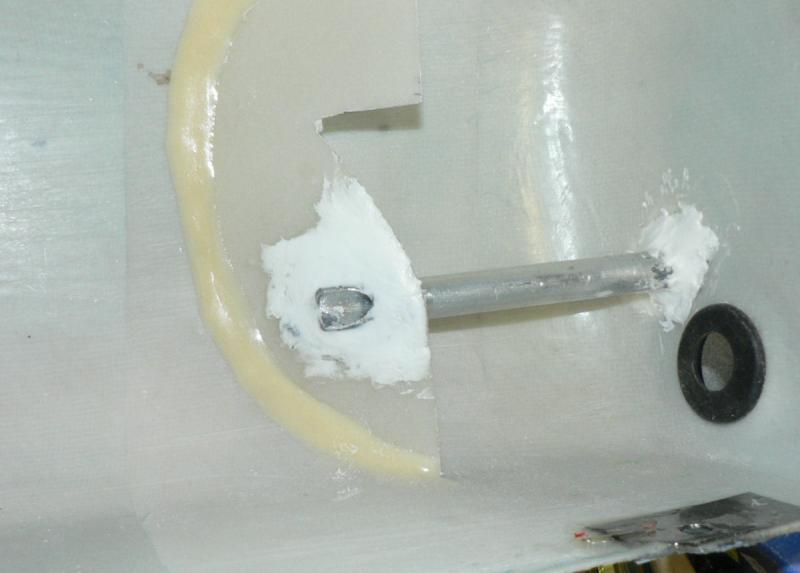
3-04-2008 Completed the flocking of the starboard main UC clamp to the UC leg with similar procedure to that used on the port UC leg clamp done yesterday. [ATTACH]5466.vB[/ATTACH][ATTACH]5467.vB[/ATTACH][ATTACH]5468.vB[/ATTACH][ATTACH]5469.vB[/ATTACH][ATTACH]5470.vB[/ATTACH] [ATTACH]5471.vB[/ATTACH][ATTACH]5472.vB[/ATTACH][ATTACH]5473.vB[/ATTACH] The last pic shows that the port main UC leg inboard bolt needs to be tightened up. It may need a few washers to pack it up or a shorter bolt. As well as that the starboard inboard bolt might be a bit too tight. The finish of the port side clamp flock was not as neat as the starboard clamp flock done today due to the interruptions during the job yesterday. It can probably be made more presentable with some selective filing and sanding.

-
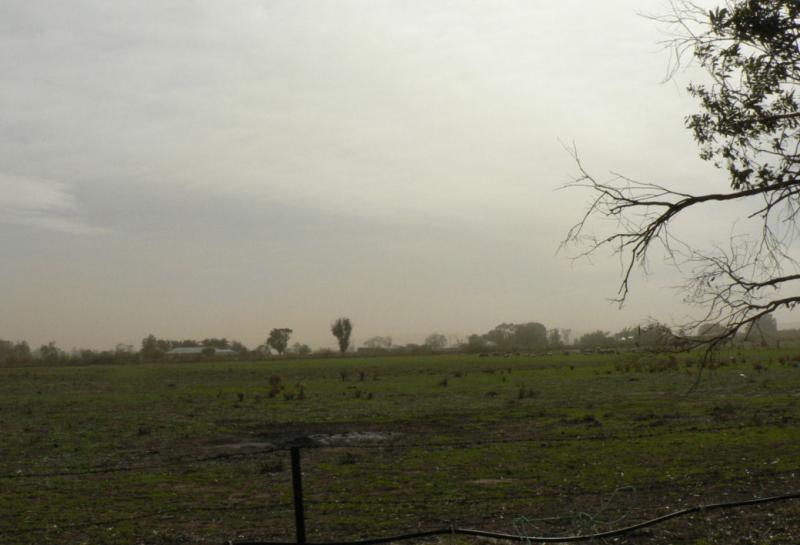
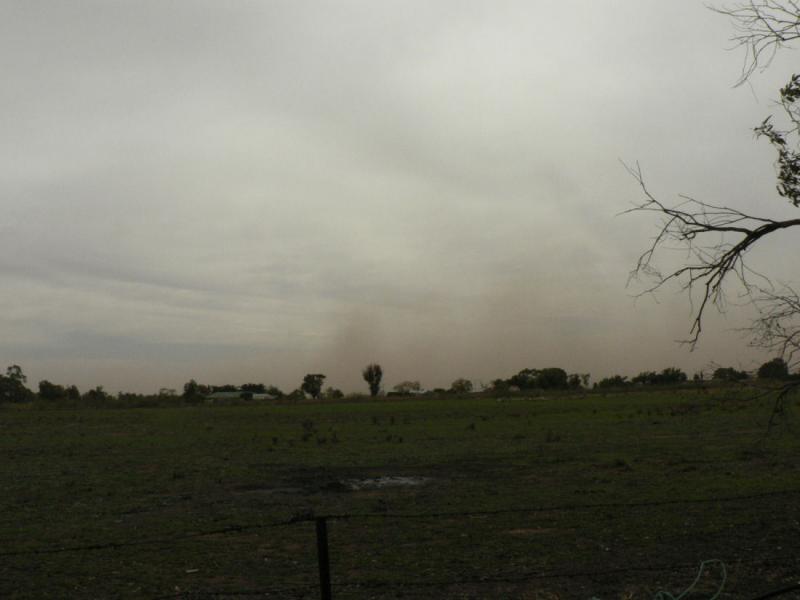
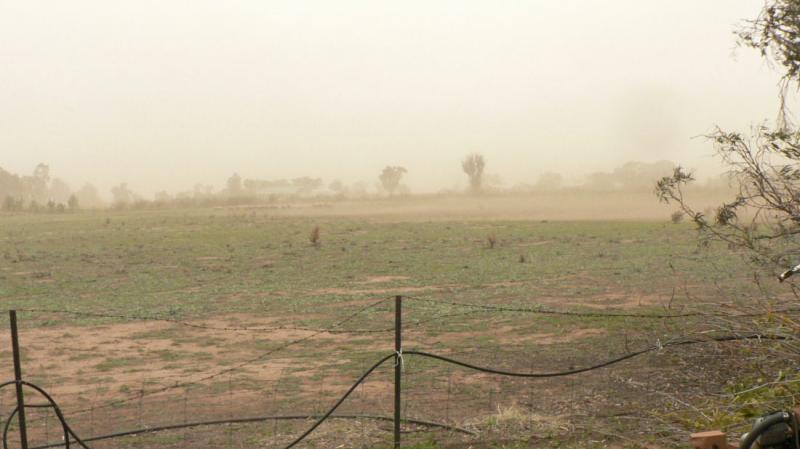
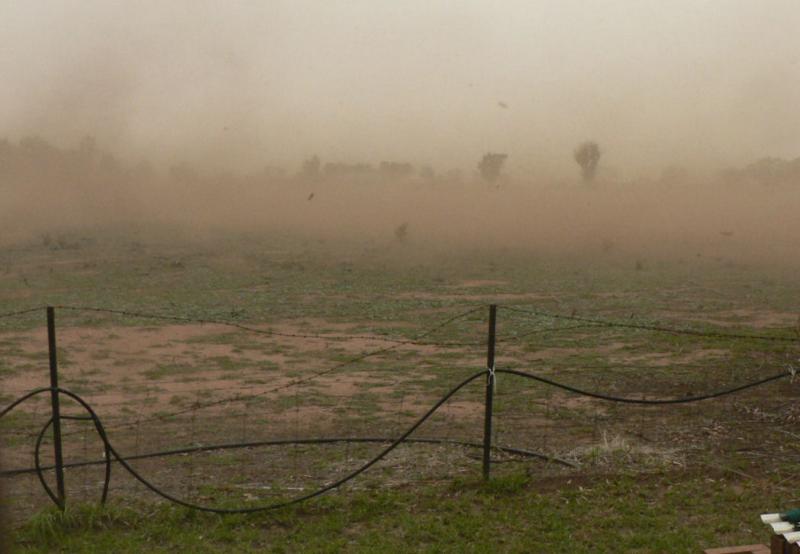
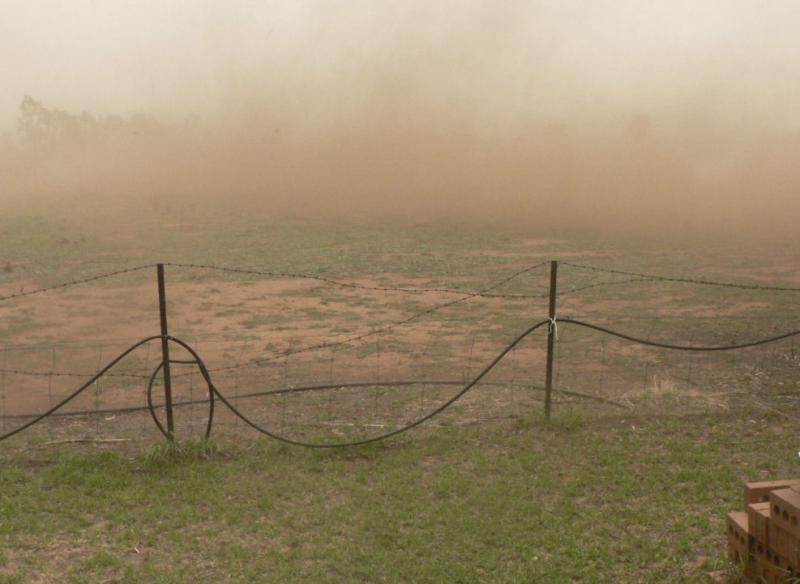
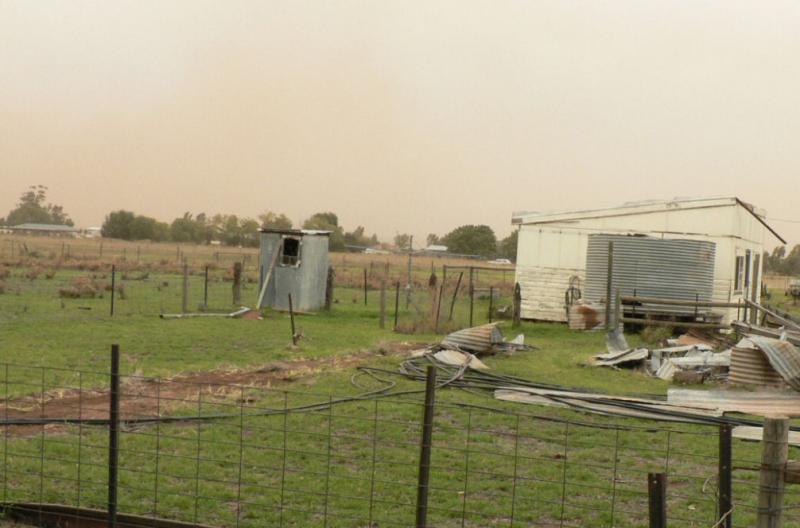
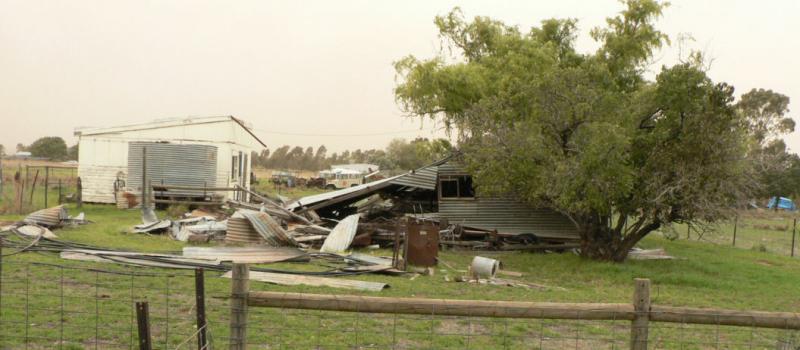
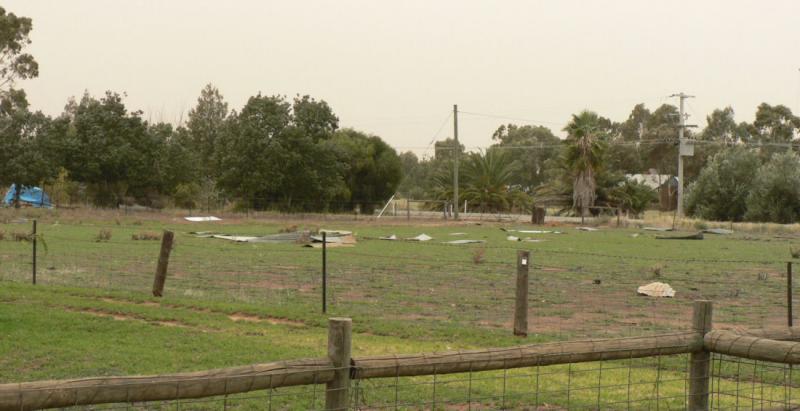
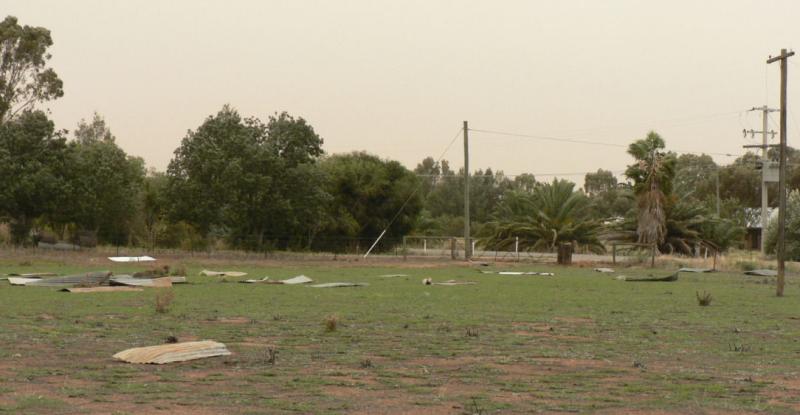
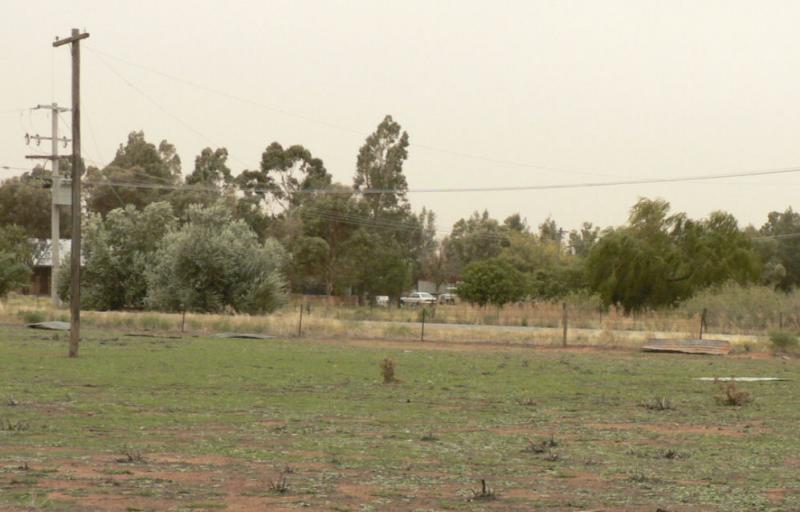
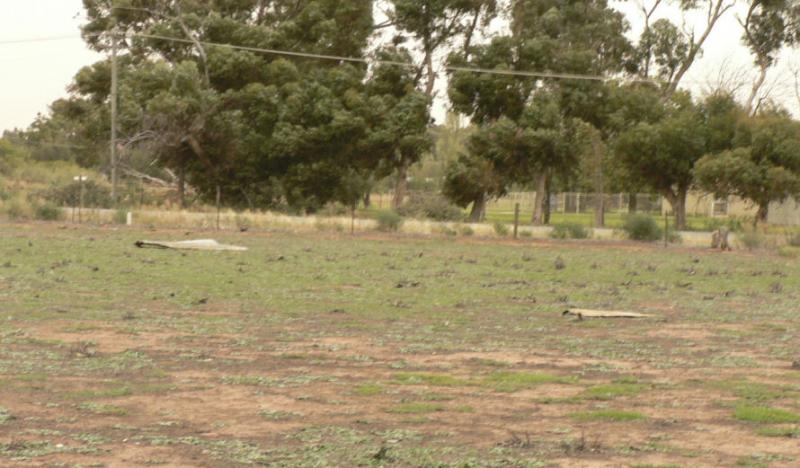
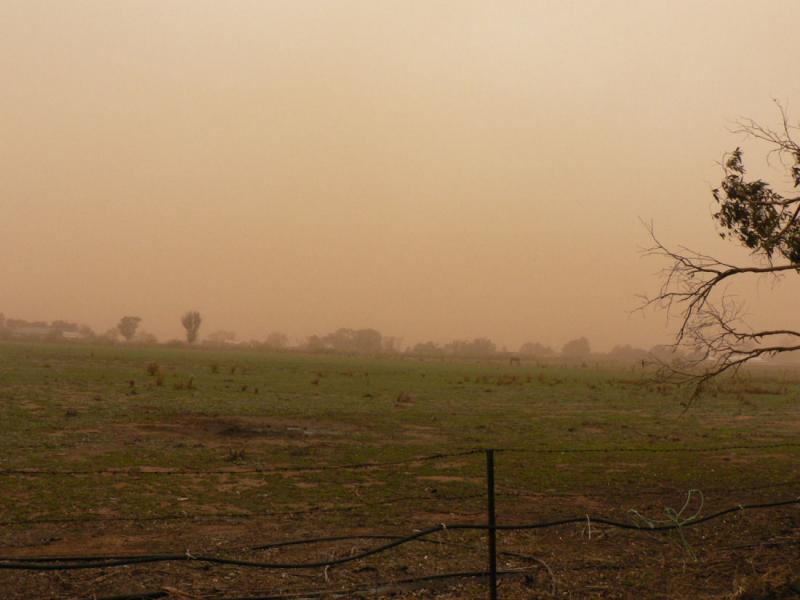
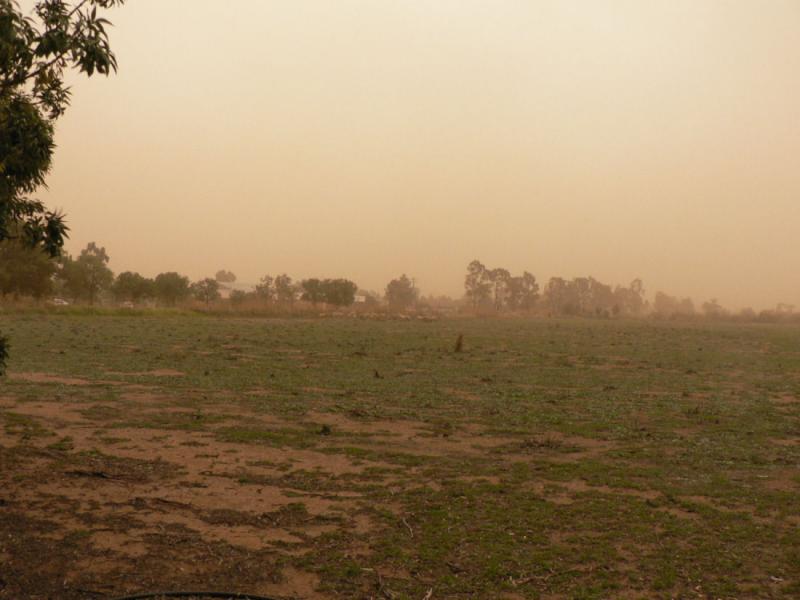
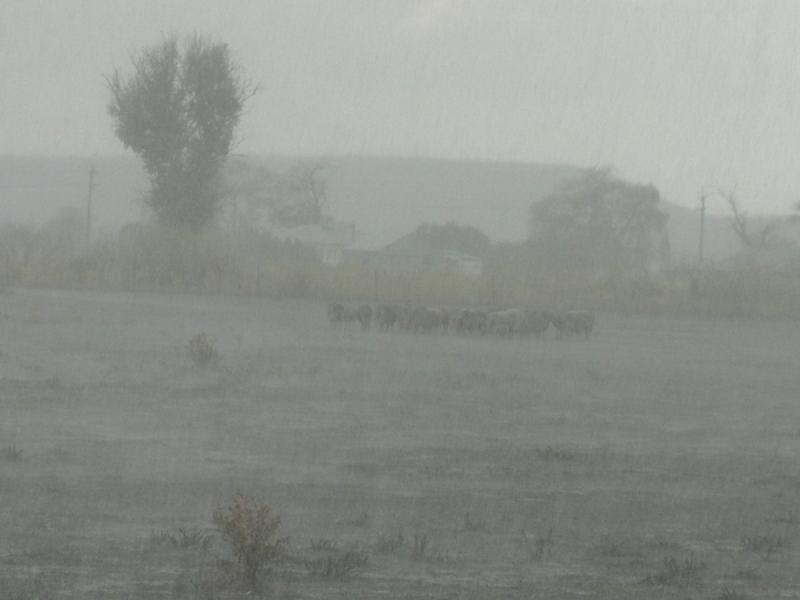
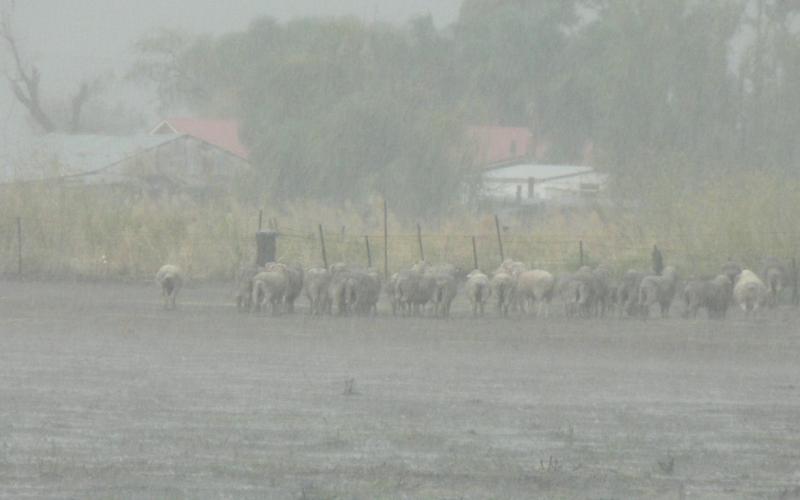
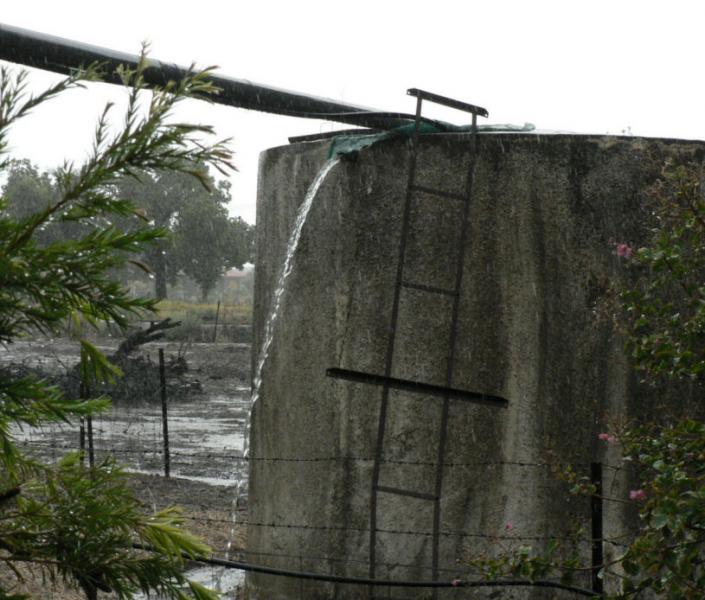
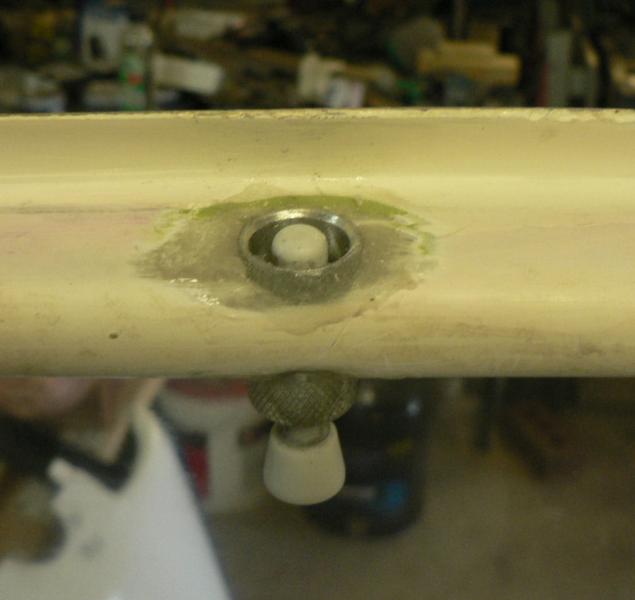
2-04-2008 Today started to flock the UC clamps to the UC legs. I had just got started when there was a lot of wind noise outside. So opened the shed door to see an approaching dust storm (see rain photos from the same door a few days ago). [ATTACH]5450.vB[/ATTACH][ATTACH]5451.vB[/ATTACH][ATTACH]5452.vB[/ATTACH][ATTACH]5453.vB[/ATTACH][ATTACH]5454.vB[/ATTACH] It was fairly noisy but I heard the phone ring it was the next door neighbour telling me the roof had blown off our old unoccupied cottage about 50 metres from our house but it still had some gear in it that was to be removed on Friday. The shed on the ground was the result of a previous wind storm just after we first moved in many years ago. [ATTACH]5455.vB[/ATTACH][ATTACH]5456.vB[/ATTACH][ATTACH]5457.vB[/ATTACH][ATTACH]5458.vB[/ATTACH][ATTACH]5459.vB[/ATTACH][ATTACH]5460.vB[/ATTACH][ATTACH]5461.vB[/ATTACH] The roof had flown off and landed on the old still live power line breaking it then dispersed itself around the paddock. One wire of the live power line was hanging low across the public road. I also had a makeshift pool heater with poly pipe laying on old gal sheets. It had also been picked up and spread around. [ATTACH]5462.vB[/ATTACH][ATTACH]5463.vB[/ATTACH] Not long after the roof came off the wind and dust returned and continued for some hours with a smattering of rain that did not seem to clear the dust but put a lot of mud on the vehicles. Work had been going on the UC during the above interruptions followed by a few long reds. Removed the LHS UC leg and marked it on the underside for the clamp location. Removed the paint with rotary emery cloth and cleaned the aluminium clamp. Then the fibreglass leg and the aluminium clamp were cleaned up with acetone and then a layer of epoxy brushed on both. A heavy bead of flock was applied to the clamp and it was reassembled on the AC with the port main UC leg. [ATTACH]5464.vB[/ATTACH][ATTACH]5465.vB[/ATTACH]
-
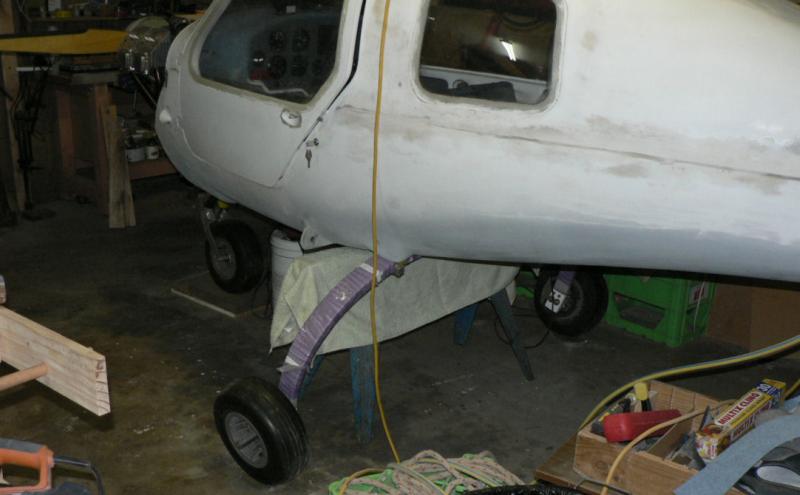
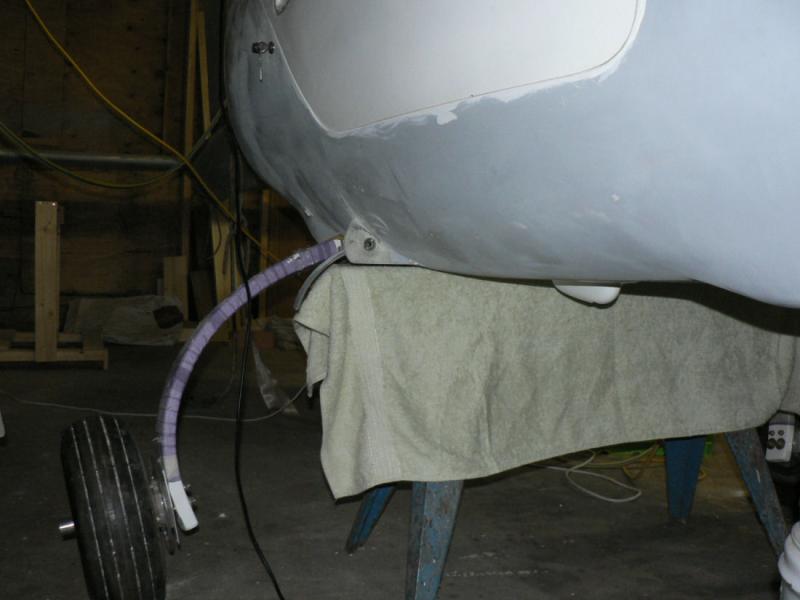
1-04-2008 Just mucked it up again. Did the whole post and quit without saving it . Fire-ban ended yesterday so was able to get rid of some large cardboard boxes today from the garage to give a bit more room to move. Due to forecast strong winds for tomorrow there is a total fire ban tomorrow. Lifted the front of the AC onto a piece of timber to lower the tail so that it would clear the ceiling. Used a saw horse with a piece of wide soft wood screwed to it to raise its height a few inches to support the cabin just in front of the main UC just to the rear of the strut lugs just below the cabin doors. The balance point turned out to be still forward of this location with the engine fitted and elevator not fitted so the main UC could be safely removed without fear of the tail falling on the ground. The main UC wheels are just clearing the floor which is not really apparent in the photos. [ATTACH]5445.vB[/ATTACH][ATTACH]5446.vB[/ATTACH] So the main UC gear can be removed and prepared for epoxying the aluminium clamp to the fibreglass legs.
-
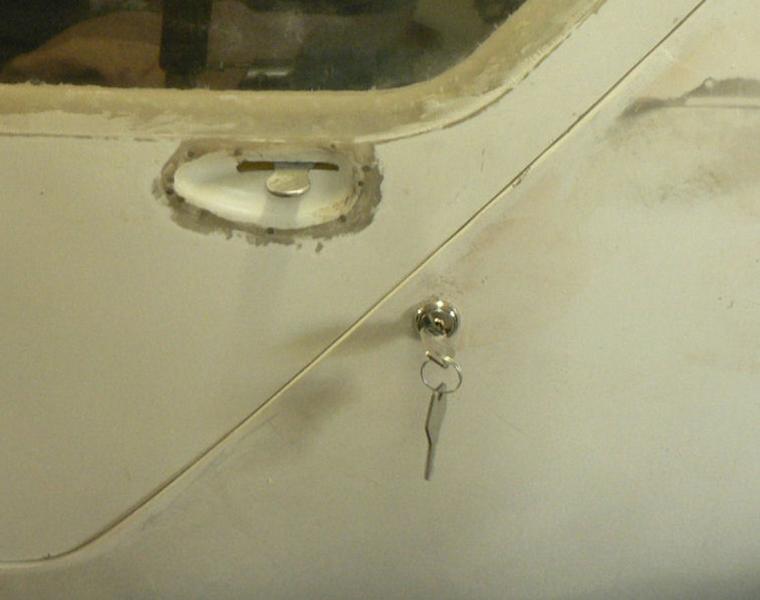
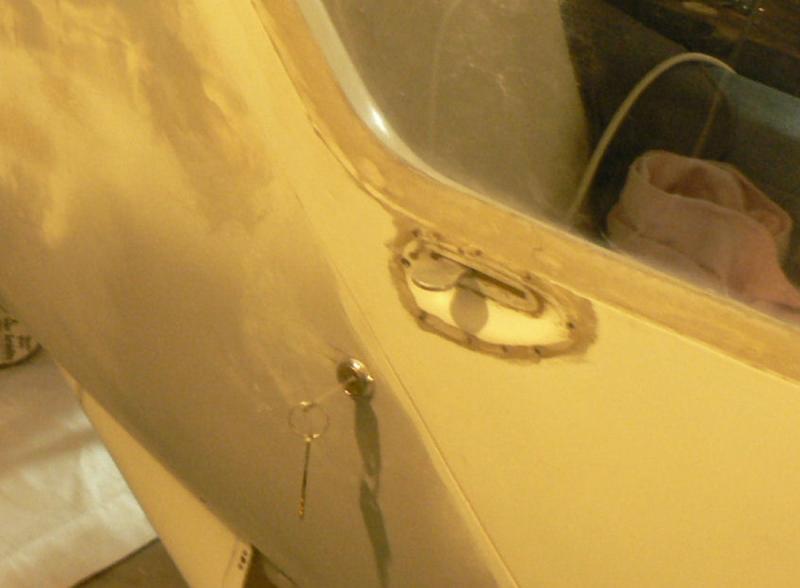
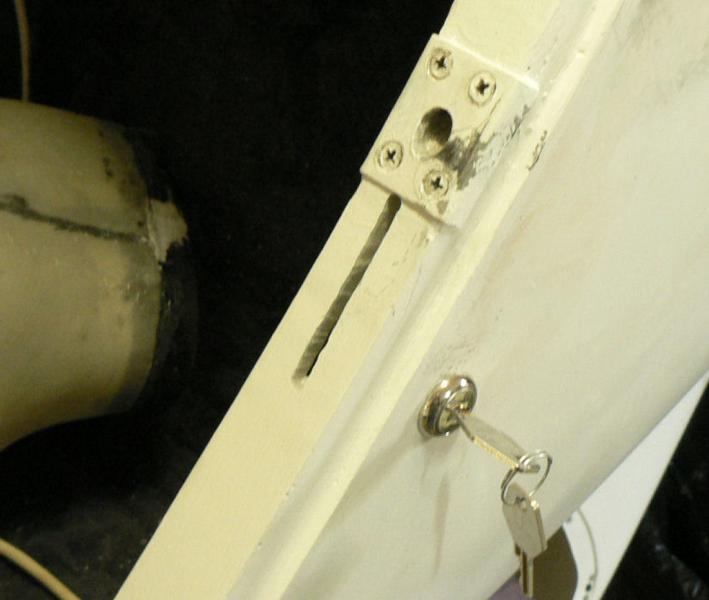
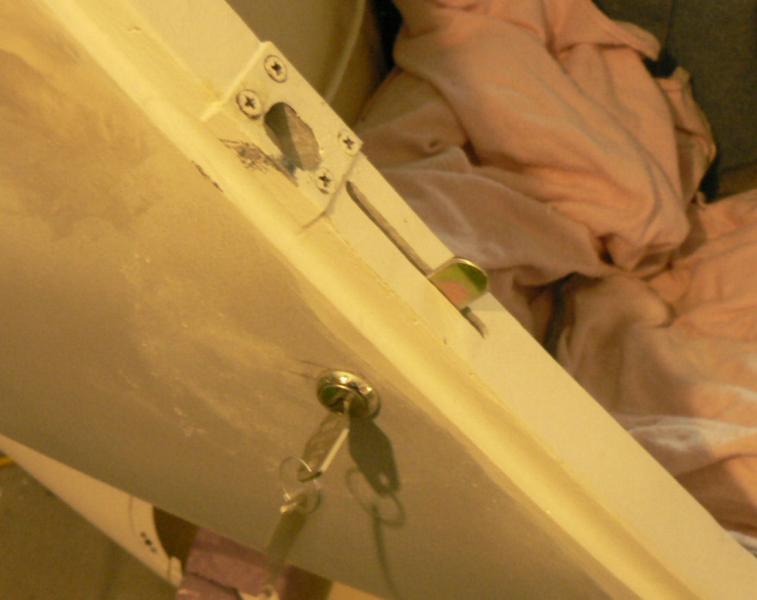
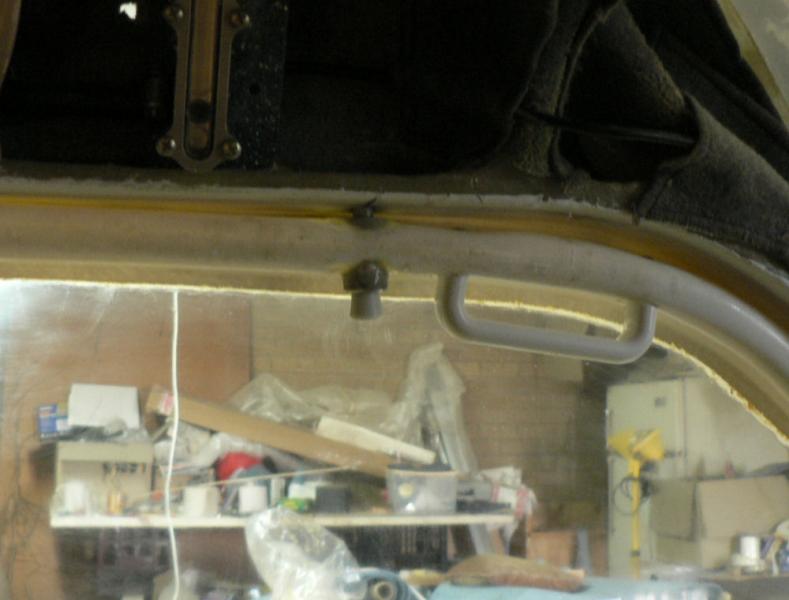
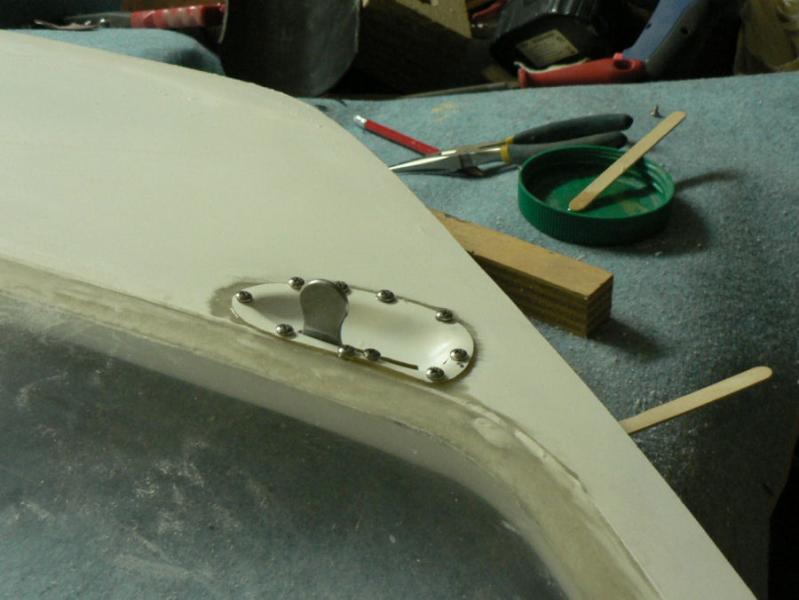
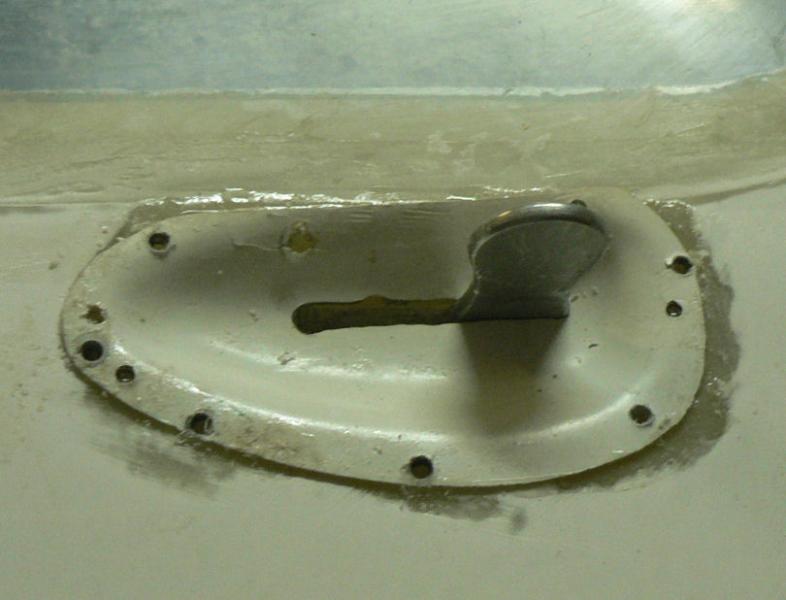
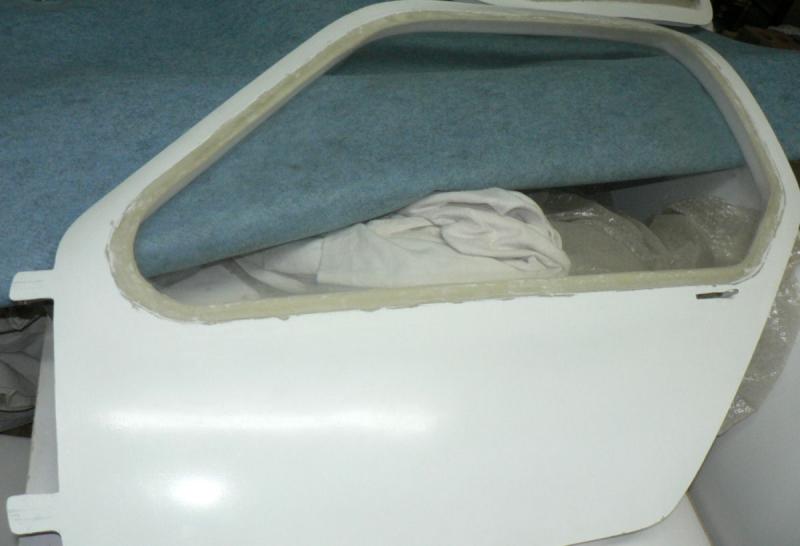
29-03-2008 Installed door locks on RHS & LHS of fuselage. The position of the locks was marked in pencil close to the door catch bolt allowing for the rotation of the lock in the slot. The elongated hole was drilled and filed out to fit the lock barrel cage so that the tab would be at right angles to the frame when in the locked position. The distance of the arm was measured and a slot cut in the door frame to match and trimmed up to clear the arm when in the locked position. A corresponding slot was marked on the door itself and cut out with the slotting tool on the Dremel with the door flush with the fuselage. [ATTACH]5384.vB[/ATTACH][ATTACH]5385.vB[/ATTACH][ATTACH]5386.vB[/ATTACH][ATTACH]5387.vB[/ATTACH][ATTACH]5388.vB[/ATTACH][ATTACH]5389.vB[/ATTACH]
-
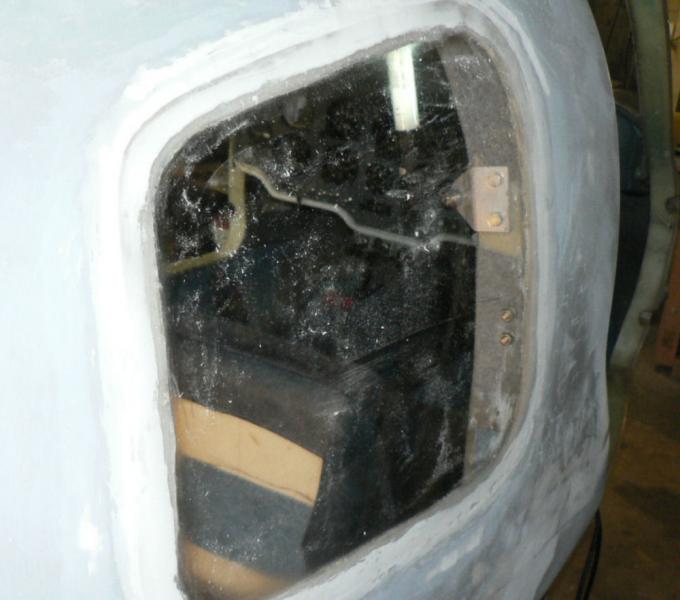
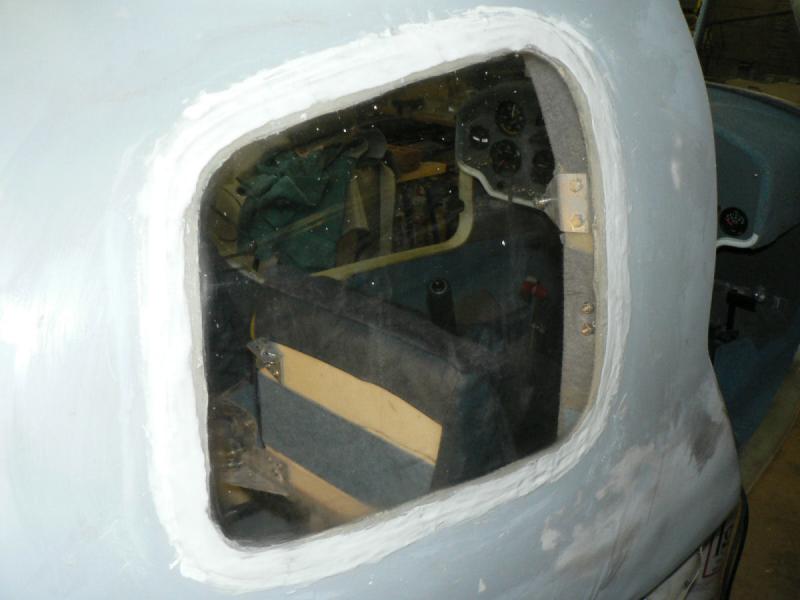
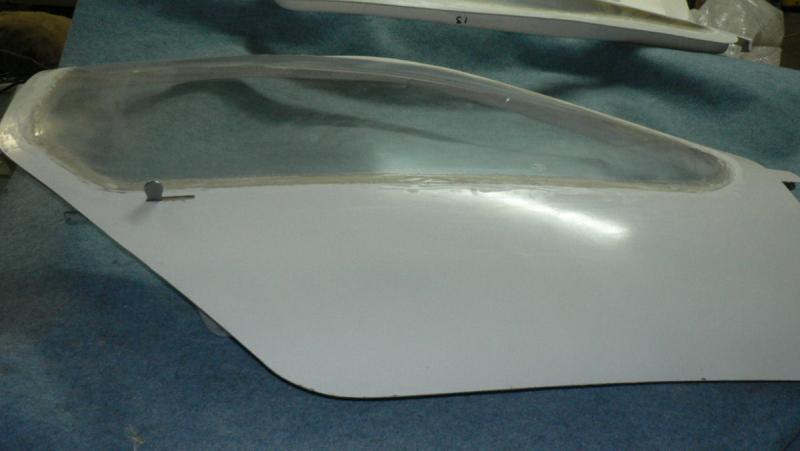
23-24-03-2008 Did a little cleaning up of the door windows on Sunday and more today. The first thing I did was scrape the narrow scratches lightly to make the scratches disappear into a larger cloudy area. To do this sharpened the knife I was using then ran the knife edge over the stone to put a blunt face with no burrs on the edge so you end up with probably about an 80 degree included angle on each side of the edge on the knife rather than about a sharp 10 or 15 degree included angle sharp edge. The fibreglass polish seems to work fine followed by the Plexus but you have to keep adding the fibreglass polish to a new bit of rag which I apply with one finger and a fair bit of pressure on each of the cloudy scraped areas. Fitted the dowel to the passenger door and the handle next to it. Ground the bases of both handles to match the curve of the door frame. Again the dowel had to be fitted as far out on the door as possible so that the matching hole was inboard on the door frame. [ATTACH]5317.vB[/ATTACH][ATTACH]5318.vB[/ATTACH][ATTACH]5319.vB[/ATTACH] We had 21 mm of glorious rain today in a passing thunderstorm. That should be just right for the start of our predominately winter growing native pastures in this area but of course will need plenty of follow up rain in a week or two. [ATTACH]5320.vB[/ATTACH][ATTACH]5321.vB[/ATTACH][ATTACH]5322.vB[/ATTACH]
-
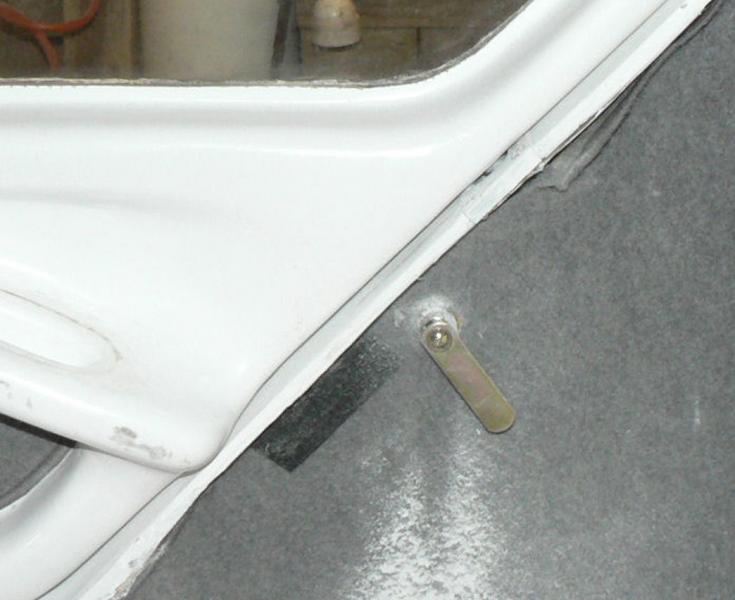
21-.3-2008 Well at least I was able to hear some of the RAA and GA people heading for Narromine and I can sit in the J160 and go Brrm,,,Brrm. Commiserations to the Old bold pilot.:confused: He will live to see another Flyin! :thumb_up: If he had been living at Leeton he could probably have flown up behind the weather. Today did more on the door catch covers. Ground off the edges and filled the holes with araldite and put a strip over the one where I cut the slot too wide due to getting it in the wrong place. The covers had to be trimmed on one side because of their proximity to the door windows. More smoothing up later. [ATTACH]5290.vB[/ATTACH][ATTACH]5291.vB[/ATTACH] Started on the dowel for the pilot side top of door. I think I moved it back a bit further than Bob's example as I did not want a hole through the strap from the wing connection down to the engine mount. So my hole is behind the wing connection which seems to be better for my door stability. As the door is not as wide as the door frame, the dowel was put as far inboard on the door as possible. The matching hole in the receiving door frame frame was still not centred when the door was flush with the fuselage but ended up on the outside of the centre of the door frame despite the dowel position. The dowels are a bit hard to pull out so I think the knob on the bottom needs enlarging. I don't think that my wife would be able to disengage them using the current knob size. [ATTACH]5292.vB[/ATTACH][ATTACH]5293.vB[/ATTACH][ATTACH]5294.vB[/ATTACH][ATTACH]5295.vB[/ATTACH][ATTACH]5296.vB[/ATTACH] In these pics the door handle had to be mounted on the curved part of the door and is not Araldited into position yet only held by two self tappers.
-
20-03-2008 Today around 13:00 I heard a few planes flying near our area heading for Narromine also some weather warnings with this area experiencing a variety of weather from full overcast then towering Cumulus (no local lightning), calm winds and gusty winds. We had about six drops of rain. By the time I walked outside to have a look it had stopped and evaporated off the concrete but left dried mud on the car windscreen! 22:30 At the moment over Leeton we have clear skies with bright moonlight and a very light south westerly breeze. There is a layer of cloud low on the North West horizon (towards Dubbo and Narromine). Another frontal cloud is approaching from the South West and at the moment looks a bit thicker than the patchy one now crossing Narromine on the radar which seems to be leaving some light rain in its wake. We had a visitor yesterday. I managed to get quite a few pics before he did his take off checks. [ATTACH]5284.vB[/ATTACH] Fitted the covers over the door handles today. They were slotted to match the handles then used as a template to mark the door. The the door was cut out inside the template mark and sanded to remove the gel coat from the join area. Then both parts were cleaned with acetone, araldite applied to both and the handle cover inserted and held down with SS self tappers. [ATTACH]5285.vB[/ATTACH][ATTACH]5286.vB[/ATTACH][ATTACH]5287.vB[/ATTACH] They will need some filling with micro-balls and then sanding to smooth them up. Only one was ready to remove the screws when I took the second pic.
-
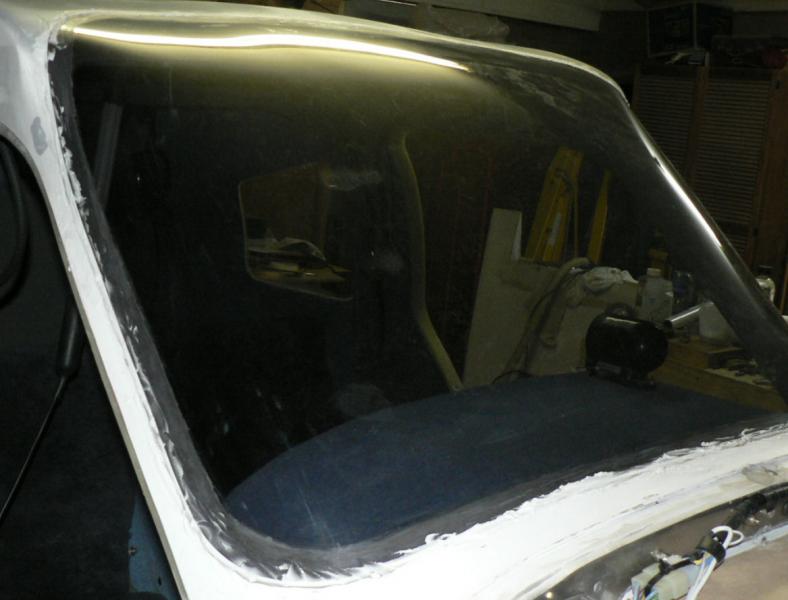
Thanks for that Biggles. I should say that if I had seen the Jabiru web site for the new detail on mounting the J230 windscreen earlier it would have been helpful in producing a neater installation and keeping the crud off the J160 windscreen and windows during installation.
-
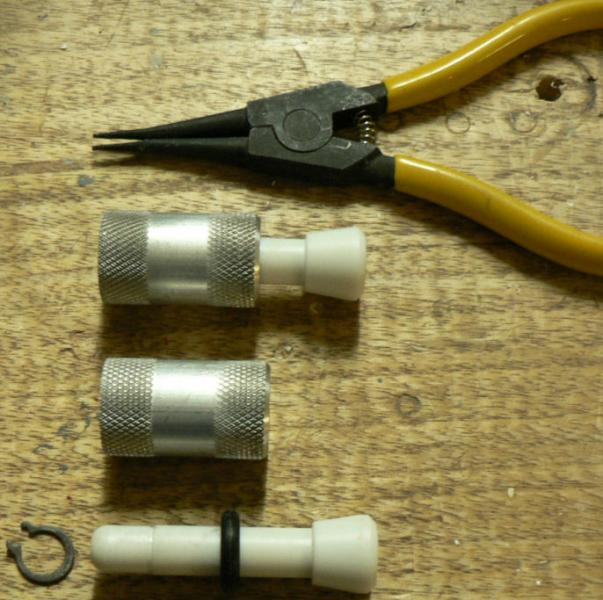
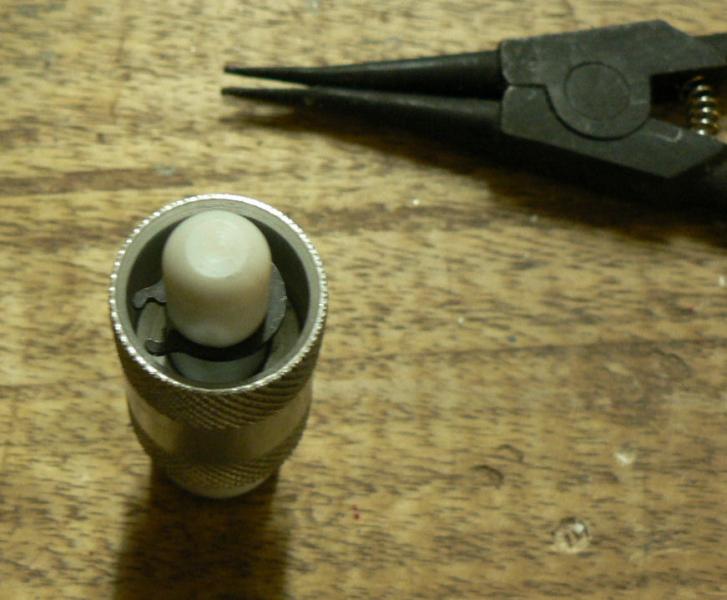
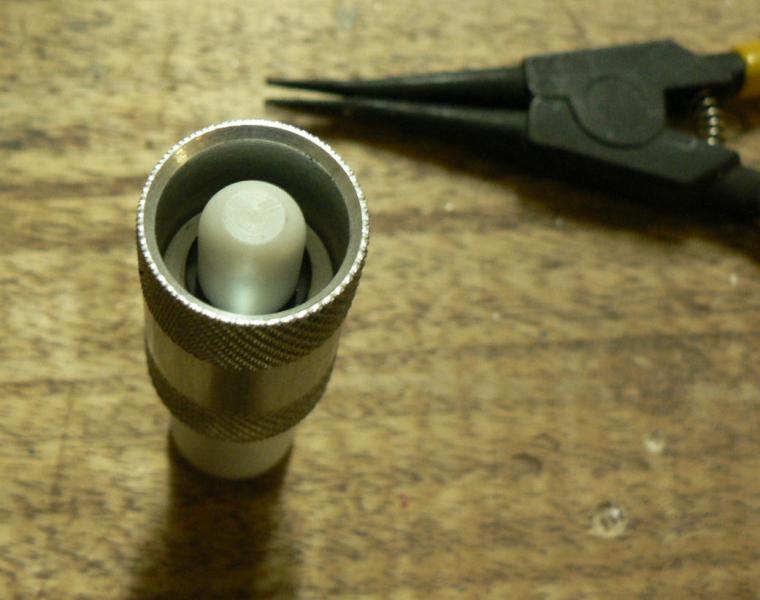
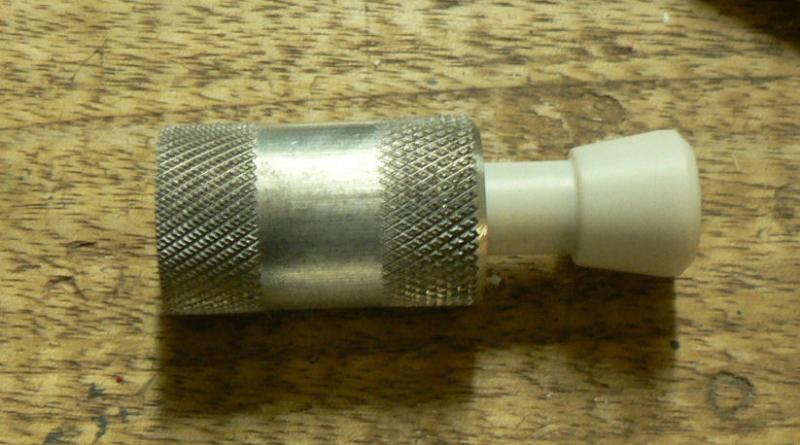
16-17-03-2008 Sunday: Moved the oil overflow vent hose sideways to stop it blowing over the exhaust pipe. The overflow from the fuel pump is also vented along side the oil vent hose. Self tappers were inserted in the previous holes for the hose clamp. [ATTACH]5269.vB[/ATTACH][ATTACH]5270.vB[/ATTACH][ATTACH]5271.vB[/ATTACH][ATTACH]5272.vB[/ATTACH][ATTACH]5273.vB[/ATTACH][ATTACH]5274.vB[/ATTACH] The camera angle makes it appear to be over the exhaust pipe - it is to one side. Went to Leeton Aviators Club meeting at Brobenah Airstrip for meeting and meal. Monday: Received the door dowels from Jabiru. Eventually managed to assemble them both. Chopped up one O-ring in the process and had to get a replacement in town. They rely on an o-ring and a groove in the dowel to provide the friction to hold them in the locked position and the friction to hold the dowel in the unlocked position. The small circlip prevents the dowel being pulled right out when it is disengaged to open or close the door. [ATTACH]5275.vB[/ATTACH][ATTACH]5276.vB[/ATTACH][ATTACH]5277.vB[/ATTACH][ATTACH]5278.vB[/ATTACH][ATTACH]5279.vB[/ATTACH][ATTACH]5280.vB[/ATTACH] Now I have to work out where to put them on top of the doors. My #14 manual shows the early type so I will probably end up mounting them in the same distance from the door corner.
-
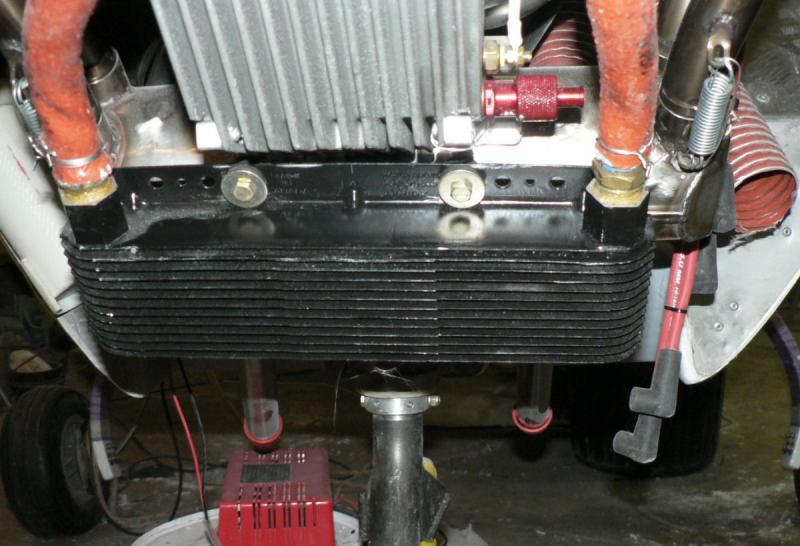
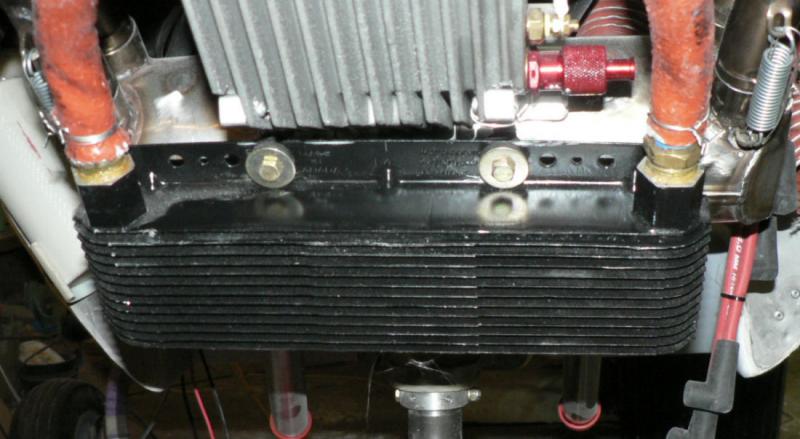
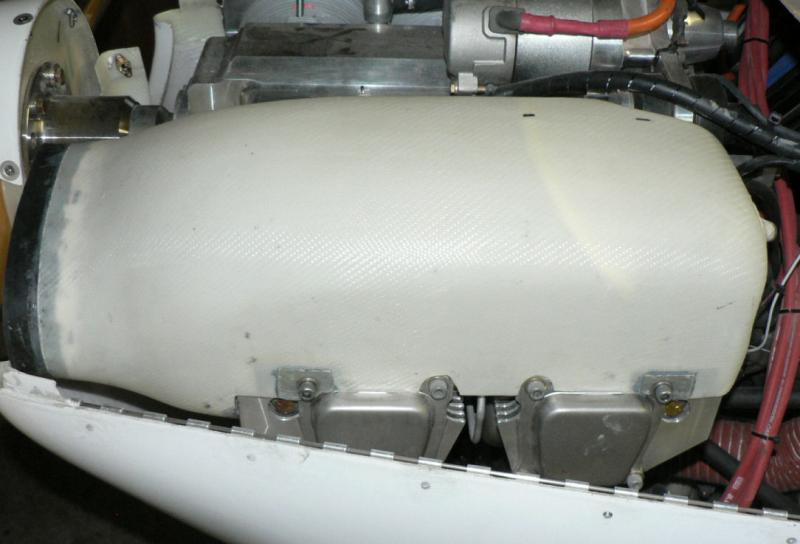
14-03-2008 Removed the bottom engine cowl and removed some material off the oil cooler intake so that there was no danger of rubbing on the oil cooler. Added two rubber strips around the oil cooler intake to match the oil cooler. Used rivets and washers to secure the strip to the intake on the bottom cowl. [ATTACH]5254.vB[/ATTACH][ATTACH]5255.vB[/ATTACH][ATTACH]5256.vB[/ATTACH] The strips may need a bit more trimming on reattaching to the aircraft.
-
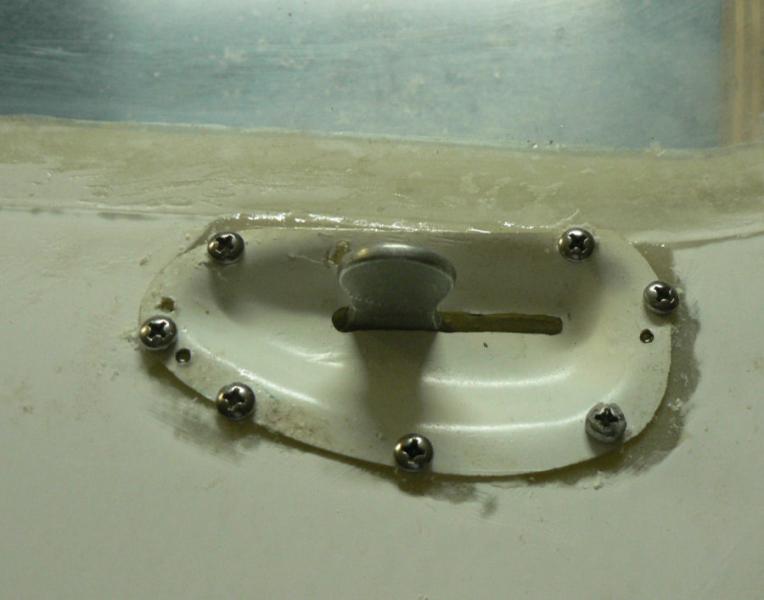
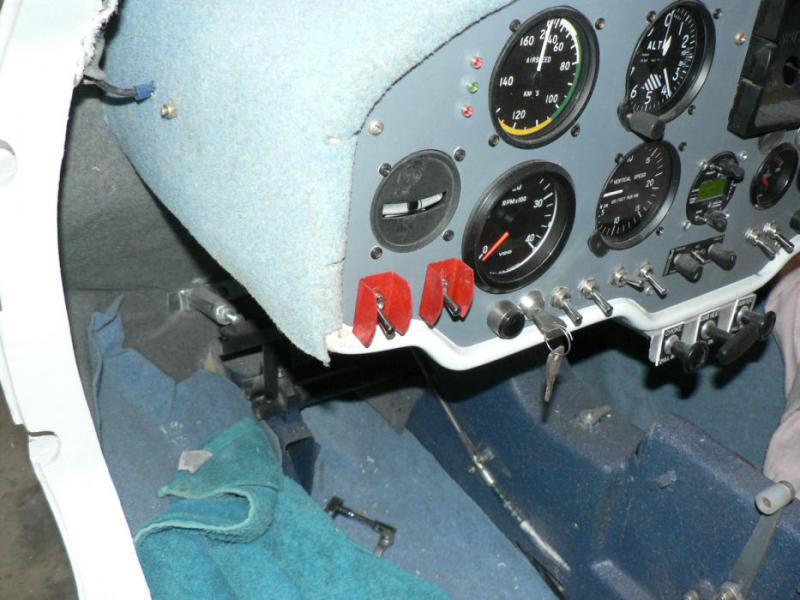
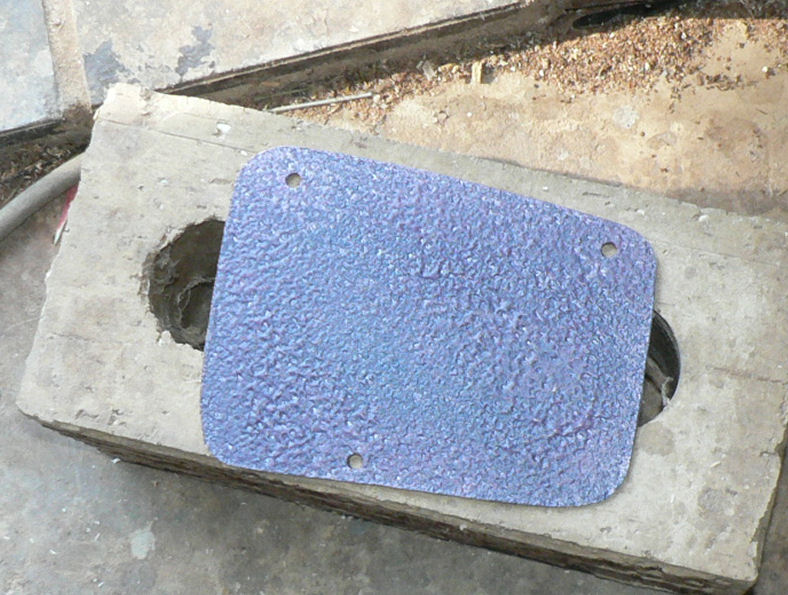
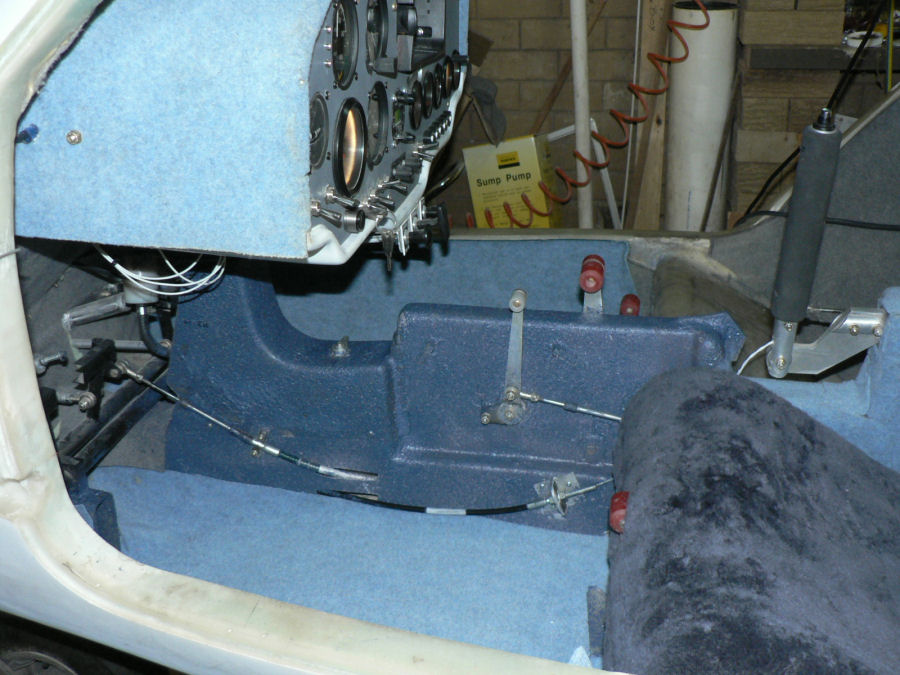
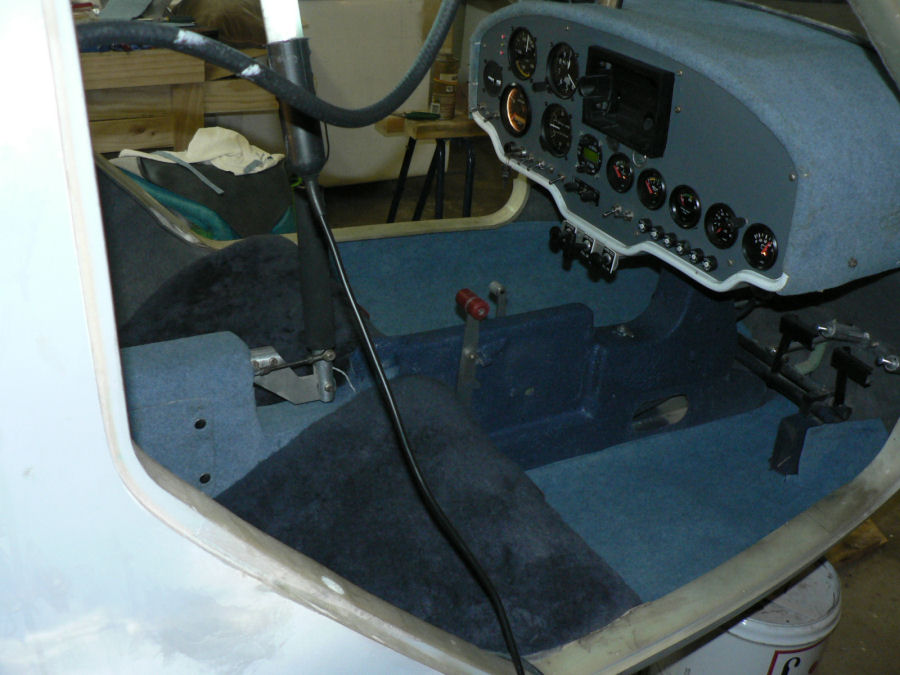
13-03-2008 Undercoated the door frames again after doing some filling with Nitrocellulose filler, then sanding. They are starting to look respectable. [ATTACH]5223.vB[/ATTACH][ATTACH]5224.vB[/ATTACH] Took out the self tappers in the door strikers and ground them off to about 11 mm length overall so that they do not protrude through the fibreglass to injure somebody. Had to heat them with the hot air gun as they had been set in araldite. [ATTACH]5221.vB[/ATTACH][ATTACH]5222.vB[/ATTACH][ATTACH]5249.vB[/ATTACH] Fitted the cover in the centre console on the passenger side. Used retained nuts in the console and painted the cover with "Stone" pressure pack then with clear acrylic. [ATTACH]5220.vB[/ATTACH] Fitted the safety guards around the two grounding ignition switches.
-
12-03-2008 Hi Geoff - thanks for the encouragement. I guess I am at the stage where it seems to be almost finished but there is still an everlasting list of small jobs to be done. Scraped and stripped all the paint off the pilot side door frame. Then sanded scraped again, then sanded, clean with air & acetone and applied a coat of undercoat enamel.. Sanded and cleaned with acetone the passenger side door frame already undercoated. Applied a second undercoat to the passenger door frame. [ATTACH]5209.vB[/ATTACH][ATTACH]5210.vB[/ATTACH] Now waiting on some parts but still plenty to do. Picked up a roll of Brown Kraft paper 50 metres long from the local panel beater for $20 (I have been a good customer of theirs lately!) to use for masking windows etc. in conjunction with plastic masking material as well. [ATTACH]5219.vB[/ATTACH] They use the brown paper on a dispenser that automatically applies adhesive plastic strip down one side. They use it a lot when painting small components on the car to mask nearby components where they don't want any over-spray. ----------------------------------------------------------------------- Actually this morning first up, went around to Warren's place to assist with the turtle deck on his Sonex. (My job mainly was to carry & hold bits). Managed to get Warren and his wife Betty in the pics. He already had all components ready to go. Note Warren looking at the supplied plans. The plan scale is 1:1 (full size mostly) Carted it out to the lawn, lifted tail end to make it easier to drill. Inserted turtle deck on one side lined it up and drilled then inserted Clecos. Once sufficient Clecos were inserted, turned it over and did the passenger side. The holes will all be drilled out to suit the rivets, deburred etc. [ATTACH]5211.vB[/ATTACH][ATTACH]5212.vB[/ATTACH][ATTACH]5213.vB[/ATTACH][ATTACH]5214.vB[/ATTACH][ATTACH]5215.vB[/ATTACH][ATTACH]5216.vB[/ATTACH][ATTACH]5217.vB[/ATTACH][ATTACH]5218.vB[/ATTACH] Inserting the turtle deck turned out to be far easier than we expected. This was due to the excellent quality of workmanship, especially the accuracy of placement of drill holes and sizes of components that Warren has manufactured and used in his machine.
-
11-03-2008 Sanded the passenger side door frame and cleaned with acetone. Drilled the striker plate, countersunk and drilled door frame to match. Araldited and inserted self tappers into the the striker plate on the door frame. [ATTACH]5205.vB[/ATTACH] Applied undercoat to the door frame. As Captain said, the first door is different to the next one - in my situation, the hole for the door catch needs to be much nearer the edge than was the case for the other door and I might still have to bend the door after heating it to improve the fit. --------------------------------------------------------- Today Warren moved his Sonex elevator from the bench to the stand ready for mounting. [ATTACH]5206.vB[/ATTACH][ATTACH]5207.vB[/ATTACH] Sounds like he is mounting the turtle deck tomorrow morning.
-
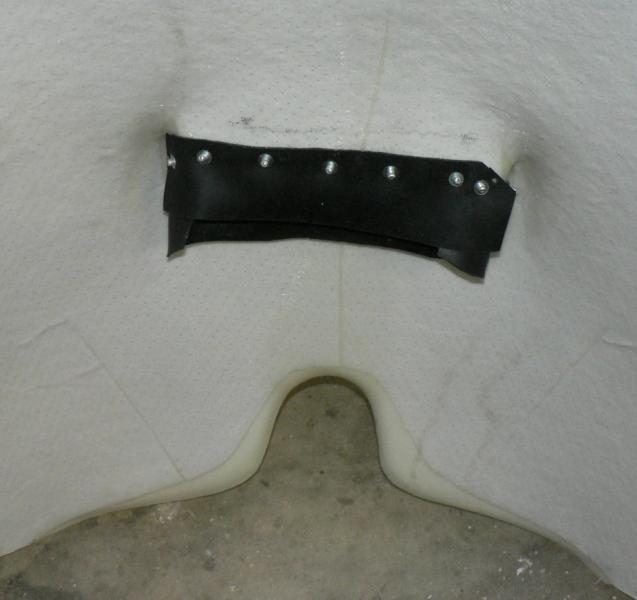
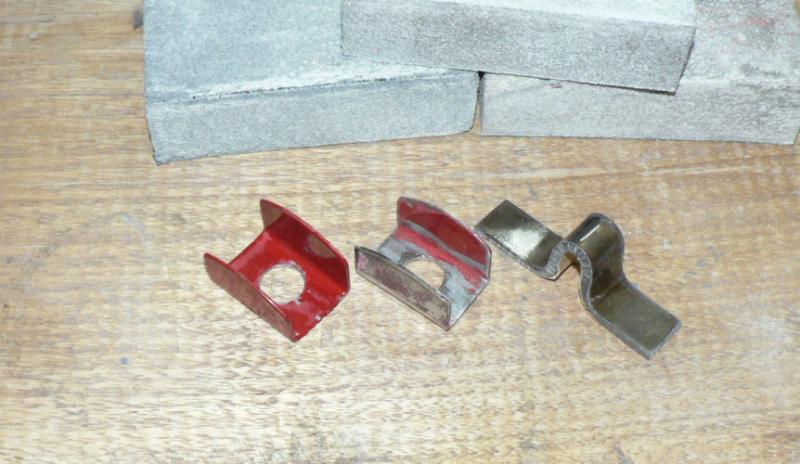
08-03-2008 Scraped the windows and windscreen again. Still need s some filling but the bogging undercoat paint should do the job. [ATTACH]5181.vB[/ATTACH][ATTACH]5182.vB[/ATTACH][ATTACH]5183.vB[/ATTACH][ATTACH]5184.vB[/ATTACH][ATTACH]5185.vB[/ATTACH] Had a visit from Eric & Steph. Eric flew his J230 kit built plane today at Narrandera so he is happy. Eric gave me a couple of switch guards which I will use on the Ign of the J160 but I need some red paint. Pic shows two of the guards plus the Jabiru supplied version. [ATTACH]5186.vB[/ATTACH] Refitted cooling air ducts with stainless inserts and had to drill out the bolt holes to clear excessive epoxy from the holes. Visitors from Narrandera MAC, Barry & Robert were welcomed as well with a couple of beers after they had a look at the progress. Basically they said rig it and fly it after the beers - I wish.
-
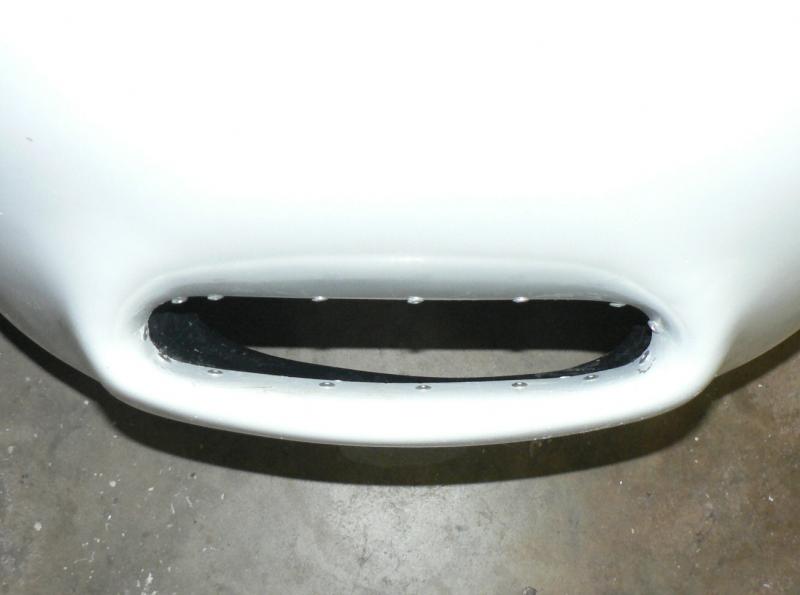
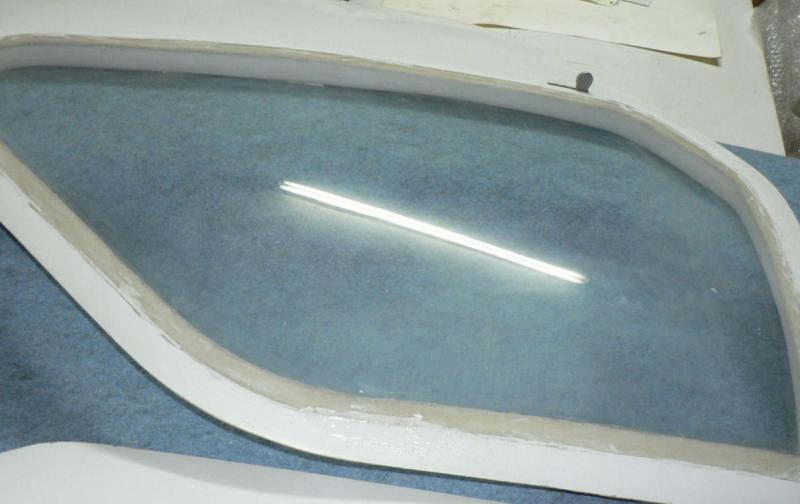
07-03-2008 Scraped the microballs off level with the surrounding window or fibreglass material late last night which left a few cavities that had not been filled adequately. I thought I had taken photos at this stage - must have gone to bed instead. Mixed another batch of microballs more liquid this time and applied with a 25 mm wide paintbrush. It was fairly stringy but tended to level or smooth out slightly once it was left alone. [ATTACH]5152.vB[/ATTACH][ATTACH]5153.vB[/ATTACH][ATTACH]5154.vB[/ATTACH][ATTACH]5155.vB[/ATTACH][ATTACH]5156.vB[/ATTACH][ATTACH]5157.vB[/ATTACH] I will scrape it off again and smooth up with sandpaper - any roughness from cavities left should fill with the bogging undercoat. Removed the engine air ducts and cut the 25 mm holes at the front for cooling the crankcase. [ATTACH]5158.vB[/ATTACH][ATTACH]5159.vB[/ATTACH][ATTACH]5160.vB[/ATTACH][ATTACH]5161.vB[/ATTACH][ATTACH]5162.vB[/ATTACH][ATTACH]5163.vB[/ATTACH] Also cut and drilled out some pieces of stainless steel to match the mounting position of the ducts on the tappet covers. Araldited them to the inside of the ducts hopefully to dissipate the heat from the engine onto the fibreglass more slowly than direct contact with the aluminium. I shall see what happens. All the failed Jabiru ducts I have seen seem to fail where they are attached to the tappet covers due to overheating going by the colour of the surrounding fibreglass. Some hours later after the araldite set, removed the clamps and peel cloth and reattached one of the ducts to the motor tappet covers. [ATTACH]5168.vB[/ATTACH][ATTACH]5169.vB[/ATTACH][ATTACH]5170.vB[/ATTACH][ATTACH]5171.vB[/ATTACH]
-
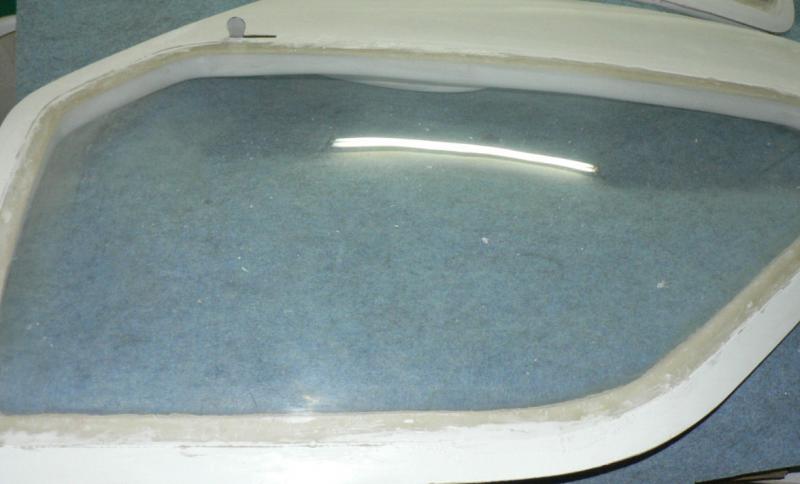
06-03-2008 Did a bit today of inserting a micro-ball epoxy mix around the windows and windscreen. It was spread with a paddle pop stick. The mix was a standard epoxy mix with microballs added and stirred in until it was a smooth paste that would not flow off once it was spread. The trouble is it becomes sticky as it dries long before all the filling is done as it needed to be fairly dry to stop leakage onto the screens. So it is and looks pretty rough but is very easy to smooth up compared to a flock mix. It can be sand-papered, filed or scraped with ease compared to flock or epoxy. In these pics it is still wet and has not set yet. [ATTACH]5145.vB[/ATTACH][ATTACH]5146.vB[/ATTACH][ATTACH]5147.vB[/ATTACH][ATTACH]5148.vB[/ATTACH][ATTACH]5149.vB[/ATTACH][ATTACH]5150.vB[/ATTACH] It is very lite compared to flock but is not suitable for structural use.
-
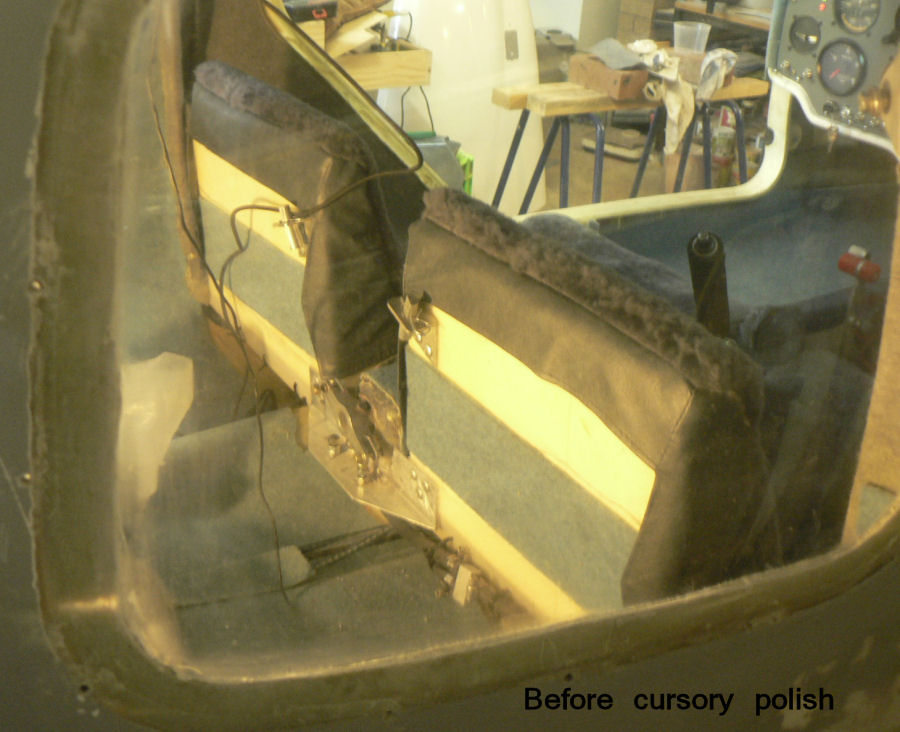
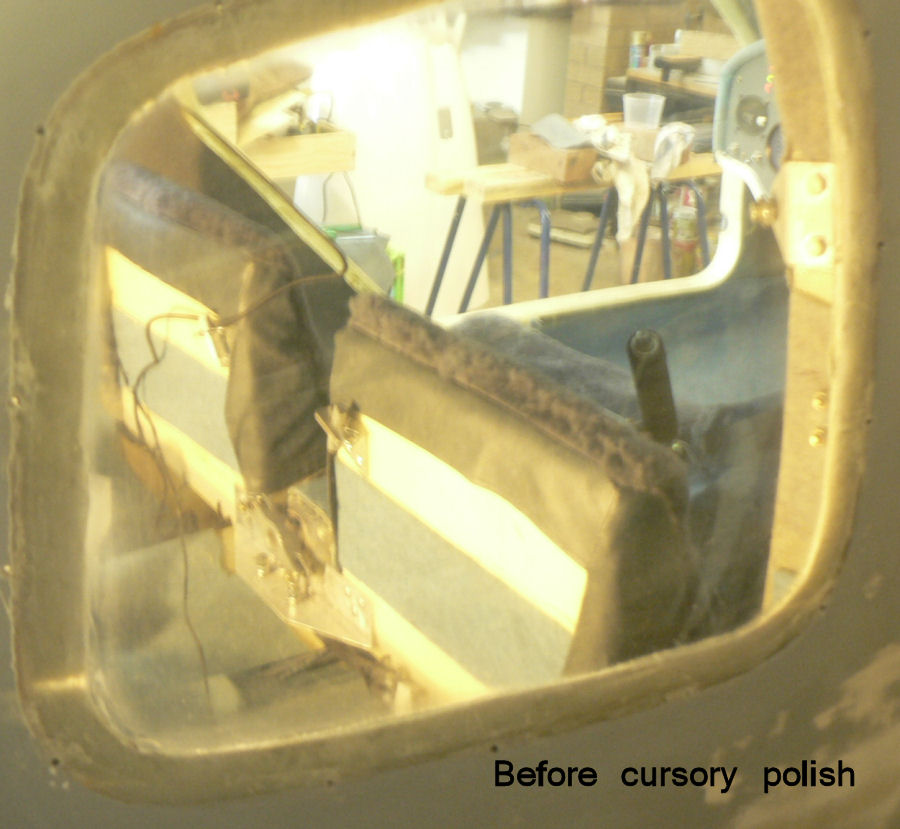
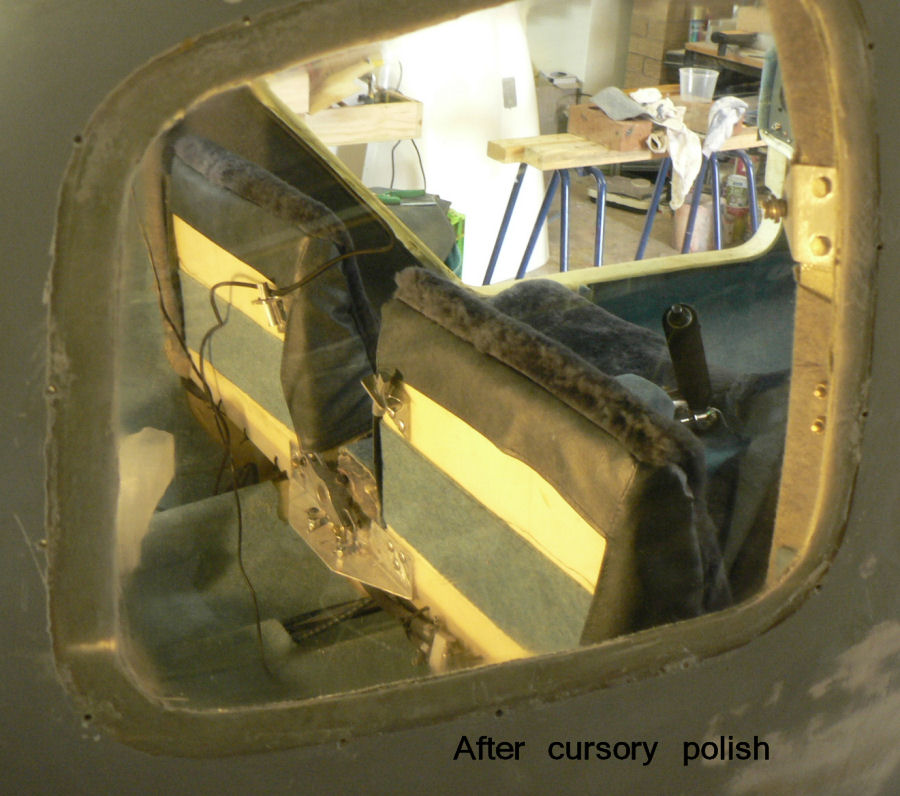
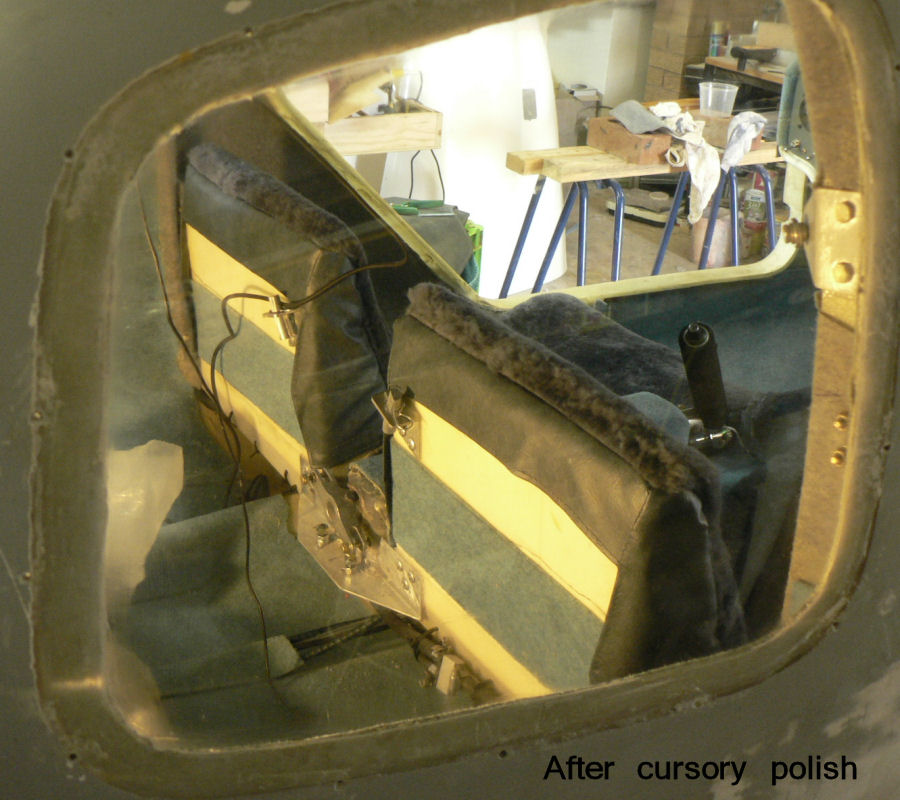
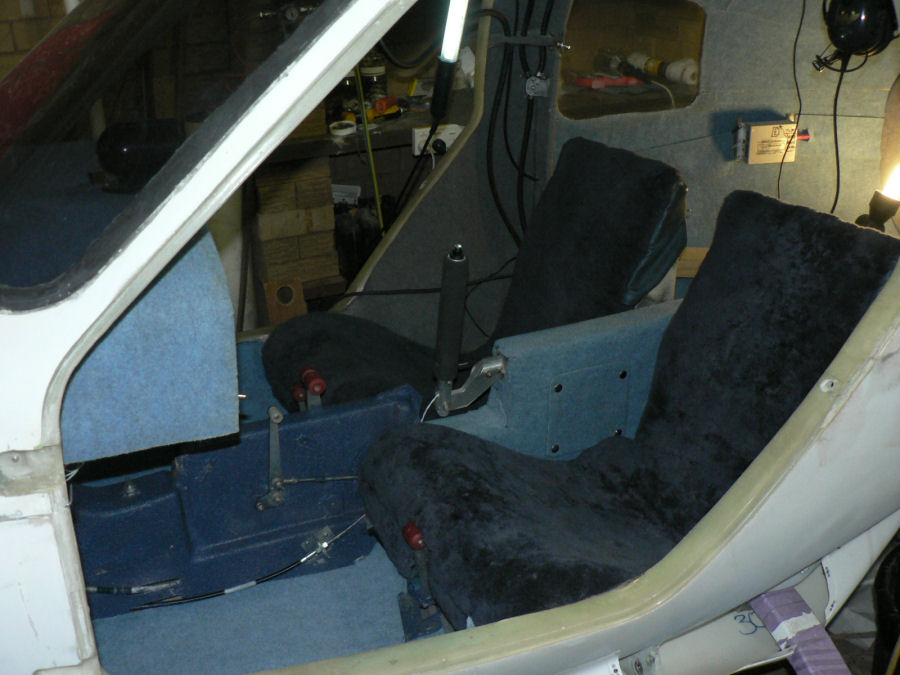
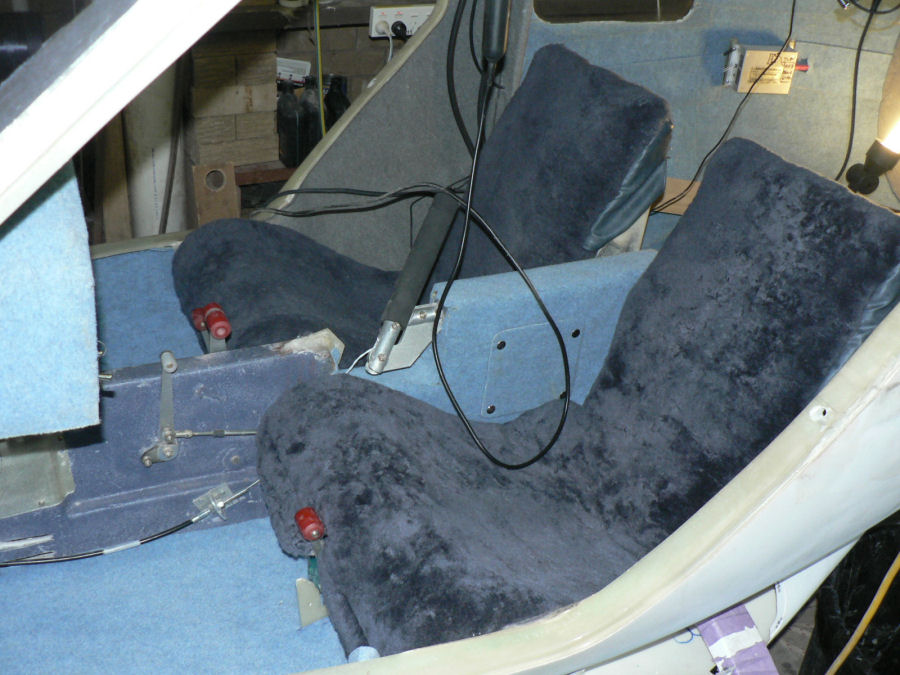
28-02-2008 Not much done today but glued in some strips behind the seats to take the Velcro straps on the seat liners. Also re-glued the felt on the front of the pilot seat. The Plexus arrived in Leeton this afternoon so I took a can around to Warren Kirkup for their Sonex etc. Got delayed there so eventually did a cursory job of trying it out on the back windows of the J160. I forgot to photograph the pilot side windows before the Plexus but managed a before and after for the passenger side although one of them is out of focus. [ATTACH]5087.vB[/ATTACH][ATTACH]5092.vB[/ATTACH][ATTACH]5088.vB[/ATTACH][ATTACH]5089.vB[/ATTACH][ATTACH]5090.vB[/ATTACH][ATTACH]5091.vB[/ATTACH] Eric Muntz from Albury should get to do his first flight in his Kit built J230 at Narrandera tomorrow or Saturday - and I will miss it.
-

Electronics Project - Quad CHT Gauge
Ross replied to sain's topic in Aircraft Building and Design Discussion
Yenn Are the "rubber" grommets supposed to be "fireproof"? I was under the impression that the grommets used were of a material that would withstand quite a bit of flame similar to the hoses fitted over the fuel & oil lines in the engine bay. The stainless steel firewall can withstand a very high temp w/o melting but it does not stop the heat which could set fire to the wood or fibreglass behind it. Could someone comment that knows please. I did not install the original kit cabin heater in my J160 kit because it was manufactured from fibreglass for the housing and an aluminium flap. The cabin heater for the certified version is made wholly from a metal that might be aluminium. I do not know what the melting point is of that particular material. Regards -
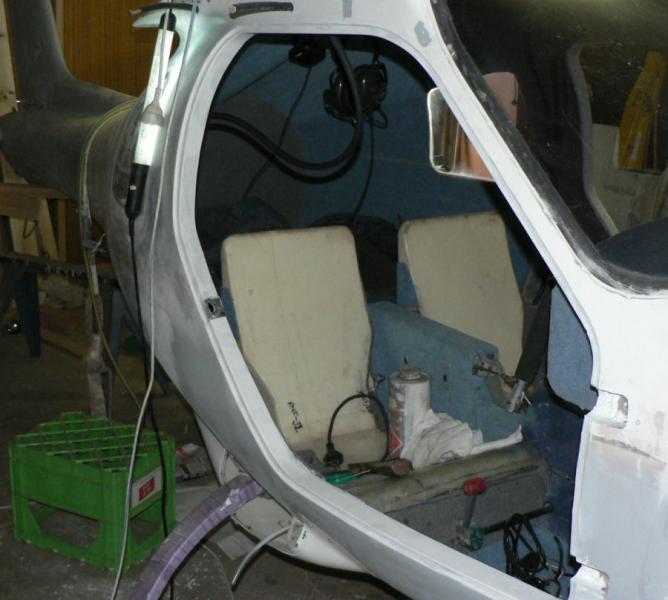
27-02-2008 No sign of the Plexus or it's equivalent yet. Yesterday, I think they might have said something like it has been despatched to Preston store rather than Prestons transport depot in Melbourne. "Prestons Leeton" is one of our local transport companies who travel regularly from Leeton to and from Sydney, Brisbane and Melbourne amongst other places. Today removed lining from the floor. Used blue "stone spray" pack to paint the console between the pilot legs and passenger legs Then gave it a spray pack coat of clear varnish after it set. Glued felt to front vertical side of pilots seat around the throttle . It is needed to anchor the Velcro on the pilot's seat cover. Sat felt on pilot & passenger floor w/o gluing to facilitate cleaning. [ATTACH]5084.vB[/ATTACH][ATTACH]5085.vB[/ATTACH][ATTACH]5086.vB[/ATTACH] Seats still need a felt strip accross the back for the Velcro to grab. This post was the second attempt to post today. I had done it all late this afternoon including downloading the pics and fixed a number of glitches and was ready to save it. Right then we had a wild wind and dust storm, a sprinkle of rain and some electrical storm activity in the distance. As I pressed the save button it came up with the message that the website was not available or words to that effect.
-
Electronics Project - Quad CHT Gauge
Ross replied to sain's topic in Aircraft Building and Design Discussion
Hi Sain Another issue is that a significant percentage of males in the general population have a problem with certain colours of the spectrum. I am not familiar with the details but note that some web designers use colours like a pale yellowy colour that is practically invisible to me (of course it could have been a bad 19" VDU at the time which has since been mothballed. It also used to gradually fade some of the colours which was very hard to pick up). Other colours of course can be quite irritating if you have to look at them for a long time. http://www.btplc.com/age_disability/technology/RandD/colours/background.htm I did a Google search for male colour sensitivity that brought up the above site amongst many others that points out that a significant percentage of men are more prone to partial colour blindness than females. It is probably worth while having an awareness of the information if you are designing screens. Regards -
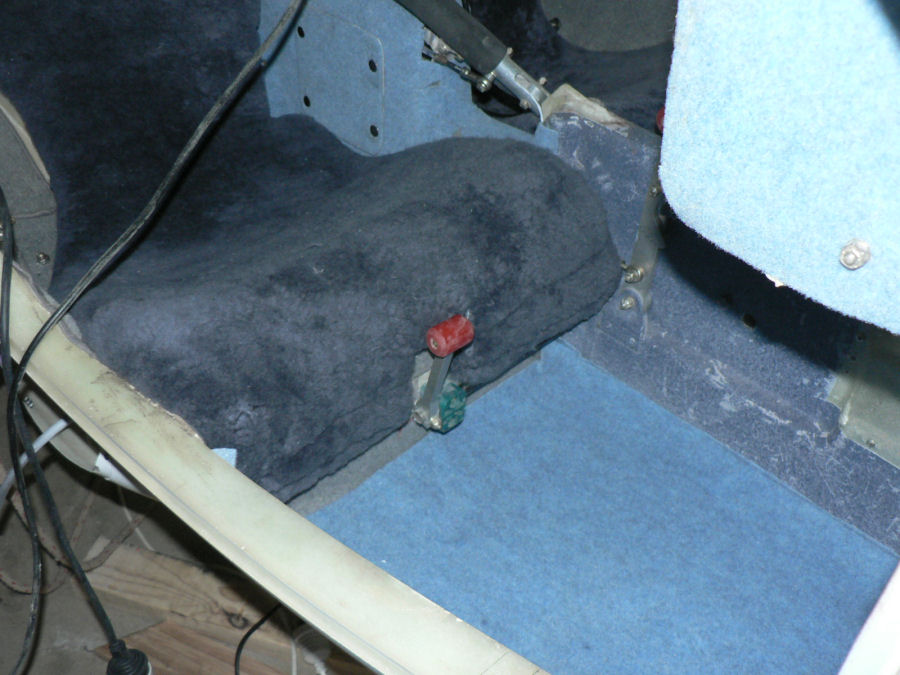
26-02-2008 Emptied the rubbish out of the floor areas and vacuumed the residue. Measured (about 780 MMx600MMx500MM), marked out and cut some felt to fit the pilot side and the passenger side floor pans. Had to relieve the seat liner around the passenger side throttle cut out to clear the "Press to talk Button" which I set into the front face of the seat base to the left of the throttle. At present the floor liners are not glued in and the felt on the front of the pilot seat also needs to be glued in. [ATTACH]5079.vB[/ATTACH][ATTACH]5080.vB[/ATTACH][ATTACH]5081.vB[/ATTACH][ATTACH]5082.vB[/ATTACH] If you check the seat liner photos notice that yesterday's seat photo has the wrong liner on the pilot seat. The Plexus "equivalent" supposedly was despatched today from the wholesaler to the carrier's depot for delivery here hopefully tomorrow.
-
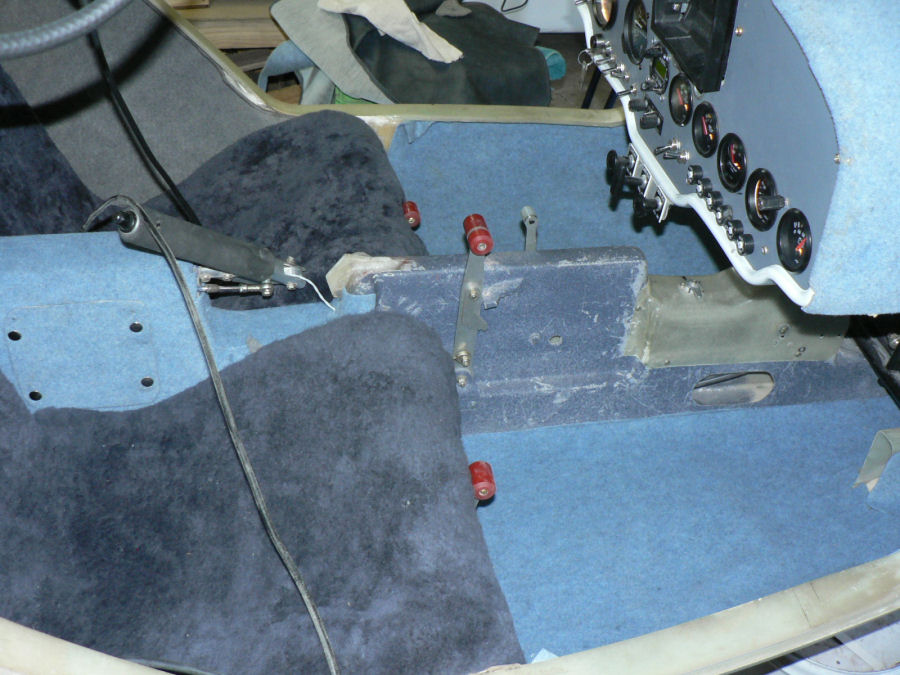
25-02-2008 Thanks for that suggestion Brent. I had noticed that from the pilots seat for example you cannot see the top of the windscreen so you can crib a bit there without loosing any view likewise on the bottom of the screen as it will only remove some of the view of the top cowl. And you don't spend much time looking out the back windows when flying although it may pay to try it out a bit more - I had not really thought of trying it before. You end up with a stiffer neck as you get older - probably in more ways than one. I always thought it might be a good idea to have some sort of rear vision mirror or TV camera on a plane like a fighter pilot especially after a glider pilot at Leeton in a Club Libelle ran down a fabric covered wooden glider over the middle of the airfield. I happened to be on the ground there at the time of impact. I heard the bang of the collision and looked up in time to see about 200 yards away horizontally and probably about 2,000 AGL the wooden glider exploded into a heap of small pieces floating towards the ground with a glider pilot hanging from a parachute amongst it. The Club Libelle pilot decided not to jump after releasing his seat belt - pulled his dive brakes and landed w/o a canopy and with a small dent dent in the right wing. He was lucky not to loose his T tail. Today did some domestic jobs and thought I would spend the whole afternoon on the plane. Was not to be. The Plexus did not arrive but I started on the plane after lunch and then my cousin turned up at 3 pm (not to help) and did not leave till 8:30 pm. So tea was late and then my ISP crashed or I had a software glitch so wasted another couple of hours before getting the ISP back online. So managed to line about 60 cm of the centre console and make up covers for the brake master cylinder access with press studs. Actually made up the covers on Sunday afternoon. Applied carpet glue to the console and the felt - left it to get tacky and then applied the felt over the press studs with holes cut in the felt to match the studs and the access holes. Used 1/8" pop rivets with a 1/8" steel washer on the back side to stop the rivet pulling through the fibreglass. The two covers could not be made identical because of the location of the elevator cable inside the console. [ATTACH]5075.vB[/ATTACH][ATTACH]5076.vB[/ATTACH] If the centre console (arm rest) is not comfortable enough could add another layer of felt on the back end. I would really like the control stick to be about 50 mm further forward as it tends to contibute to an unconscious rolling of the wings to the left when applying full back pressure in a normal landing. Even fitting the forky stick extension used in the J230c might improve it.
-
Hi Geoff Congratulations on getting that beautiful aircraft into the air for the first time. It must be a great feeling of satisfaction when she lifts off the runway after all the effort and research that you have put into it! I am one of the ones getting greener after those flights of yours yesterday. I shall have to listen out on your frequency while working on the J160 in the garage. Regards
-
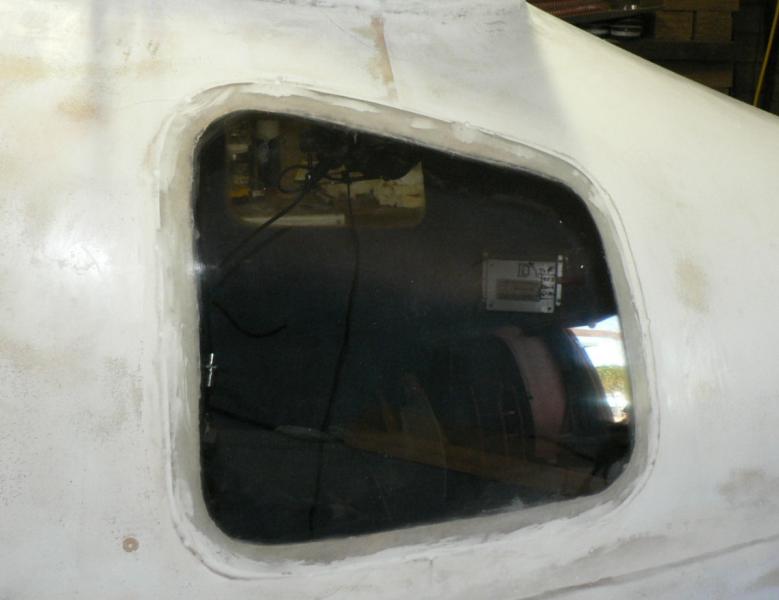
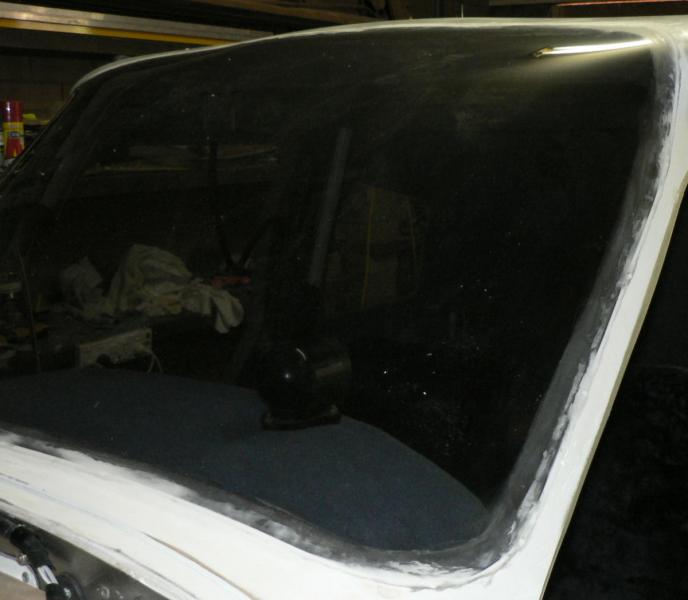
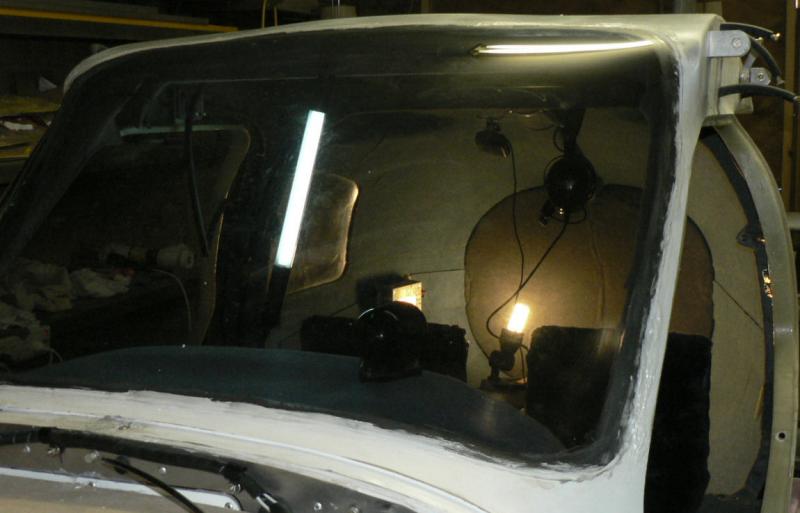
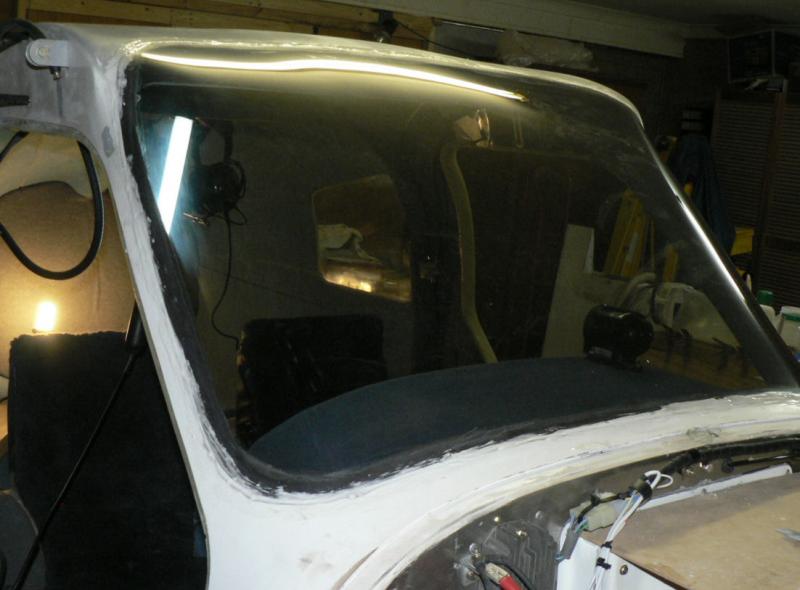
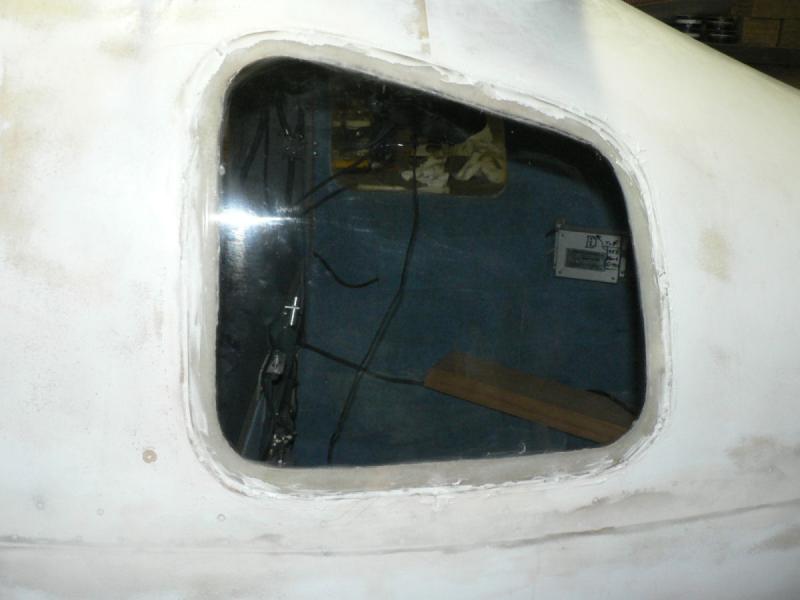
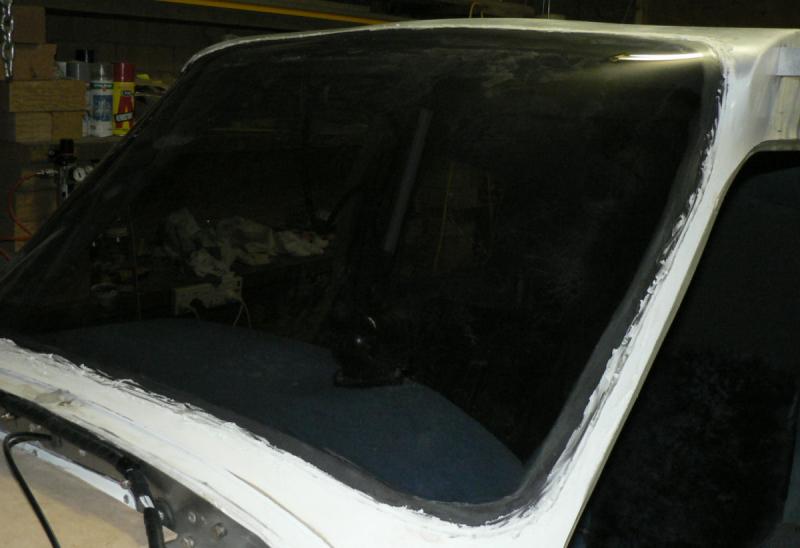
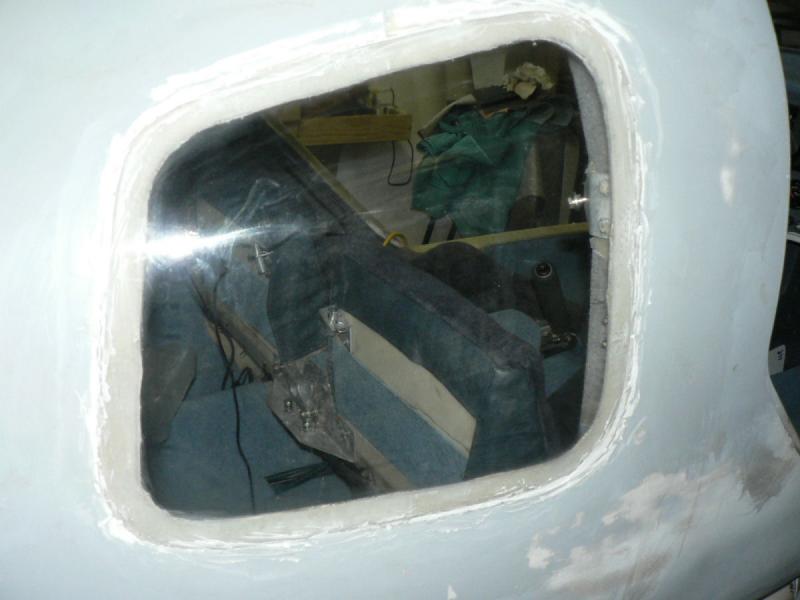
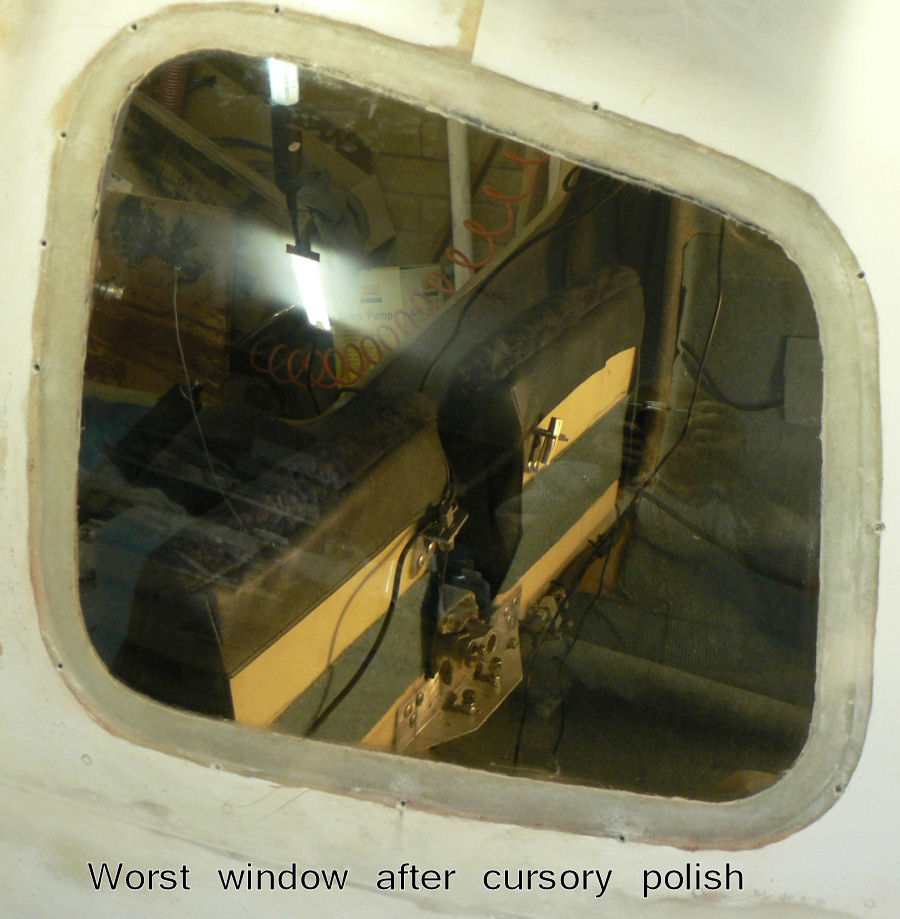
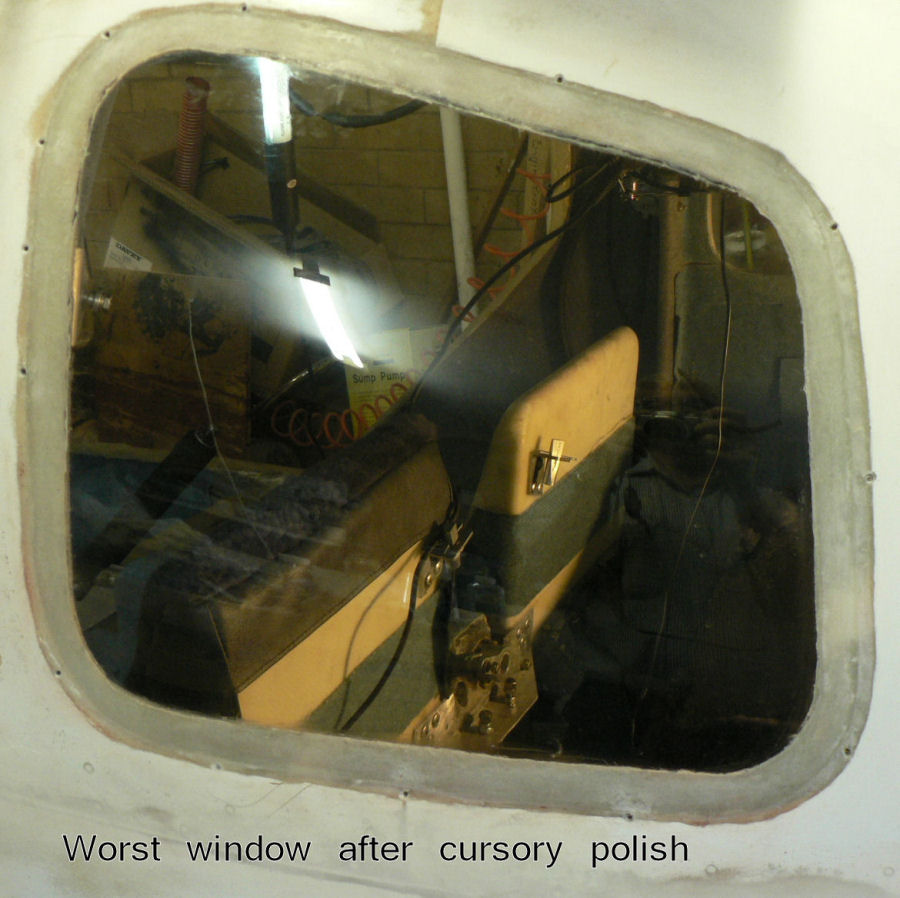
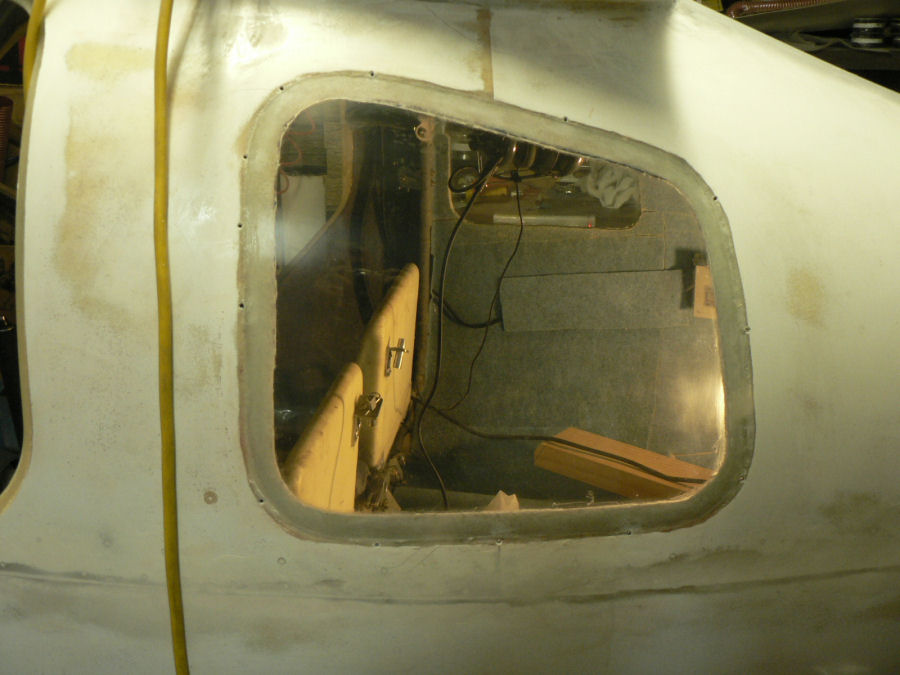
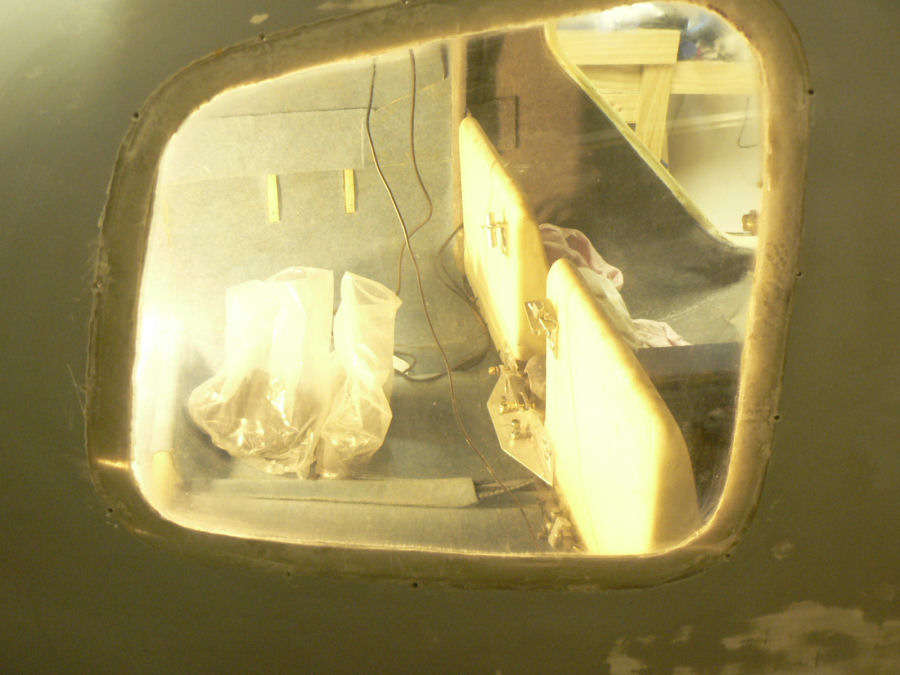
24-02-2008 Spent the last week on and off cleaning up the surrounds of the windscreen, door windows and back windows of the J160. The initial effort was not very effective. After some experimentation a cellular type cotteon singlet with Brasso proved effective in reducing scratches. But there were small pieces of flock and the protective plastic stuck around the edges of all the windows which required more drastic action. A way of removing them was to apply & use the brasso liberally then come back with an evenly sharpend pocket knife and run the blade vertically over a diamond sharpening stone to remove the last bit of the sharp edge so that it will act like a scraper and not a knife so that it will not dig into the windows so readily. So each time it encounters a lump it will tend to scrape it off level with the window/windscreen. Once all the highs are removed then polish with brasso or a less aggressive polish if the scratches are small. Once the brasso is finished then I plan to use Plexus or an equivalent to clean and polish the windows. This product was developed in the USA for maintenance of aircraft plastic windscreens and windows also cleans and fills the scratches with some kind of wax which appears to make the scratches dissapear. At the moment I am waiting on a delivery of Plexus pressure pack to finish off the windows and windscreen. Depending on how it goes I may have to do more polishing. [ATTACH]5065.vB[/ATTACH][ATTACH]5066.vB[/ATTACH][ATTACH]5067.vB[/ATTACH][ATTACH]5068.vB[/ATTACH] The four pics here all show views through either the windscreen or the back windows. The door windows are not shown in these pics. The windscreen turned out the best so far and the back windows the worst before the application of the Plexus or equivalent.
-
The straight skinny legs indicate a very early model like LSA55. Their tail are less high than an adult's height. J160's are much taller and have much thicker and curved UC and later J160 apparently have heavier UC again. Presumably you could get detail from RAAust if you quote the registration or Jabiru if you could get the serial number of the fuselage and the engine serial number and size. Regards