Lyndon
-
Posts
648 -
Joined
-
Last visited
Content Type
Profiles
Forums
Gallery
Downloads
Blogs
Events
Store
Aircraft
Resources
Tutorials
Articles
Classifieds
Movies
Books
Community Map
Quizzes
Videos Directory
Everything posted by Lyndon
-
All I can find is house stuff. Lyndon
-
So I'm guessing heat and unscrew it.
-
That is good news. Will have a crack at redoing then them. Lyndon
-
I have coolant elbows bolted with an o ring. But the design is these are sweated where it leaks. Lyndon
-
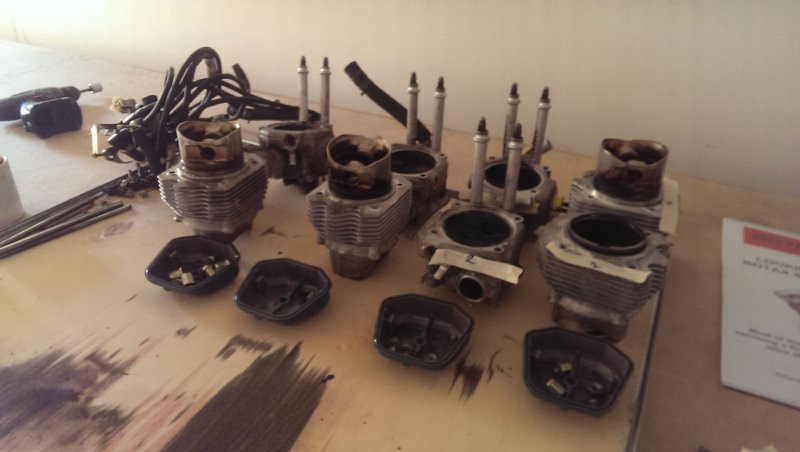
I have had time to clean and measure it. Been busy with a race engine that has ruined 4 k worth of titanium valves and the head as well at another 3 k. The joys of motor cyles Surprisingly the rings are well worn and the bore has zero wear. The bore fair enough but the rings were well shot before 1740 hrs. The guides are perfect so I'm thinking the shitty k and n filters did ok and dirt did not wear them. One thing I can't work out. Why sweat a fitting into a housing that runs a nice o ring. Only to leak where it's been sweated. Why not have an o ring and and collar. Cheaper and it actually seals. All my water outlets have leaked coolant. Yes I know glycol finds every weep but its unacceptable and such a easy fix. So I have something in mind. If it works I Will share it. Ps the bores wernt touched. My opinion is anything done to it will not be as good as leaving it. A good clean and she will be fine. Lyndon
-
On initial inspection they are all still honed nicely. At best I will give them a wipe with a scotch brite. Lyndon
-
100 hp engine
-
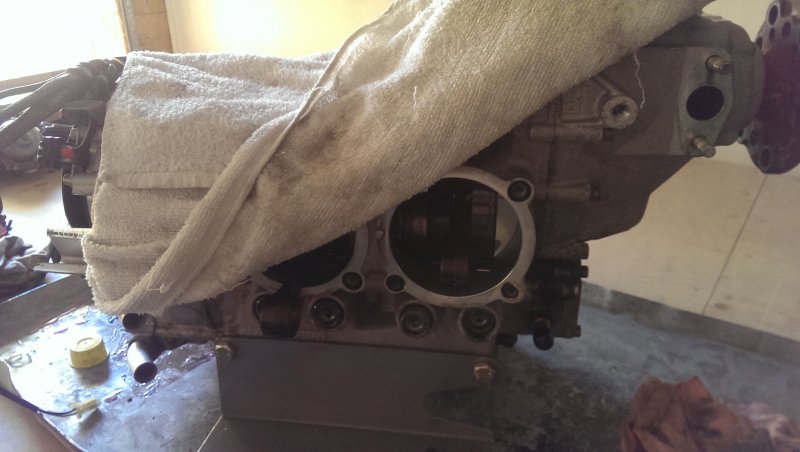
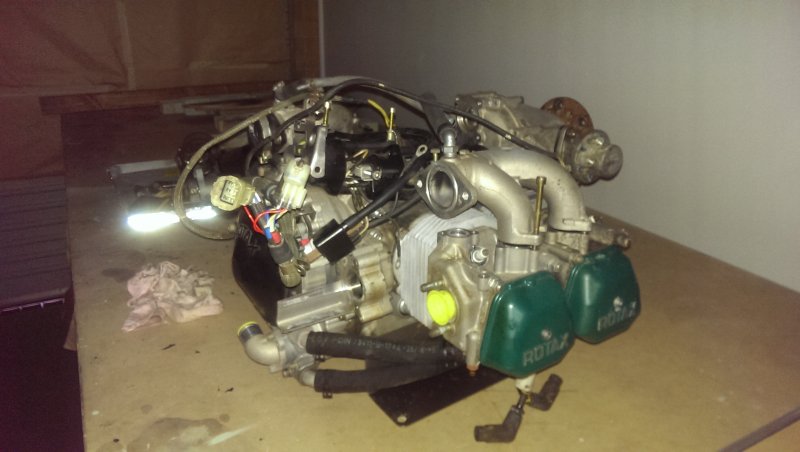
Taking a break from construction and doing what I really like. My thoughts on the Rotax 912 . First I wish the Japanese built one but anyway we will have to put up with Austrian engines for now. 2010 or 2011 not quite sure. 1740 hrs and it's mine. Pulled it apart and first impressions are it's made so simple and easy to work on. Not all orings seal perfectly which is normal for a European engine thus it's not as oil tight as is should be. Cooling system has quite a few leaks. Yep it's not Japanese. Inside the cooling system is perfect. Nil corrosion. Inside the engine is also very good. No sludge but at oil change intervals and how it's used I would expect better. The lifters are worn. I blame the oil for this. The oil rings are badly carboned up as is the heads and piston crowns. Bore pistons rockers valve seats guides etc show virtually no wear at all. The cam is fine upon initial inspection and will go around again. The front reduction unit is also perfect. Inlet valves are perfect and the exhaust have some marking but are now fine after a very light lap. Overall if this engine had better oil it would be only just run in at these hrs. The carbs also look perfect albeit very dirty etc. The oil pump is also like new. So lifters. Valve stem seals. Maybe a light home. Valves lapped. Some oil control rings new gaskets and seals and would be very disappointed if it didn't do those hrs again. Lyndon

-
100 hp. They have a tbo off 2000 hrs. Nothing to do with how long they last. Sorry I should have explained myself better. Cam looks good and lifters are worn. One would expect both the same. I was hoping to get some advice from someone who knows this engine. I have since found out that new lifters will be fine. Apparently they do fail but at early hours. At the hrs this engine has done it's just wear. Apart from the oil rings and lifters the rest of what I can see will easily do it again. Thanks Lyndon
-
It has had the correct oil. But I'm my opinion its not up to scratch. Porsche have a similar problem and it's the oil. What is good for the cat and emissions is not good for their valve train. Anyway when I say they are shot I mean the case hardening is just on the way out. Eg you would never put them back in. My concern is the cam looks good but lifters don't. Thanks Lyndon
-
Gday . This is just an initial observation. I've pulled a couple of lifters and they are shot. I've had a quick look at the cam through the crankcase and it looks fine. This is contrary to what I should see. Rotax 912 with 1800 hrs. I have no experience with these engines. I'm hoping to get another 1000 hrs out it. Will it respond well with just lifters ???. I'm just freshening up the top end with new orings. Everything is clean and the engine looks perfect. Thanks Lyndon
-
Makes perfect sense. Thanks Lyndon
-
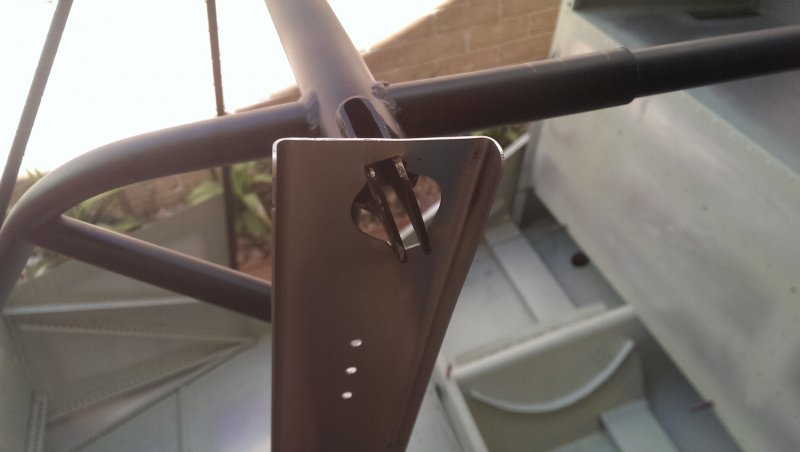
I'm using the factory template. Happy with the diagonal on top. But the legs look to long and are not parallel with the row of rivets. By the manual at this stage it looks only the top is riveted.
-
Or it seems this can't be wrong. ???
-
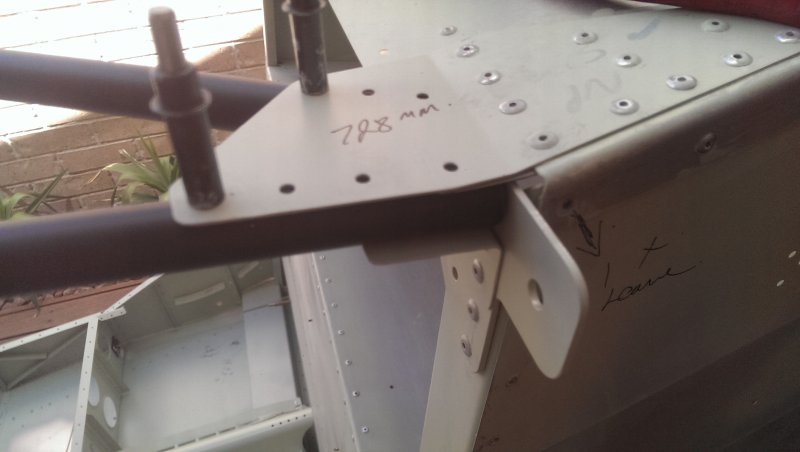
Wing distance ????. 728 plus or minus 1mm. Measure from where. The front mount has two lugs and guessing the wing locates in the center. Distance between the front and rear lug. Or center of both. I only want to drill these once. Yep I want the wing to fit first time. Advice ???? Thanks Lyndon
-
I'm just thinking the engineering staff who designed this are a lot smarter than me
-
So the plates are on the outside. Then I have a nice edge inside for the cowling makes sense
-
Well if it's designed to be inside then that's what it will be . Thanks Lyndon
-
Ok I sorted the plates. Now I will look into where the cowel should be .
-
I realize this but why would one not put it on the outside. It just makes common sense like roofing tiles
-
Would make sense to put it on the outside surely for air flow
-
I'm mounting the four plates that reinforces the cowling mounts. The manual is just mumbo jumbo. I use the black rivets but where and why. Then it says use soft rivets but does not make sense where or why. Lyndon
-
No worries. Makes sense. Main concern is its clecoed up and some holes that I'm not using yet do over lap a bit. It's one of the very few bits that once are are joined you really can't get it wrong. I'm presuming they just weren't stamped quite perfect. Lyndon
-
Is that aimed at me or Dennis
-
No worries. I will go ahead with this riveting. I would rather wait a day than drill em out . Thanks Lyndon