MajorTom
-
Posts
289 -
Joined
-
Last visited
-
Days Won
1
Content Type
Profiles
Forums
Gallery
Downloads
Blogs
Events
Store
Aircraft
Resources
Tutorials
Articles
Classifieds
Movies
Books
Community Map
Quizzes
Videos Directory
Everything posted by MajorTom
-
It is the loctite 577 I was supposed to use. The blue color comes from the blue pen I used to mark the exact spot for the drill. I'm not confident with the fuel line setup ether. Why not using good hose lines only. The steelpipes just double the number of joints. I could live with some experimenting around in places with easy access. But I dont wan't to open my wings ever again!!! Can you sent me a link to the sugested hose??? This is exactly what I want to do. Cut off the USB connector, when the arduino/digispark is programed, solder a mosfet and some red/green+white LEDs together. Don't want to waste space using a board. just soldering.... Then drown all into clear resin... finished.... At least, this is the plan. Problem with the 10W / 12V LED modules is, they might be to weak in "burst mode" on 12V (or generator 13,8V ?) The guy uses 4 lipo cells to run his experiment.... Therefor I ordered a bunch of single high power LEDs. The are 3W on 3,2V. Idea is to put 3 of them in line and two lines parallel. This gives 18W on 9,6 Volts.... Yes, they would burn out on 12V.... but they just have to life throu a burst pattern... lets say 3 times on/off for 70ms/70ms and a break 700ms .... If this is to much for them, you can adjust the pattern.... Hope this works... I ordered all stuff from banggood.com.... it is so cheap... void setup() { //Initialisierung der digitalen PINs pinMode(0, OUTPUT); //LED on Model B pinMode(1, OUTPUT); //LED on Model A or Pro } void loop() { digitalWrite(1, HIGH); delay(70); //wait 70ms digitalWrite(1, LOW); delay(100); digitalWrite(1, HIGH); delay(70); digitalWrite(1, LOW); delay(100); digitalWrite(1, HIGH); delay(70); digitalWrite(1, LOW); delay(700); }
-
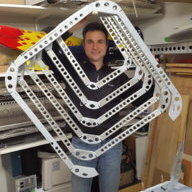
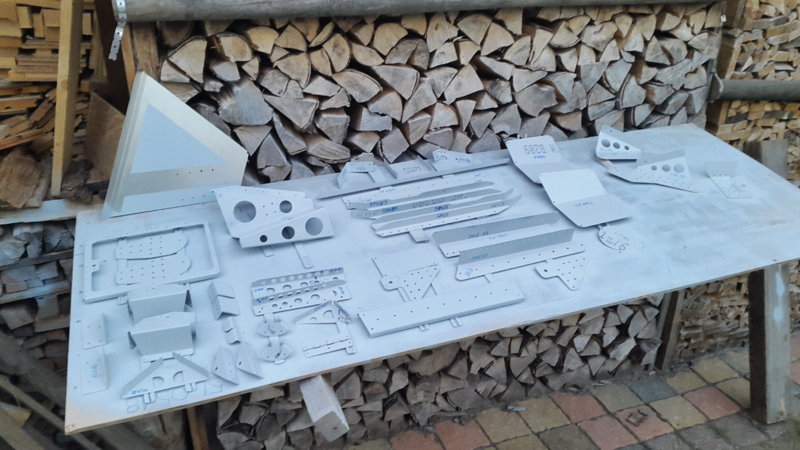
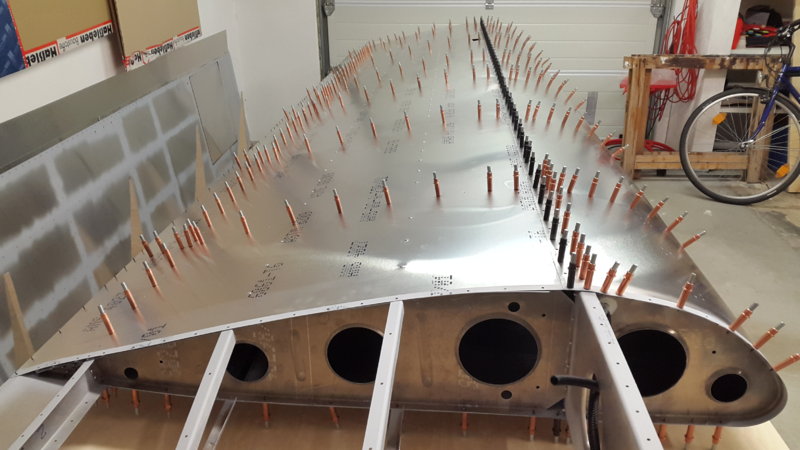
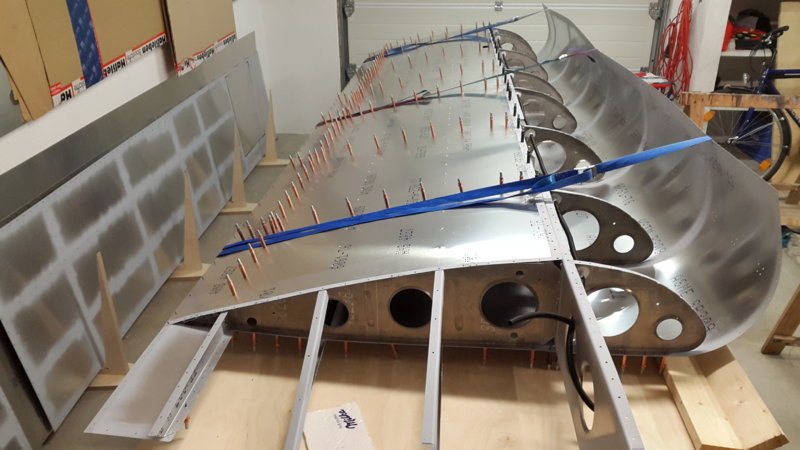
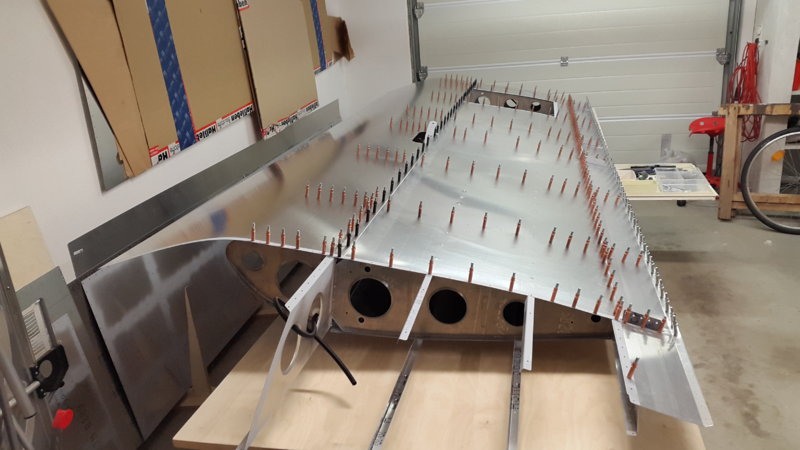
No building yesterday... just some cleaning up after I preped all skins and parts for the left wing. Today i just have to grab the stuff and cleco it together. It is just like in the zenair videos. In one hour the wing strukture rises from nothing to "wow, an real airplane part, this is so amazing".... What the don't show, is the 20 hours deburring, priming and stuff... But I'm not complaining... I like doing it. What I did yesterday... I tested my newly arrived digispark boards.... tried a simple strobe sequence. http://savannah-blog.de/uploads/strobe-vid-1.mp4
-
Sorry...don't get it... Well, thank you Bob. You are right. Best to put things that need more thinking aside and take my time desiding what to do.
-
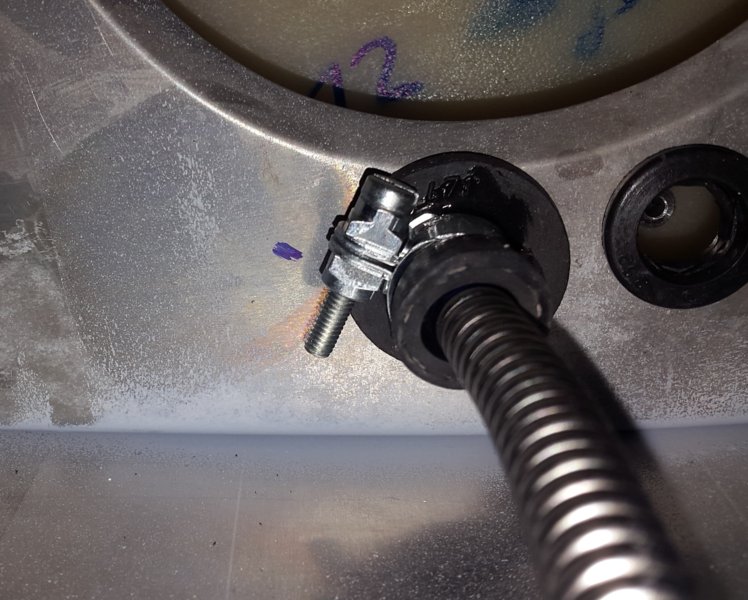
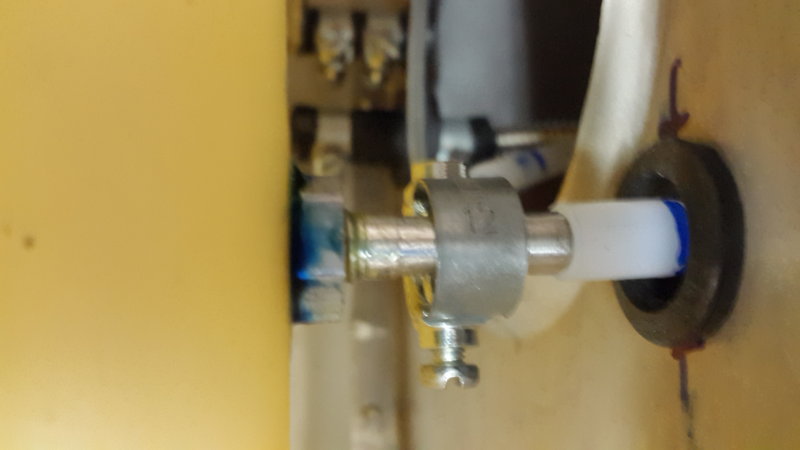
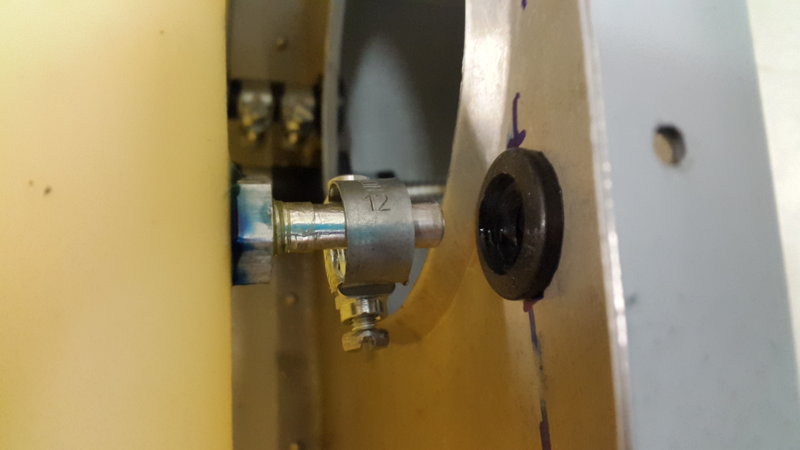
I stopped working on the fuel lines and put the wing on the wall. Did some prepping for chapter 14 instead. The hole topic is frustrating. I'm totally unexperienced and have no reference. So I should built it, like ICP tells in the manual. Problem is, I can't get myself to trust them. It just seem not right. I don't want to end up with leaking fuel lines in fully rivited and painted wings. I need to test the fuel system, whem installed in the wing. There seems to be no use to do it on the work bench. All the difficult couplings are done when putting the tank into the wing. If have seen a video once. They used latex gloves as indicator and did a pressure test. Pressure Testing Fuel Tank But therefor I need to get the fancy flushtype tank openings sealed... And... do you think this connection is o.k.??? The hose seems a little to wide for the tube?

-
No, they are done fine from factory. The video was just for explaning the procedure.
-
Thanks for the support Bob. I was realy frustrated yesterday. It was a wrestling match, if I would not "waste" so much time deburring, I would have cut some fingers off or my wrists open. Guess I will do as you sugguest. Use a longer hoose and clamps on both sides. Other problem comes with wing two. I just got 4 big grommets, which I used up already. Also just 4 small clamps, which I also used compleatly on my first wing...
-
No, it's more like a training camp for the international cursing contest !!! I just can't get a trustworthy connection on the smaller fittings. The big ones are realy o.k. .... But on the smaller ones you have to assemble 2 clamps in the small gap betwen tank and rib. I can't get the risilan tube deep enough into the rubber hoose. Also the space betwen fitting and rib is just 1 cm. To little space for the clamp, I think. I would rather have a longer hoose and clamps on both sides of the rib. I can't believe this is going to be leakfree. Lets say every fith connection is imperfect... and I counted 31 clamps...then I will end up with a leaking fuel system for sure. I can't do propper leak testing eather, because I don't know how to presurieze the system. Remember, I got the fancy flush tankclosings. Any tips on the small sight gauge connections? The rubber hoose in the pictures is missing for better view.
-
Have no time to make a video yet. Still busy cursing over this nasty wing tank installation. No seriously, I can't remember using such language for a long time. This bending stuff was not exactly my idea. I got inspiration from this EAA video Flanging Lightening Holes with the The tool itself is a quick make from some scrap metal maybe 2cm by 15cm by 1,5mm. Bent on both sides then cut to achive the desired bent distance. ( 4 mm and 8mm ) All edges are rounded and smooted carefully!!! In the middle goes a peace of ply wood, fastend by 2 bolts. You just put the tool betwen the skins and bent a little, them move forward half an inch forward an repeat. Its fast and easy, you won't see steps. If you think more is needed, make a second run. Richard seems to have a roler tool to do some edge bending on unassembled sheets. ...
-
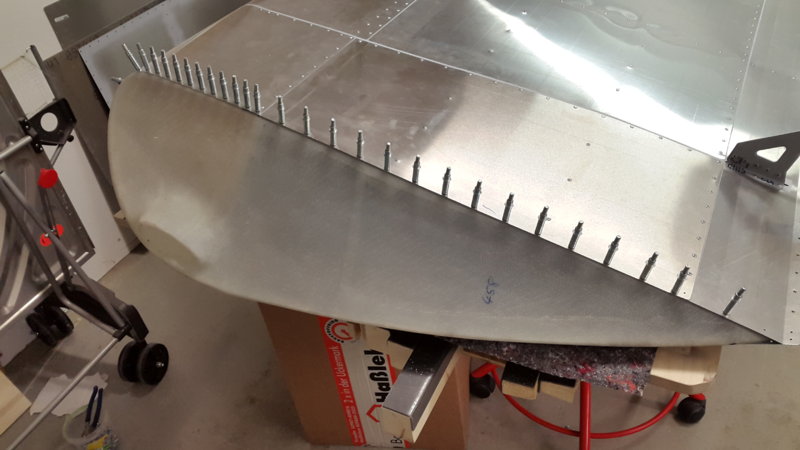
Best thing about buying two...If you by two, just in case you don't find the first, you will never have to look for even the first one ... ;-) I have already used all my 350 copper clecos, when assembling the wing skins. And I think you need minimum 50 silver clecos to get perfect trailing edges.
-
Yes, for sure. But sometimes it don't works for me. Maybe the wrong search words... or something
-
Still don't understand the tank / fuel system ... - should there not be a return line from the carbulator? - why are there return lines to both tanks? Can someone please help me with a link to usefull info about the hole topic?
-
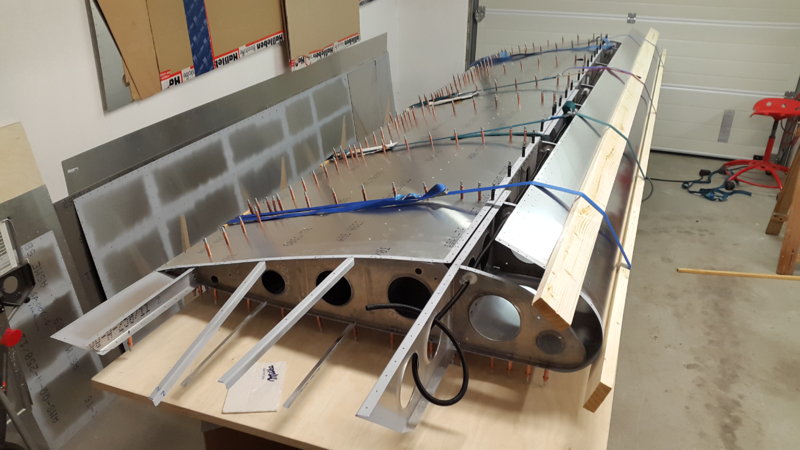
Sometimes skins don't lay flat against each other after riveting... I built this easy tool to bent the edge of the upper sheet a little. It works great and you don't even need to disassemble the skins compleatly.
-
Yes, I know. And I tried to find his post about it, to get even more input. But, I have always problems finding what I look for in his posts. Yours a so much easier to find and understand for me. ;-)
-
Or I could shorten the lower skin about 1 or 2 mm.... Or I could give the edge of the skin a little bent up towards the wing tip... make it smooth Or leave it like it is and be happy with it...
-
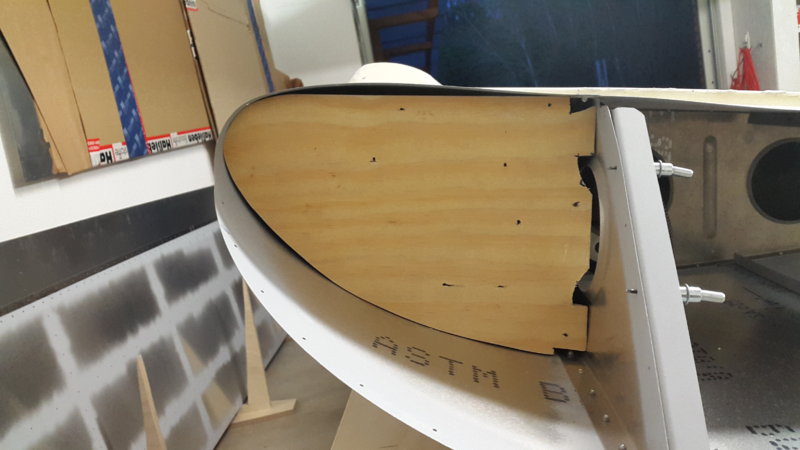
yesterday was wing tip wressling time.... followed Bobs tipps and used a wooden nose rib could not have done it without help, it was very difficult bring and hold the tip in place the result lookes nice and straight, but the wingtip slipped a little too much inside the lower skin, esp. from the main spar backwards, see last pic Don't know, if I schould close the drillholes and do it again from beginning???
-
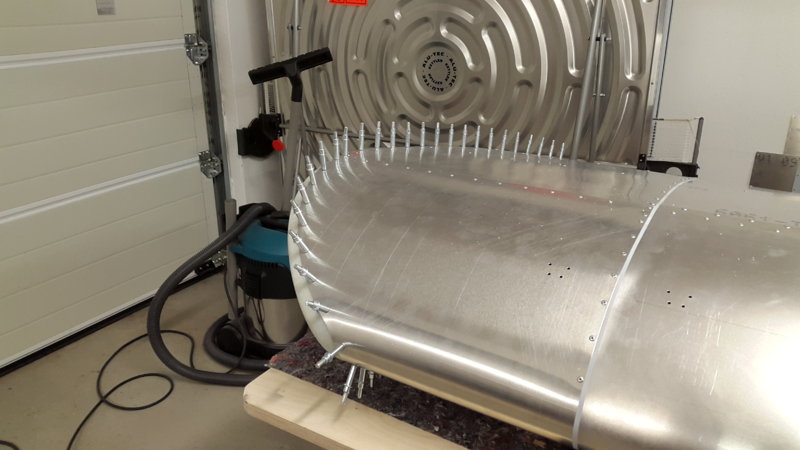
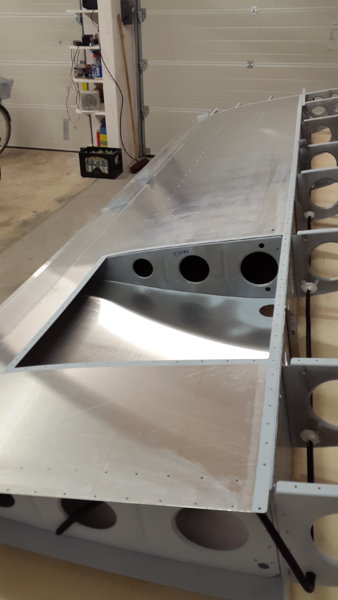
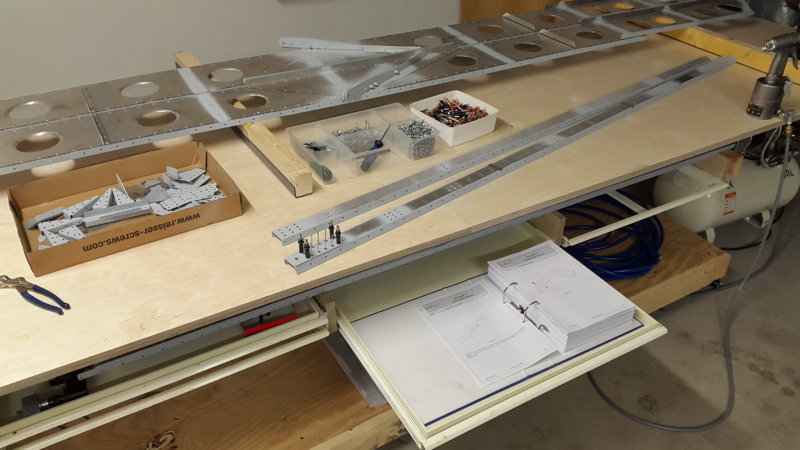
Alfter some day ICP said. I should use a alloy spacer under the skin, where the gap in the spar is. Guess I will do so. Yesterday it was time to try my first wing closure. I did hesitate a little, read and reread some threads. Most helpfull as allways was IBob for me. He might no be the inventor of all the stuff, but his summeries give me just the information I need in a way and completity thas is best for me. Thanks... Savannah S Build Notes - Wing Nose Skin and Closure Then I realized I schould put some thought into the tanksystem better now than later. But I have no knowlage whatsoever.... The ICP manual was no big help. The pictures show the instalation while the bottom skin is not present... there where many "ifs" and "whens" so I ended up confused... Then I rememberd IBob and read his summary: Savannah S Build Notes - Fuel Tanks This and some other threads about spillage, fumes and .... brought even more confusion, but also the fact, that I can safely close my wingskins and leave the tanks for a little later. I just want a simple simple and reliable system with 2 tanks. Any help (maybe a link or two) is wellcome!!! The wing itself was, thanks to the two woods and straps trick, not very difficult so far. I put all my clecos in....
-
For strobe this looks like a good aproach.... take an arduino, or smaller version an som LED... the 12V LED's in this video might be not bright enough as strobes on 12V. They are built vor 12V continuos light. Used for 3 small bursts every second, the voltage needs to be higher, I think. That can be fixed, by using some 3V LED's in line. All the electronic could go into a strobe shaped mould filled with clear, uv-resistent epoxi resin. What do you think??? small and bright landing lights could be made from something like this..... 10W 900LM White/Warm White High Bright LED Light Lamp Chip DC 9-12V .... some alloy on the backside... a cover on the front side... and put on the noseleg
-
I will absolutly not install that 90's style landing lights!!! The are so huge and produce little light but lot drag. 1 or 2 small 20W LED Modules should be more than enough. Alloy is a good heat transporter so no heatsink is needed. Maybe just a water proof cover or they go into an epoxi resin bath. Good position might be the front landing gear.
-
Thank you Rick, just the answer I was looking for.
-
No Kyle, ICP is not often responding to emails. I was told to rather give them a call, but this is of no use. I'm no nativ english speaker and they are not ether. The mixture of both accents is just to much for a technical conversation over the phone.
-
Thanks both of you. It is reely more than 1mm, I would not complain about 1mm. But a 2 mm step in a flying surface seems much to me. Sure, the podger ( sounds like flogger ) is my best friend... This tool was the best advice for my built. What would I do without!!! This schould be written in the ICP handbook in bold letters. This "slipped during bend" think could be checked by measuring the distance between the hole lines on the sheets and/or compare whit the right wing spar.... I will do so.
-
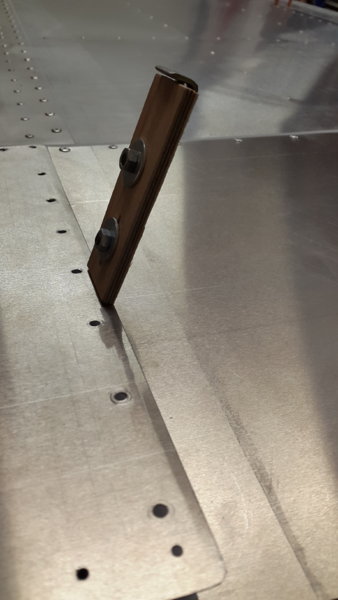
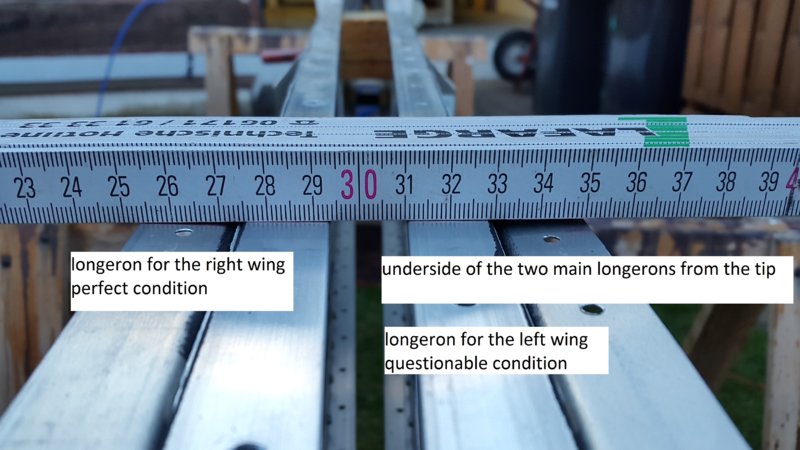
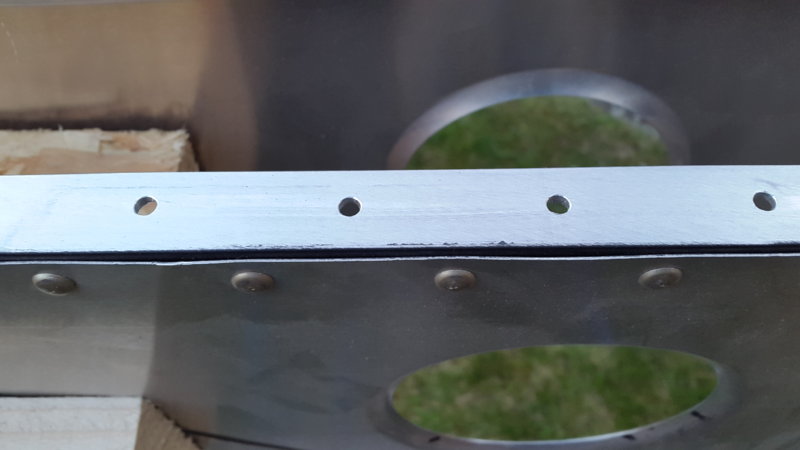
Kyle, when you look at the picture, you see a gap on the right side. The picture shows the two longerons from the underside, viewed from the tip. The folding rule is where the longeron changes from the strong, inner part to the lighter, outer part. The left longeron in the picture is for the right wing and perfect. The right is not. I can't imagin what happens, when I try to put the skins on this section.
-
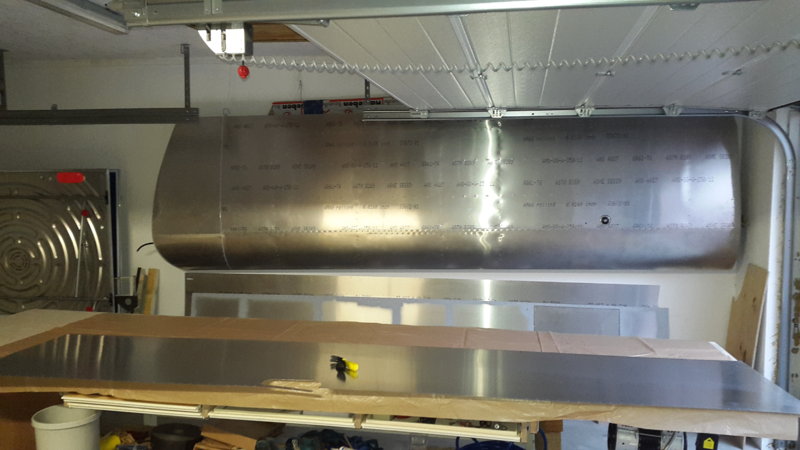
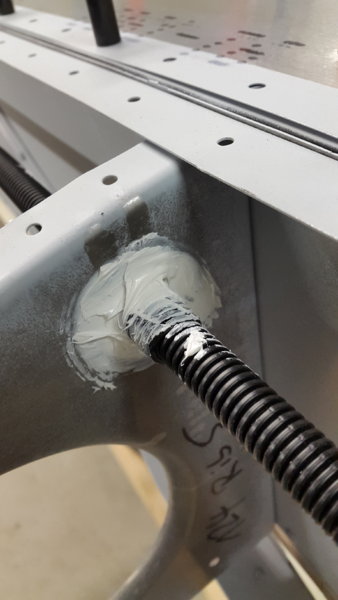
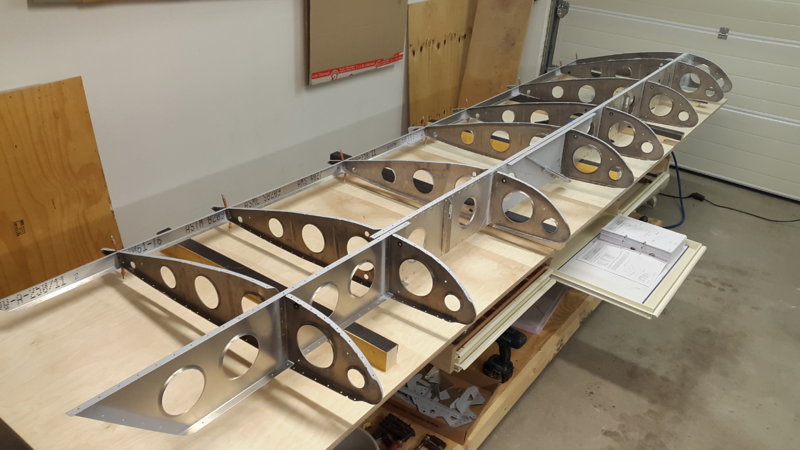
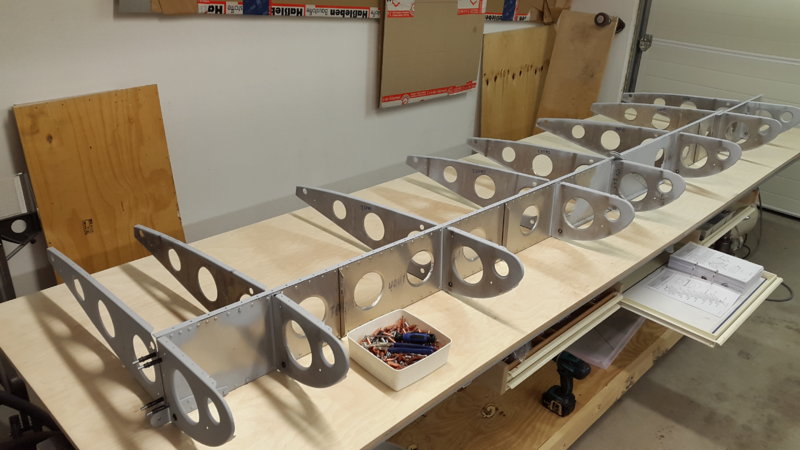
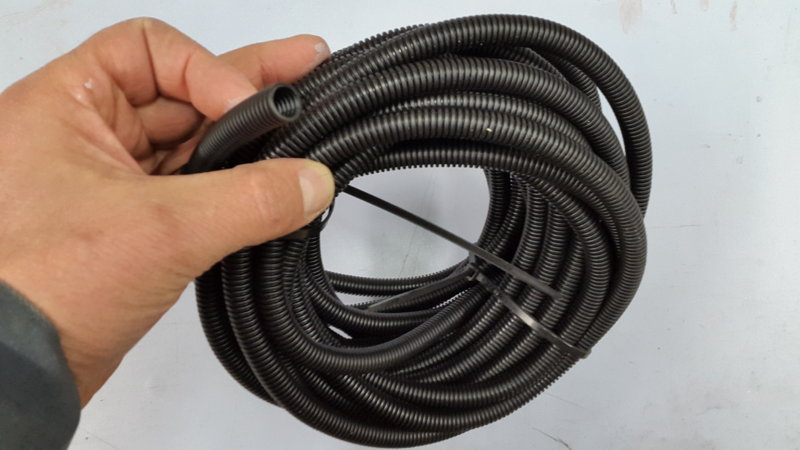
Still no solution to my gap on longeron problem.... and no answer from ICP BUT I had a wonderfull evening assembling my right wing structure ... ;-) What a joy to see it grow on the work bench. 10 hours prepearing and 10 minutes clecoing it together Also bought some 8,5mm automobil grade "cable tube" (sorry don't now the right word) to put the strobe cable in. Hope this stuff is good enough. But then, if it works for many years in a car you use dayly in wind and sun and rain, it schould be enough for a recreational plane. Right???
-
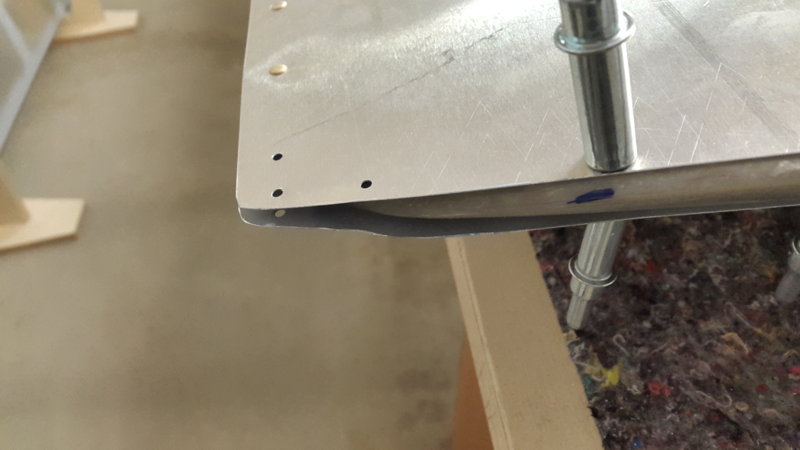
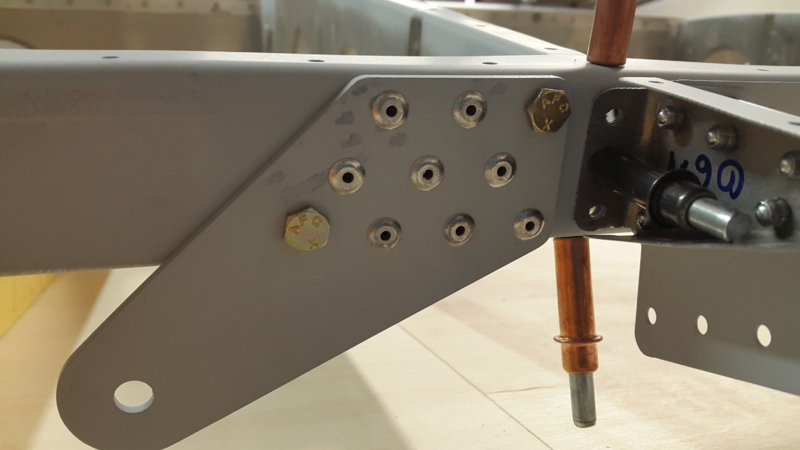
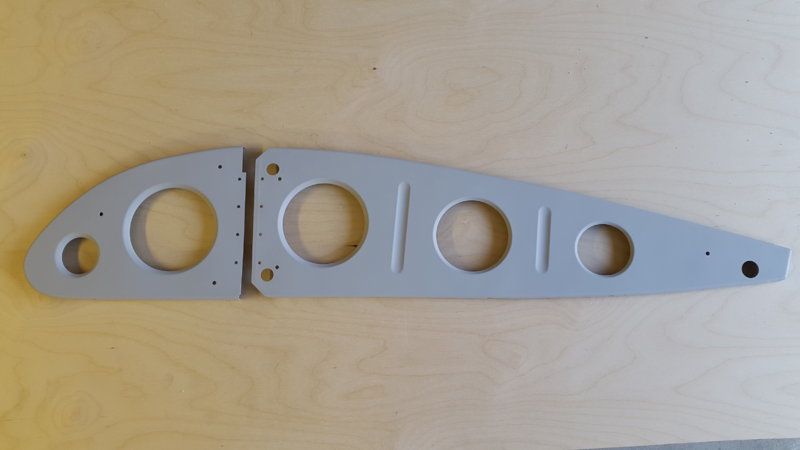
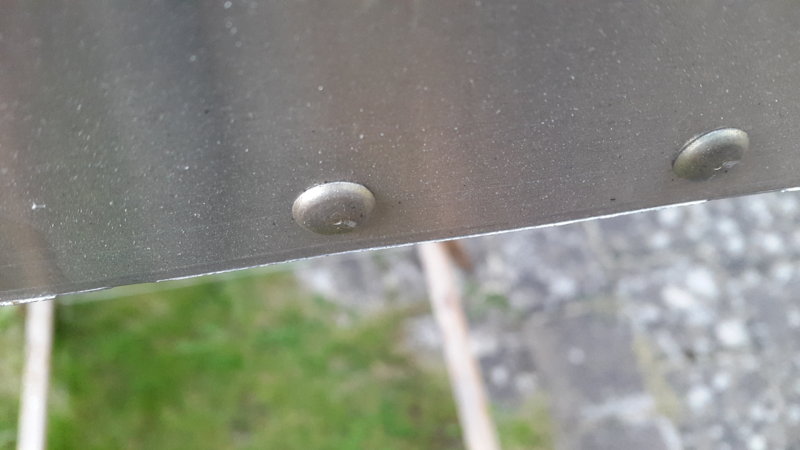
Yes, you are right. But it took me weeks to get that little hour of help and company. Yes, but just for us kit builders. ICP don't seem to waste any time with deburing and prepping at all. At least I could not find any signs of deburring on my main spars. I have not heared of of any fabric build Savannah crashing, due to careless assembly. So perhaps we are realy wasting our time, putting so much effort in deburing and stuff..... One other thing that realy confuses me is one spars last part before the wingtip. When the massiv spar changes, there is a 3 mm jump in height. First thought was, that is needed for some reason. But then I looked at the other spar.... this one is without that "mistake". I put a photo below. Can someone of the experienced builder give my advise please?
-
This was not fully my intention. I was doing chapter 13 because it is interesting work that can be done in my warm cellar and small parts to store. Then I was doing prep work for chapter 14, because I was looking for missing parts. Then I finaly managed to get my family to help and we ended up deburring holes and stuff for chapter 16, while sitting around a table chatting. After counting it is clear now, that 50% of the time is spend for preparing parts from deburing to priming.