wokbat1954 Posted August 16, 2009 Posted August 16, 2009 OK guys, the Strike is a work in progress. if you wish to follow the build, we have a blog at www.bx2.com.au. It will be slow to start but anyone wanting to build this taildragger Sierra may find something of interest. Happy flying 1
Chris Willars Posted August 27, 2009 Posted August 27, 2009 I'll be watching, a tailing wheel Cheetah Sierra is on my list. Good luck with the build guys:thumb_up:
batesey Posted August 27, 2009 Posted August 27, 2009 Thanks Chris, I have many, many more posts to put on the blog. It takes a bit of time to write about the building. We have just installed the dual controls and the floor is next...apart from the outer skins, the base fuse it pretty much complete. We'll be starting the tailplane on the weekend. Stay tuned, more will be up shortly. Cheers Toby
Chris Willars Posted August 27, 2009 Posted August 27, 2009 Need to rename you speedy, you must be trying to rival Slarti and Biggles for constructing a cheetah in the shortest possible time.
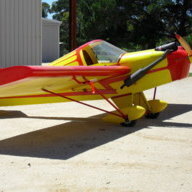
batesey Posted August 27, 2009 Posted August 27, 2009 LOL, no not speedy, it's just a testament to Garry's kit. It's as quick to building as it will be to fly. You got to remember though, 9 times out of 10 there are 2 of us working on the plane, cuts the walking around the bench time in half. We usually work about 3 nights a week for a few hours and all day Saturday. The nights that we aren’t working on it we are studying the plans, watching the video & reading the manual. When we get together we generally have pretty good idea of what we want to get done for the following night. To be honest, we have probably spent WAY too much time thinking about how to attack certain things in the construction and laboured far too much on little things that will never be seen, but we are pretty proud of how she's looking so far...we aren't rushing it and although I am biased, the workmanship really shows. Here are a couple of sneak peeks: [ATTACH]8606.vB[/ATTACH] [ATTACH]8607.vB[/ATTACH] Cheers, Toby P.S. The floor and Rudder pedals went in tonight...LOL
Chris Willars Posted August 27, 2009 Posted August 27, 2009 Sitting in it, making plane noises, cooooool !!!!!!!! :lost:Nice work..
slartibartfast Posted August 28, 2009 Posted August 28, 2009 Looking great. Can't wait to see another birth in the family. Just curious, have you made the rudder bigger for tail-dragging configuration? I've never run out of rudder, and I feel there's plenty, but a few people have looked at it and said "is that big enough?". Given that Middo's mishap was mainly due to not enough rudder on a tail-dragger Jabiru, I was wondering what you were doing. Keep up the good work. It's going to be a lot of aeroplane. Ross
batesey Posted August 28, 2009 Posted August 28, 2009 Hey Ross, Thanks for the compliments. As for the fin post, it actually has to be trimmed 1" in the top as marked by Garry. I think what you are seeing is our fin sits at a 12 degree raked back angle. The original (I think yours as well) only has a 7 degree angle making the fin look more vertical. It was a consideration form the start that we wanted the sleeker looking Fin/Rudder combo and Garry made our kit with the greater swept back fin in mind. We are adding a nice fiberglass tip to the top; adding another 3 inches. Also, we'll probably make our rudder slightly narrower at the top and add the area to the bottom thus giving it a different look. The real illusion that will make our Fin/Rudder look HUGE (just the way I like it) is our rear deck can come down really close to the top longerons and really tighten up the tail end. Because we have the dual controls installed, our elevator control horn hangs upside down so we don't need the room up top. Speaking of a lot of aeroplane, before taking the photo above of me sitting in it, we mocked up the cowel on the firewall just to see how she would look. Let me tell ya, this thing is MASSIVE in the front end...there is definately a WHOLE LOT of plane in front of you. I can't wait to put her shoes on and see how she looks all three point like...I think this plane is going to have one mean stance, kind of like the way my Doberman looks when he's alert. Cheers Toby
Vision325 Posted August 28, 2009 Posted August 28, 2009 Sierra building Great work Toby, Thanks for posting updates. Its good to see you making such fast progress. This is the aircraft I hope to build in the future. I have looked at the DVDs from Gary and am impressed with the simple and practical solutions he uses in his kit making philosophy. I have looked over every bit of info and photo I can find on the net and your blog, keep up the good work. Gary dosn't update his web page much so the interested potential builders rely on guys like you and Slarti for the latest info.(Thanks again:clap:) One question I have about the fuselage frame material. The Cheetah that Slati built looked to be made from round tubing but your sierra is square tube. Do you know the reason for this and what material the tube is? Also do you know of any builders in SE Qld, Im on the Sunshine Coast. I am keen to get a look at a Cheetah/Sierra first hand. Happy building Steve
slartibartfast Posted August 28, 2009 Posted August 28, 2009 One question I have about the fuselage frame material. The Cheetah that Slati built looked to be made from round tubing but your sierra is square tube. Do you know the reason for this and what material the tube is? The Cheetah is half fabric (usually) and 4 cylinder powered. The Sierra is designed as all-metal and for the 6 cylinder Jab ,and has a much higher VNE. It is beefed up accordingly. The box section tubing is stronger than the round tube in mine. I can't remember the specs, but they're both aluminium.
batesey Posted August 28, 2009 Posted August 28, 2009 Hey Vision, Slarti has hit the nail right on the head. The Sierra has a 3mm Box section tube instead of the round because the Sierra is all metal covered. The main reason I believe was to make for a nicer look to the fabric as it wrapped around the curves in the tube. Also, due to vibration over time it was thought that square tube would eventually cut through the fabric. As Slarti pointed out, the Cheetah can only accommodate the 4 cyl Jab whereas the Cheetah Sierra can have a variety of power plants up to 125hp. You can of course fit the 4 cyl to the Sierra if you don't wish to burn as much fuel, and there are a couple of Sierras out there that have gone with this option. The whole airframe is Aluminium apart from a very few select parts that are steel and fibreglass. I'm glad you are enjoying the blog, one of the reasons I started it was because apart from being a bit of a geek, I knew when I was looking for info on that one aircraft, there was NEVER enough...I just wanted more and more. Cheers, Toby
Yenn Posted August 30, 2009 Posted August 30, 2009 G'day Toby. I am jealous and have been watching progress on your blog. I hadn't realised that the Cheetah used round tube. I noticed that you have cut the ends of the diagonal bracing for the fuse square. I am probably wrong but I would have thought that they ought to be cut to fit snugly in between the verticals and longerons. Does Gary give detailed drawings? Concerning the rudder, there is a big advantage to having the fin vertical or even forward leaning as per Mooney. There is less blanketing of the rudder by the elevator and therefore easier spin recovery. The normal rule of thumb is that the elevator blankets anything 60 deg above the leading edge of it. Look at some of the old aerobatic trainers and you will see the rudder well ahead of the horizontal stab. Hopefully I will be able to join the ranks of builders in the not too far distant future.
batesey Posted August 30, 2009 Posted August 30, 2009 I noticed that you have cut the ends of the diagonal bracing for the fuse square. I am probably wrong but I would have thought that they ought to be cut to fit snugly in between the verticals and longerons. Does Gary give detailed drawings? Hey Yenn, No, your not wrong, I know what you are saying too. I actually addressed the same question with Garry when I had all of those months to study the plans before the kit arrived. The diagonal tubes do fit snuggly up against the verticals and the logerons, they just haven't got that wedge shape cut in the end of them to match up in the corners. From what I was told it just adds a little unnecessary weight where it is not needed. At most those triangular gaps are only about 1/2". It really would make no sense to put that extra metal in there and it does nothing to improve the strength, the gussets and rivets are what take the loads and with the spacing of the rivets, you wouldn't put one that close to the corner of a join anyway. I think the main thing that Garry pointed out to me concerning this is it simply doubles the time of constructing this part of the aircraft, for no valuable returns. Remember also, the Sierra has a full Metal skin on the outside which acts as one GIGANTIC gusset. I just put a post on my blog and one of the lines is as follows: "It’s amazing, with every cross member, rivet and bolt that you put in, you can just feel this airframe getting stronger and stronger and stronger." The drawings that are supplied with the kit are satisfactory, there are improvements that could be made, but let’s just say, I have made it pretty far into the construction without having to make too many calls to Garry. Garry also knows the weaknesses of his manual/plans and listens to his builders. Hope this answers your question and thanks for looking at the blog...it's good to know a couple of people out there are enjoying it. Cheers, Toby
Chris Willars Posted August 30, 2009 Posted August 30, 2009 Still looking and enjoying the blog Toby. Just out of interest, what are you using to cut your fusalage tubes with, a bandsaw or a chop saw? Nice looking fuz though:thumb_up: Chris
batesey Posted August 30, 2009 Posted August 30, 2009 Hey Chris, Just using a hack saw mostly...there have been times when we have used a JigSaw with Alu blades. There really hasn't been that much that's needed to be cut on the tubes. Everyting is however finished up on the linisher; then a fine file is used on the ends to ensure that no marks that could generate cracks are left. Cheers, Toby
Louie Posted August 31, 2009 Posted August 31, 2009 G'day Toby As an interested potential Sierra builder have been enjoying your blog and wanted to say congratulations on the standard and detail that you have provided in documenting the build process. Out of interest I would appreciate your suggestion on the suitable dimensions for a workbench to suit the Sierra build. Also a question (maybe basic) I have regarding your blog is I notice you smoothing the gussets on a 'finisher'. From the photos looks like an upright type of belt sander. Is this an essential item that you would recommend having to make the job easier? Keep up the good work. Cheers Rob
Chris Willars Posted August 31, 2009 Posted August 31, 2009 Thanks Toby, Very good hacksawing from what I can see. lol. Kind regards, Chris
batesey Posted August 31, 2009 Posted August 31, 2009 LOL...thanks Chris, it's the linishing and filing that makes it all pretty. That and the fact that my old man teaches me little tricks here and there to make life a bit easier...It's hard to believe but I took the art of HACKsawing a little to literally; that was until Dad showed me a better way of doing it. But like I said, the finished product is all thanks to sanding and filing. A little time consuming, but like you said, the results are worth it. Hey Louie, The bench...well ours is 5 meters long by 1.1 meters wide and .8meters off the gound. We also made shelves underneath and there was ample room to store the bits we were not using yet. I think that I mentioned on the blog that the bench is JUST wide enough. Remember, if you get Gary to mod your kit and make your plane wider, you'll need a wider bench. I'll be putting info on the blog about the workshop and tooling soon. As a matter of interest, the length of my workshop is just long enough to house the plane once the cowl is on...but I cant have the Prop or spinner attached...LOL. As for the 'Finisher', well I guess you could call it that, but it is actually a Linisher...a Vertical Belt Sander. The one I have is a Triton 2-in-1 Disc and Belt Sander. The belt part is pretty cool, it can stand up as seen on the blog, or lay flat. I wouldn't say that any tool is really essential, but saying that, having the right tool does certainly help and this belt sander is something that I knew I wanted. Before the kit arrived I thought of every tool I thought I would need and went on a mad tool buying bender...Come to think of it, I bought more tools than I really ever needed or thought I would use; but I have been surprised by how much I have used EVERYTHING I purchased. Cheers guys and thanks for watching the blog. Toby
Guest Gomer Posted August 31, 2009 Posted August 31, 2009 Cheers guys and thanks for watching the blog. Toby Watching? Can't take my eyes off it... :thumb_up:
batesey Posted August 31, 2009 Posted August 31, 2009 Nice one Gomer, gald you're enjoying it. There will be heaps more posted over the next couple of day so stay tuned.
Guest Gomer Posted August 31, 2009 Posted August 31, 2009 Tell me, what's your feelings about the stresses in the frame? When you bent the second longeron to match the first, I think you said that you had to hold it in place while you fixed the struts, etc. Do you think that will put a twisting stress on the frame that may start to show up later? Likewise, the pulling in of the tail, although that of course doesn't create a twisting stress. I wonder if there's a way to treat the frame after it is complete to relieve the stresses without weakening the material?
Guest Qwerty Posted September 1, 2009 Posted September 1, 2009 Comment here re hacksaw FYI. For aluminium cutting I use an ordinary joiners (for wood) drop saw. I have a tungsten tipped blade just so it stays sharp. The tungsten blade is not neccessary. Cheers, Qwerty
batesey Posted September 1, 2009 Posted September 1, 2009 Hey Gomer, All valid questions, I had the same thoughts when I bent the longeron into position. Tell me, what's your feelings about the stresses in the frame? When you bent the second longeron to match the first, I think you said that you had to hold it in place while you fixed the struts, etc. Do you think that will put a twisting stress on the frame that may start to show up later? The short answer is no...Not one twist in the longerons or the rest of the fuse what so ever. I probably could have just left it the way it was and just made sure the tail and firewall were the same height, but I am a stickler for perfection (just ask Dad) and actually bending that longeron to my liking is what took up most of the build time that day. Once complete, you wouldn't have been able to tell if they were different, but it would have just bugged me had I not done what I did. I can assure you that our airframe has not one twist in it and is perfectly square. Likewise, the pulling in of the tail, although that of course doesn't create a twisting stress. I wonder if there's a way to treat the frame after it is complete to relieve the stresses without weakening the material? The stresses from bringing the tail and firewall together are immediately relieved by the gussets that hold them all together. There is no need to try and prebend or post treat anything, you would probably only weaken the structure. I think Garry told me that each of the Longerons was rated to about 32g or something like that, so PLENTY of strength there. Once all of the Formers, Verticals and Diagonal tubes are fixed in position and riveted in you can just feel the strength...and I haven't even skinned the outside yet! This is one tough and RIGID airframe. Hope that answers your questions. Cheers Toby
batesey Posted September 1, 2009 Posted September 1, 2009 Qwerty, Thanks for the input. I have a range of saws at home for cutting various materials but immediately went for the Hack saw with diomond blade for one reason only. My Compound Drop saw is large and we simply ran out of bench space to be able to utilise it. Lucky there wasn't that much that needed cutting...LOL.
Guest Qwerty Posted September 1, 2009 Posted September 1, 2009 Sounds to me like you need a bigger shed....shall we say 15m x 20m ????
Recommended Posts
Create an account or sign in to comment
You need to be a member in order to leave a comment
Create an account
Sign up for a new account in our community. It's easy!
Register a new accountSign in
Already have an account? Sign in here.
Sign In Now