Head in the clouds
-
Posts
1,842 -
Joined
-
Last visited
-
Days Won
42
Content Type
Profiles
Forums
Gallery
Downloads
Blogs
Events
Store
Aircraft
Resources
Tutorials
Articles
Classifieds
Movies
Books
Community Map
Quizzes
Videos Directory
Everything posted by Head in the clouds
-
It's hard to tell much from the limited info and photo. What brand are the brakes? Are they floating caliper type or floating disc type? If they're the first type then the caliper should float sideways on pins or on the axle to compensate for uneven wear between the inner and outer pad. If they're the latter type then the caliper remains fixed and the rotor (disc) floats sideways on the pins. Either way they can be fitted (or designed) wrongly - here's a link to a post I wrote on HBA about the incorrect design and fitting of the otherwise excellent Black Max brakes - Black Max Brakes
-
6061 angle supplier in aus
Head in the clouds replied to nblight's topic in Aircraft Building and Design Discussion
Very hard, if not impossible to source. However, at thicknesses of 1/8" and below you can fold it in a brake press from sheet material - and it'll cost about 20% of the price of extruded/drawn. For the longer lengths you need to find a reasonably precision sheet metal shop with a 12ft brake press but there should be plenty of those in Adelaide I would think. The important issue is to avoid making the bend too small a radius and a good way to do that is to get the fellas in the shop to bend a strip of 1.2 or 1.6mm steel sheet double and leave it 'clipped' over the blade of the press, effectively increasing the radius of the nose of the blade. Apart from the large cost reduction, a further advantage of folding your own angle is that you don't have to fold it to 90°, you can fold it to angles greater or less than 90°. That can be a great benefit if the angles are for wing spar caps because you can bend them to an angle which aligns with the wing skin. EDIT - based on $450 per 12ftx4ft sheet of 0.125 6061T6 from AMA, including freight and shop work the 12ft strips of formed 1x1.5x0.125 angle should cost about $40 each. AMA are still listing 1x1.5x 0.125 at $15/ft, so a 12ft length would be $180 plus freight. -
The XPB Stage 1 underway.
Head in the clouds replied to bexrbetter's topic in Aircraft Building and Design Discussion
Control horn? -
My crazy STOL idea ...
Head in the clouds replied to bexrbetter's topic in Aircraft Building and Design Discussion
Good luck, but it's not a new idea. Carter Copter have been onto the hybrid plane/copter for more than fifteen years having spent several millions so far, and still haven't reached market yet. And theirs incorporates vertical take-off and landing without having a powered rotor, instead having a massive amount of stored energy in the rotor due to using depleted uranium weights in the rotor tips. Consequently the centrifugal loads on the blades and hub are immense, years ago someone quoted something like 300 tonnes a side ... -
Get a load of this landing in a Britten-Norman BN-2B
Head in the clouds replied to red750's topic in Aviation Videos
The low approach angle seems a bit nuts to me, Islanders are draggy as hell in landing configuration so can make very steep approaches to good benefit in that type of terrain. Apart from which the pilot had no view of the strip prior to the threshold so couldn't have been able to make his own inspection of it to be sure it was clear ... -
Company owned Aircraft flights
Head in the clouds replied to MartyG's topic in AUS/NZ General Discussion
My early Private and Commercial Ops might help to clarify some of the vagaries of the difference between the two - Once I'd completed my CPL I found I wasn't very good at 'the line pilot thing' so I formed a Company, wrote up a company Operations Manual for General Charter and Mustering operations, applied for and secured an Air Operator's Certificate/Air Service Licence, nominated myself as Chief Pilot and was duly interviewed and then appointed as such by the Regional Director of CASA. All of that then allowed me to conduct Charter and Mustering operations independently, and also hire pilots and lease aircraft as required. Naturally I was then required to maintain mountains of paperwork and be subjected to annual audits and 'surprise visits' as the CASA whim dictated. To be fair CASA were usually extremely courteous and mindful of the pressures of the commercial operation in remote areas (as mine was), and they generally gave reasonable notice and were helpful with providing information and assistance when asked. One of my early experiences was in the southern Kimberley. I'd leased a Robinson R22 and also secured a job employed as a station pilot in the southern Kimberley. The station had its own Robinson R22 and also a Piper SuperCub. I was employed to fly both of them as needed and when I wasn't required I could use my own helicopter in my own mustering business, offering services to other stations. This is where the difference between Private and Commercial Ops comes into play. On this and other forums people have often referred to the Regs where they state that 'mustering is a commercial operation' but that's rather misleading because it must be taken in context with other Regs (and Orders) which come into play when the operation itself is not necessarily a commercial one. It is all very confusing at first and since I had a good relationship with CASA I frequently asked them for determinations of the Regs, mainly because I had two very large competitors watching my every move and the last thing I needed was to provide them with an opportunity to report a misdemeanour. As it happened they did report a number of things but I had always ensured I was in the clear beforehand. So - when I flew on that station using their aircraft for their business it was ALL private operations. It didn't matter whether I was delivering tools and parts to the bores, running the boss or head stockman into town, checking fences, mustering, or dropping smoko to the lads and lasses in the yards. And - I didn't need to have a CPL for any of it, it could all have been done by someone with a PPL. What I did need was the following - Low Level endorse, Mustering endorse, Tailwheel endorse, R22 Type endorse (you need to have an endorsement for each Type of helicopter you fly, not just <5700kg as for fixed wing). Note that I used to muster in the SuperCub as well as in the R22 and I have a CPL for helicopters but only a PPL for fixed wing, I checked all this with CASA to be sure it was within the rules. Sometimes I'd be mustering on neighbouring stations with my own R22 and that would all be commercial ops under my AOC. Also, if I was busy on the home station I'd hire a CPL(H) pilot to use my helicopter mustering on the other stations. That would also be a commercial operation of course, with me as CP and them conducting the actual flying. We'd also do joyflights out of Broome's Cable Beach during the Shinju (Festival of the Pearl), and general Charter work, helifishing, film work and photographic excursions - all commercial ops. Interestingly - occasionally the station helicopter would be down for maintenance and usually I'd fly it to the engineer's facility in Derby but sometimes they'd come to the station instead. That would mean there'd be a couple of days or so when, if they urgently needed to, the station would employ my helicopter as a commercial operation to fill in. However, later CASA pointed out that wasn't necessary. In fact the station could cross-hire (rent) my helicopter from me and have me fly it as part of my station pilot duties, that way it would be a Private operation - there was less paperwork and insurance benefits to doing it that way. That means that if they wish to, someone can quite legitimately own an aircraft, lease, or rent, or cross-hire it to an organisation, and then be employed by that organisation as a pilot to fly it as a Private operation as long as all the flying involves that organisation's own personnel or equipment. If someone was to go down that road it would be wise to have a written cross-hire agreement in place for the insurers so that there was no misunderstanding about who was the aircraft operator in case something went wrong (the 'operator' is the person who owns, leases or rents the aircraft, not the person who is piloting it unless the pilot is also the owner, lessee or rentee). -
DooMaw - building a STOL
Head in the clouds replied to Head in the clouds's topic in Aircraft Building and Design Discussion
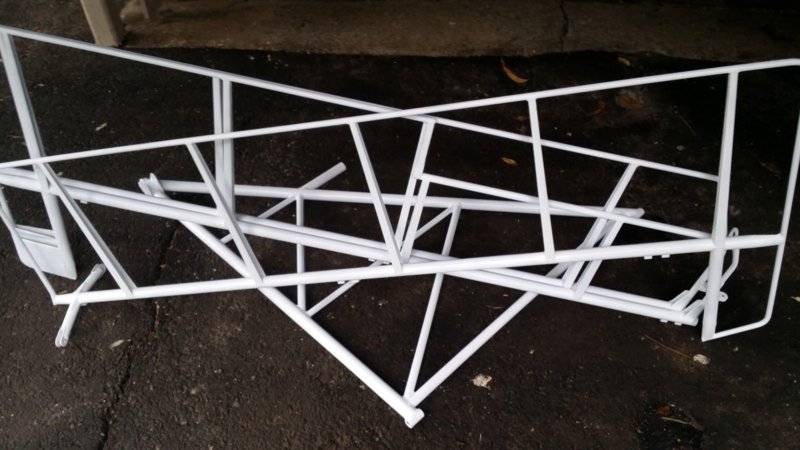
30th March 2017. As mentioned in my last post I got back into fabrication, briefly, and installed a cross-member and a couple of triangular plates above the seat-back to support the headrests/restraints. That was the last welding on the airframe, that I could think of, which allowed me to start preparing to get the epoxy coat on and stop having to constantly monitor for rust and clean and re-prime areas where any surface colour starts to show up. Then I've had a few weeks distraction messing about with boats which made a nice change, must make a point of doing that more regularly, all work and no play makes HITC a dull boy, and all that. Over the last few days the weather has been good for painting so I have made a start on that. So far I have painted four of the six tailfeather panels and the rudder pedal assemblies. It's going well and the small HVLP gravity feed spray guns I bought a while back are working very well with the quite high viscosity of the epoxy. I had to completely disassemble the pedal assemblies for painting of course, and yesterday I was able to start the re-assembly of them. It was a pleasant realisation that doing so was the first final assembly of the whole project, and the real nyloc nuts were used instead of the temporary ones because it's not envisaged that they be removed again for a very long time. As a record for posterity, the rudder pedals were assembled onto their tube-on-tube pivots with Quicksilver 2-4-C marine grease (with ptfe) which should not need servicing for ten years/1000hrs whichever is sooner. Other similar pivots (walking beams, control surface hinges for example) will need occasional oiling (100hr intervals) but I didn't want to provide oiling points on the rudder pedals because excess oil would leak out over time and make a mess of the plywood cabin floor. The other oiling points are much smaller and can be lubricated during servicing and then the excess wiped clean to prevent soiling the inside of the fabric covering. The pictures show - 1. The installed headrest supports 2-5. All work is meticulously checked by the resident workshop Inspectors and Chief Supervisor 6. Partially completed rudder pedal assemblies 7. First stage of painting - getting right into the acute angles with a small brush to ensure rust doesn't develop in hard-to-access corners, it'd be virtually impossible to remedy later if that was to occur. 8. Painted tailfeather components. Including the fabrication, welding, prep for painting, and painting, there's a total of 37 more hours for the log, making a total of 1496hrs so far.
-
A riveting weekend
Head in the clouds replied to planet47's topic in Aircraft Building and Design Discussion
Very nice work. Looking forward to seeing more ... -
Just don't call me late for dinner ... Powdercoating cure temperature is about 200°C and tempering temperature is above that so it shouldn't affect the heat treated condition. The hardness tester uses a small ball impacted onto the surface of the steel and then you measure the size of the indentation with a magnifier and tiny scale, it's a very simple test, but reasonably accurate. You'd have to remove the powdercoating from the test area. Frankly I wouldn't bother unless you're bending the gear legs easily. I'll try and attach a *.pdf file from the University of Vermont, it tells you pretty much everything you need to know about 4130 Chromoly heat treatment - OK, it's too large, it's 660Kb, anyone who's interested can send me their email address via PM if you like, and I'll email it to you.
-
I'll post it here rather than PM, others may benefit from the info too. It looks like heat treatment is in something of a decline. As far as I can tell Thermalhire at Geebung is no more but perhaps they've merged with Heat Tech which was over the road in Granite St. It's a very long time since I had anything to do with them but they did a good job at the time. Heat Treatment Australia is at Coopers Plains and they have aerospace experience and AS9100 accreditation. They're a big operation and were quite expensive for a couple of small items, but did good work. Queensland Heat Treatment, WYAMPA and Metal Components Australia all appear to have merged and are at 49 Dunn St, Rocklea. MCA did the gear legs for my AussieMozzie build and they did a good and accurate job of the harden and temper but the legs required a lot of straightening in the press afterwards. They also did the CRMO sheet metal components for the wing attachments where it was important to get them in the right final hardness/temper state, which they did well. Five gear legs and about 20 small plates only cost about $100 and the wait time for a full oven was about 3-4 days.
-
OK, I'll PM you tomorrow.
-
Hellsbells - that's pretty fair, if the basic cost of materials and processing is $250 as I demonstrated - and you want someone else to do all the precision cutting and drilling on your behalf, warranty that it fits your plane, pack and send it, well at my modest charge out you'd think I have to do all that for less than $75/hr? Oh - and I pay the freight ... So you have a kidney for sale for $600? I'll take it!
-
Yes OK, always respect everything you say M61A1, as I'm sure you know, but it doesn't have to be quite that difficult ... With even greater respect I do have to say that whether the item is bowed or not after heat treatment has nothing to do with whether it was hung or laid in the kiln providing that it's soaked at temperature for several hours, it will be evenly heated overall. However it does have all to do with how it enters the quenching fluid. As you'd be aware it can be quenched in water (not recommended) oil, or a variety of gels or salts. The gels are the kindest but are specialty work not generally available here, so oil is the most likely, given that's how the local industry does spring hardening and tempering. If the items ended up too soft it wouldn't/shouldn't have had anything to do with the hardening process, more likely someone doesn't have good control over the tempering which is much more difficult to get right, and 'amateur' shops err on the side of over-tempering because people tend to complain if their springs are brittle and break but generally have little to say if they're a bit soft and relax a little later. Consequently a customer should ideally have their own hardness testing equipment, or know someone who does. It's not expensive stuff, my Brinell cost about $250 or so and I would just charge for my time if someone wanted to confirm their heat treatment. Getting back to the bowing of the item, from experience I do think it's almost unavoidable with anything less than a direct vertical drop into a deep oil or gel quenching bath, since one side of the item will always hit the fluid first and contract earlier than the other side. There's nothing wrong with banana shaped properly heat treated items, you just need to have the right straightening equipment - a shop press with a setup for full escape containment of the rod/tube and a dial gauge. There are two or three highly knowledgeable and capable heat treaters in Brisbane which I could recommend and who will provide a finished product within 5% of requested hardness after tempering, but as I mentioned in an earlier post I don't know where the OP is, and he/she hasn't responded to that, so there's not much point in making recommendations if they're in Adelaide or Perth, for example ...
-
I hope you didn't get badly ripped off because if you can cut and drill them yourself it's not a very expensive exercise to make them up. Current price for 1.5"x 0.0120" 4130N from Bralco (formerly Airport Metals) is $11/ft, 1.375" x 0.0120" is $13/ft, can't recall which size you need for the outer but you need about 8ft of the outer and about 4ft of the inner sleeve in total. The inner sleeve material (1.250" or 1.125" x 0.095") is $9/ft or $7.50/ft, so the most the material can cost is $140. The freight would be about $30. Cut and drill it yourself using the old ones as examples and then the heat treatment is about $60 as long as you are happy to wait for a day or two until the heat treatment people have enough for their oven. So - add GST and you wouldn't get me selling a kidney for $250.
-
DooMaw - building a STOL
Head in the clouds replied to Head in the clouds's topic in Aircraft Building and Design Discussion
Hi Oscar, yes you're right, I copy/pasted small segments of the invaluable info from DL and did notice that I'd included the error, and then forgot to correct it afterwards! And thanks again to both you and Marty for the kind words. I must say I'm pleased to have completed the machining for now and I'm back into some fabricating work now, I'll post some more about that shortly. -
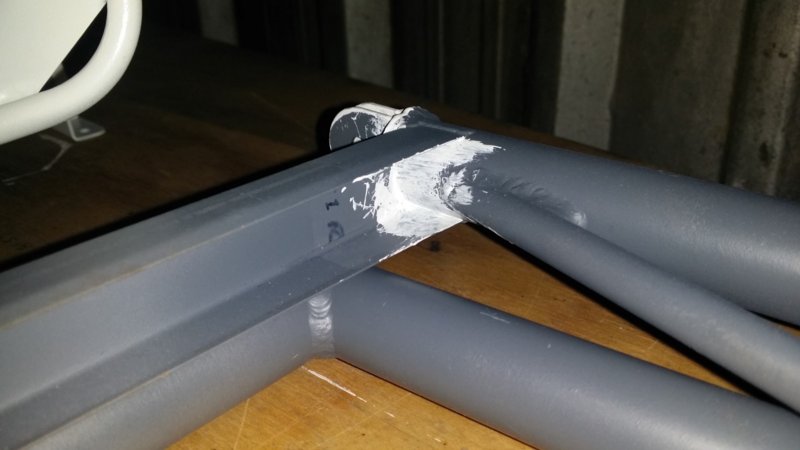
The originals are 4130 Chromoly but they have to be heat treated after you cut and drill them. I can't remember the sizes but you can measure that off the originals of course - off the top of my head I think the outer was 1.5" diameter x 0.120" wall and the half length internal sleeve was 1.25" x 0.095" wall but don't take my word for it ... Your avatar doesn't say where you're located so I can't recommend a heat treatment plant but you need to be sure they know what they're doing with the tempering process otherwise they could end up brittle. You'll also probably need someone with a 20-50 tonne shop press to straighten them after heat treatment, they often end up with a fair curve in them. Don't try and do it with a sledge hammer or it'll probably spring back and kill you. Likewise in the shop press they need to be fully contained so that if they slip out from under the ram they don't go anywhere at high speed. Seriously - it can be deadly, to straighten even a slight curve you need to bend it like a banana in the opposite direction. I drilled holes right through my shop press vertical main supports and threaded the legs through them so they were positively held under the ram that way and couldn't escape.
-
DooMaw - building a STOL
Head in the clouds replied to Head in the clouds's topic in Aircraft Building and Design Discussion
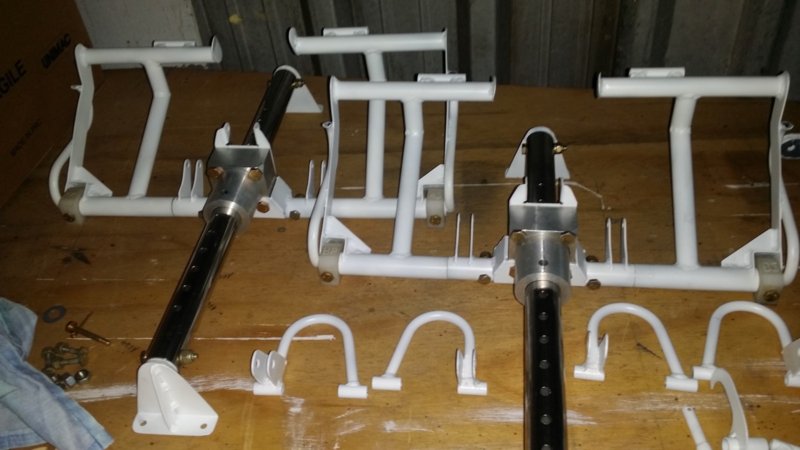
On Thursday and Friday 23/24th Feb I finished off the lower strut fittings I'd shown started in the last post then I spent the weekend of 25/26th Feb machining again and finally completed all the strut parts. The last part of the job was to radius the ends of them which involved removing the parallel vise and fitting the small rotary table I mentioned a few posts back. This rotary table is a real toy. It's only 4in/100mm in diameter and, as purchased, doesn't rate better than unusable junk. I used to have a very solid, high precision Swiss made 300mm/12inch rotary table that had no detectable backlash and a 4inch spindle with widely spaced bearings providing great rigidity. Unfortunately someone must have needed it more than me and it must have been quite an achievement running off with it 'coz it weighed upwards of 60kg ... I don't often use a rotary table so I wasn't going to pay a couple of thousand or more to replace it right now, and as this current job was only on a few small aluminium components I bought this little 4 inch rotary table on ebay for $150. I didn't skimp entirely, there was a smaller 3 inch one for $100. When it arrived it looked superficially OK but the outer casting hadn't been machined parallel at the hold-down points so the first thing I did was clamp it in the vise on the mill and fix those. Next I had a look at the tiny 'hand-wheel' that you were supposed to use to turn it around. That might have been half OK if you just wanted to use it to change the angle of machining once or twice, but it wasn't going to be any good to turn the workpieces back and forth through 180° a few hundreds of times. Additionally, there was about 15° of backlash in the worm-drive which could do with fixing. And ... after I had turned it this way and that a few times the table became loose and rattly. The cause of that proved to be that the spindle only had a single bearing and any rigidity of the whole unit relied on a tiny machine screw under the unit fighting against a single-row ball-bearing and clamping the table against the housing. Tighten it and you got some rigidity but couldn't turn the table, loosen it and the whole thing rattled and wouldn't hold the workpiece against the machine cutting loads. It just shows that Chinese stuff is like Rolls Royce compared with Indian. Anyway, I pulled the whole thing apart and treated it like a kit of parts to use to make something half reasonable that might just go the distance to do the current job, and in the end that proved to be the case, it was getting loose and rattly again on the last two components. The pictures show the modified rotary table with a large crank handle to rotate it back and forth. The bronze sleeve acts as a coupling for the handle as well as a bushing to control the backlash. I had to use the mill to make the T nuts to clamp the workpieces down, I couldn't find a local source of them as small as that. I also machined a hole in the centre of the top of the table and threaded it to fit a sleeved bolt which the workpieces could locate onto to ensure that they were concentric when clamped down. The last few pictures show the workpieces clamped in place for machining and the finished items. Another 25hrs for the build log making a total of 1459hrs so far.
-
My old mate Bazza (Barry Hughes RIP) had some interesting times in strong headwinds in his Rotec Rally. The most notable event was in the Numinbah Valley which is a natural wind funnel in southerlies or south-easterlies. On this day he was flying down to Evans Head for the New Year fly-in, in about 1989 and it was blowing about 20kts aloft which becomes about 40kts with the funneling effect. There isn't really any way of avoiding it because everywhere else around there is tiger country. Bazza realised he was making such slow progress that he would run out of fuel, so he decided to land in a paddock below, near Natural Bridge. He made an almost zero groundspeed landing similar to the OP and then had to use considerable throttle to taxy forwards to the end of the paddock where he intended to tie the plane to the fence. When he got there he had a moment's brain fade and switched off the engine to jump out and tie to the fence but before he'd even got his harness undone the plane was blown over backwards and cartwheeled down the paddock. It was quite badly damaged but Bazza had it fixed and flying again in a matter of days, in time to get to the fly-in before it ended. It used to be about 5 days back then IIRC. After that, and since the Rally had a pusher engine, Bazza always carried a length of 6mm rope tied to a grappling hook - like a 200mm long fishing treble - to lassoo a fence from the pilot seat if he ever needed to.
-
First Aircraft Purchase - Exciting!!!
Head in the clouds replied to scre80's topic in AUS/NZ General Discussion
Before you give scre80 a heart attack ... Some 601s certainly had a wing shedding issue and there's plenty to read about it on the net. I have a friend with a 601 who was very worried when these problems began, to the extent that he traveled to the factory to get some answers. It wasn't easy at the time, they were very tight-lipped about it. Anyway it ended up that it was the 601XL (IIRC) that had the problem, the 601HD has a different wing construction. There was/is a mod for the inboard part of the XL wing which should have been done to all of them, to solve the problem. -
DooMaw - building a STOL
Head in the clouds replied to Head in the clouds's topic in Aircraft Building and Design Discussion
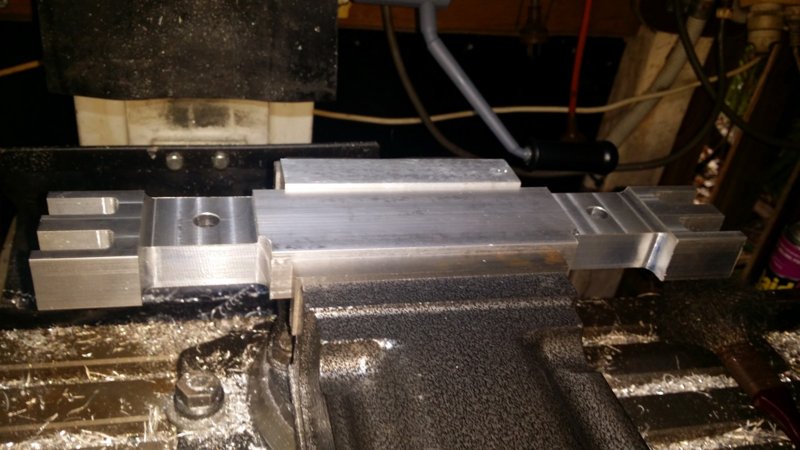
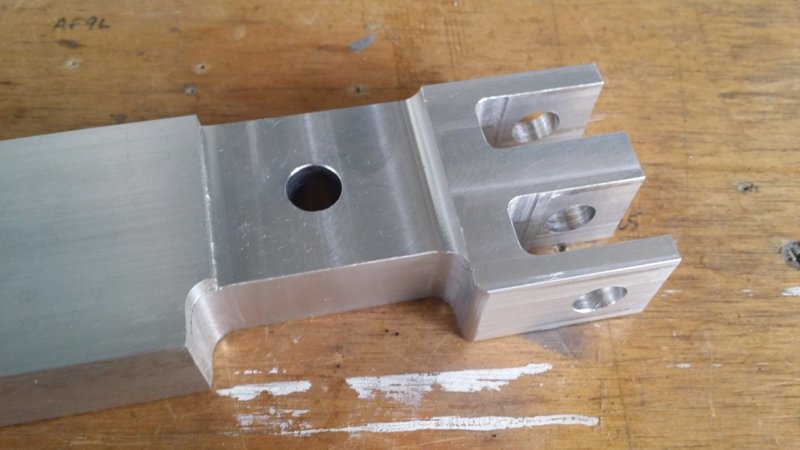
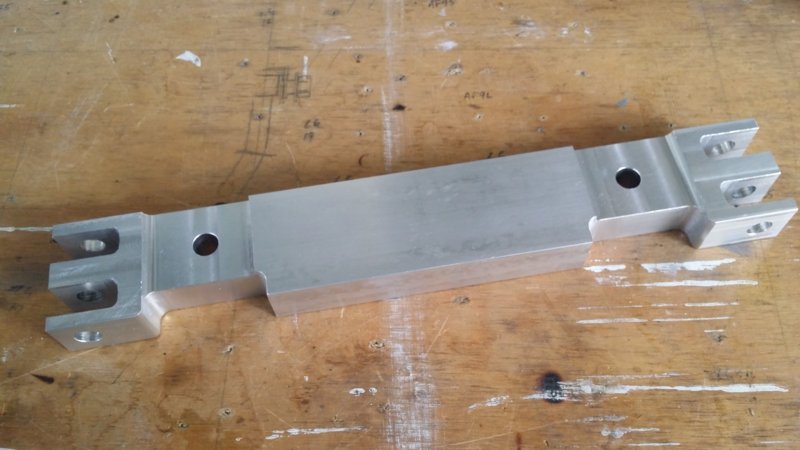
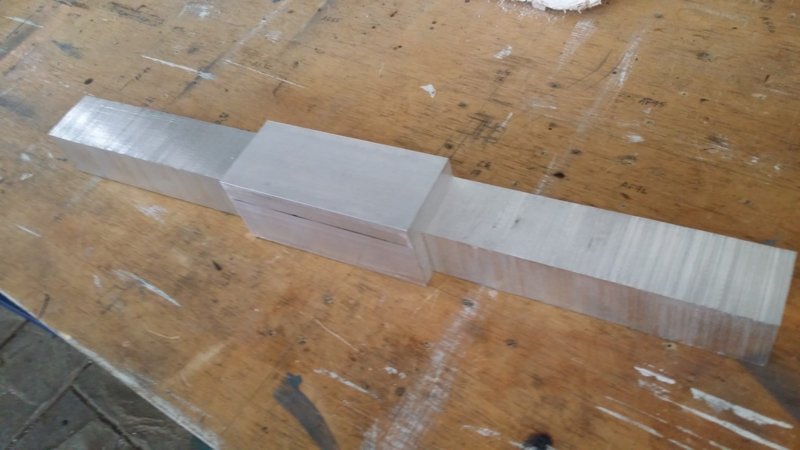
Another weekend of machining ... OK, I've had enough of it for now and am looking forward to getting back on the fabrication again. I'm on to the lower strut end fittings now. The first four pictures show the parts which fit into the CRMO clevises each side of the fuselage, the last picture shows the billet for the last of the strut end fittings which are the parts that attach to the ones in the first four pics. They will be bolted inside the lower ends of the struts. I have sawn away the excess material on the bandsaw and that last piece is now in the mill ready for next time. But - I'm going to have to make some adapters too. I had a bit of an awakening last week - I have to admit that I'd never given a great deal of thought to the amount of dihedral at which to set the wings. Previously I've always given low wing planes 3 degrees per side and high wings 1.5 degrees per side - simply because that fairly closely matched what you see on 'average' planes. And that probably works closely enough as long your new plane is very 'average' but in this case, DooMaw isn't very average at all. DooMaw has a proportionately very large fin and rudder, nothing is very average about the wing and it also has a wide, tall and boxy front end. I'd not considered that these things could very significantly affect the amount of dihedral that should be rigged. Also - I'd always thought that dihedral really only just provided a degree of directional and 'self righting' stability but I've recently been appraised of the fact that there's a heck of a lot more to it than that, and getting it wrong can be quite dangerous. And if not so far off as to be dangerous, conversely getting it right can make the difference between a plane that is a delight to fly, or just rather average. In short, having too much dihedral causes the horrible weaving tendency called 'dutch roll'. If that was all, perhaps you could live with it even though it causes pretty major airsickness issues, but it isn't as simple as that. Too much dihedral and the aircraft will not return to equilibrium, the dutch roll will amplify and the aircraft potentially become uncontrollable. At the other end of the scale, an aircraft with too little dihedral will have 'spiral instability' meaning a tendency to roll into a spiral dive when flown hands-off, rather than having a tendency to return to level flight. In practice most planes are set up to have a small amount of spiral instability, since it is preferable to dutch roll and both vary greatly with power settings, CoG position, speed, weight etc, BUT the amount of spiral instability must be very small - in the worst case of power/weight/CG/speed, the time to double the rate of change heading must not exceed 10 seconds. I must say a special thank you to the forum member who brought this to my attention - thanks again Oscar! And also a special thank you to aeronautical engineer Dafydd Llewellyn for taking time to provide me with References and other assistance in this not often discussed matter. What a shame Dafydd doesn't frequent this forum anymore, his experience and assistance was one of the best things here for many of us who design our own ... Dafydd also took the time to give me an insight into the necessary steps for determining the right amount of dihedral and it involves a lot of flight testing with adjustment between flights to accumulate data. Consequently, initially I will need struts that are easily and quickly adjustable for length, so I will have to make adapters for the strut-ends I have made, which will fit into telescopic tubes for the initial testing. Once we know the exact length for the struts I can cut the streamline-shaped extrusions I received recently and fit the ends to them instead. Another 15hrs to add to the log, making a total of 1434 hours so far.
-
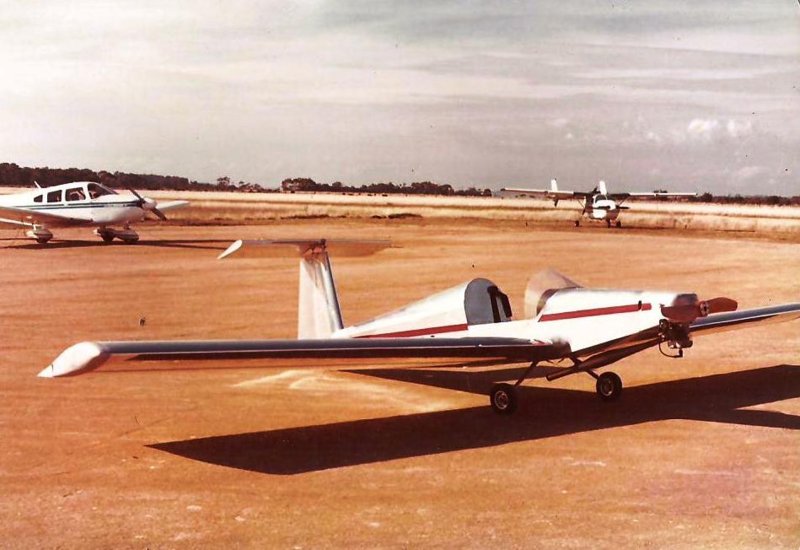
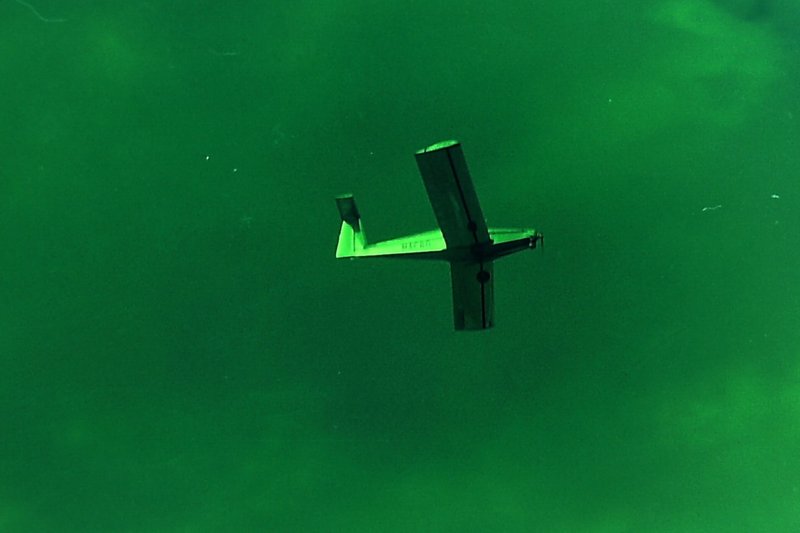
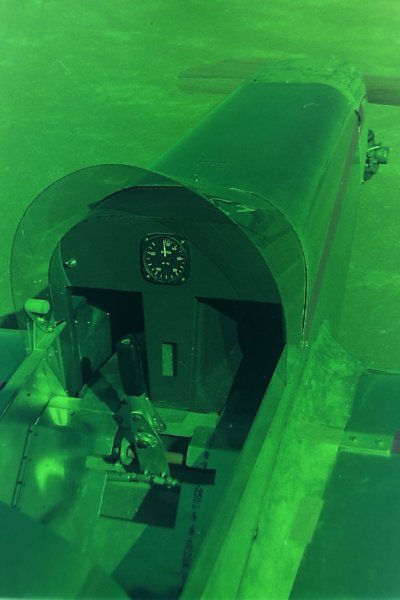
Well, it sort of was ... It was a bit of a cross between a Cri Cri, Hummelbird, Moni and an RC model, unfortunately the pictures are very old and heat affected, note the overwhelmingly complex instrument panel, fuel tank is between the knees and under the legs -
-
Here's an old picture taken at Mangalore 1984 by Australian Aviation Magazine photographer Rob Fox. Anyone know the plane or builder? Hint - there were six of them built, the first didn't have a T tail, the one in the photo is the second one, the rest of them were a bit larger. Later there was a side-by-side twin-engined two seat version.
-
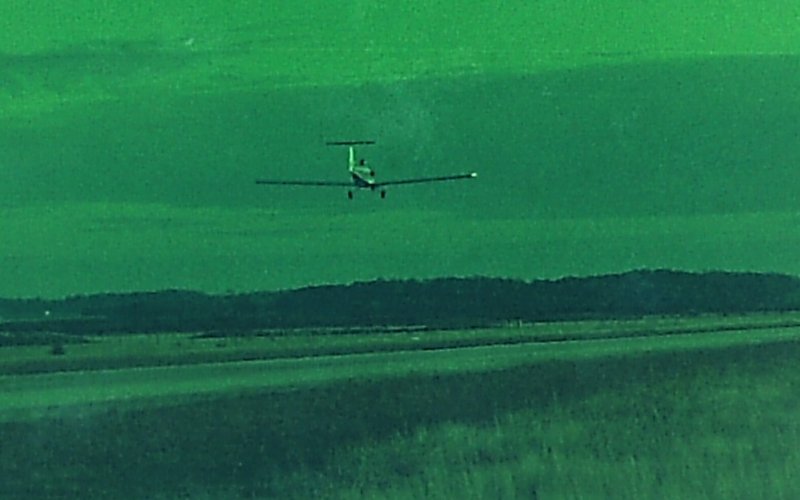
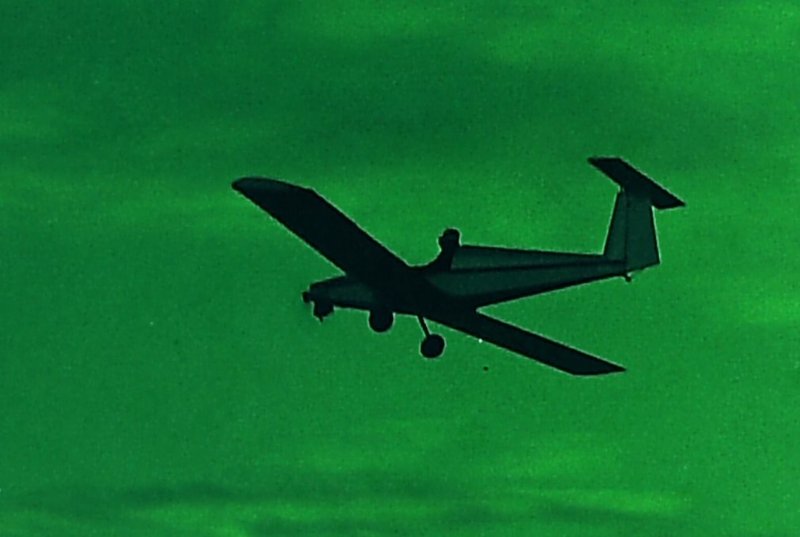
No, that must be another plane. This one certainly never received any government or other third party money, and was kept well away from the media because of the hassles DoA were giving to it and the owner/builder. It did fly on quite a number of occasions, at one or more gliding airfields north of Melbourne and also at Essendon Airport ... briefly. First hint - before building this the builder had worked with a major glider company and was/is a composites specialist. He also spent time with Burt Rutan in USA and consequently this plane features a fair bit of Rutan-ish Ezy technology.
-
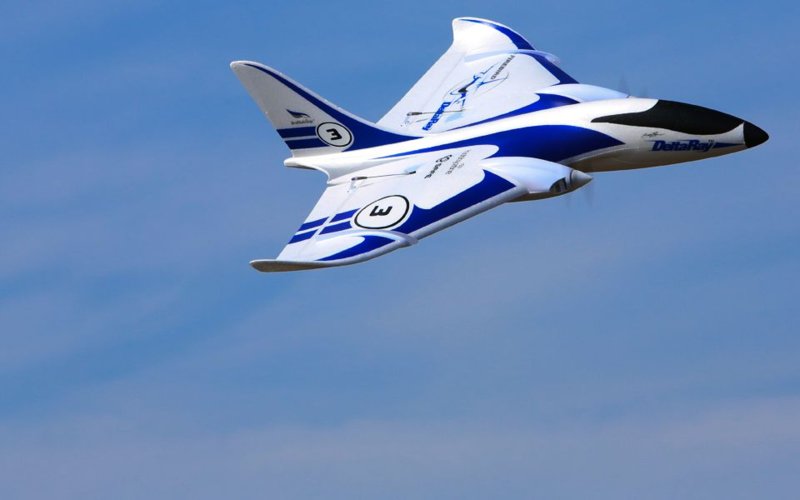
Yes, you could certainly count the strakes which is most of the fuselage in planform but the weight of the swing-wing mechanics might kill it for 300kg including usable load. I think the fixed geometry DeltaRay model configuration is very hard to beat for a fast 95.10. You get massive amounts of wing area in a very small package (5m span!). The twin engines - well, I'd use electric motors - could be spun in opposite rotations and used to assist the development of the leading edge vortex (LEV) which produces huge amounts of lift at high AoA for reasonably low speed approach and landing. The propwash would 'blow' the wing, increasing lift and assisting laminar flow (or at least helping to resist flow separation) and there's all that room in the fuselage on the CG, to mount a range extender. The thick wings would house the batteries ... and then you'd have a series hybrid with oodles of power for take-off and climb (use liquid cooled motors so you can overpower them significantly for short periods - 3000ft/min climb is a reasonable figure running 2x 40hp liquid cooled at 2x 80hp for two minutes = 6000ft in 2mins ...) and you'd have plenty of range once you throttle back to 2x20hp for 120kt cruise at altitude and let the batteries recharge. And with electric motors having max torque at all rpm you don't need variable pitch props, just use scimitar shaped blades and pitch them optimally for cruise and let them flex to suit under higher power settings and lower airspeeds. With just enough batteries for that initial 6000ft climb (approx 30kg of batteries), once they have recharged after the climb you'd have about 20mins of 100kt cruise under battery power alone to get to an airfield if the range extender ever died, meaning you could happily use a cheap 20hp 2 or 4 stroke industrial motor as the range extender. Provided the range extender ran normally you could have something like 800Nm range ...
-
Hey Frank , I think the problem here is that we're becoming so conditioned into believing we have to have an endorsement or similar to be able to do something. However - the rules simply say that to fly a 95.10 plane we must be a member of RAAus and have a Pilot Certificate. And the CAO (95.10 as I copy/pasted above) makes it quite clear what a 95.10 plane is ... Nowhere does it say we need a multi-engine endorsement to fly it, although it's quite clear by the omission of a restriction in the CAO of the number of engines/power-plants/props etc that the aircraft might well have any number of engines. Since we, in Australia, are only prohibited from doing things that the law says we can't do, and since there's no law saying we have to have a multi endorse to fly a 95.10, by inference it's quite legal for us to do so, as long as we're complying with all the other restrictions that actually are in the CAO. So - until some desk johnny (hopefully not from within our own ranks at RAAus!) decides to bring in another restriction that hasn't been demonstrated by safety issues to be actually needed, we can build and fly our 95.10 multi to our hearts content ... Now - to get more speed at cruise ... telescope the outer wings back into the inner wing section or should we swing the wings back into a delta like an F-111?


.jpg.6a22db640023667a5d39b8f267e8b02e.jpg)
.jpg.e88d2dac1e08c6c637b45af911d17bfc.jpg)
.jpg.69f5f33ca76c04dad9edaafb265a70d5.jpg)
.jpg.cc5e5998051ba1cb1d068a65b152b062.jpg)
.jpg.0876d2e478456efdd46e0e2c9b196c0e.jpg)
.jpg.5c0615144194073ae21a3b3dad3644ff.jpg)
.jpg.099c93a6c0c378800d7bb1c0fb7ad8c3.jpg)
.jpg.fea3bd184170585402034f0514eeaa1e.jpg)
.jpg.e8da0bed5831cd408c89cecdef501a0e.jpg)
.jpg.5616e2a66fec7e094f4bc7cd40e3b5fa.jpg)
.jpg.e79b88561bbbfabb826f040f28412588.jpg)
.jpg.f250049612be94fda2bc2625c346525b.jpg)
.jpg.985f8ab349a82fd5f0422ac32ba4e708.jpg)
.jpg.5a60f983e7626066c01fd3144a1e9582.jpg)
.jpg.498b63f9faaadfe6c22d1801a421794c.jpg)
.jpg.165937a037f8fa5979feae51ae804a6d.jpg)
.jpg.50f6ad2edf5eec919b7c1e315dd031ea.jpg)