rankamateur
-
Posts
3,216 -
Joined
-
Last visited
-
Days Won
8
Content Type
Profiles
Forums
Gallery
Downloads
Blogs
Events
Store
Aircraft
Resources
Tutorials
Articles
Classifieds
Movies
Books
Community Map
Quizzes
Videos Directory
Everything posted by rankamateur
-
Absolutely they can. I saw one with 1200 hours on it about a month ago that has had the doors off for most of that time used for spotting goats. It was a bit dirty inside though.
-
You have to hold your mouth right when you are doing solid rivets and it was a lot easier before I needed glasses, than it was after. I used solid rivets across my dash board too, still have the butt end of the three A4 rivets in the middle though. Also on the four mounting plates around engine cowl fixtures, but I needed the extra reach jaws in the tool to reach them. There were enough solid rivets supplied to do all that and still had some over, Pity they weren't as generous with the regular A4 rivets.
-
I only had trouble with the second rivet, there was room for the first one. I used a standard rivet for the second one, put it in beside the first and applied more than normal pressure to the gun as I pulled it and it pulled up straight on the second attempt, drilled the first one out. Then did the other ribs the same. I think you will have a bit of the same trouble on the flaperon ribs too from memory.
-
Didn't your manual tell you to use water pump pliers? I used Reg's tool which I think he bought in Brisbane so try sending him an email. I think the sticker with their name on it rubbed off on a hot sweaty day about four years ago but he will remember were it came from.
-
I haven't read the pats list, sorry. Don't know what the silver bit would be called, just wanted you to grind the right part.
-
Forgot to tell you that the first thing to do to you air riveter is to grind the silver tube that hold the "nose piece" as you call it, flat for about two inches on the top side, but make sure the silver tube is tightened right up before you judge where the top is. You can grind into it until you can just see through to the plunger that grips the rivet stem. There are quite a few places it will then fit into properly.
-

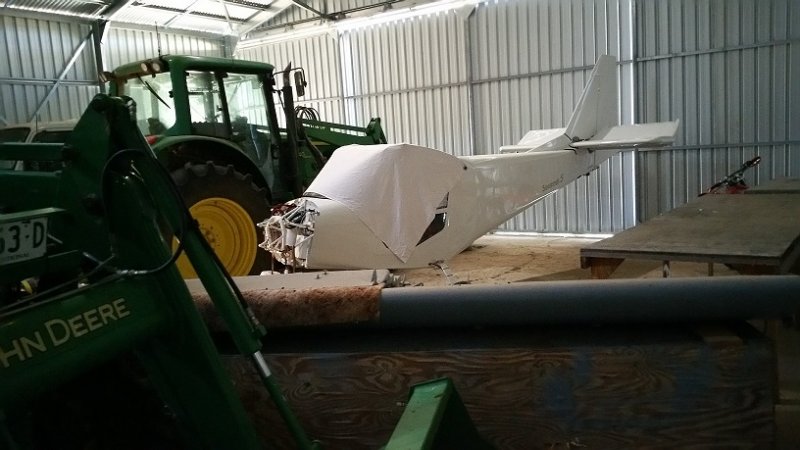
Kin Kin accident
rankamateur replied to Kyle Communications's topic in Aircraft Incidents and Accidents
Not a Maule! Win news said it was a Cessna, who would have thought? -
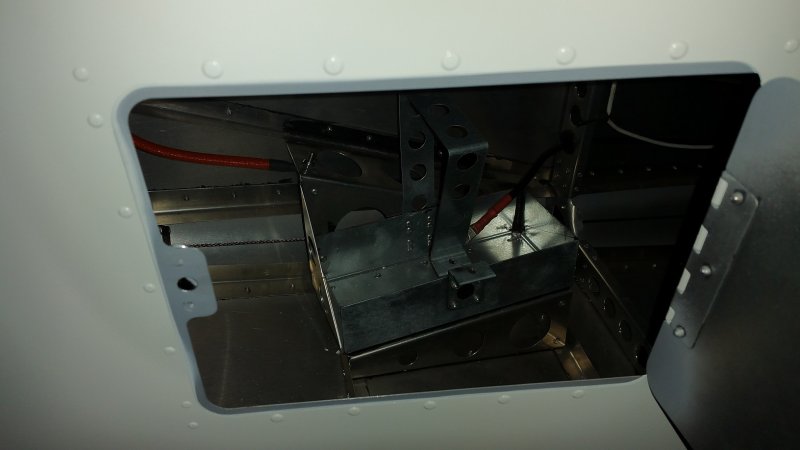
The rivet rows on the lower and left hand skin show where the angulars are installed to support the battery tray.

-
I used some surplus angulars from the area around the extra fuel tanks and fixed them between the fames either side of the door. Trouble is once you put the battery in there is very little room to reach in and do up the retainer bolt, hence the need to swap the door to the opposite side. Photo coming soon.
-
My job is suitable for inland. If I lived and flew mostly on the coast I would have deburred then alodined everything, and probably also used that poisonous chromate primer. It is a case of horses for courses. The black has to go on both mating surfaces and allow to dry well. If you choose to just use etch primer you will get working on the rivets at joints especially where pivot points are involved like where the elevator and rudder pivots attach.
-
I ran the trial on my Samsung Note 4, it was like a Lite version of Ozrunways, much like the free hook versions of apps with the nag screens. They have a hide asking the same price for these two apps. The screen size was quite usable just the same.
-
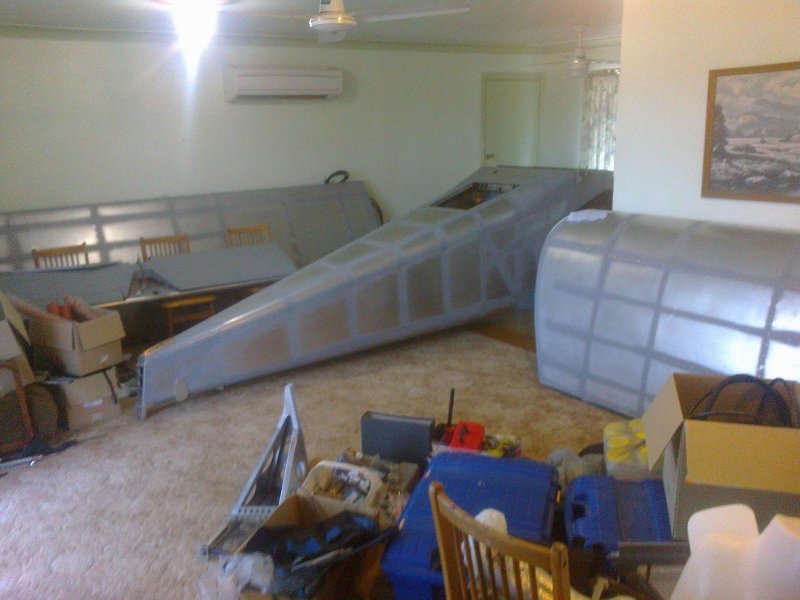
I just had a quick look, Very impressed with the prepping. Looking at those fuselage frames getting their first skins, reminded me of something I tried out on my build. Due to my Airmaster constant speed prop installation, caused my battery to need installation in the rear position near the door. I fitted the left sheet on the right and visa versa, moving the door to the right hand side of the fuselage and giving a lot more room to access the battery terminals and tie down bolt.
-
That is etch primed under the rivet lines and etch primed + black mastic on the facing sheet joins.
-
Yes, my kit was delivered Jun 2013, just before the Jul2013 manual revision. I had the same problem as you with my kit having new parts which were not in my manual. I am about to hang my engine, paint the wings and apply for a registration number.
-
Do you have the one piece fiberglass wing tip. Mine is the last of the multi piece fiberglass and aluminium one and they may be what is described in your manual. The upgraded wing tip is probably a little bit lighter weight wise but otherwise is not an UPgrade at all.
-
It is not that bad, but it does need someone who speaks English to work through it. It is much improved on the Savannah classic manual. Since BRM stole the savannah classic plans, and manuals on a CD the company are not very keen to let a third party loose on an editable copy of their current manuals.
-
The other pipes with it are fuel tubes.
-
Were they 3/32"(A3) countersunk? I have only encountered 1/8"(A4) and 5/32"(A5) countersunk.
-
Don't fret. ICP supply A3 rivets which are standard pop rivets, structural A4 and A5 rivets are multi pull (avex) type pop rivets.
-
There were none in my kit shipped three years ago. Only A4 and A5 ones.
-
I used counter sunk rivets. To make them I drilled a 3/32" hole in a piece of steel, then counter sunk the hole. Then put the rivet in the holes and put a pair of pop rivet pliers over the rivet stem and struck it my hammer about 5 times then gave the resulting counter sunk rivet a rub on the grinder to knock the frill off around the edge.
-
Big incentive to get it registered before they do, me thinks! Nothing like moving goal posts to keep the team fit.
-
And just how does a 19 builder with a near complete plane organise these other 3 inspections at this end of the project?
-
Bob,I used a paint buddy roller but they became completely unavailable about three years ago. You could buy up 4 packs of replacement rollers for them about four years ago for about 2 dollars at big paint shops in the throw out bins, but I missed out on them or I could send you my paint buddy to use but the roller dries out and buggers up.
-
I kept a 1/2" paint brush with the handle shortened in my jar with a bit of black in it to reach the places that the roller couldn't get too. Try to avoid making the black too thick or lumpy when you apply it, so the pieces fit better especially when the parts fit together around a curve. ICP have taken great care to make the holes in the right place but you will need a couple of Philips screw drivers ground to a gentle point to wriggle the parts to get the holes to all align. You will need them with 5/32" shaft and 1/8" shaft for the A5 and A4 rivet sizes. There is a ready made tool that Reg buys but I was unable to find them any where so cannibalised screwdrivers in my lathe with the angle grinder, a tool post grinder would have been more civilised.