

dan tonner
-
Posts
125 -
Joined
-
Last visited
Content Type
Profiles
Forums
Gallery
Downloads
Blogs
Events
Store
Aircraft
Resources
Tutorials
Articles
Classifieds
Movies
Books
Community Map
Quizzes
Videos Directory
Everything posted by dan tonner
-
I am interested in those "electronics pliers" Major Tom. Am I correct to assume these were used to snip off one side or the other of the solid rivets? Did you have to modify them I never was too happy with the trailing edge rivets on the wings, flaperons, rudder or trim tabs when I built my own Sav but after seeing what's possible with the right squeezer, the proper rivets and fitted rivet sets, (thank you IBob) I'm about ready to give it another go. The issue that's been keeping me at bay is how to remove the installed solid rivets without damaging the skins by grinding off the heads or elongating the holes with a skating drill bit.
-
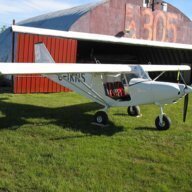
A little late, perhaps, but these images, from Scott Thrash in Texas and posted in the Savannah Owners Facebook site, sure caught my eye. Canada Dan
-
Savannah VG Boly Prop with spinner touching cowl!
dan tonner replied to Trackley's topic in Savannah
Rotax advises a maximum spinner extension length beyond the engine thrust plate that is about the length of the stock Savannah extension. I don't know why or how this limit was determined, but it may be something you want to investigate before adding any additional length to the existing extension. Just my thoughts. All the best; fly safely, Canada Dan -
Hi Bob, Are these any help? I was unaware of any changes to the "S" model. Fly Safely, Dan

-
Hello Mark; With reference to your entry #47 (lower fork leg support), here's a couple of pics from 2015 following a sudden nosedrop on final. (I'm not talkin' ... all's well now.) The poor bugger had already replaced the stock lower support with the new style support after a noseleg collapse in 2014. Given the forces that were involved in the 2015 "landing", the new model stood up remarkably well - still had to be replaced though. I think its greatest asset is that it seems to prevent (delay?) cracking at the elbows of the "L" support caused by the uncushioned rebound of the fork leg. 'Best Dan
-
Hello IBob; Would it be presumptive of me to say "Hi Bob? I will be spending 10 weeks or so in North Palmerston between now and the middle of April and would be interested in getting together for a cuppa. I've been following your thread with interest and have admired your tenacity and resourcefulness. I would love to see the results. If interested, give me a shout at [email protected] and I'll share a few more details about my trip to the other side. All the best; Dan
-
Can't wait to see it and try it out - along with the new flap brackets.......unfortunately, that won't be until April because the great white north (for me, at least) is closed for the winter. Dan
-
Hi Mark; Looks like you're doing what you like to do; by the way, what is the box riveted to the floor just behind the hatch? Allabest, Dan
-
Hi Mike; I have assumed your build has the same firewall arrangements as my 2010 XL VG. If so, the upper front gear tube is guided through a sandwich of eight pieces - (SF 225; SF353 [plastic]; the firewall "shelf"; SF 235; SM 025; the roller bearing; SM003; and SM002). The plastic guide is second up from the bottom plate (SF225). I have assumed the "binding" is happening through the plastic plate or through the center of the roller bearing located 3rd piece down from the top - not counting the top "cap" ( called "tap" in my assembly manual ). Things to check before enlarging any openings: 1. Is SF 235 laying flat on top of the firewall "shelf"? (It's purpose is to "level" the surface between the front and rear "shelf" angulars). That surface carries the plate that supports the roller bearing when the tube is fully extended. 2. Is there any apparent paint buildup on the upper end of the front gear tube? If so, remove the paint on the tube and try the fit again. 3. Is there any apparent paint buildup on any of the sandwiched parts that might interfere with them lying flat? 4. You may find similar "binding" happening at the lower plastic guide at the bottom of the firewall if there is excess paint on the front fork leg at that level as well. Alignment of all these parts, of course, is key. If the alignment is correct, I'd go after the paint on the fork leg first - when all is assembled, you don't want side clearance (other than what's needed for a good plastic-safe lubricant) between these guides and the fork leg. During my build and during two rebuilds of the front fork assembly (I'm not talkin' about it) the paint on the factory supplied front fork tube was thick enough to cause the binding. Some #400 wet sandpaper, applied as needed, freed things up. Good luck; hope this helps, Canada Dan
-
Hi again; The rectangular cut-out holds both the rocker switch and the LED indicator side by side. Those were supplied with my kit in 2010 but I purchased one of the last Savannah kits that Eric Giles sold before moving to another line of aircraft. (He previously owned "SkyKits" and now owns "World Aircraft Company".) Mine was a kit that he had on hand. I didn't even ask if was a basic kit or if there were any options. Don't let the mess in the picture deter you - that was during disassembly to remove the bent support and I had removed every zip tie. The wiring is time consuming but working one circuit at a time simplifies everything and when it is all tied up with a red bow, it is neat and tidy. This is how it looked after reassembly: The "carbon fiber" is automotive-grade adhesive vinyl. All the best; I think you'll be very happy with the Savannah - don't expect to get it assembled in 200 - 400 hours though! Dan
-
Hello Richard; These pictures might be of some help. The first pair are the original support and console which came with my 2010 Sav VG XL Kit - these parts became damaged and were replaced. The kit was ordered with the stock instrument package (except radio). The pre-cut openings were 3 1/8" for the Tach/Hobbs, Alt, VSI and IAS; 2 1/4" for the slip indicator, fuel pressure and radio and 2" for oil temp, oil pressure, voltmeter, outside/abx switchable temp and two cylinderHead temp gauges. I used the "extra" hole to mount an airworthiness plaque required in Canada. After the original support and console were damaged, I ordered replacements (using the same part numbers) and the next picture shows the parts I received. The last picture illustrates how I re-arranged my console during the repair. I bored a 2" hole where the rectangular Trim Switch was to be and re-cut an opening for it on the left side of the panel. I believe these are the "new" type of panels supplied as stock - they permit removal of the instrument cluster without disturbing the throttles, the choke, carb heated air control, ignition switch etc. It caused me some angst at first because I was looking for a "bolt-in" replacement part, but I acknowledge it is an improvement over my original setup and I was able to re-use all the original instruments by mounting the plaque in a 2 1/4" hole rather that a 2" hole as on the original. Perhaps all this can be of some help. All the best, Season's Greetings; Canada Dan
-
Welcome OP; I learned to fly at 65; built my Savannah at 66 and entered my 70th year (turned 69) last July. Very refreshing to hear from you and others "of a certain age" in this forum. Perhaps someday, when its needed, we'll launch an "Old Farts Forum" to discuss issues like: how to get in and out of a Savannah; or ...where to store the keys so you can always find them; ...or making flight plans that never exceed 60 minutes.... Fly safely, best of the season to you all, Canada Dan
- 21 replies
-
- 11
-

-

-

-
Best of the Holidays to you and your family as well Ian; You cannot imagine how helpful and informative this site has been for me personally as I decided upon which plane to build, as I actually built it, and now, as I maintain and fly it. Much more than all that wonderful stuff, being in a somewhat out-of-the-mainstream location, Recreational Flyer has given me companionship with others who share my passion. Thank you. Please keep up the wonderful work and know you are appreciated. Fly safely. Canada Dan
-
I will be keen to hear what Roger has to say...... I didn't see any way to open the module "pot" to see how it is wired without destroying the contents but I do know the newer modules control the soft start system on the newer engines. Mine doesn't have that feature. Somehow the electronics in the newer modules must determine how long the ignition spark stays delayed (one side or both sides?) then switch the signal to run in the advanced timing mode after startup. All this assumes - correctly or incorrectly - that the ignition timing stays fully advanced after startup - quite a different design from an automotive setup ..... I also believe part of the reason Rotax redesigned the modules was to reduce vibration breakage in these wires by stabilizing the connectors more securely. It would be nice to be working from schematics for the four (or more?) different modules. All the best, Fly safely, Dan
-
Thanks Mark; Sounds like a plan...... All the best, fly safely, Dan
-
Hi Tom; Thanks for this; The Rotax Parts Catalogue lists four different modules which are used on the 912 and 914 series of engines and 966 721 is not on the list at all. What are included are 966 359; 966 724; 966 728 and 966 729. (These numbers appear with 965 446; 965 440; 965 442; and 965 444, respectively in the updated 2015 Parts Catalogue.) My modules (pictured in post 1117 on page 56 of this thread) are labelled 966 359 (new number 965 446 in the updated Rotax Parts Catalogue). In the Catalogue, only 966 359 and 966 724 use the 4-pin connectors. I don't know why 966 721 does not appear in the old or the updated catalogues and I also don't know if the 966 724 (the only other 4-pin version) can be rewired to match what I have. I do know that my generator coil, all 5 trigger coils and the four spark plug coils are working fine. (My engine starts right up and runs smoothly when the "good" module is fully connected to either of the redundant ignition sets - the "bad" module does not even generate a cough when it is connected.) I'm still investigating the possibilities....and may still want to talk to you about your set (or part of it?) (Jump in anytime Mark....: - ) 'Best; fly safely, Dan
-
Hello Tom; I was pleased to get your reply and will await Mark's and Roger's assessment next week. What are the first six numbers stamped on your original ignition modules? With respect to the selling price, this will have to be your call: any offer I made would be unduly influenced by "...the less it costs, the better.." Best regards, fly safely, Canada Dan
-
Interesting note, Rotax 618. I think before I sank that kind of money into my old 80 hp 912, I'd be looking around for other engine options....the Rotax prices are impossible to justify. $3,200.00 Canadian Dollars for two new modules; $350.00 apiece for four coils. I resent the 22 dollars for an oil filter! Not to be dissuaded, however; are your old modules the same as mine and, if so, would you care to part with them? My part numbers are 966 359 (which Rotax now replaces with 965 446). Anyway, on with the quest for modules.... Mark, I have rounded up five used modules - two of which were changed due to hardened wire coatings, one which was changed to solve a problem that did not reside with the module, and a couple that have broken wires which (it appears) were unsuccessfully soldered and re-covered with shrink tube. All these are one of the three newer styles (966 724; 966 728 or 966 729) - each now replaced by Rotax with - respectively - 965 440; 965 442 or 965 444. ne Here's my questions: Do you have a wiring diagram for these modules that illustrates the intended destination of the wires that emerge from the original boxes? If so; are you willing to share it? Is there a simple multimeter test for the often-failed condenser that resides inside these boxes? If so, would you be willing to share it? All the best; fly safely. Canada Dan
-
......my bad..... the four wires in the plastic plug connect TWO of the four trigger coils to one module - the other two trigger coils are (of course) connected similarly to the OTHER ignition module. Canada Dan
-
Hello Mark; I have just confirmed a failed ignition module on my 912 UL - I have the older original style (4-pin plug connecting the 4 trigger coils and 5 separate wires as follows: 1 wire from the stator generator coil; 1 wire from the mag kill switch; 1 ground wire and 2 wires that go to the primary side of the spark plug coils. (photo attached) Clearly, it would be of great interest to me to have another source for a "test" module purchase. Would you be interested in including one (or two?) of these when you send me the new flap brackets? I am eager to discuss this with you. All the best, fly safely, Canada Dan
-
Hello Mark; Be sure to count me in; I'll have to get some guidance from you regarding paying for them and the shipping to Nova Scotia. All the best, fly safely, Canada Dan
-
Thanks for the advice and pictures Mark. The links below show one more "MOD" that was done to my plane based upon your reply to my thread. As with your cowl, the openings were added to both sides and have done the trick. All the best, fly safely, Canada Dan Dropbox - 2016 10 (3).JPG Dropbox - 2016 10 (2).JPG
-
The link which follows is a summary of the modifications I made to my Savannah VG XL since I began building it in 2012. Most of them are copies of the modifications which were so generously shared by other owners and builders on this site. If the airplane itself weren't such a delight to fly, just having the comraderie of the contributors to this site would be reason enough to buy and build a Savannah aircraft. There's hardly been a day when I have not opened the Savannah Forum to check on what's happening with all the friends and Savannah owners/builders I've never met. Keep up the great work. Perhaps the day will come.... Canada Dan Dropbox - SAVANNAH MODIFICATIONS.doc
-
Thank you Blueadventures, Rick, Microman, Mark and Spitfire (and IBob - I was wondering why Mark's antenna was down there too!) It appears a couple of strategic cowling openings may be the simplest cure for my woes. Spitfire: I'd like to see a picture of the aluminum angle you installed - I'm not clear how bowing the lower cowl downwards gives extra clearance at the sides where the problem resides. Whichever way I proceed, I'll post the results when I'm finished. While I am at it, I'll also post a listing of the changes I've made to my Savannah - most of which are direct copies of the changes you've made to your various machines and generously shared on this wonderful site. My airplane is now flying and I am learning to fly it under the direction of my good friend and certified flight instructor here on the east coast of the Great White North. The airplane is a dream to fly: straight and level is just that - with the trim set dead center; she jumps off the ground and climbs at 60 MPH; stall is a non event with power off and level, and produces an easily rectified nose drop with power on. She'll run the whole runway with the front gear airborn if you wanted to. Most of all, she's got positive balance - the plane self-correctsfor gusts and currents in hands-off flight. My 80 HP Rotax is a sweetheart. All this being said, I enjoy working on the airplane as much as flying the airplane. I began assembling the kit in June of 2012 and had it ready to fly in July of 2014 (about 1300 hours of actual build time). Two major setbacks - one in August of 2014 and a second in August of 2015 -(just after she was airborn for the second time) were discouraging but far from defeating. Bottom Line: very rewarding - I'd do it again in a heartbeat (except the setbacks - I'd take a pass on those.) Many thanks to you one and all - including so many contributors not named above. I'll get some pictures up once I figure out how small they have to be. All the best, fly safely, Dan Tonner
-
Greetings all; I have about 1 cm clearance between the forward corners of my exhaust silencer (muffler) and the bottom cowling. I wrapped the silencer ends with a couple of layers of exhaust pipe heat wrap (held in place with safety wire) and applied two layers of reflective/adhesive heat shield to the inside area of my lower cowling. This was still not sufficient to prevent a spot of scorching of the paint work on the outside of the cowling. Has anyone else encountered this issue and- if yes - how did you handle it? I am considering cutting a couple of circular holes right through the fiberglass cowling to permit some airflow in these areas as well as providing a little more clearance between the silencer and cowl. Response? Canada Dan
.JPG.ad015a1b1076dbb499a26832f5a0704e.JPG)
.JPG.99c034f196a40c082e6d99e955408986.JPG)
.JPG.23ecfebfa46523d2ed2b1c9a19c484e6.JPG)
.JPG.db91a511823170364ed92052a472e530.JPG)
.JPG.98e21109453a1bce438275ac3264de96.JPG)

.JPG.9911799a52e64eb8ceeac8fbc2214702.JPG)
.JPG.de65366434033a613c9c2e4a381588d4.JPG)
.jpg.80a3641eac70371800b02eefd7052705.jpg)
.JPG.7801361c9bd778cfd33bbf29484a3fa4.JPG)

.JPG.dec8288945d032dd37d40ea04d5b8c29.JPG)