

dan tonner
-
Posts
125 -
Joined
-
Last visited
Content Type
Profiles
Forums
Gallery
Downloads
Blogs
Events
Store
Aircraft
Resources
Tutorials
Articles
Classifieds
Movies
Books
Community Map
Quizzes
Videos Directory
Everything posted by dan tonner
-
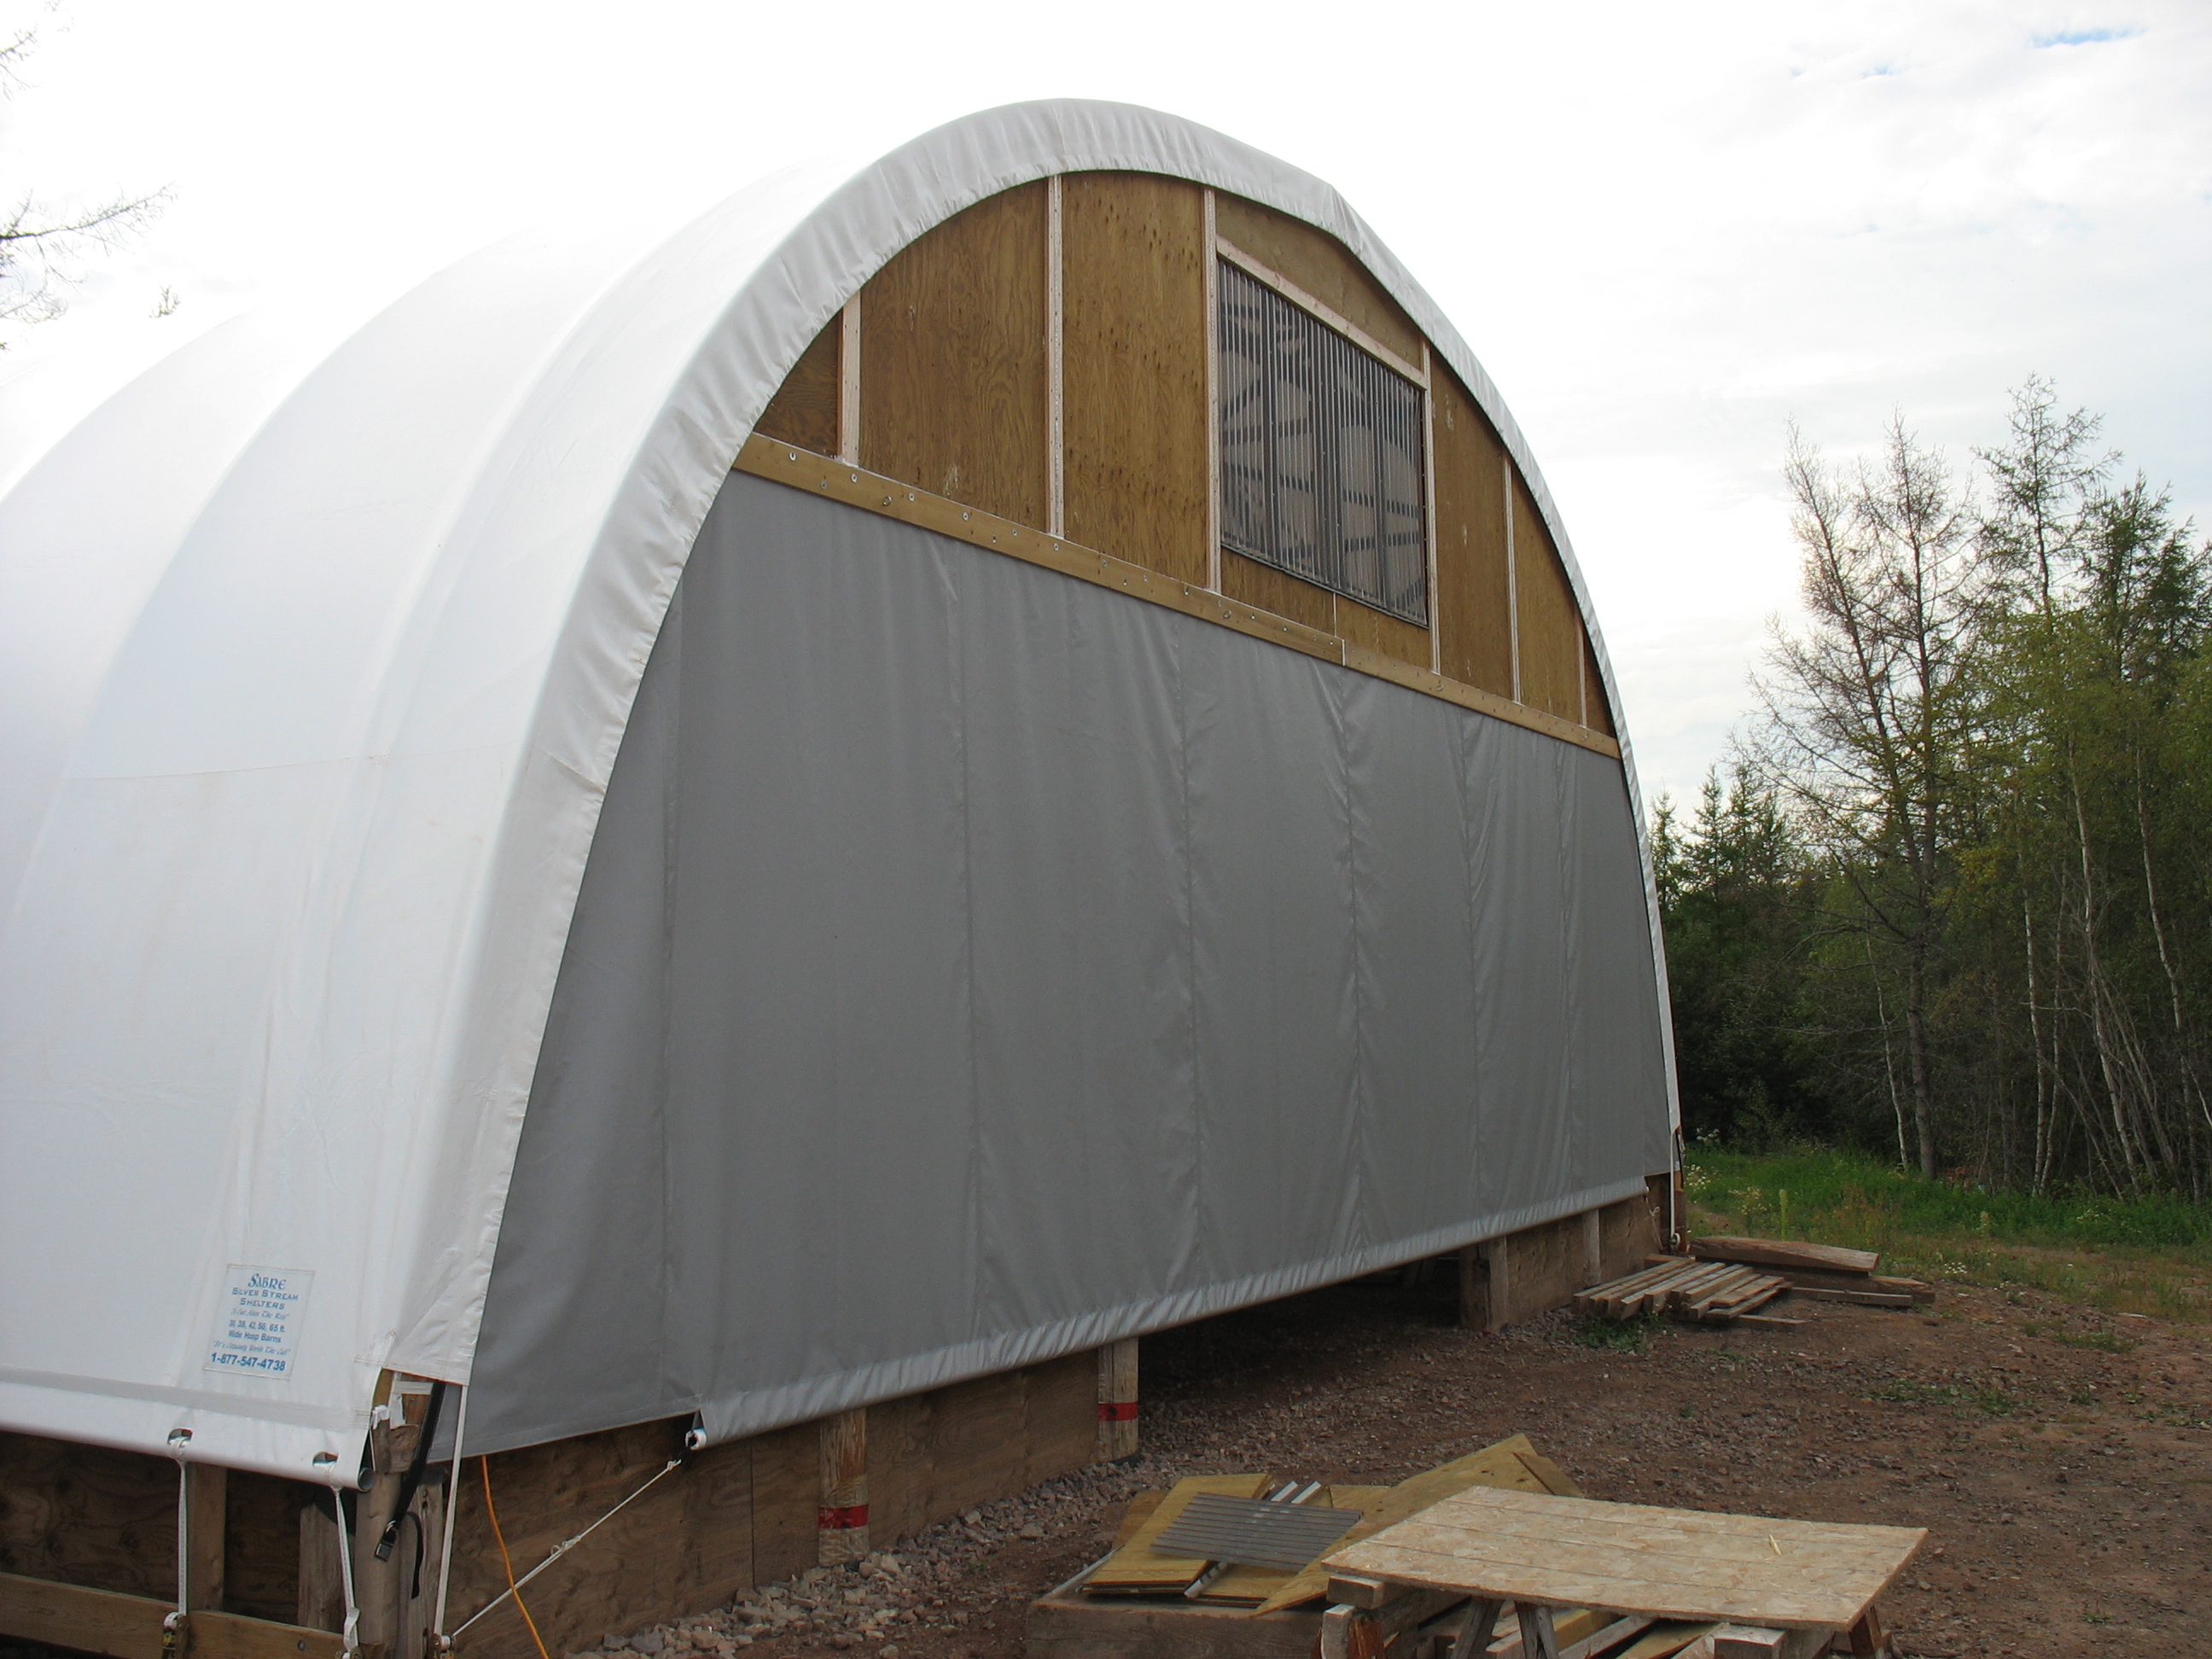
Reference 'way back to post #25. (I've been on different assignments while trapped inside by COVID-19...……………….) The properly installed fabric should last a minimum of 7-9 years - probably longer here - in temperate Nova Scotia. A replacement roof costs about CDN $800.00 from the manufacturer. The fabric door hangs on a sewn-in rope cord along the top that is captured above a board screwed to the header. There is a pocket along the bottom of the fabric door that carries a 32 foot long, 2" steel pipe. Cut-outs in this pocket allow for ratchet tie-downs when the door is closed. Four spaced nylon straps operate the door. One end of each is suspended outside on the header, loops down and under the pipe and back up to a gimballed roller supported on the inside of the header. From here, the straps connect to steel cables that cross to the back wall of hangar where pulleys direct the cable down to a floor-level hand-operated winch. The left and right "flaps" of the fabric serve as man-doors and are folded inwards to roll up the door (50 handle cranks of the winch). It has all worked well since 2014 and the fabric shows no signs of deterioration. The building was located to be somewhat sheltered from the nasty nor'easters we sometimes get up here. I-Bob: I like the simplicity of the fabric door that opens laterally on cables - that arrangement would greatly reduce the weight being carried by the header on my hangar - I've made a note of that. How was flight life during your summer? CanadaDan
-
I currently have a wood arch, white fabric roof hangar with a roll-up fabric door. I used lots of polycarbonate on the front and back walls and get lots of natural light. Because there may be a move required in the future, I'm looking for something simpler. I've been toying with designing/building a T-Hangar by combining a 40' and 20' container with most of the side cut out of the 40' - again with a fabric roll-up door. I'd love to get the pros and cons from anyone who has already done something like this. C

-
Ahh.....yet another testament to the adaptable and relaxed nature of Canadians. Airplane on the highway? No problem. Left signal, slip into the passing lane, overtake. Just another day at the office.
-
Hello Yenn; This is just a shot in the dark, but: Is it possible the o-ring which should rest on top of the needle circlip in the diaphragm piston (and just below the fixation screw) has somehow found its way under the circlip? This would result in a higher needle position and an over-rich mixture; or; as alluded to by SkippyDiesel above, there was a recall on ROTAX floats for the Bing Carbs a couple of years back. The Rotax 912 floats are actually two independent "foam-style" blocks in the float bowl made from synthetic material (as opposed to the connected pair of hollow "bobbers" used on most altitude-compensated motorcycle engines). There was an issue with a limited number of Rotax floats whereby they became "waterlogged" (gas-logged???) and failed to close the inlet needle valve properly. If your carbs are equipped with the "Styrofoam-style" floats, you might want to Google the following Rotax Service bulletin: Rotax SB-912-065 - Carb Float Buoyancy Good hunting; CanadaDan
-
The real treat is still ahead for you Bob - wait until you fly her from the pilot's seat. The aircraft looks beautiful; after following your build log religiously, I know it is a gem. Congratulations!!! Dan
-
Software be darned. For me, it is the incessant tweaking, "improvements" and unsolicited changes that keep appearing on my desktop that turns me away. At my age, technology remains a steep learning curve - it doesn't take much to turn a minute or two online into a frustrating two or three hours at the keyboard. My mornings (every morning) used to begin with a few moments with RF - just checking in with the regulars and seeing what's new. It just doesn't seem that simple anymore. I was a dedicated member of Recreational Flying since beginning my pilot training in 2009 at age 62. This site was my companion, my workshop manual, my advisor, my shoulder to cry on, the place where I've made friends, borrowed tools, bought parts, received gifts - and more; so much more. The Savannah I began building in 2010 is a by-product of this site - even the decision to buy a Savannah kit versus the other options available to me was the result of research done on RF. I still visit from time to time, and still rely on the counsel of the regulars and enjoy the updates and collegiality of those with whom I've interacted, but, it is more complicated to do this now. And I do this from the other side of the world - "If it ain't broke, don't fix it." All the very best; and by the way, "THANK YOU". CanadaDan
-
Thanks Mark - I like the way you think. Given that the brackets are only about 1/8" thick, the "nose portion" of the bushing will demand some pretty close tolerances; too short and both brackets get locked against the bushings; too long - and the "free" bracket loses lateral support. I spent some time in the hangar yesterday and made note of the following: 1. The "stock" bolt holes in my moving and stationary brackets are 6mm; an AN4 bolt is 6.34mm and could be accommodated by either bracket; 2. the stationary brackets (on the wing) are flat pieces of stock, easily accessed and can accommodate a 3/8" (9.53 mm) hole for the flanged bushing(s). (The stubby aileron bracket provides less room to drill "square" and is angled stock.) 4. My inclination would be to secure the bushings to the aileron brackets (AN4 bolt) and allow the fixed bushings to turn inside the enlarged holes in the stationary brackets on the wing. 3. A flanged Nylon, Teflon or suitable Plastic (?) bushing with an OD of 9.53 mm, and ID of 6.34mm turned from 12 mm round rod stock would still have more than 1.5 mm of "wear thickness" surrounding the AN4 (1/4") support bolt. While at the hangar I reversed the assembly direction of the stock brass bushing in my "loose" aileron.. That eliminated nearly all the slop in the outer right flaperon attachment - although I realize it will be short lived. My calipers showed the original bushing is now narrower at the unflanged end (where the aileron bracket was initially supported). BOB: I thought you might be interested in the attached page from my assembly manual - it would seem the insertion direction of the AN3 bolt (and consequently, the orientation of the flanged bushing) was at the discretion (whim?) of the assembly manual writer. The pictures from your manual are not present in my manual and the attached page seems to imply that the bolts lace through the aileron attachment first at each support. My manual also seems to show unflanged bushings although my kit came with the flanged ones. Gotta love that manual! CanadaDan aileron attachment.docx aileron attachment.docx
-
"...……………..really you need 2 bushes per hangar one either side to balance the load better...………." Can you elaborate a little here Mark?
-
Great discussion here! JG - thank you for initiating! My 2010 XLVG is approaching 200 hours and there's noticeable excess slack in the outermost right flaperon bushing and "noticeable" slack in the other seven - progressively less as I work towards the cabin from each wingtip. IBob, Mark and Danny. Please book a set (8) of whatever each of you produce - I'll pay postage and costs - just tell me where to send the money, and what exchange to use - (Canadian, US or Australian dollars) Gotta love this site!!! Fly safely, Canada Dan
-
The tips, experience and advice are appreciated here in the Great White North as well. Thank you Facthunter! CanadaDan
-
Savannah S with Viking 130
dan tonner replied to Savannah Karl's topic in Aircraft General Discussion
The Viking engine is a relatively new entry to the options available to the amateur build / experimental / homebuilt / ultralight builder. Given Honda's design successes, it will be of interest to many pilots and builders. Being installed in a Savannah, the thread will be of interest to any Savannah builder - or owner . Can the thread be added (or linked) to the Savannah Recreational Aircraft Usergroup Forum? Karl, I'm looking forward to seeing and hearing more. CanadaDan -
CanadaDan learned to fly in his 60's, built his Savannah at 65 and can't wait to get back in the air every spring - this year at 71. Recreational Flying provided the inspiration, a wealth of honest opinion on all flying-related topics to peruse and digest and a good measure of laughter, common sense and companionship. I'm not sure I could have done it without you. How can I help? Dan
-
".........….the only country I believe that has the extended baggage kit come out as a standard……………….." Hi Mark; I've been following the "Mabel rebuild" with considerable interest. It looks great and appears as if you will have a far finer airplane than the one that appeared on the original designer's blueprints. FWIW: my 2010 Savannah XLVG was the only model offered to North America when I purchased it in 2011; - it, of course, had the extended baggage feature. I believed that as the ICP models underwent manufacturer's modifications over the years, older versions were discontinued (once existing kits were sold off) and another handful of assembly manual pages were added to the documentation package. All the best, Canada Dan
-
Hello Bob, it is nice to see you back at the build; I have thoroughly enjoyed the precise and astute commentary as your build progressed from day one. It was a treat to meet you and see your project in our visit to NZ in early 2017. If you ever decide to sell, I want to buy it and fly it back home to Nova Scotia as the penultimate Savannah. ? It is going to be a winner. Your silencer and a few other things with your setupThis may not be much help with the exhaust clearance, but I've attached a few pictures of the pipes I installed on my 2010 XLVG (called a VGW here in Canada). The curve in the your forward pipes appears to be a modified version of what came with my kit - both my forward pipes were (initially) straight from the welded joint to the silencer "ball end". I added a soft "s-curve" to the left-side pipe to be able to remove the oil filter without having to move the pipe. Since these pictures were taken (and 150 hours - or so - of flight time) much has changed - Silicone rubber coolant pipes to and from the radiator, a new proper set of plug wires, a different oil cooler and aft supports for the radiator. Lots of other stuff too - maybe someday we'll have another chance to compare notes. I also had to remove, clean and re-position the coolant nipples but this was because the original installation of my 600-hour 912UL was on a bed mount in an Aeroprakt A22 (Foxbat). I'm sure you're already aware the Loctite is a specialized one for the coolant nipples and it softens up nicely with the application of a little heat. The nipples do not have to be "tight" in the position you want them when using the thread sealant, so, even by shortening the threaded ends by a few mm, you will be able to gain some clearance. Re-bend the pipes? Shorten the coolant nipples? You've got options! (And Mark Kyle and the Aussie never seems to run out of great ideas if we do.) All the trouble and all the effort is forgotten the moment the wheels leave the ground. I suspect it must be like childbirth. The airplane is a true joy - docile, forgiving, responsive and predictable. I've only been flying a few years, but it would have been many more had I had a sample Savannah flight thirty years ago (like the ones I had with Ken in Feilding and Pete in Masterton while in NZ in 2017). All the very best, Canada Dan
-
Hey Major Tom; Congratulations and a tip pf my hat for a fine looking airplane. I have often heard references to the "RV grin"; the picture of the man in the pax seat (you, I assume) suggests the "Savannah Smile" equally paraphrases our experiences. Fly Safely, Canada Dan
-
????? The Rotax 912 series engines all use 45 degree, resistor-type NGK spark plug caps (although I understand they are moving towards a 90 degree cap to make it easier to measure the pull-off force). Rotax specifies resistor-type plug caps for this series of engines although I'll bet they can be sourced elsewhere for a quarter of their price of over US $16.00 each. Rotax calls them "Suppressed Spark Plug Connectors" - perhaps to explain away their usual ridiculously inflated price tag. Fly safely; CanadaDan
-
If the aircraft flew properly without the VGs and with slats, the issue appears related to the altered lift characteristics and/or airflow changes resulting from removal of the slats (I have assumed the slats were removed) and the addition of VGs. JG (John Gilpin) - an active contributor to this group - was a pioneer with this modification to the Savannah aircraft. I suggest you address an inquiry directly to him. You may have seen these articles - certainly a good place to start... http://www.stolspeed.com/slats-v-s-vgs; http://www.stolspeed.com/id/26; StolSpeed Aerodynamics - Performance Enhancement for Light Aircraft (the latter two links connect to JG) Wish I could offer more. Fly safely. CanadaDan
-
Hello Hugh. I was a member of the Jazirah Aviation Club, located in the emirate of Ras Al Khaimah in the United Arab Emirates - in fact, I learned to fly there. The original club aircraft were Jet Fox airplanes similar to the one you pictured. The club had two of these listed for sale and I believe at least one of them was still listed when I left the UAE for home (Canada) in 2011. I believe the club would be able to provide the information you are seeking. The club website and contact information is below and there is a "Contact Us" link on the site. Good luck. Canada Dan Jazirah Aviation Club
-
(Let me finish what I was saying without hitting "enter") ....simply means: "the attachment of the strut brace" MAJOR TOM: 451/452 rivet to the underside of each wing at the third rib and form the upper mount for the strut brace. gotta love that manual.... Canada Dan
-
Hello Eightyknots; For anyone living in another galaxy, it is clear: "the attacks of the strutbreaker" simply means: "the attachment
-
Hello Lyndon; I've been following your build with interest for some time - takes me back to my trials and tribulations of building my VGXL in 2012 - 2013. With regards to the plastic instruments: my kit came with the plastic VDO gauges for both Temperature and RPM. VDO make spin-on mounting collars for these plastic gauges and they are relatively cheap to buy and solve the "spindly-legs" problem and the risk of cracking the gauge body by over tightening. The gauge bodies are already threaded toaccept the spin-on collars VDO was easy to deals with and shipping was prompt. All the best, fly safely; Canada Dan
-
Thanks Rankamateur; I had read here somewhere about the heavier spring under the flap lever button and have already done that. I am installing Mark's modified flap brackets to improve the lever positioning as well. I will reinforce the base of the new brackets with lengths of 3/4" extruded aluminum angle. I'll post a picture or two when finished. Eightyknots: The airplane has been repaired and has flown about 30 hours since. I'm still working on an intermittent engine misfire that began last fall just before winter layup; I plan to be flying again shortly. All the best, fly safely, Canada Dan
-
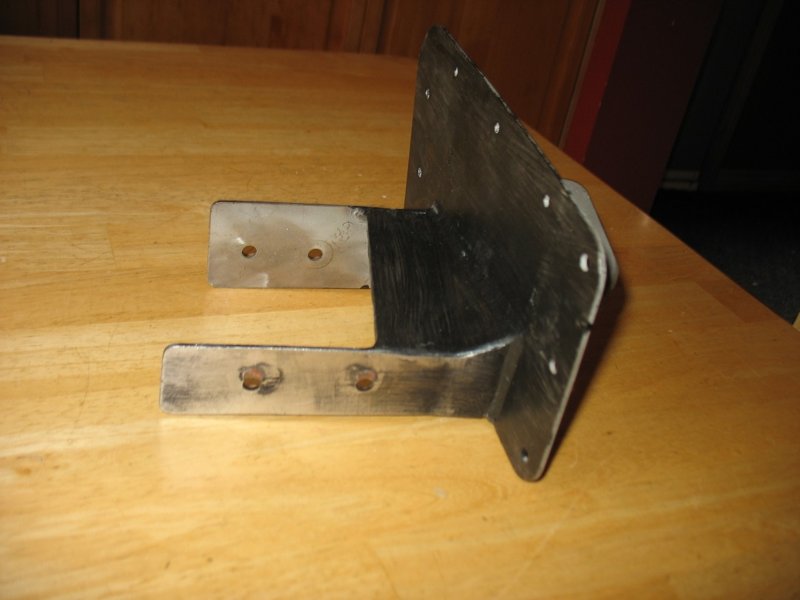
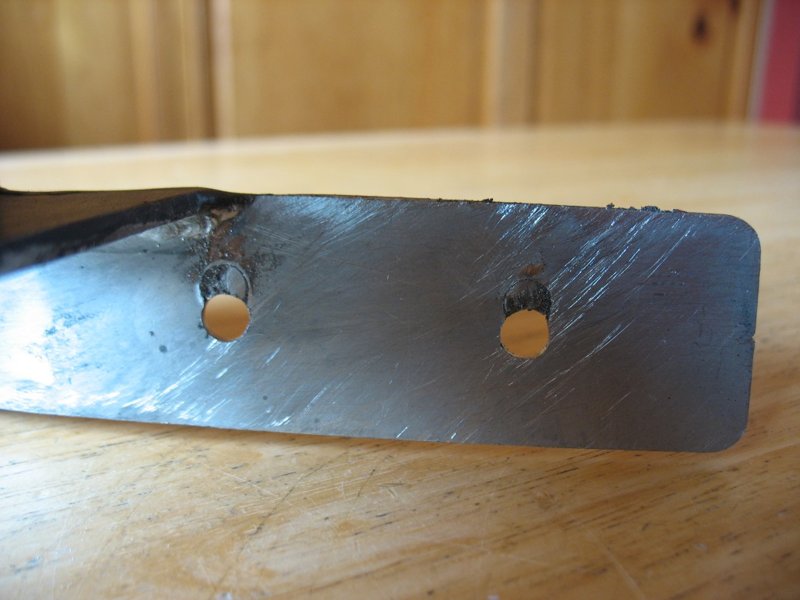
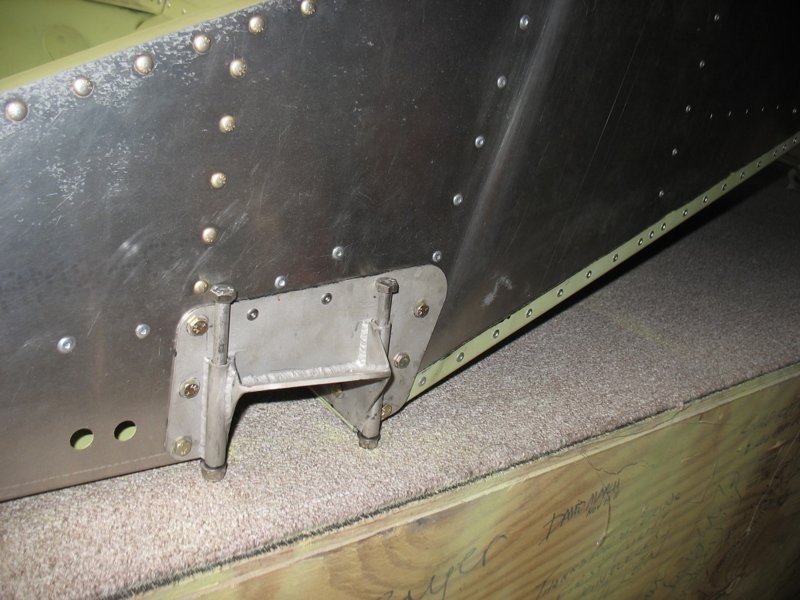
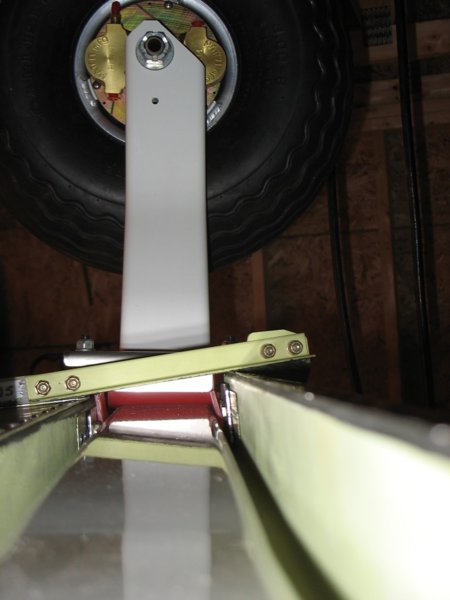
Hi Bob; Remember my build was an XL VG but I do recall an issue with one of the SS strut-to-fuselage fitting during my build. Essentially, the bolt and rivet holes in the fitting that attach to the left and right sides of the cabin frame all aligned perfectly; BUT, of the 5 bolt holes (2 front side, 3 rear side) in the "fingers" that reach into the tunnel, the two front side holes - on the left side strut-to-fuselage fitting only - did not line up with the holes in the channel. (The right side strut-to-fuselage fitting caused no grief and all 11 bolt holes aligned properly.) The two fittings (left and right side) did not look like mirror images of one another - the two bolt holes in the front "finger" on the left side fitting were not centered in the finger; the bolt holes in the "fingers" of the right side fitting were centered. To correct the issue, I bolted the strut fitting to the side of the fuselage, marked the hole alignment using the holes in the mainspring channel, then removed the strut fitting, re-drilled the holes and used epoxy to fill the original holes. (pictures attached) This may not be the issue you are facing, but it did indicate to me that the strut-to-fuselage fittings on my build did not live up to the same tolerances to which the rest of the components were blessed. Perhaps that part is still not sorted - the fittings appear to be individually fabricated and perhaps are not up to CNC tolerances. All the best to you, Leigh and Peter; you each contributed great memories of a wonderful New Zealand visit. We're back home and excited about the Nova Scotia Spring. Perhaps someday, should you visit my neck of the woods, we can return your warm hospitality. Dan
-
Thanks Major Tom; I didn't know such a tool existed - I'm looking into adding a pair or to to my shopbox. All the best; Fly safely, Canada Dan
-
The "Tundra Tires" tires that came with my 2010 XLVG Savannah kit are the ones pictured below; they look like the same ones on the Texas Sav. Mine are 800 x 6 Carlisle Golf Cart tires. They are 4-ply and are clearly marked "Not for highway use". (But OK for airplanes???) So far, they've been fine. Knock on wood. Canada Dan
.JPG.ec6e0ed497351d9e8c43383d3597c498.JPG)


.JPG.4623fd74e9c33a48252678b8bc295118.JPG)
.JPG.d006721044f4fcbfa8240a9f84ce4f11.JPG)
.JPG.e9b2fd48551b878d780d81a9e55a6dd9.JPG)


.JPG.953b5e5c223749cedc26b99294c66b8d.JPG)