rick morawski
-
Posts
254 -
Joined
-
Last visited
-
Days Won
1
Content Type
Profiles
Forums
Gallery
Downloads
Blogs
Events
Store
Aircraft
Resources
Tutorials
Articles
Classifieds
Movies
Books
Community Map
Quizzes
Videos Directory
Everything posted by rick morawski
-
The Smile was priceless. Great vid.
-
Oooherr could you send one to me too? [email protected] or maybe just post it up. Cheers Rick oot em rof ypoc a
-
Broken Hill, NSW has a cafe on the airfield. Plus the flying club has a couple small accommodation units on field, great if your just passing through and want to get an early start. The local pizza shop also deliver out to the strip, what more could you want? Rick
-

Rotax 912ULS Rectifier/Regulator
rick morawski replied to Flyinglion2000's topic in Engines and Props
Yes it's right, it gets disconnected from +ve by the R lead thru the switch. I agree with the others, that it is cooked. Order one from Floods and get a capacitor if you don't have one. Also be aware you can damage the sprague clutch if you try to start up with an under charged battery, so charge your battery up before starting. -
Rotax 912ULS Rectifier/Regulator
rick morawski replied to Flyinglion2000's topic in Engines and Props
Check also the continuity of the wire from the "C" terminal, which goes to the key switch(check switch connecting) and then to batt +ve, if it's not connecting it won't charge, and if it doesn't disconnect it will discharge the battery. (from memory, wont hurt to check though) Cheers Rick -
You're scaring me now Mark, I put it there for ease of wiring, have done one before with no probs, maybe I'll insulate it.
-
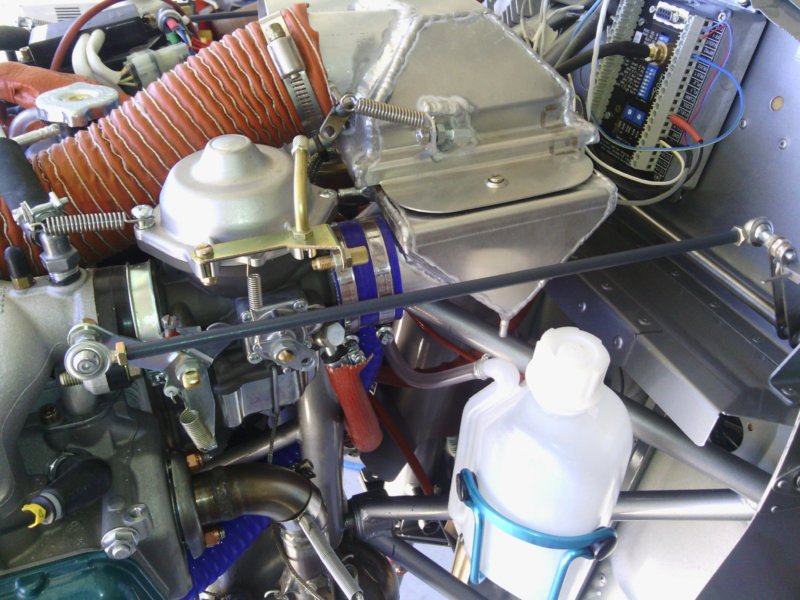
This not the first time I've done this, no problems on others I have installed the rods on have over 600hrs. The double cables JG suggests are good, but I like to have two throttles, just my preference.
-
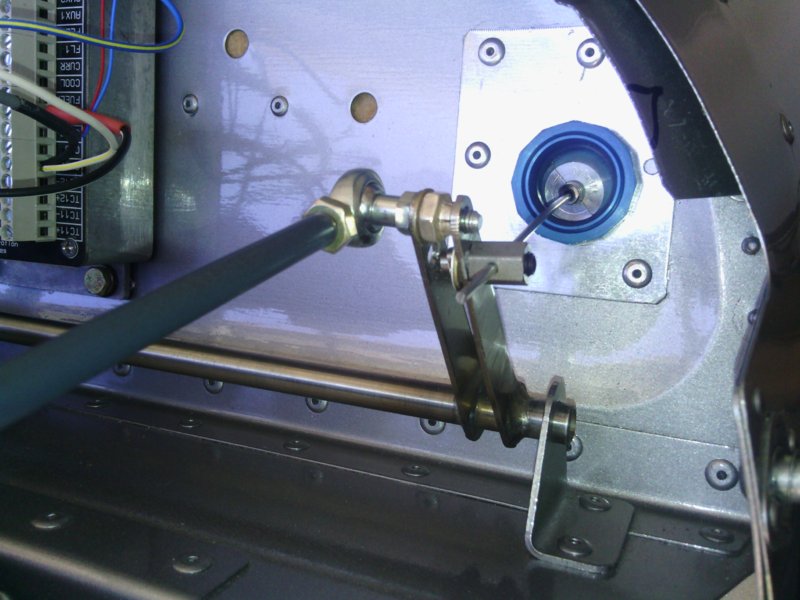
I have been asked to show my throttle setup so here it is. I used standard GA type throttle controls with solid wire (can push and pull) connected to the throttle torque tube crank on the firewall (drilled an extra hole). From there to the carb connection I used 1/4" CrMo tube tapped out (left hand thread one end) and spherical bearings at each end. This removes the cable problem from the equation and super easy carb balancing. Most everybody asks "What about the motor movement on startup?" You would think it affects it but I haven't experienced it, it runs extremly smooth and rarely needs adjusting for sync. One installation has over 600 hrs no probs. I also add that this was not my idea. I saw it on a web page ages ago, University of Hawaii Engineering or something. They (students) built a CH701 and didn't like the cables either, so used the rods. I've copied the idea on 3 or 4 aircraft, no probs. Use it if you like, don't if you don't. Cheers Rick

-
I think the wiring will melt or catch fire before that fuse blows.
-
Yep they're the ones, except check the longest ones, from memory they are a few bucks cheaper for some reason. I'll take some photos tomorrow a post up a new thread in the Sav forum.
-
I got the airgizmo mount from ACS as well, cheapest but you need to have a decent order, Just getting one thing is not too cheap as they still charge you about $50-$60 postage. I like the elect flaps cause I like my hand on the throttle for those quick take offs and not on the flaps lever. I don't have any cables on the throttles, all solid rods, works a treat and so easy to adjust/sync. Sorry if we're going a bit off topic - let me know if you want to see the throttle linkages and I will start a new thread maybe.
-
No flying not yet, maybe Jan or Feb. The little switch panel above the trim is elect flaps controller, I can set the flaps to up, half or full with a button push without taking my hand off the throttle. Yes the throtle controls are from ACS, they go to the throttle torque tube thingmy same as the solid rods, but i like them down on the lower panel - comes easier to hand I think, also easier to take out the panel without having to dismantle your throttles.
-
I have been pondering an anomaly in the Savannah wiring, that is I reckon the fuse in the charge circuit is way bigger than is recommended in the Rotax installation manual. They (ICP) include a whopping 50A fuse for the purpose but the Rotax manual recommends 25A max or serious probs could occur. Any other builders noticed this and what if any changes have you made? I am completly rewiring my Sav due to installing an EFIS and have left the 50A fuse out and put a 30A circuit breaker in instead.(I couldn't get a 25A breaker) Let the forum speak.
-
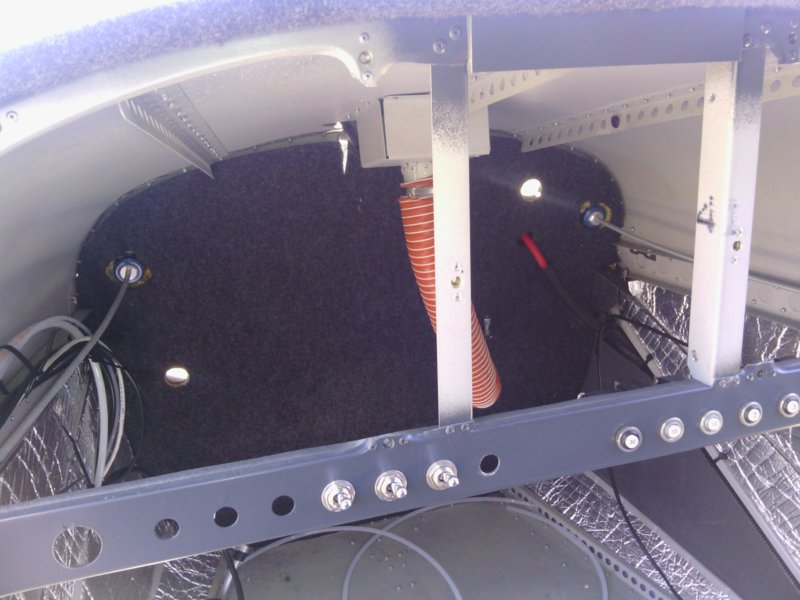
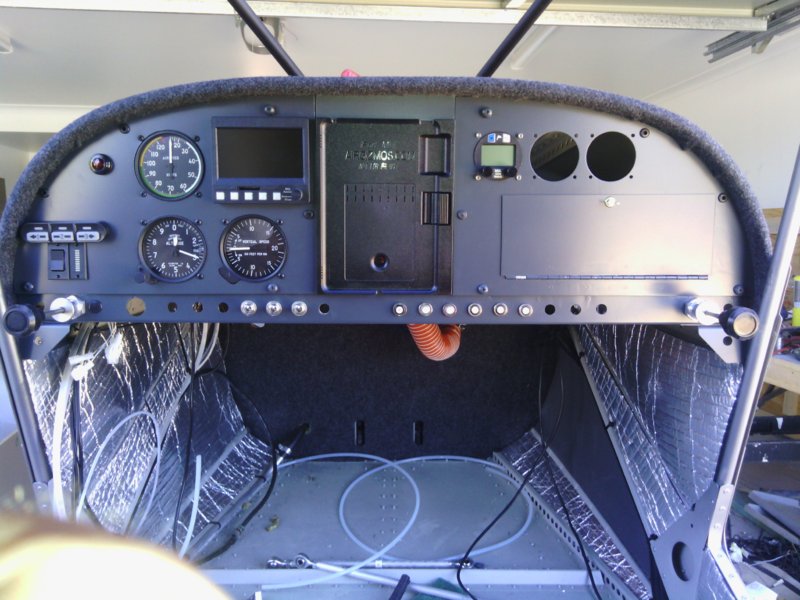
First pic shows how i cut off the vertical part of the panel sub frame and added in 2 new ones made of 1" x 3/4" angle closer to the center, 6 1/4" apart to take the airgizmo. Second one shows the panels in situ. They are two separate parts on either side of the airgizmo panel. The right panel has a glove box in to fill it up a bit because it looked a bit sparce, also handy for POH and what nots. Still got to finish the wiring but getting there, hoping to have it finished and test time flown before Natflly.
-
Hi Mark, Yes i have installed the airgizmo ipad mini mount in my Sav S, havn't got the ipad yet though it should arrive tomorrow. Had to make a new panel in two parts with the ipad in the middle, got rid of all the engine instruments to make room and used a MGL Extreme for engine monitor. Can post some photos if you want. Cheers Rick
-
Looks fantasic, but don't just tease us with one photo, give us more!!! Have you flown it yet? Cheers Rick
-
Savannah Incident At Caboolture
rick morawski replied to Cosmick's topic in Aircraft Incidents and Accidents
Sorry Mark, I do know your name!! -
Savannah Incident At Caboolture
rick morawski replied to Cosmick's topic in Aircraft Incidents and Accidents
Hi Kyle Are you going to get new ali bits from ICP or just copy /make them out of sheet ali ? I reckon you could make them pretty quick. Rick -
Hi Cam I think your kit would have the upgrade, just look at the forward strut attachment that sticks out the bottom of the wing. If there is a short piece of plate held in between the two attachment plates with two A5 rivets then it is already upgraded. My kit is 54-195 and it came with the upgrade done. As for the paperwork and placard supplied with your kit, who knows when they will catch up with that. Cheers Rick
-
Savannah Incident At Caboolture
rick morawski replied to Cosmick's topic in Aircraft Incidents and Accidents
Glad you and the pax are OK, go out and have a fly soon before the heebies get to you. I had the same problem of actuating the brakes while turning, to the point where I adjusted the brake pedals further forward and made it part of my on final checks to have my heels down. Thanks for sharing. Rick -
Fuel-proof floating pellets needed
rick morawski replied to Old Koreelah's topic in AUS/NZ General Discussion
Thanks Kev, I have been looking for these for ages too. Old K, the submit button is way down the bottom. Cheers Rick -
Awsome skills demonstrated here!! Hypnotic to watch the metal almost turn to fluid. Methinks there is potential disasters waiting here for the amature player.
-
Hi ave8rr If you are referring to Savannah 19-4138, I installed the upgrade kit in that aircraft myself when it was mine. I don't recall what info was sent to RAAus as it was while ago. You can call me on 0409 778 021 if you want info on the aircraft. Cheers Rick
-
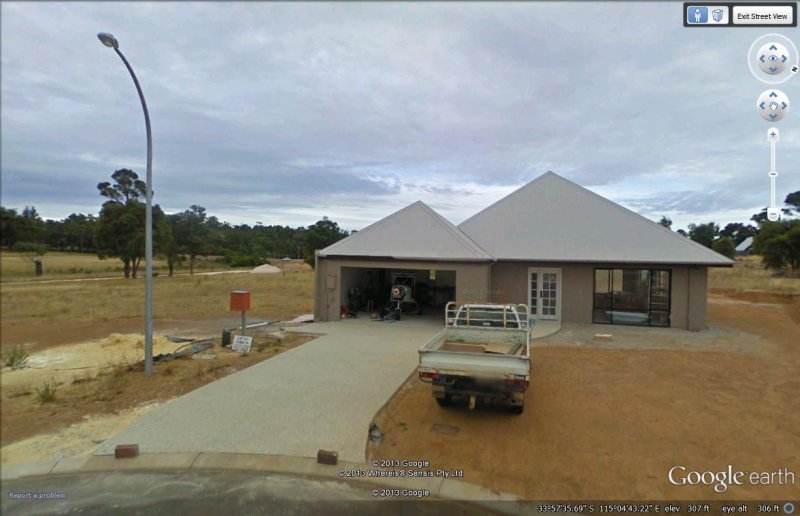
Ha! I was wondering if someone would pick that up!! Well the bath got put in after the plane was finished. If they came back today the picture would be much the same, except with a Savannah S in the garage and the garden still not done, one must pioritize things you know.
-
I saw this on Google Earth (street view). I was building a Sav XL a while back when the Google Earth car went wizzing past before I could do anything rude for the photo. I took ages for them to load it up but when I looked recently there it was. Bit of fun really. Cheers Rick