rick morawski
-
Posts
254 -
Joined
-
Last visited
-
Days Won
1
Content Type
Profiles
Forums
Gallery
Downloads
Blogs
Events
Store
Aircraft
Resources
Tutorials
Articles
Classifieds
Movies
Books
Community Map
Quizzes
Videos Directory
Everything posted by rick morawski
-
Don't like to use non rotax part but better than using goo on your carbs. Have a look here- http://www.ebay.com/itm/Rotax-Reusable-Float-Bowl-Gasket-Nitrile-830-727-/321586624037?hash=item4ae00e7625:m:m6ZZ-OQdP_zWSpmlT9Z28YQ&vxp=mtr
-
Yep, try it and see, it's 185mm to the bottom of the filler neck. Really, those sight gauges are only good to show if you've got some fuel or not.
-
Here's the measurements I use, they work well if the aircraft is levelish, courtesy of Barrie from Kiwiland. Make a dipstick using these measurements. Dip all tanks and add together as the levels can vary between tanks. Cheers Rick savannah fuel calibration.pdf savannah fuel calibration.pdf savannah fuel calibration.pdf
-
[/quote="rotax618, post: 545223, member: 3283]"The problem with a rigid connection betweer the carb and the firewall is the movement of the engine under thrust load, this is particularly bad on the VG bed mount models. I used a bowden cable with a slight kink (the same amount of kink each side) this allows the engine some movement without moving the throttle. Have you tried it? I have put these rods on five or six savannahs, bed mount and ring mount and have never had any problems. I was cautious on the first one (a bed mount), but thought hey I can just go back to Bowden cables. So I made a set and they worked a treat, no vibration problems, and adjusting carb balance is micrometer fine.
-
you can get it all from spruce Spherical bearings - p/no MB-3 (male left hand thread 3/16 unf). p/no MM-3 (male right hand thread 3/16 unf) AN315-3R locknut r/h, AN315-3L locknut l/h connecting rod/tube - cromo tube 1/4"O/D .035" wall p/no 03-00300 Worked out the length of the tube ( from memory 300mm one side, 320 the other, but check), tapped out the tube l/h one end, r/h one end, boltedto carb lever and throttle torque tube arm with an3 bolts and locknuts. The stepped washer on the carb throttle lever protrudes a bit and has to be filed down just a little so the bolt tightens down onto the lever arm and the center of the bearing then takes the rotation. I used the cromo tube early on but later have changed to 6061-t651 5/16" hex bar, which of course you have to drill and tap whereas the cromo tube could just be tapped out, no drilling.
-
Hi Hasse, All the parts came from aircraft spruce- the cable outer grip part no. 05-16250 on the firewall (i did use a swivelling one but can't find the part no for that one) the inner wire gripper part no. 05-16245. Cheers Rick
-
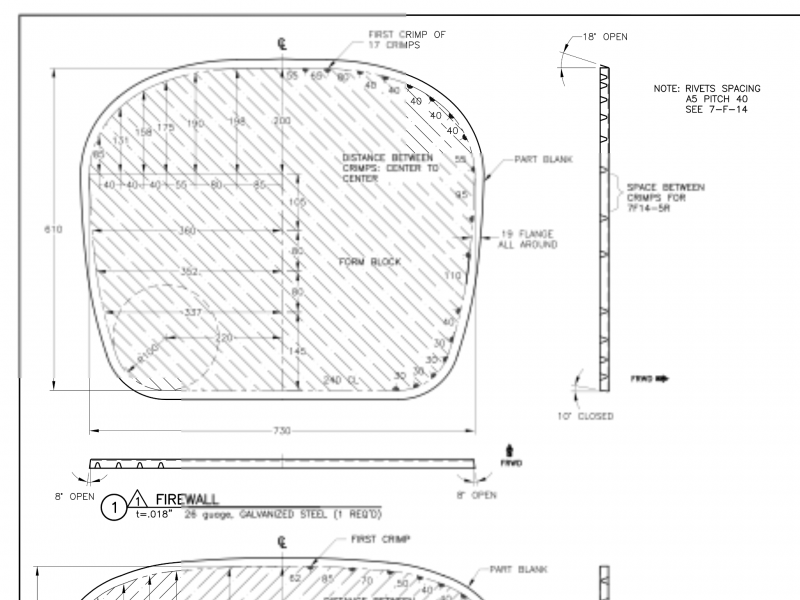
Page 7-F-1 dated sept 2003
-
730mm on my plans

-
They look like the parts that are riveted to the top of the doors to close the gap at the top. Can't say positively without a better picture, cross section view. Why dont you use the POH that comes with the kit? Cheers Rick
-
Lyndon, see that claw hammer.
-
Correct
-
Of course the strip goes on the inside before the tanks go in
-
I usually cleco top and nose top, then rivet the entire top, so the bottom part of the nose skin is hanging down, then flip over (someone to help is good) and cleco bottom and two trailing edge skins, then use straps and a long piece of timber to bring the leading edge back around to the main spar, then a lot of wiggling the podger to get the main spar clecoes in and rivet up. Piece of pi** That's how I do it, the way you suggested would work as well.
-
Just thought- don't put rivets in the top skin tank space because they will rub against the plastic tank and possibly cause a leak. Just cut a strip of skin from the scrap cutout about 20-25 wide and glue it over the holes with sikaflex.
-

Broken Hill to Bathurst trip - Ferry Sav
rick morawski replied to pilotdave69's topic in Trips/Events/Seats
9500' just got me on top of em. -
Your underpants I hope.Haha couldn't resist. I'm guessing you mean the top skin flapping. The fuel tank is hard up against the underside of the top skin, the bottom panel has the tank support bar to stop that rattling too much.
-
Broken Hill to Bathurst trip - Ferry Sav
rick morawski replied to pilotdave69's topic in Trips/Events/Seats
Went BHI to CBA just last month with a sav ferry as well. Lots of nothing out there. Horrendous thermals and turbulence during the heat of the day, but had phone service everywhere. Enjoy the trip, I await the photos. Cheers Rick -
Yep
-
Correct
-
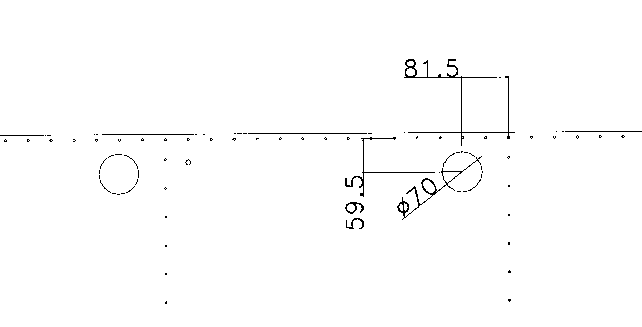
They are drain holes in case you get a fuel leak. They should be at the inboard rear of each cover panel.
-
yes
-
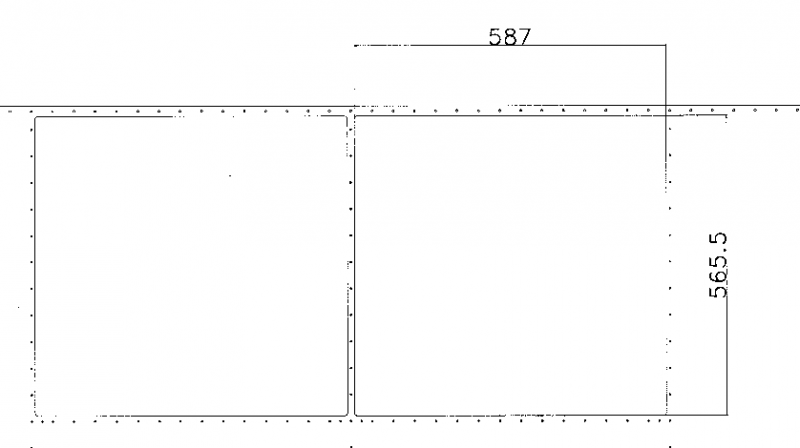
Hi Lyndon Easier if you cut the holes for the extra tank while the skin is on the bench (uninstalled) Basically just copy the existing holes to the next outboard bay and cut out. Rivet up all the skins then install the tanks making sure you centre the filler neck in the hole. run the hoses and rivet on the covers and jury strut attachments. Note that the 10mm hole for the vent line will have to be moved inboard a little as it intersects with the edge of the extra tank
-
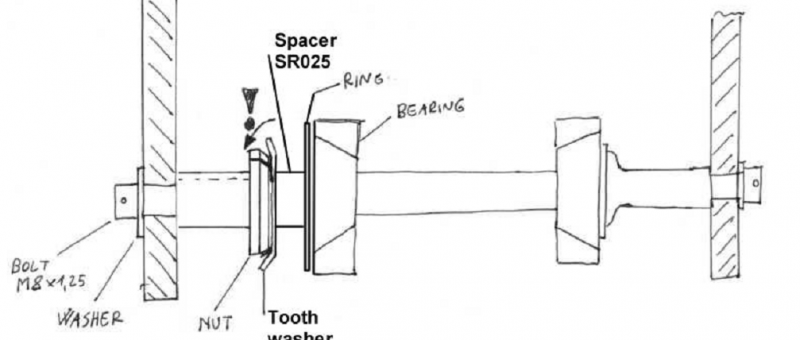
They are Spacer ring SR025 Chapter 20 page 1 Chapter 21 page 1
-
When you get over the hissy fit you will ream out the slide tubes to fit, removes the rotors to fit the wheel, and seal the bearings with felt washers or o rings and get on with it. Yes the older brakes were not the best, they have improved since, but unless you spend big bucks like Skee and buy Behringer replacements you just make do. Note that the older models like yours will expose the seal on the piston when the disc pads are only about 2/3rds worn and empty your fluid on the ground- not good if your doing a short landing! Remedy is to glue a 50 cent piece on top of the piston when they are about half worn. Crude but works. Most people use Auto trans fluid for brake fluid. Use the low strength pink loctite on the screws when you put the discs back on unless you're going to drill and lock wire them.
-
Hi Jerzy I have fitted the extra tanks to quite a few Savs in the past, never took the wings off. It certainly pays to have experience with aluminium aircraft work as you have to cut holes in the bottom skins, cut a circular hole in the top skin, derivet the inboard tank cover to run and connect hoses, etc. usually takes a day to complete, so no not a real hard job. I know a lot of people fit taps to the fuel lines, but they are not a must. I have done many without taps - keep it simple theory, you choose. If you wanted to do it you can order a kit with tanks, brackets and support beams from Reg at Aerokits. Cheers Rick